Beams of Light
DIY fake beams with recessed lighting! Step by step tutorial with photos and diagrams.
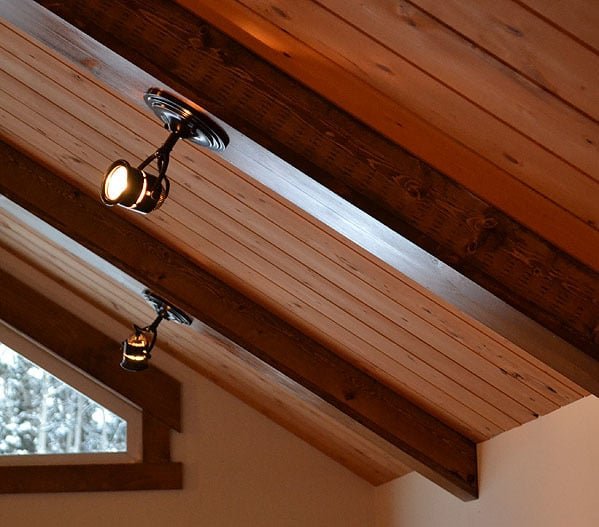
Specifications
| Project type | Home DIY |
|---|---|
| Room | dining room |
| Style | Farmhouse Furniture |
| Difficulty | Intermediate |
Shopping List
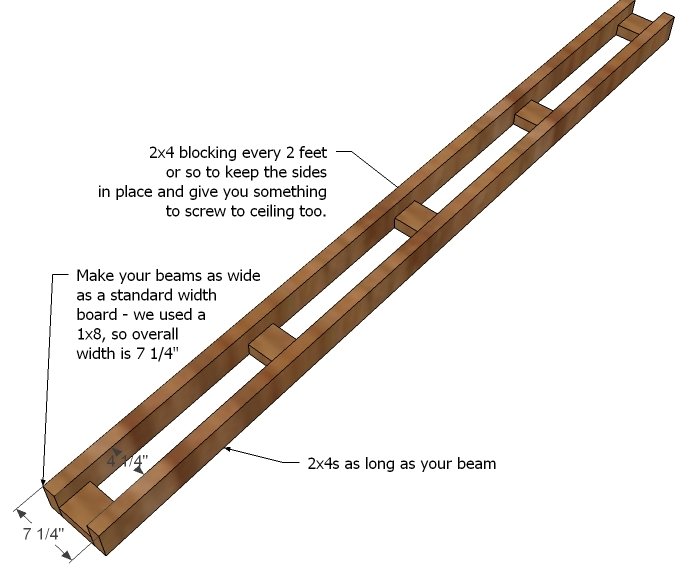
2x4s for the frame - minimum size - you could go larger width boards
1x8s for the face - this is the minimum a electrical light box will fit
Screws depending on how you will join boards and attach to ceiling:
Cut List
Cut to fit
Tools
- measuring tape
- square
- pencil
- safety glasses
- hearing protection
- drill
- circular saw
Step-by-step Instructions
Step 1
We have a cathedral ceiling, but these beams can be attached to any ceiling as long as you are able to screw into studs in the ceiling or properly anchor. This plan also works just for adding faux beams to your ceiling. But if you plan on adding lights, figure out where your lights are placed and avoid putting a 2x4 support in that space. You'll be tight on room. We used a pocket hole jig, but you can use screws and glue as well.
Step 2
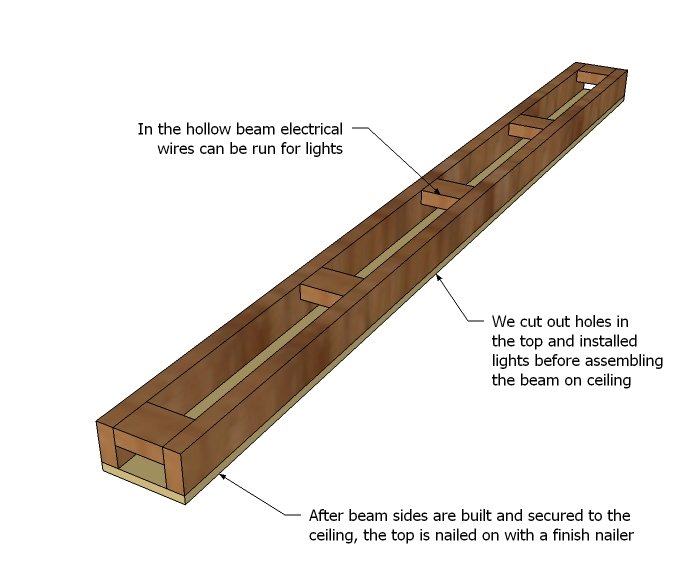
Then it's just a matter of attaching the frame to your ceiling, and adding the top board. We installed as much lighting as possible on the ground to minimize ladder work. Consult with an electrician about wiring and lighting code requirements in your area before taking on this project.
Finishing
Sand all surfaces, starting with a medium grit and finishing with fine. Wipe off the dust, fill any holes or gaps with wood filler, and sand smooth once dry. Apply primer if you're painting, then finish with your choice of paint or stain and seal with a durable clear topcoat. For outdoor projects, use exterior-rated primer, paint or stain, and sealer so the piece stands up to the weather.
Source (temporary): https://www.ana-white.com/woodworking-projects/beams-light