Bean Bag Toss Baseball Game
Bean bag toss on the wall! This bean bag toss game works is easy to build and hangs on the wall with our french cleat system. We love how it adds a decor or art element to a space. Easy to build with.
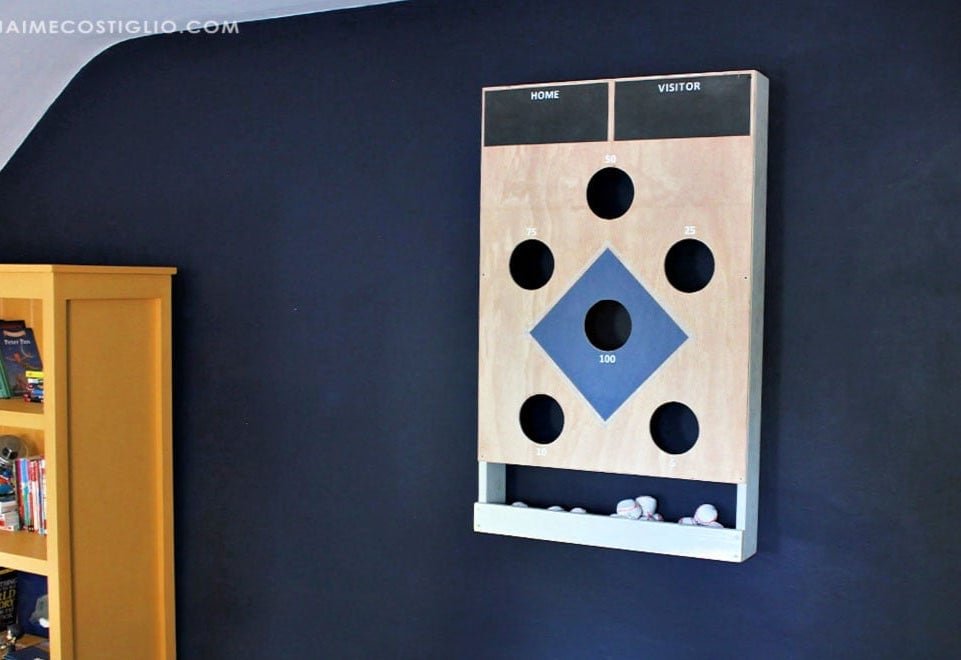
Specifications
| Project type | Toys |
|---|---|
| Room | Bedroom |
| Difficulty | Beginner Projects |
Dimensions
Use the size-specific shopping and cut lists below.
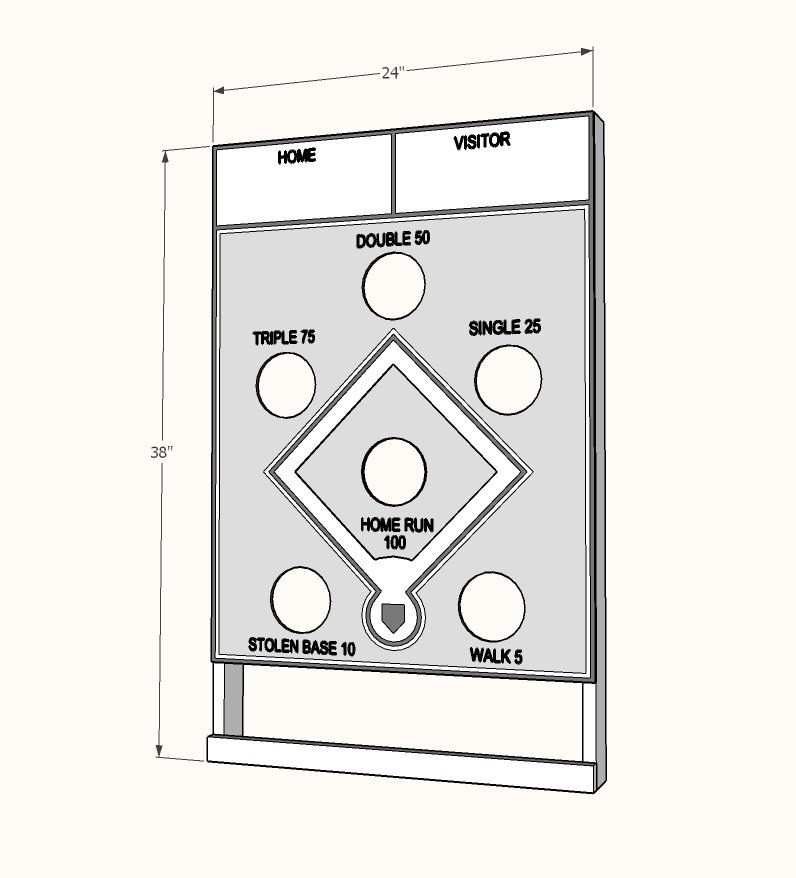
Shopping List
2 - 1x4x8
1 - 1x2x4
1 - 1/4" plywood 24" x 48"
1-1/4" and 3/4" brad nails
Cut List
4 - 1x4 @ 22-1/2"
2 - 1x4 @ 38"
1 - 1x2 @ 22-1/2"
1 - 1x2 @ 24" (NOTE: Jaime used a 1x3 instead here)
1 - 1/4" plywood @ 24" x 32"
Tools
- measuring tape
- square
- pencil
- safety glasses
- hearing protection
- kreg-jig
- drill
- circular saw
- nailer
- sander
- hole saw
Step-by-step Instructions
Step 1
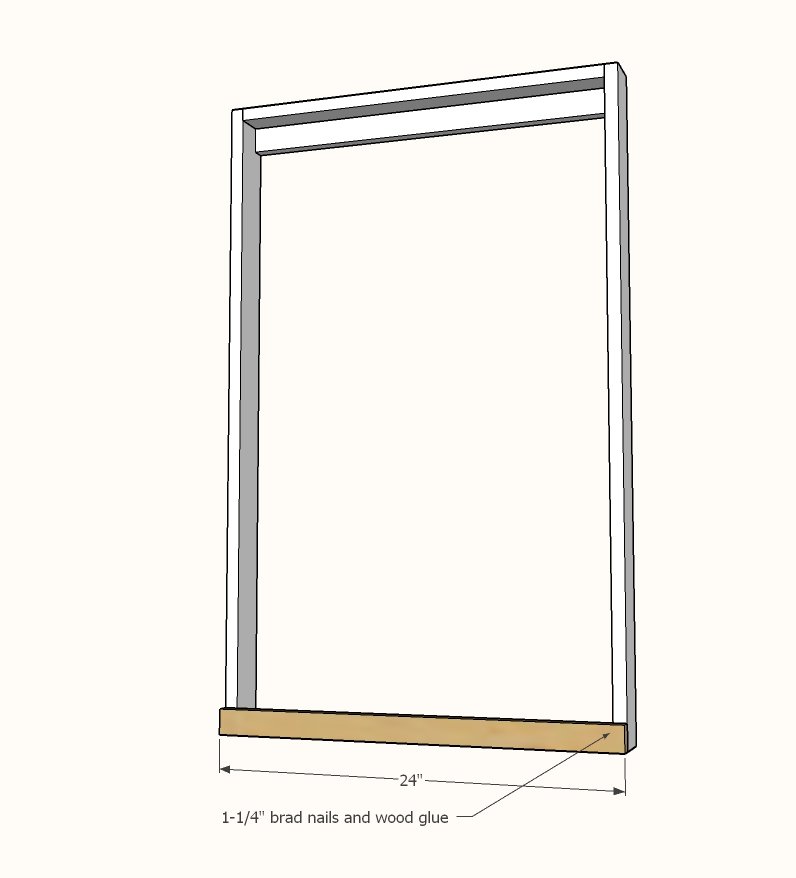
Build the basic frame of the project. Use 1-1/4" brad nails and glue.
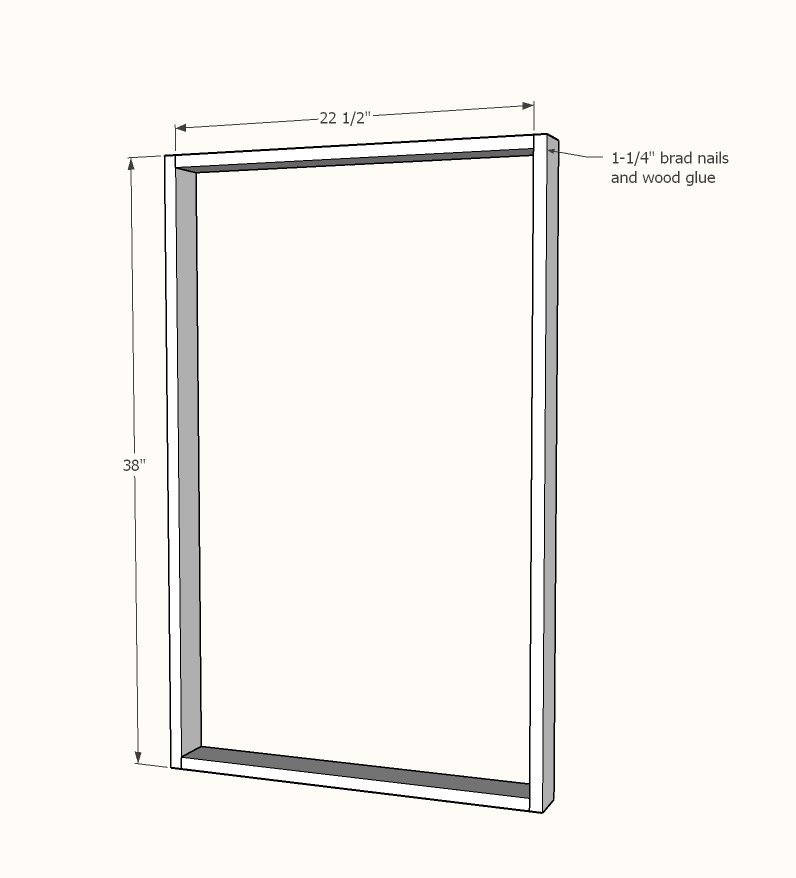
Step 2
Attach back support to top with 1-1/4" brad nails and wood glue.
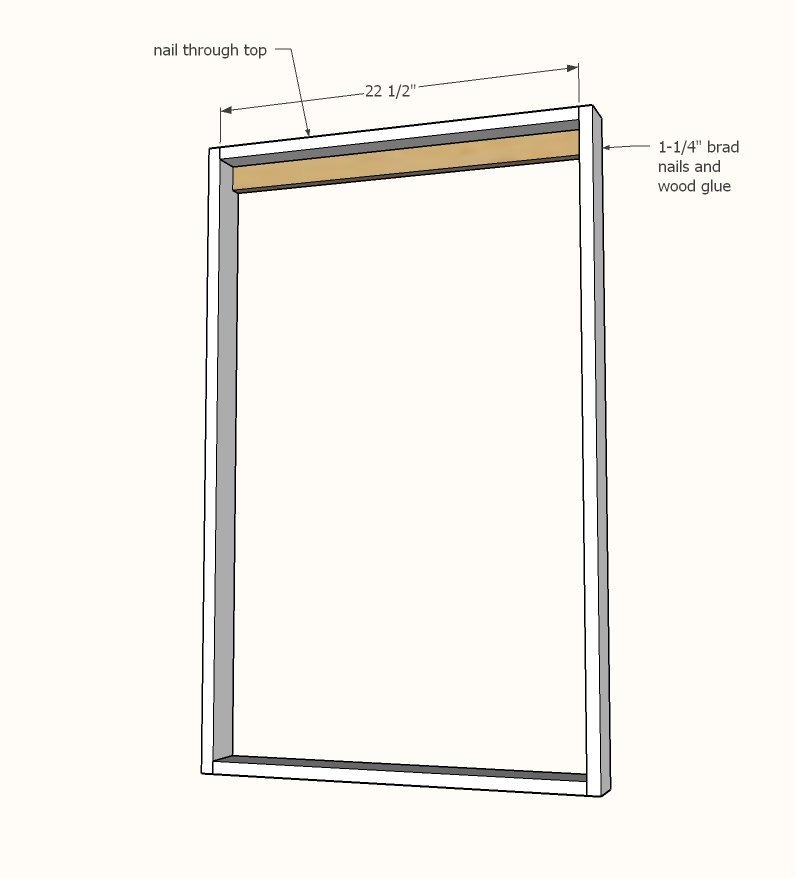
Attach front bottom with 1-1/4" brad nails and wood glue.
NOTE: Jaime used a 1x3 here.
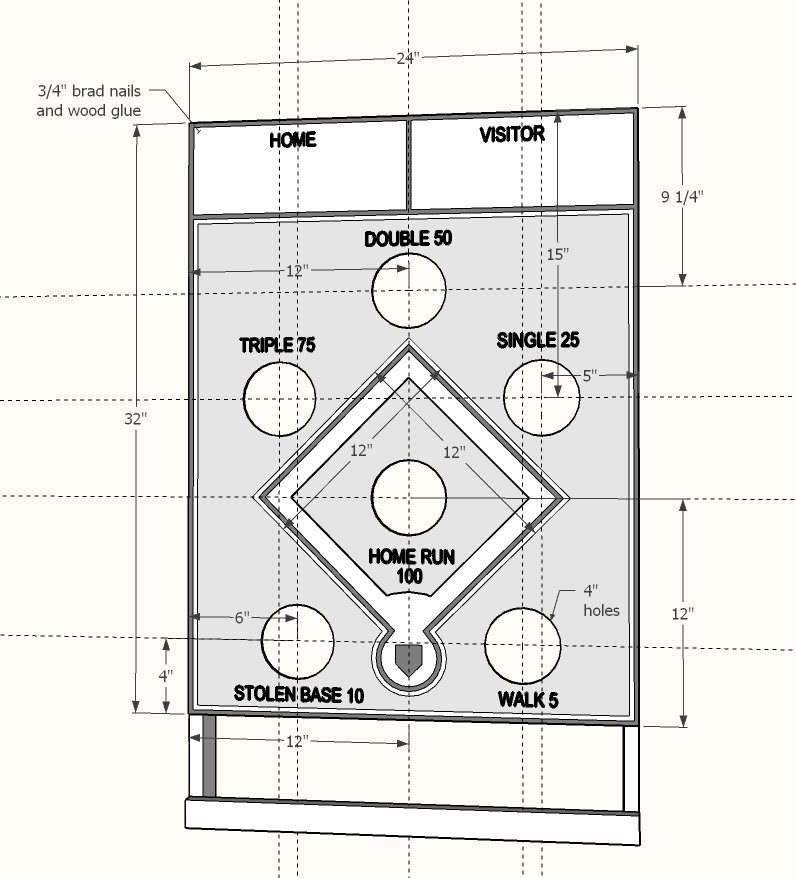
Attach 1/4" plywood to the front with 3/4" brad nails and glue.
Mark out pattern and drill holes with 4" hole saw or similar. Sand any rough edges.
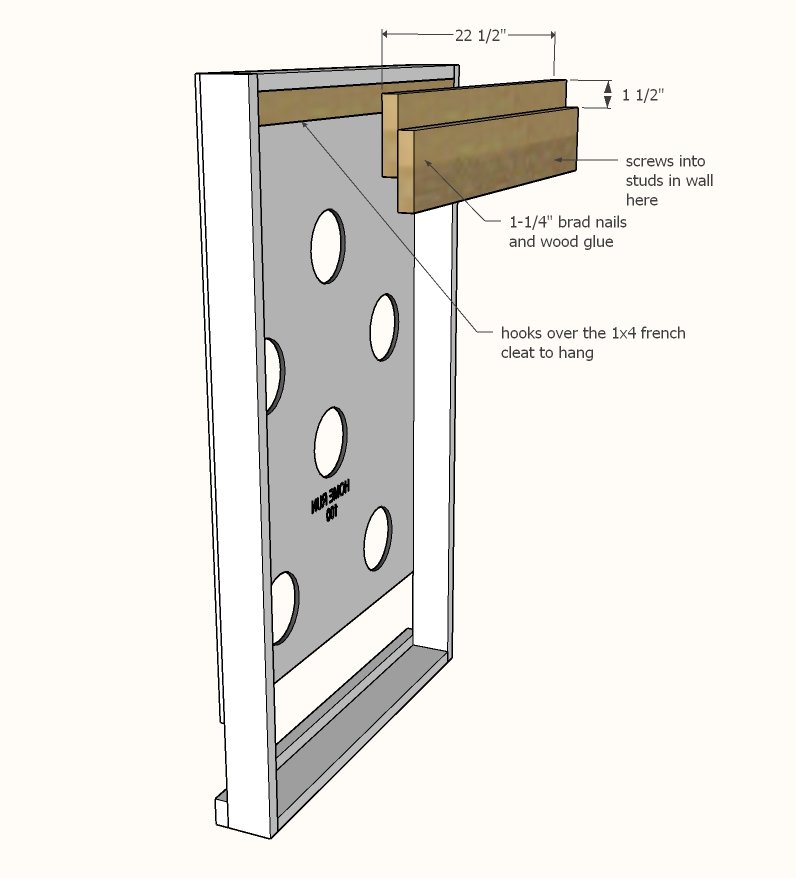
Layer the 1x4s over top of each other and nail and glue together.
Make sure the french cleat system fits inside the back of the project and hooks around the 1x2 at the top of the project. Trim ends if necessary. Hang the 1x4s on the wall in the desired location. Hang the project on the french cleat.
Finishing
Sand all surfaces, starting with a medium grit and finishing with fine. Wipe off the dust, fill any holes or gaps with wood filler, and sand smooth once dry. Apply primer if you're painting, then finish with your choice of paint or stain and seal with a durable clear topcoat. For outdoor projects, use exterior-rated primer, paint or stain, and sealer so the piece stands up to the weather.
Source (temporary): https://www.ana-white.com/woodworking-projects/bean-bag-toss-baseball-game