Becca Wood Trunk
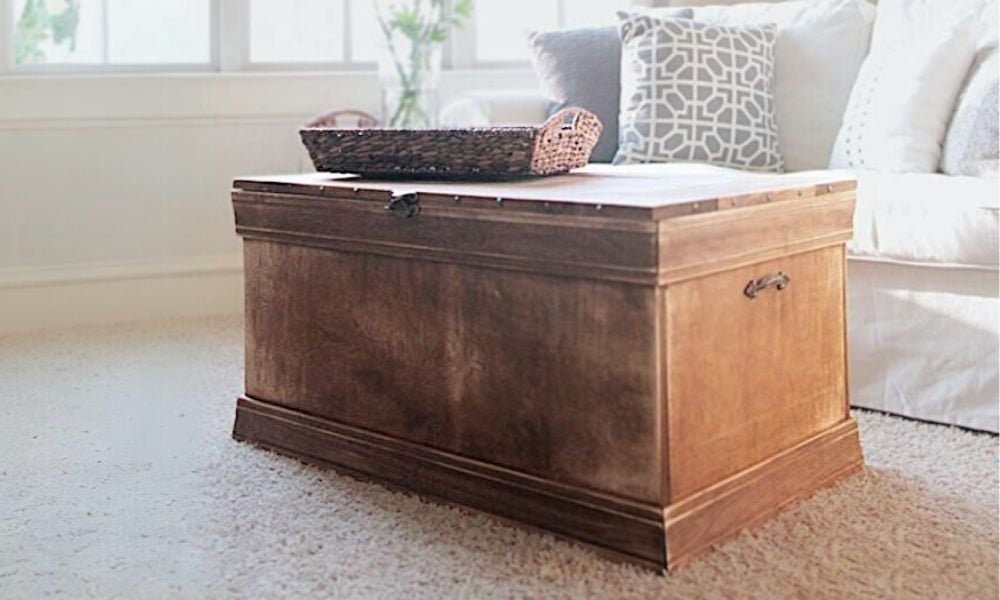
to build a vintage style chest or trunk from plywood and whitewood boards! This beautiful trunk is perfect for a coffee table or a bench in the entryway. We love it throughout the home. Our step by step plans and include detailed diagrams, shopping list and cut list.
Specifications
| Project type | Coffee Tables |
|---|---|
| Room | Storage Solutions |
| Style | Farmhouse Furniture |
| Difficulty | Intermediate |
Dimensions
Use the size-specific shopping and cut lists below.
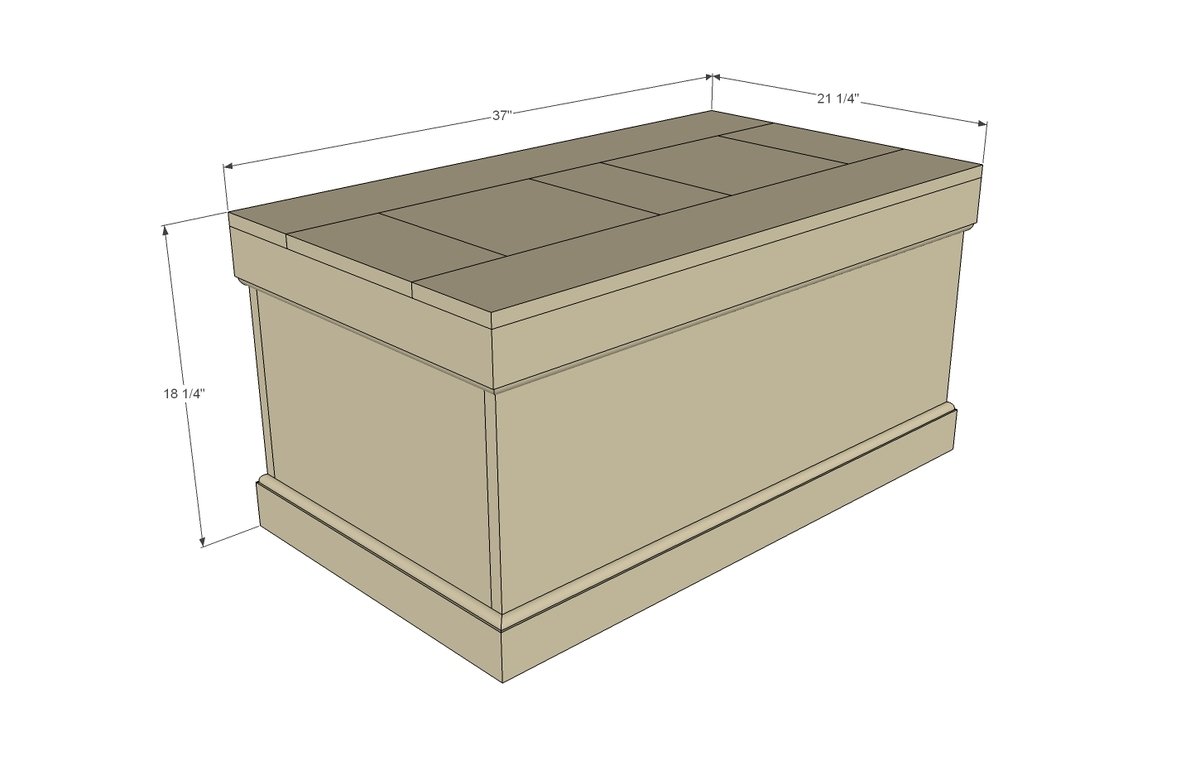
Shopping List
- 4x4 (half) sheet 3/4" plywood cut into 15 3/4" wide strips x 4 feet long
- 4x4 (half) sheet 1/4" plywood or other hardboard
- 1 - 2x2 @ 8 feet long (furring strips are fine)
- 20 feet of 3 1/4" base moulding
- 10 feet of 1x6 whitewood boards or similar
Cut List
- 1 - 1/4" plywood @ 36" x 20 1/4"
- 3 - 2x2 @ 20 1/4"
- 2 - 3/4" plywood 15 3/4" x 18 3/4"
- 2 - 3/4" plywood 15 3/4" x 36"
- 4 - 3 1/4" base moulding @ 36" (both ends cut NOT parallel at 45 degree bevels, short point to short point measurement)
- 4 - 3 1/4" base moulding @ 20 1/4" (both ends cut NOT parallel at 45 degree bevels, short point to short point)
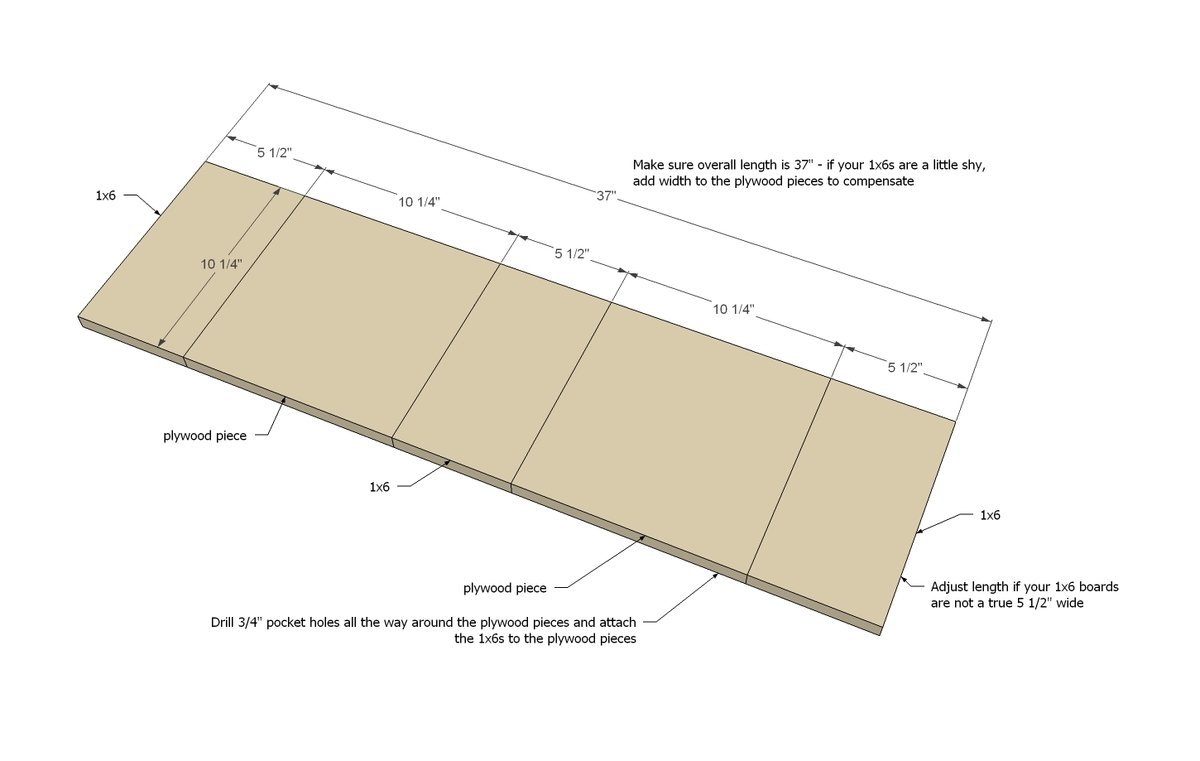
- 3 - 1x6 @ 10 1/4"
- 2 - 1x6 @ 37"
- 2 - 3/4" plywood @ 10 1/4" x 10 1/4"
Tools
- measuring tape
- square
- safety glasses
- drill
- circular saw
- compound miter saw
- nailer
- sander
Step-by-step Instructions
Step 1
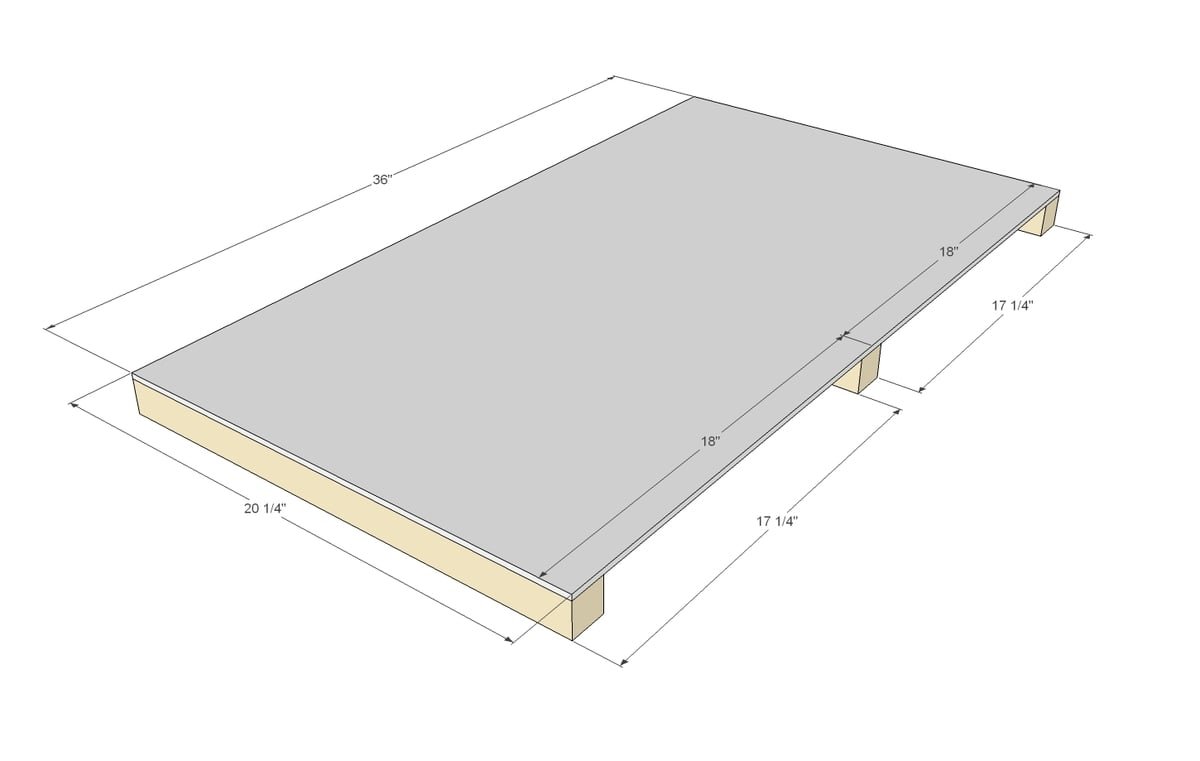
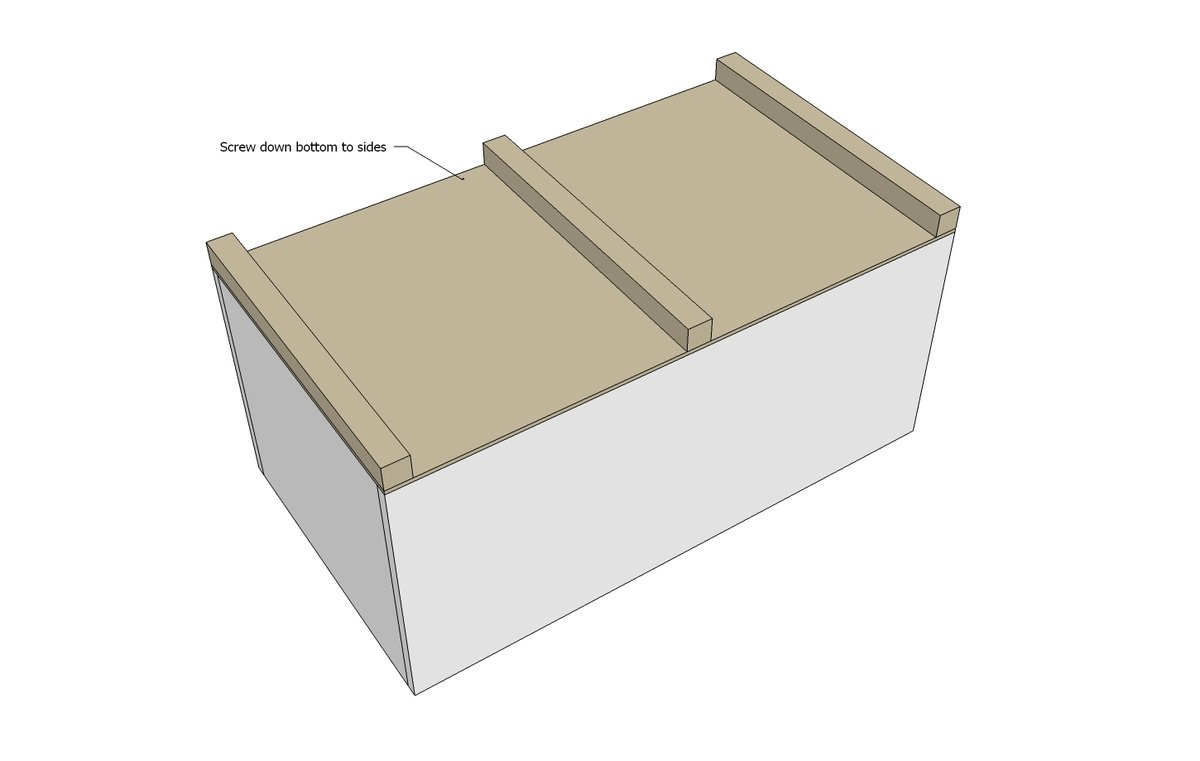
I chose to make the base like this to cut down on weight and cost in the project, and also to elevate the base from the floor. That way if there's water spilled, it won't rot the bottom out on your trunk. But by adding the 2x2s underneath, we create a system where the weight rests on top of the joints, resulting in a stronger bottom. You can just nail and glue the base to the 2x2s - nothing special here!
Step 2
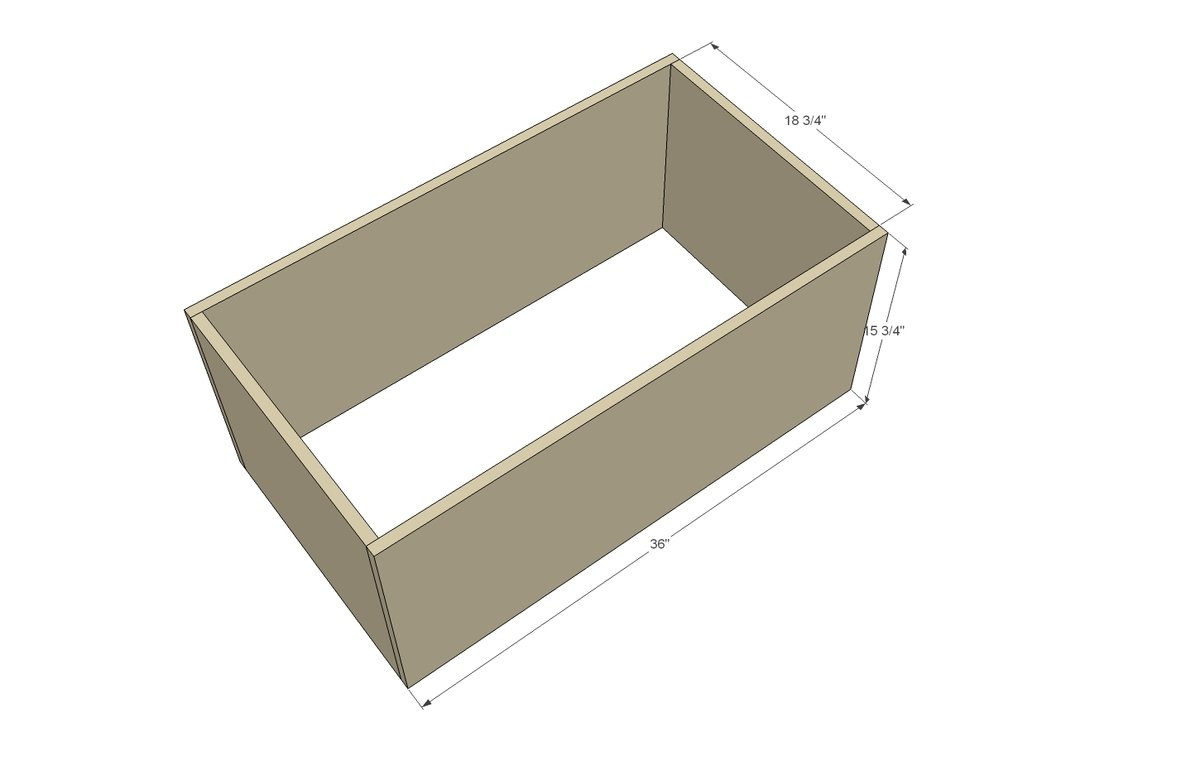
Now construct the main box out of the plywood pieces as shown above.
Step 3
And then attach the base to the bottom. You can just screw and glue or nail - remember, the weight of the trunk pushes down on the base, keeping everything together. We'll also be hiding the joint with base moulding.
Step 4
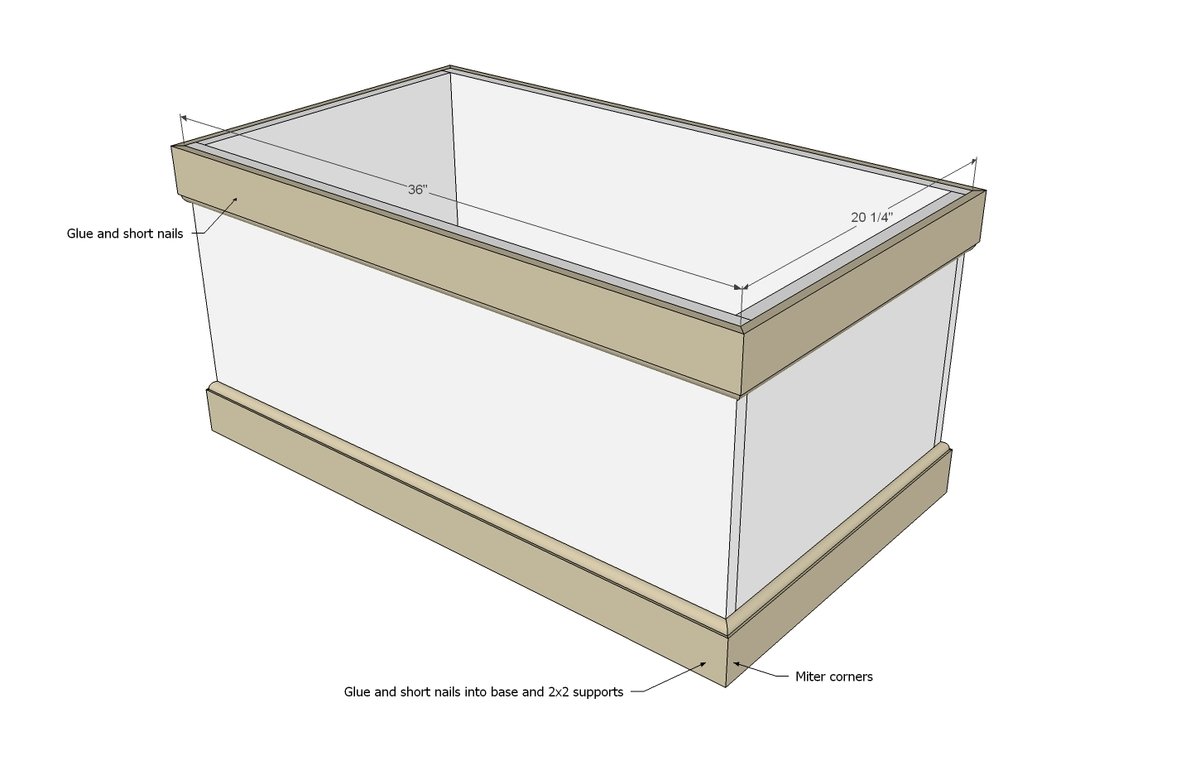
Cut base moulding to fit with your miter saw set at a 45 degree bevel. I tend to cut my pieces just a tiny bit long and then trim them down to get a perfect fit. Nail on. Be careful here to select a nail size that fits your moulding thickness plus the 3/4" thickness of the plywood. Use glue too. NOTE: You can use a wider base moulding too!
Step 5
Step 6
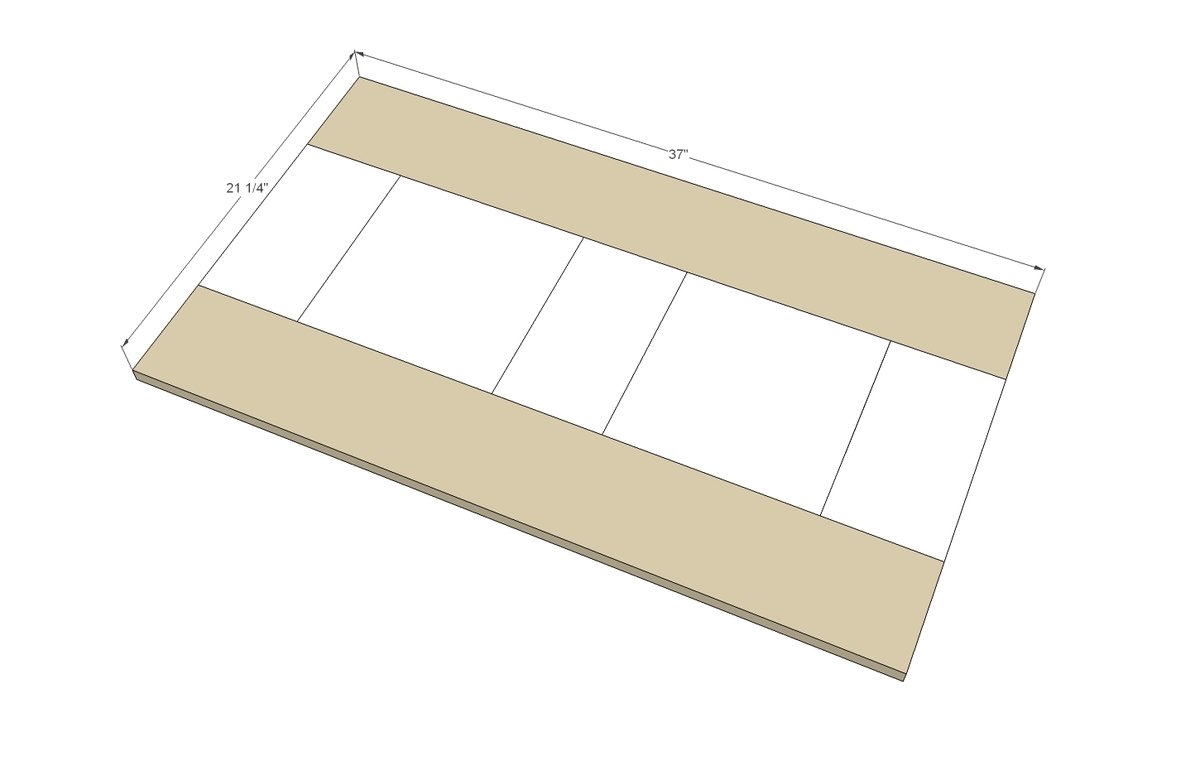
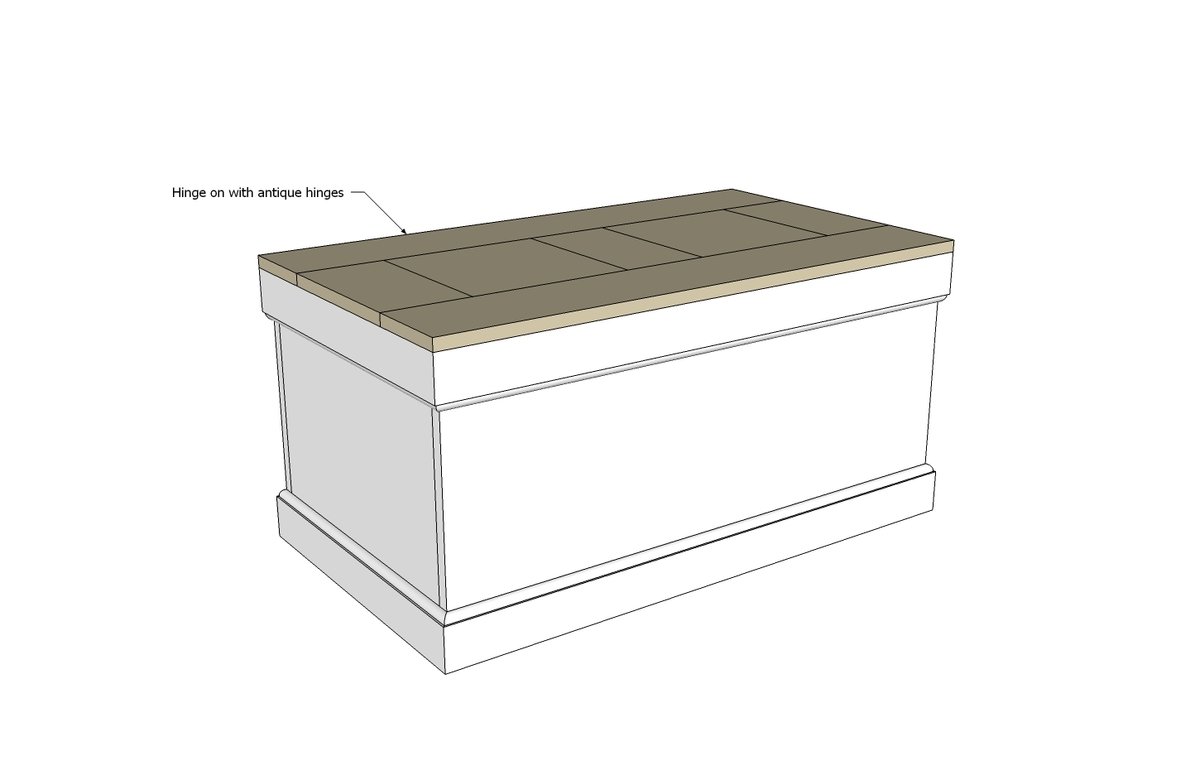
Then add the end 1x6s to finish off the top. Having a planked top will add more character and all the plywood edges are covered too!
Step 7
Use exterior mount hinges to attach trunk top. If you have kids, you may consider adding a hinge top support to keep the top from slamming little fingers.
Finishing
Sand all surfaces, starting with a medium grit and finishing with fine. Wipe off the dust, fill any holes or gaps with wood filler, and sand smooth once dry. Apply primer if you're painting, then finish with your choice of paint or stain and seal with a durable clear topcoat. For outdoor projects, use exterior-rated primer, paint or stain, and sealer so the piece stands up to the weather.
Source (temporary): https://www.ana-white.com/woodworking-projects/becca-wood-trunk