Beginner Farm Table (2 Tools + $50 Lumber)
Beginner DIY Farmhouse Table – Built with Just 2 Tools & $50 in Lumber Build your own stylish and sturdy farmhouse dining table with beginner-friendly plans from. This affordable DIY project uses just two basic power tools—a drill and a saw—and about $50 worth of standard lumber. Designed for new woodworkers, this project includes a simple step-by-step guide with diagrams and a cut list, allowing you to create a beautiful, functional table with minimal experience. Perfect for rustic, modern farmhouse, or country-style interiors, this solid wood table comfortably seats 6 and adds timeless charm to any dining area.
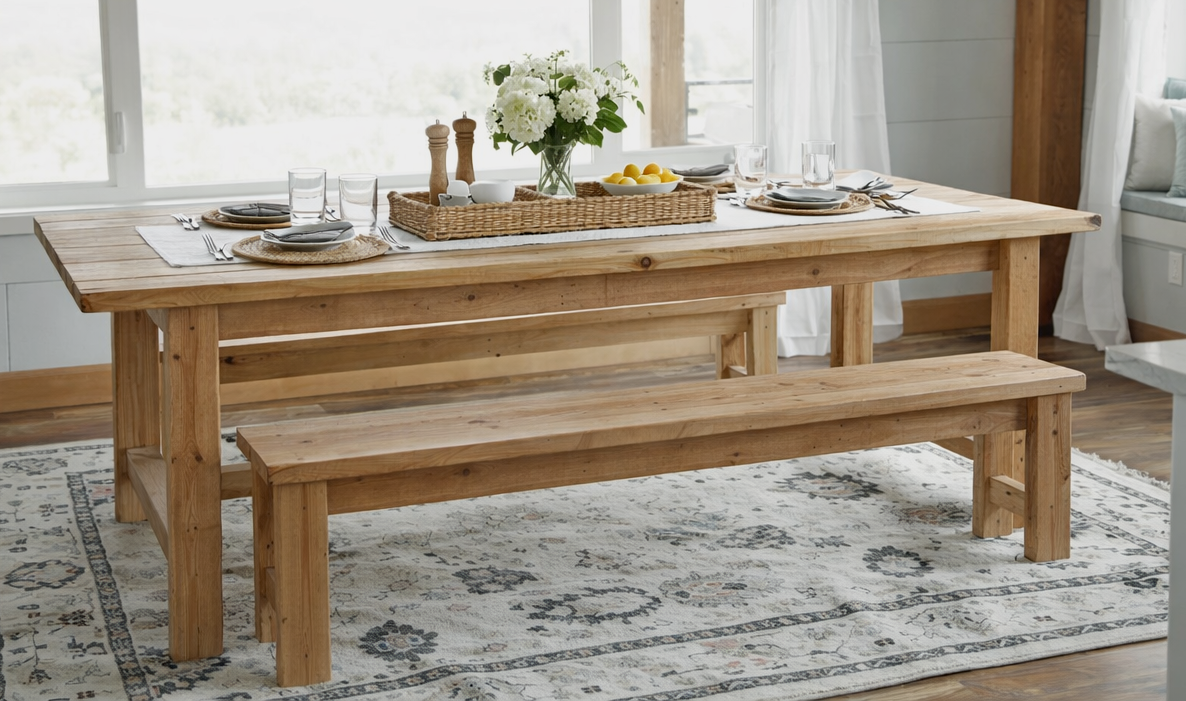
Specifications
| Project type | Dining Table Plans |
|---|---|
| Room | dining room |
| Style | Farmhouse Furniture |
| Difficulty | Beginner Projects |
| Estimated cost | $50 - $100 |
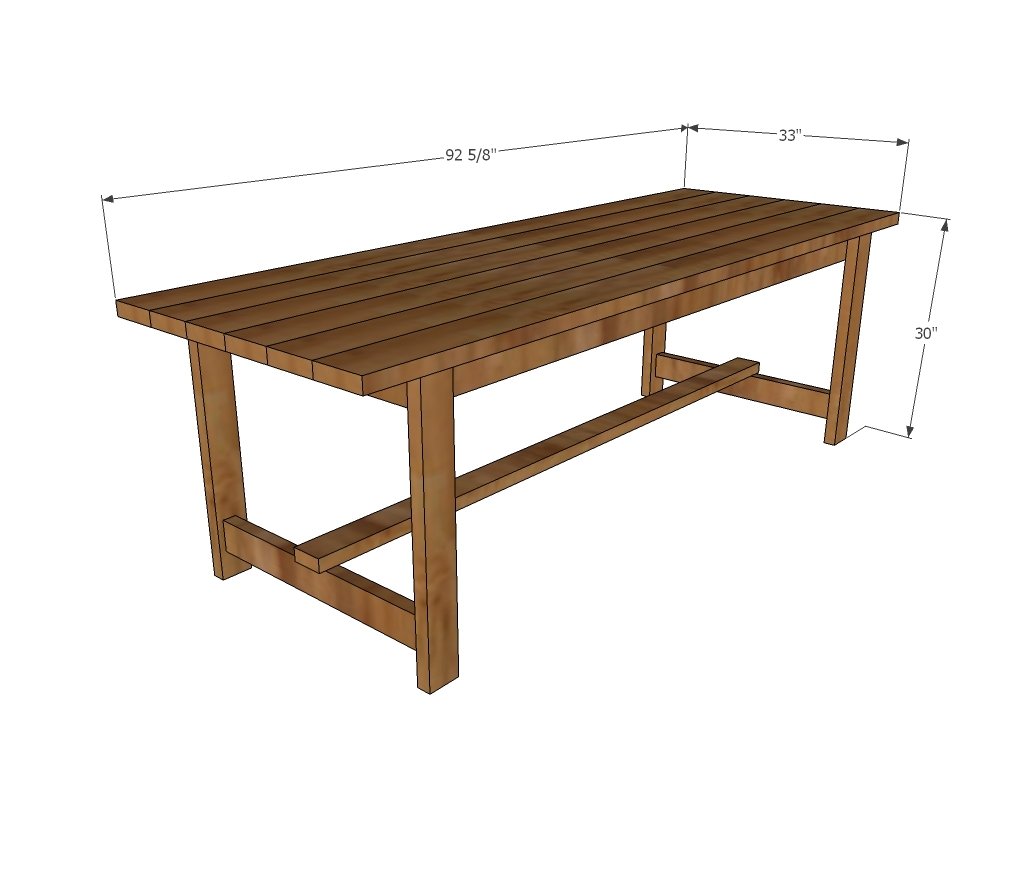
Dimensions
Use the size-specific shopping and cut lists below.
Shopping List
- 6 - 2x4 @ 8 feet or 8 foot stud length
- 6 - 2x6 @ 8 feet or 8 foot stud length
- About 100 2-1/2" self tapping wood screw
- Wood glue
- wood stain
- polyurethane for tabletop
- Color matched wood filler (for filling screw holes after wood staining is dry)
Cut List
- 8 - 2x4 @ 28-1/2" - end leg sets
- 2 - 2x4 @ 75-1/2" - side aprons
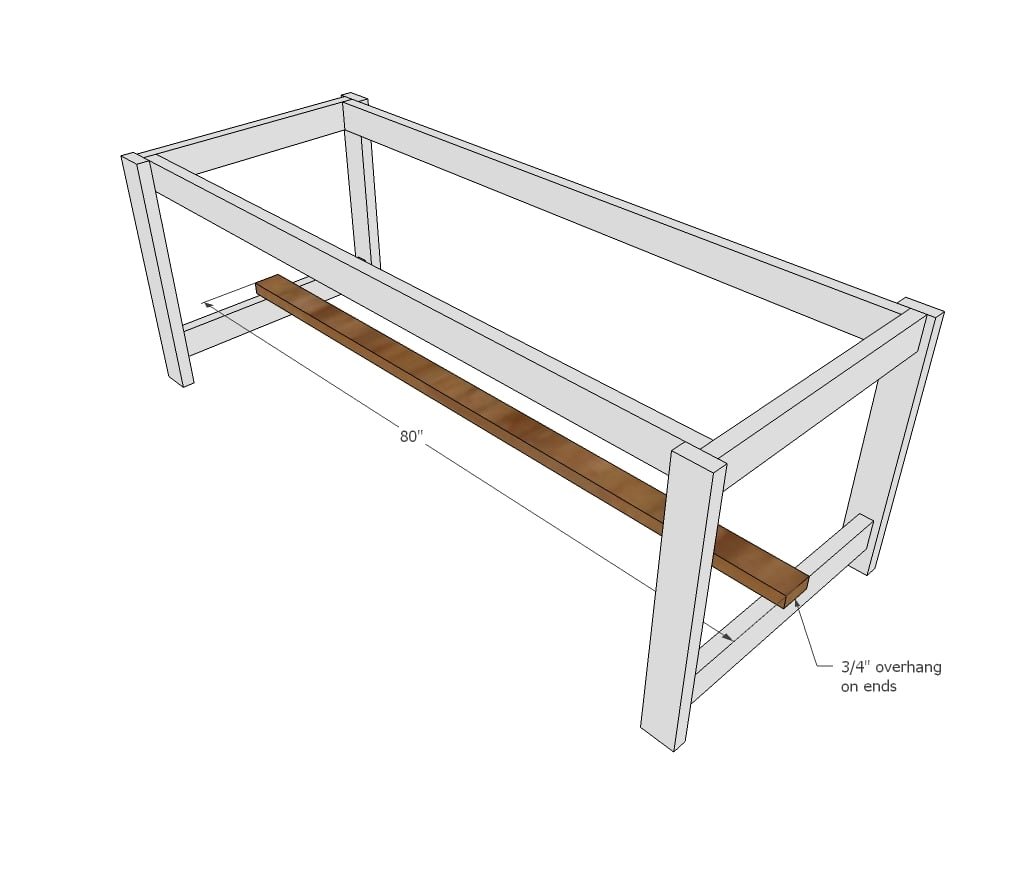
- 1 - 2x4 @ 80" - bottom stretcher
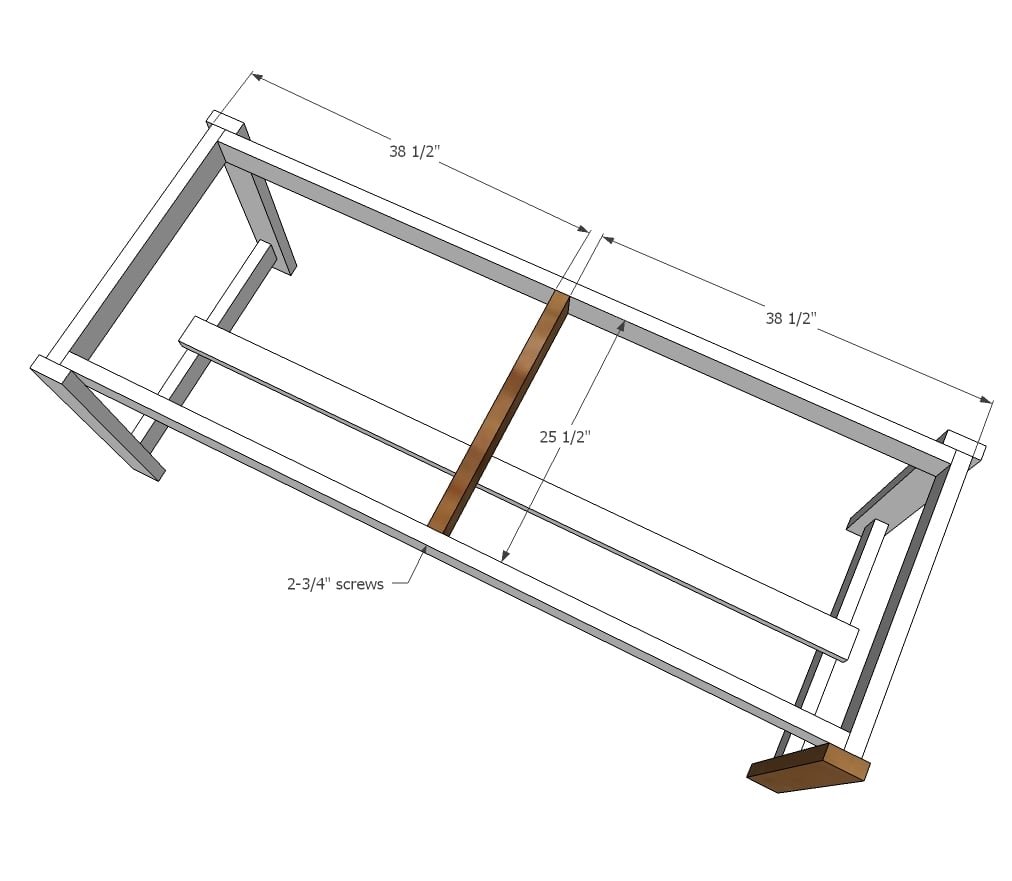
- 1 - 2x4 @ 25-1/2" (middle support)
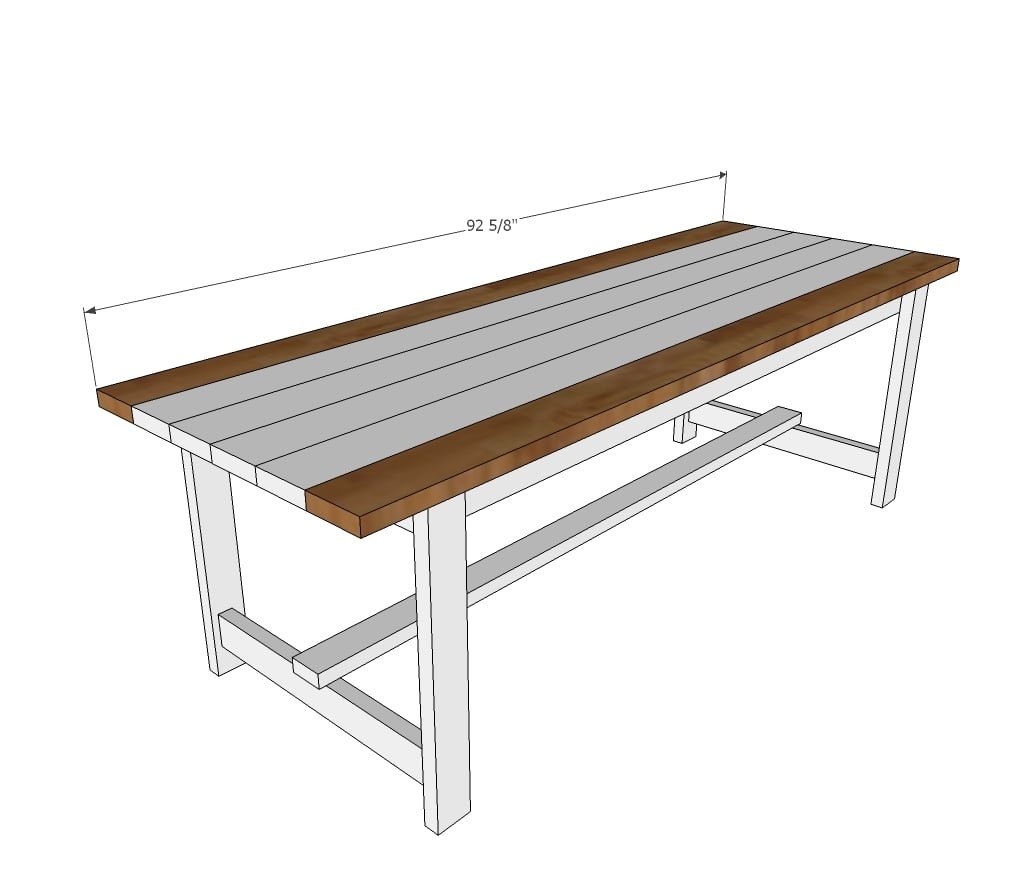
- 6 - 2x6 @ 92-5/8" (tabletop boards)
Tools
- measuring tape
- square
- pencil
- safety glasses
- hearing protection
- drill
- compound miter saw
Step-by-step Instructions
Step 1
Build two of the leg sets with 2x4 boards cut to 28-1/2" long
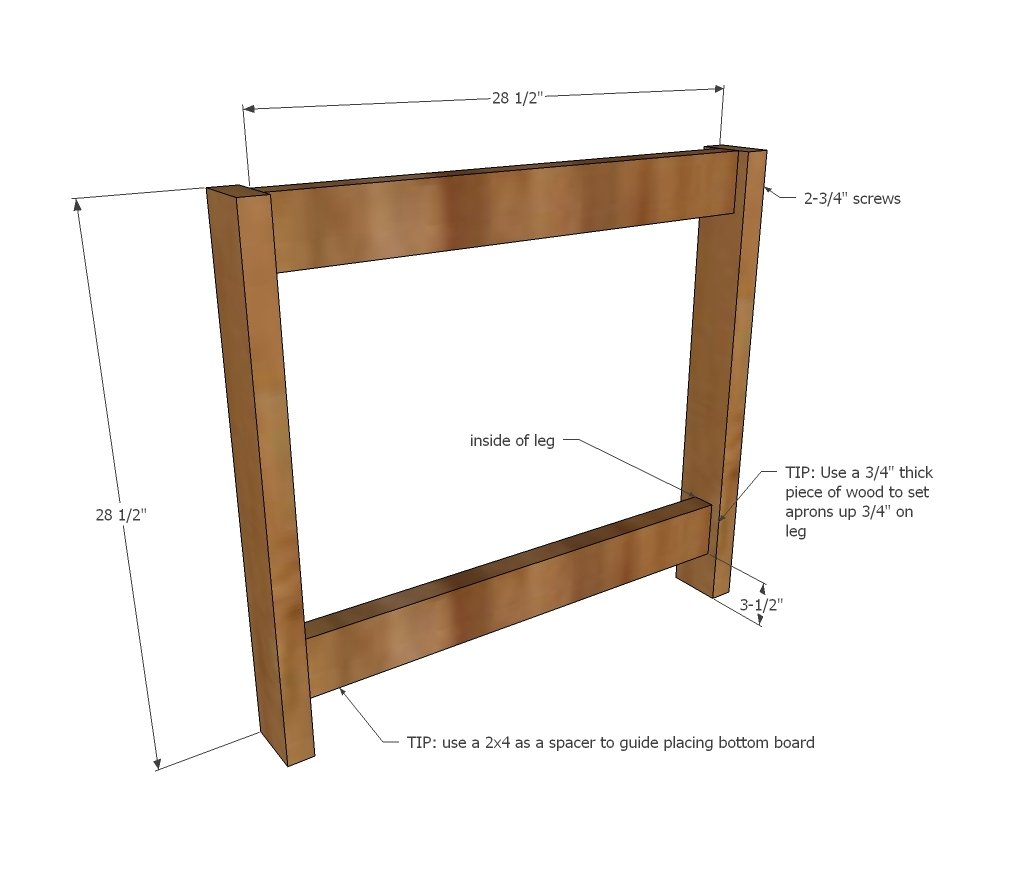
Step 2
Will leg sets upside down, on a flat level surface (be careful on garage floors as they usually slope) attach aprons to leg sets.
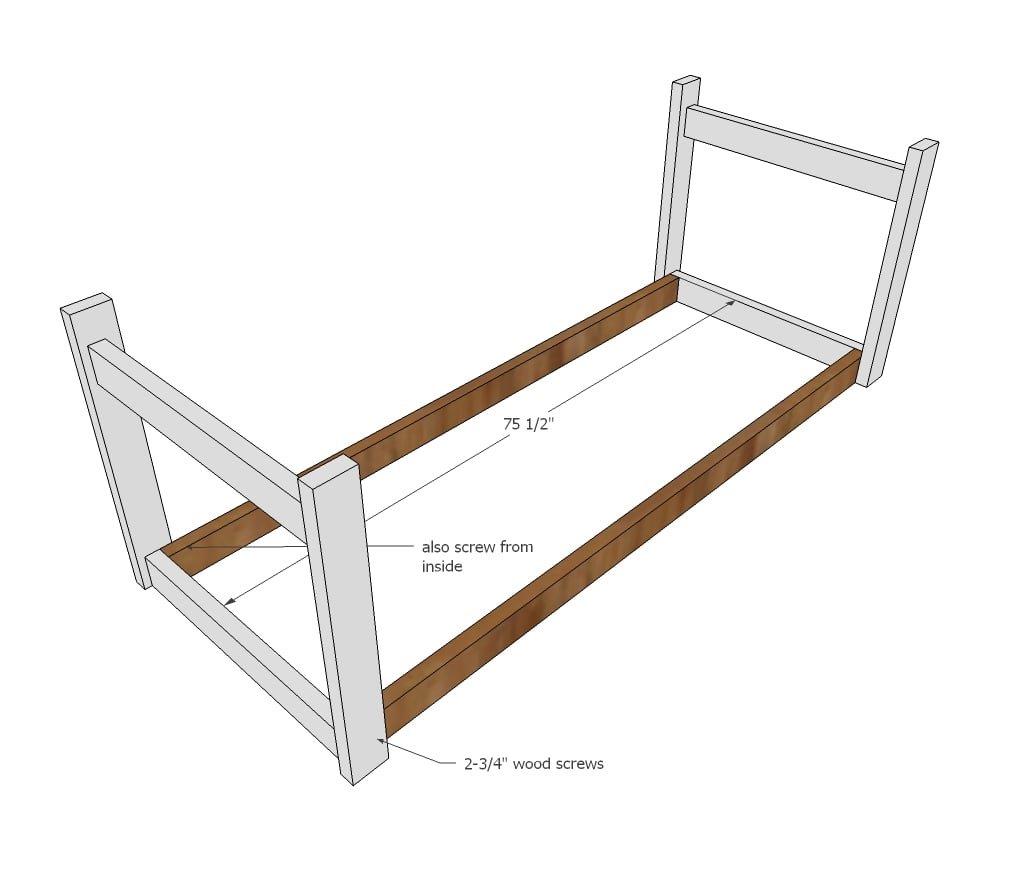
Step 3
Flip over and adjust for square. Then attach bottom stretcher with equal overhangs on ends of 3/4".
Step 4
Add center support.
Step 5
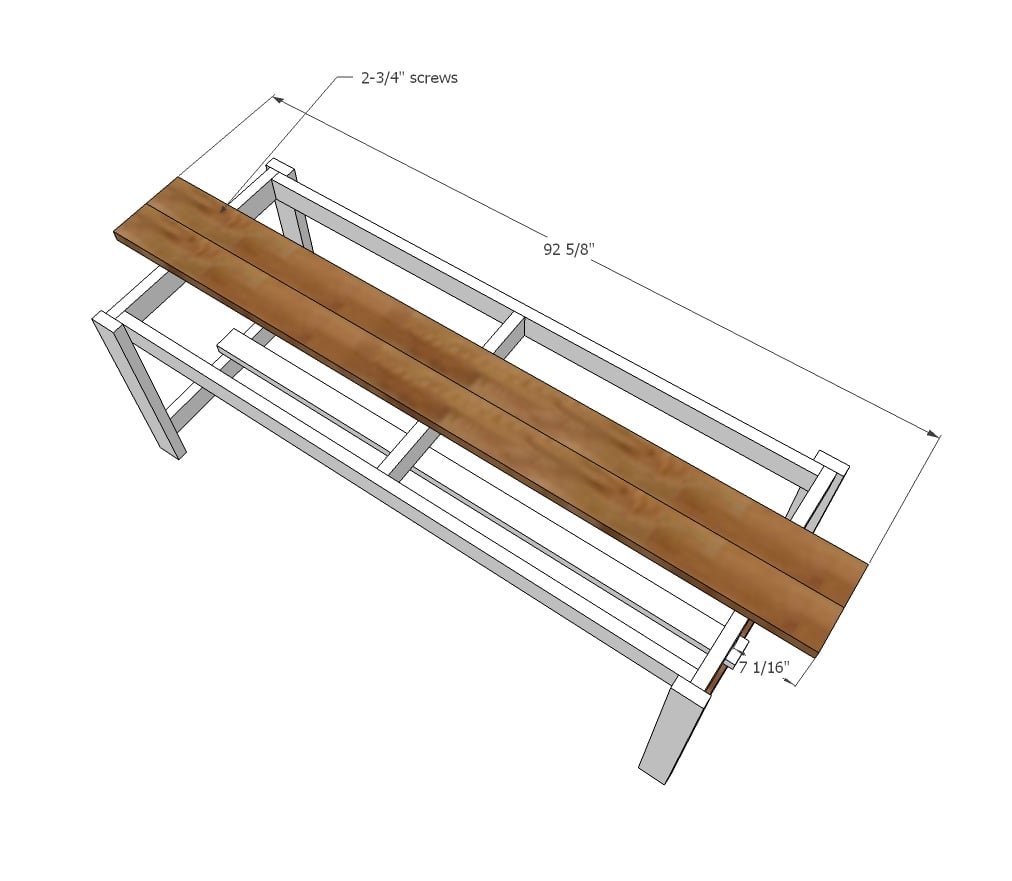
Step 6
Attach next boards as close as you can to first boards.
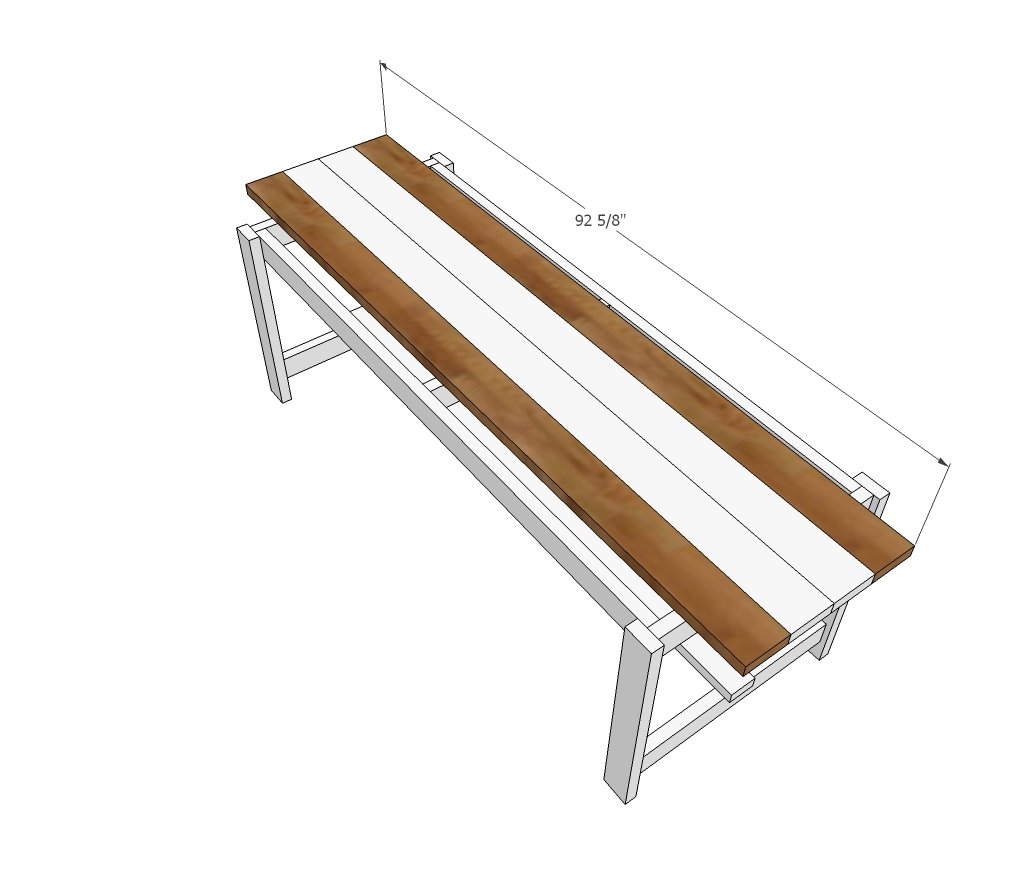
Repeat for final boards.
NOTE: I also angle screwed from underneath on inside of apron into the underside of the end tabletop boards for extra support.
Finishing
Sand all surfaces, starting with a medium grit and finishing with fine. Wipe off the dust, fill any holes or gaps with wood filler, and sand smooth once dry. Apply primer if you're painting, then finish with your choice of paint or stain and seal with a durable clear topcoat. For outdoor projects, use exterior-rated primer, paint or stain, and sealer so the piece stands up to the weather.
Source (temporary): https://www.ana-white.com/woodworking-projects/beginner-farm-table-2-tools-50-lumber