Behind Closet Door Storage
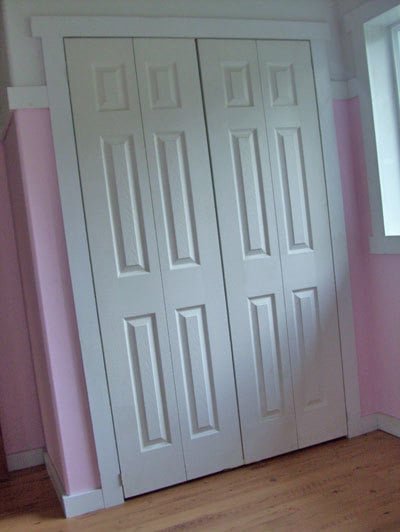
Claim two extra square feet in your closet with this amazing easy plan!
Specifications
| Project type | Bookshelf and Bookcase Plans |
|---|---|
| Room | Closets |
| Style | Children's and Kid's Room Furniture and Toy Plans |
| Difficulty | Intermediate |
| Estimated cost | $20 - $50 |
Shopping List
1x6 Boards Heavy duty hinges four caster wheels 1x2 Boards Anchoring bolts for hollow core doors Screws
Cut List
Cut your boards to fit your closet and closet doors.
Tools
- measuring tape
- square
- pencil
- safety glasses
- hearing protection
- drill
- circular saw
- sander
- level
- countersink drill bit
Step-by-step Instructions
Step 1
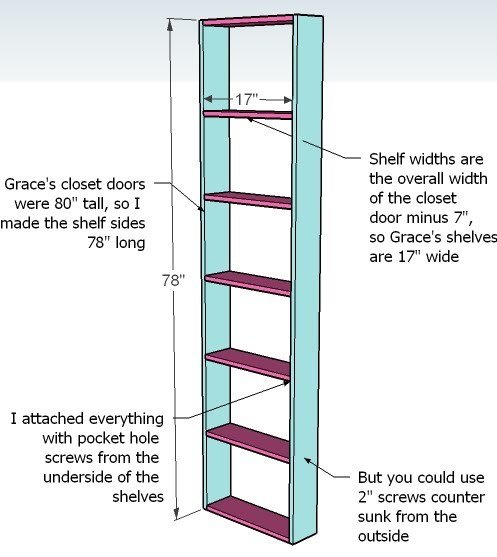
First, measure your closet doors. If they are a standard 24″ wide, you will need to subtract 5 1/2″ to get a total door shelf of 18 1/2″ wide. That means all of the shelves will need to be cut at 17″ wide. Measure the overall height of the doors and subtract two inches. Cut two 1x6s to this length. You will also need to cut as many shelves as desired to the shelf width (in my example, 17″ wide). Also cut 1×2 shelf trim to the shelf width, one more than the number you cut for shelves.
Step 2
Basically, you just build a shelf, as shown above, out of 1x6s. You have to make the shelf 5 1/2″ narrower than the closet door so that it has room to swing when opening and closing.
Step 3
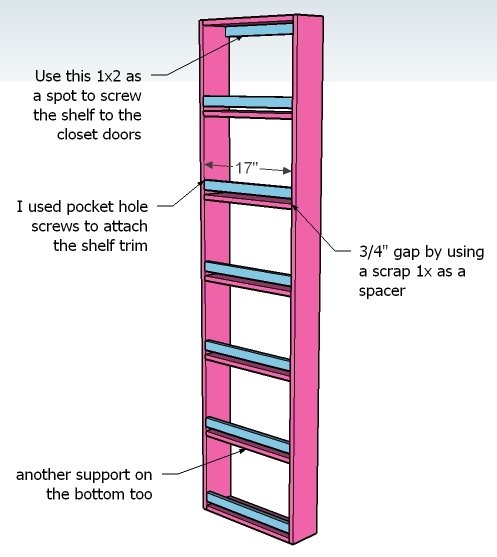
Then you attach the 1x2s as shelf trim and supports. I used my Kreg Jig™ to build Grace’s closet doors, but you could also simply use 2″ wood screws countersunk. Don’t forget the glue.
Step 4
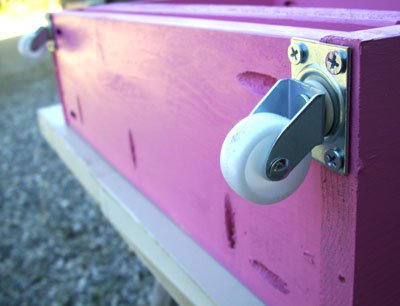
Then you attach the caster wheels to the bottom. You only need two caster wheels per door. I use 1 1/4″ caster wheels. Those are the pocket holes I used to build the shelf with.
Finishing
Sand all surfaces, starting with a medium grit and finishing with fine. Wipe off the dust, fill any holes or gaps with wood filler, and sand smooth once dry. Apply primer if you're painting, then finish with your choice of paint or stain and seal with a durable clear topcoat. For outdoor projects, use exterior-rated primer, paint or stain, and sealer so the piece stands up to the weather.
Source (temporary): https://www.ana-white.com/woodworking-projects/behind-closet-door-storage