Behind Sofa Table with Charging Station
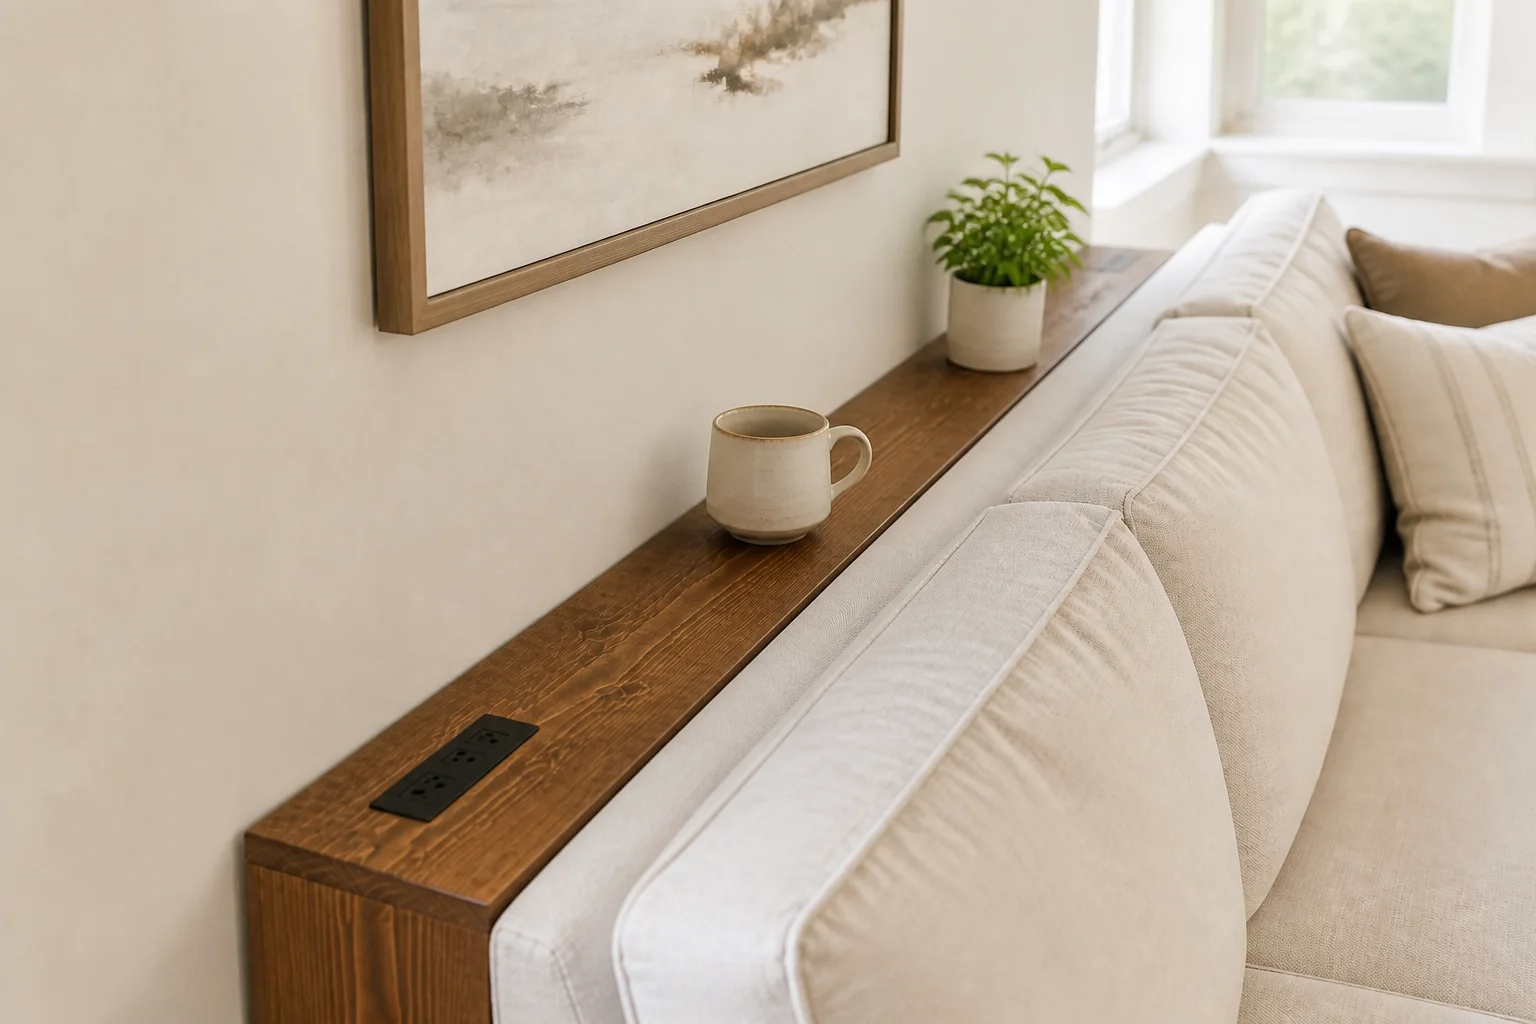
Build a slim, sturdy table that fits behind your sofa and adds a convenient place for drinks, remotes, decor, and charging devices. This fast beginner-friendly project is customized to the exact length and height of your sofa.
Specifications
| Project type | Tables |
|---|---|
| Room | Living room |
| Style | Simple |
| Difficulty | Beginner |
| Estimated cost | $30–$60, plus charging outlet |
| Build time | A few hours |
Dimensions
Use the size-specific shopping and cut lists below.
Shopping List
1x6 boards for the top and outside legs
1x3 boards for the lower supports and trim
2x4 boards for interior supports
1-1/4 inch pocket hole screws or brad nails
Wood glue
Charging outlet or recessed power strip with manufacturer-supplied hardware
Sandpaper
Optional: wall or floor anchoring hardware
Cut List
CUSTOMIZE ALL CUTS TO YOUR SOFA
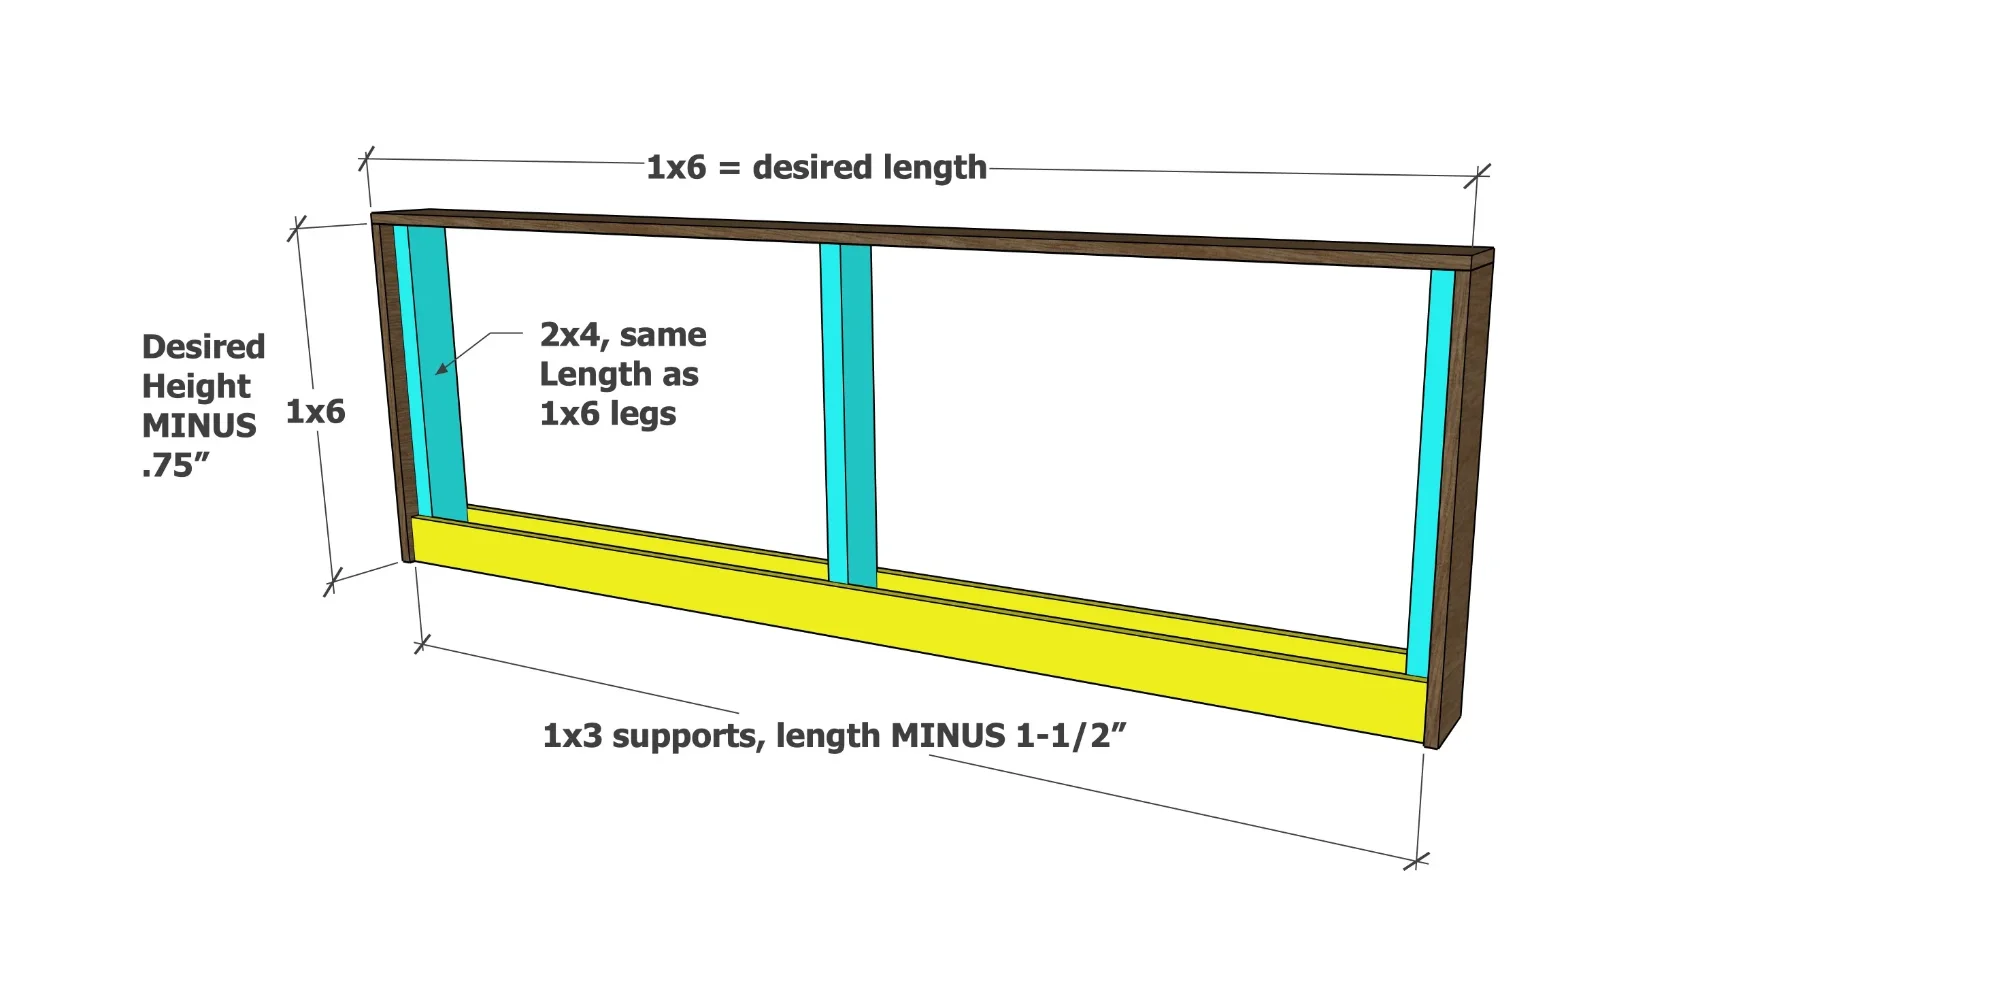
1 - 1x6 top: desired overall length
2 - 1x6 outside legs: desired finished height minus 3/4 inch
2 - 1x3 horizontal supports: desired overall length minus 1-1/2 inches
3 - 2x4 vertical supports: same length as the 1x6 legs
Measure your sofa and space before cutting. Dry-fit the frame behind the sofa before installing the charging outlet or applying finish. Cut the outlet opening to the manufacturer’s template.
Tools
- Tape measure
- Pencil
- Speed square
- Drill
- Circular saw
- Miter saw
- Jigsaw
- Kreg jig
- Nail gun
- Sander
- Clamps
- Level
Step-by-step Instructions
Build the Outer 1x6 Frame
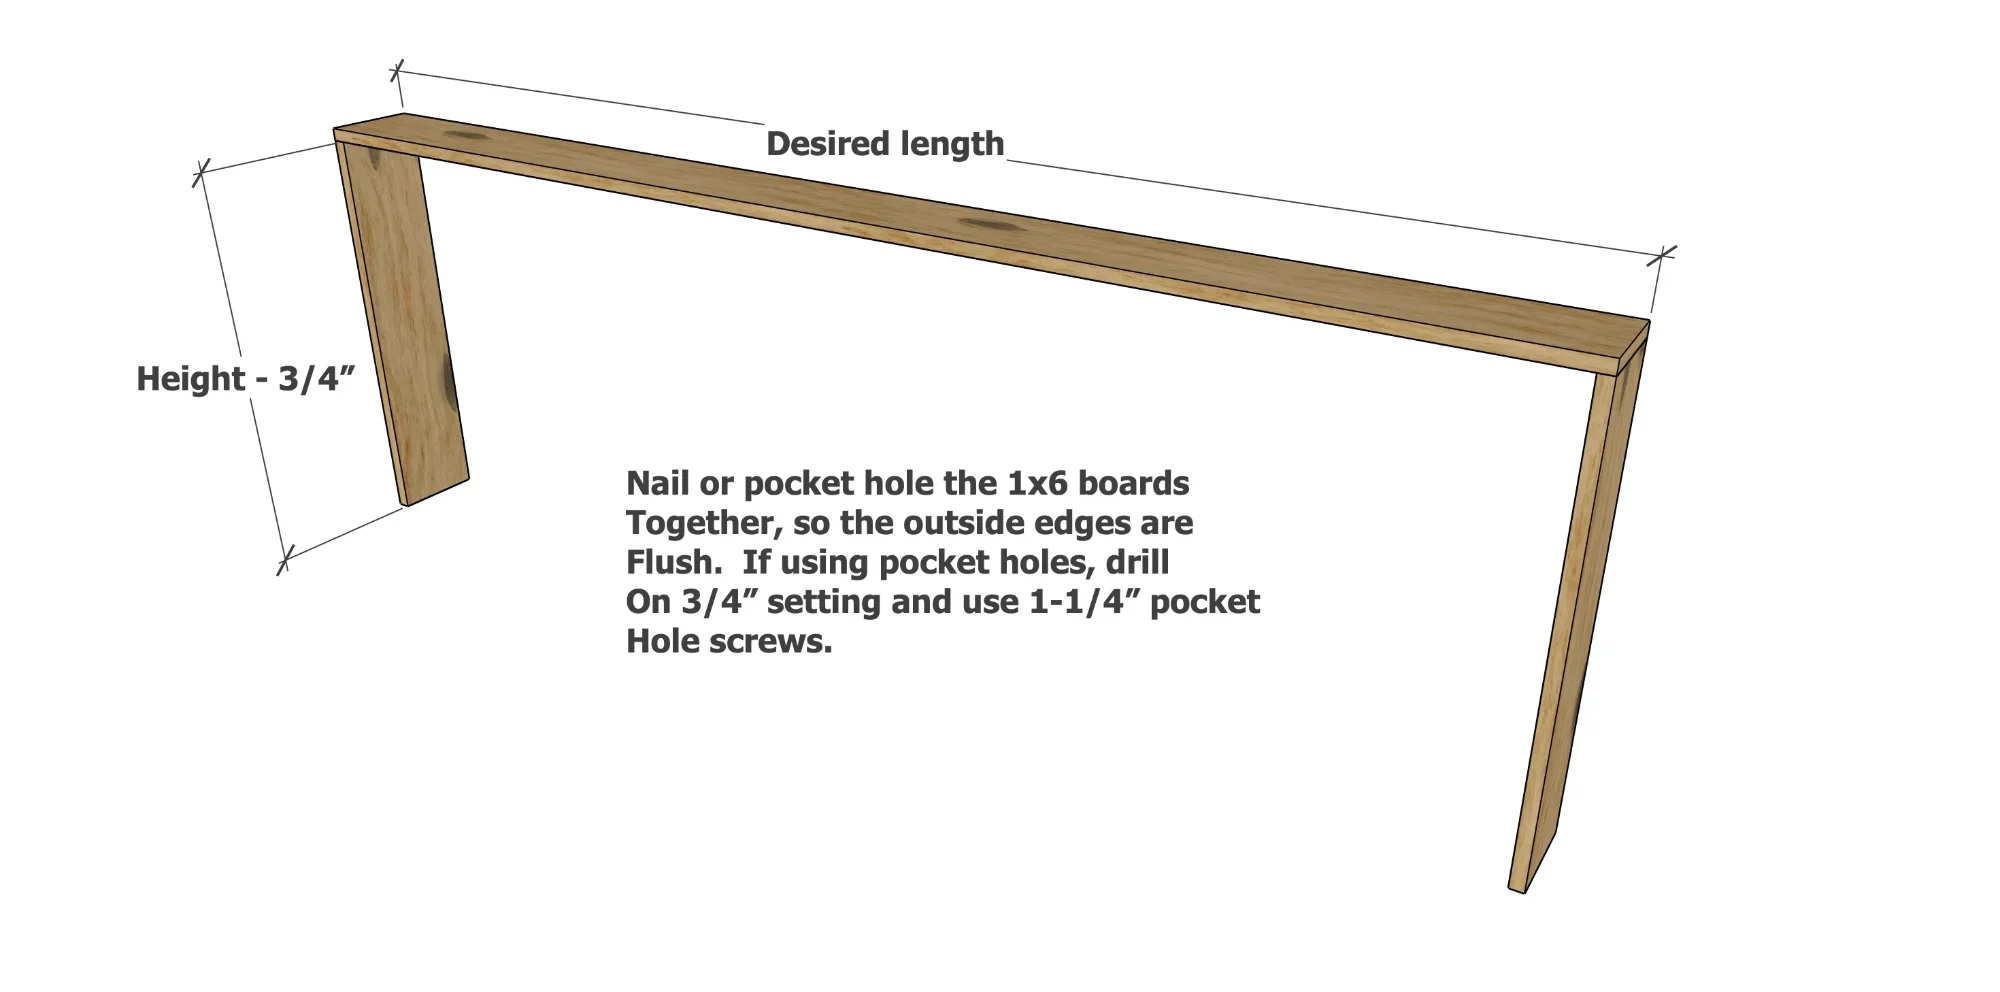
Cut the 1x6 top to your desired overall length. Cut two 1x6 legs to the desired finished height minus 3/4 inch. Attach the legs beneath the top with the outside edges flush. Use 3/4-inch pocket holes with 1-1/4-inch pocket hole screws, or glue and brad nails where appropriate. Check the frame for square.
Add the First Lower 1x3 Support
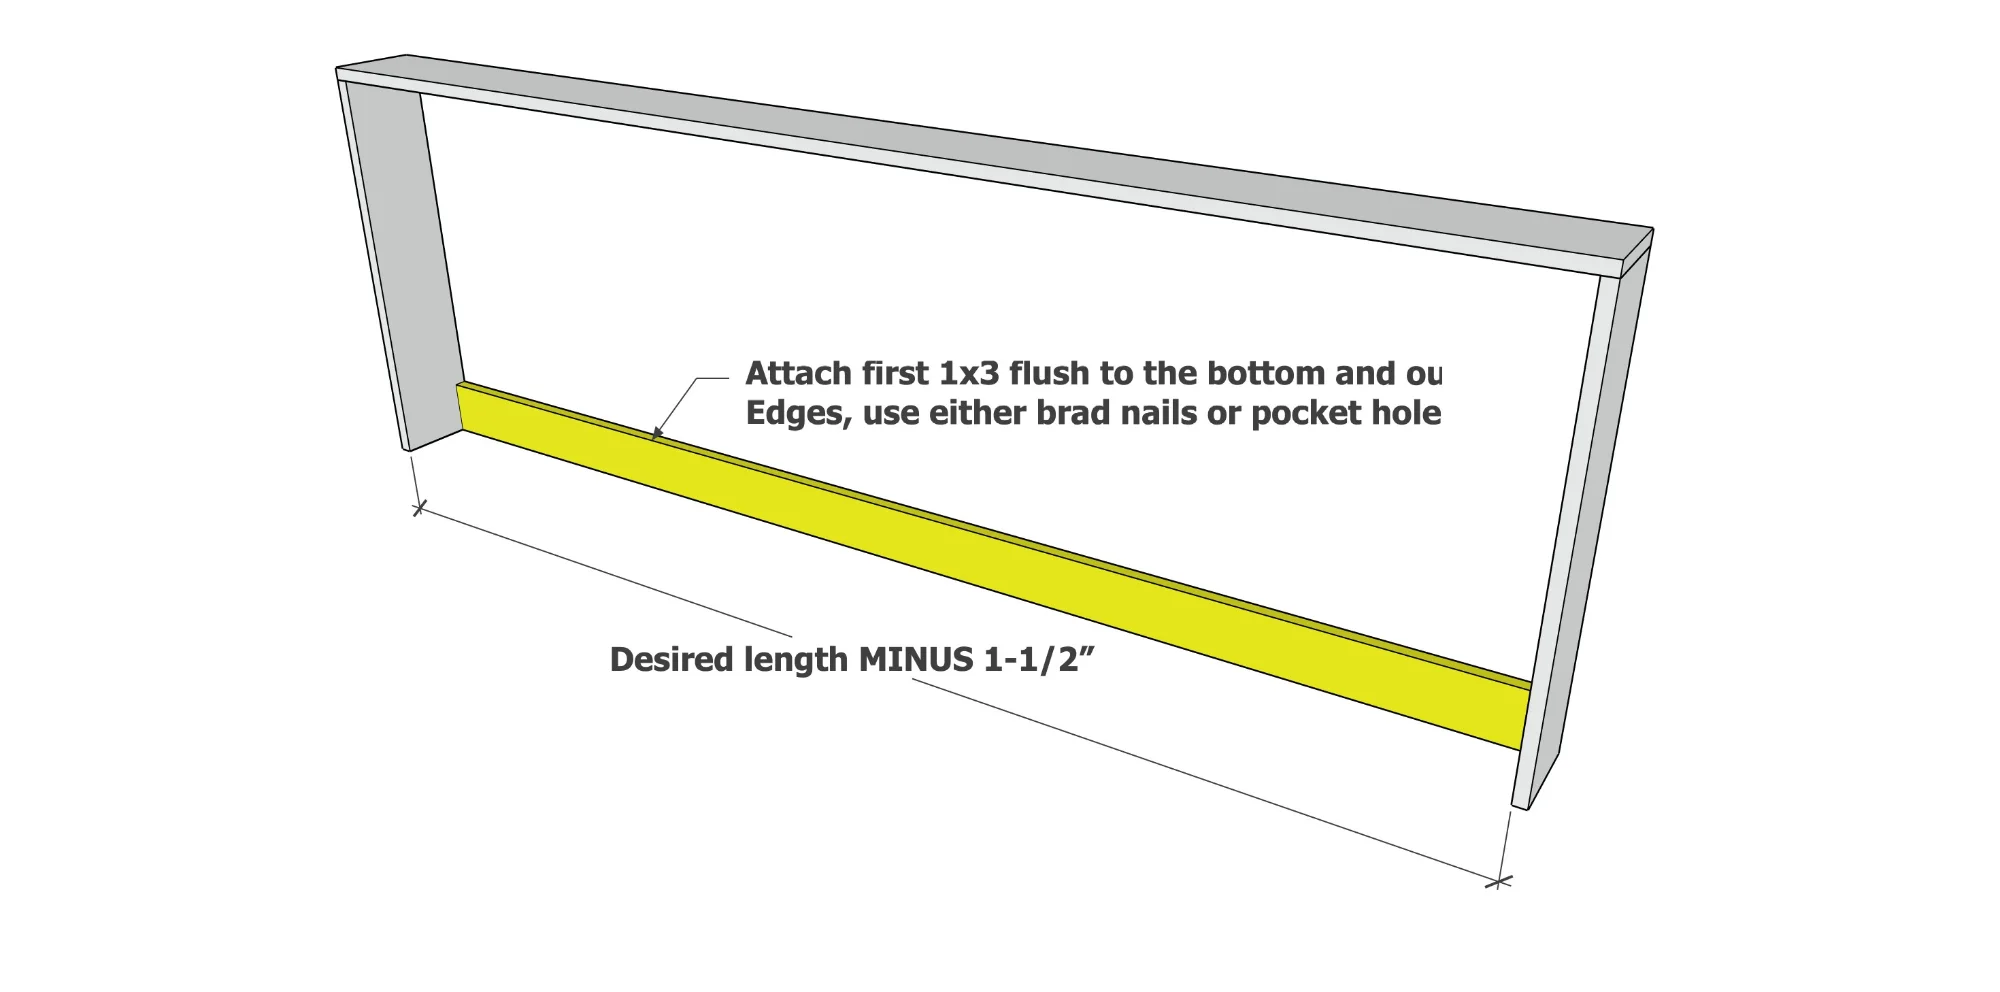
Cut a 1x3 to the desired overall length minus 1-1/2 inches. Fit it between the outside legs with its bottom and outside edges flush. Attach with wood glue and brad nails or pocket holes.
Install the 2x4 Supports
Cut the 2x4 supports to the same length as the 1x6 legs. Place one near each end and one near the center for a long table. Fasten the supports to the top and lower 1x3 with wood glue and brad nails or screws. Keep every support square to the top.
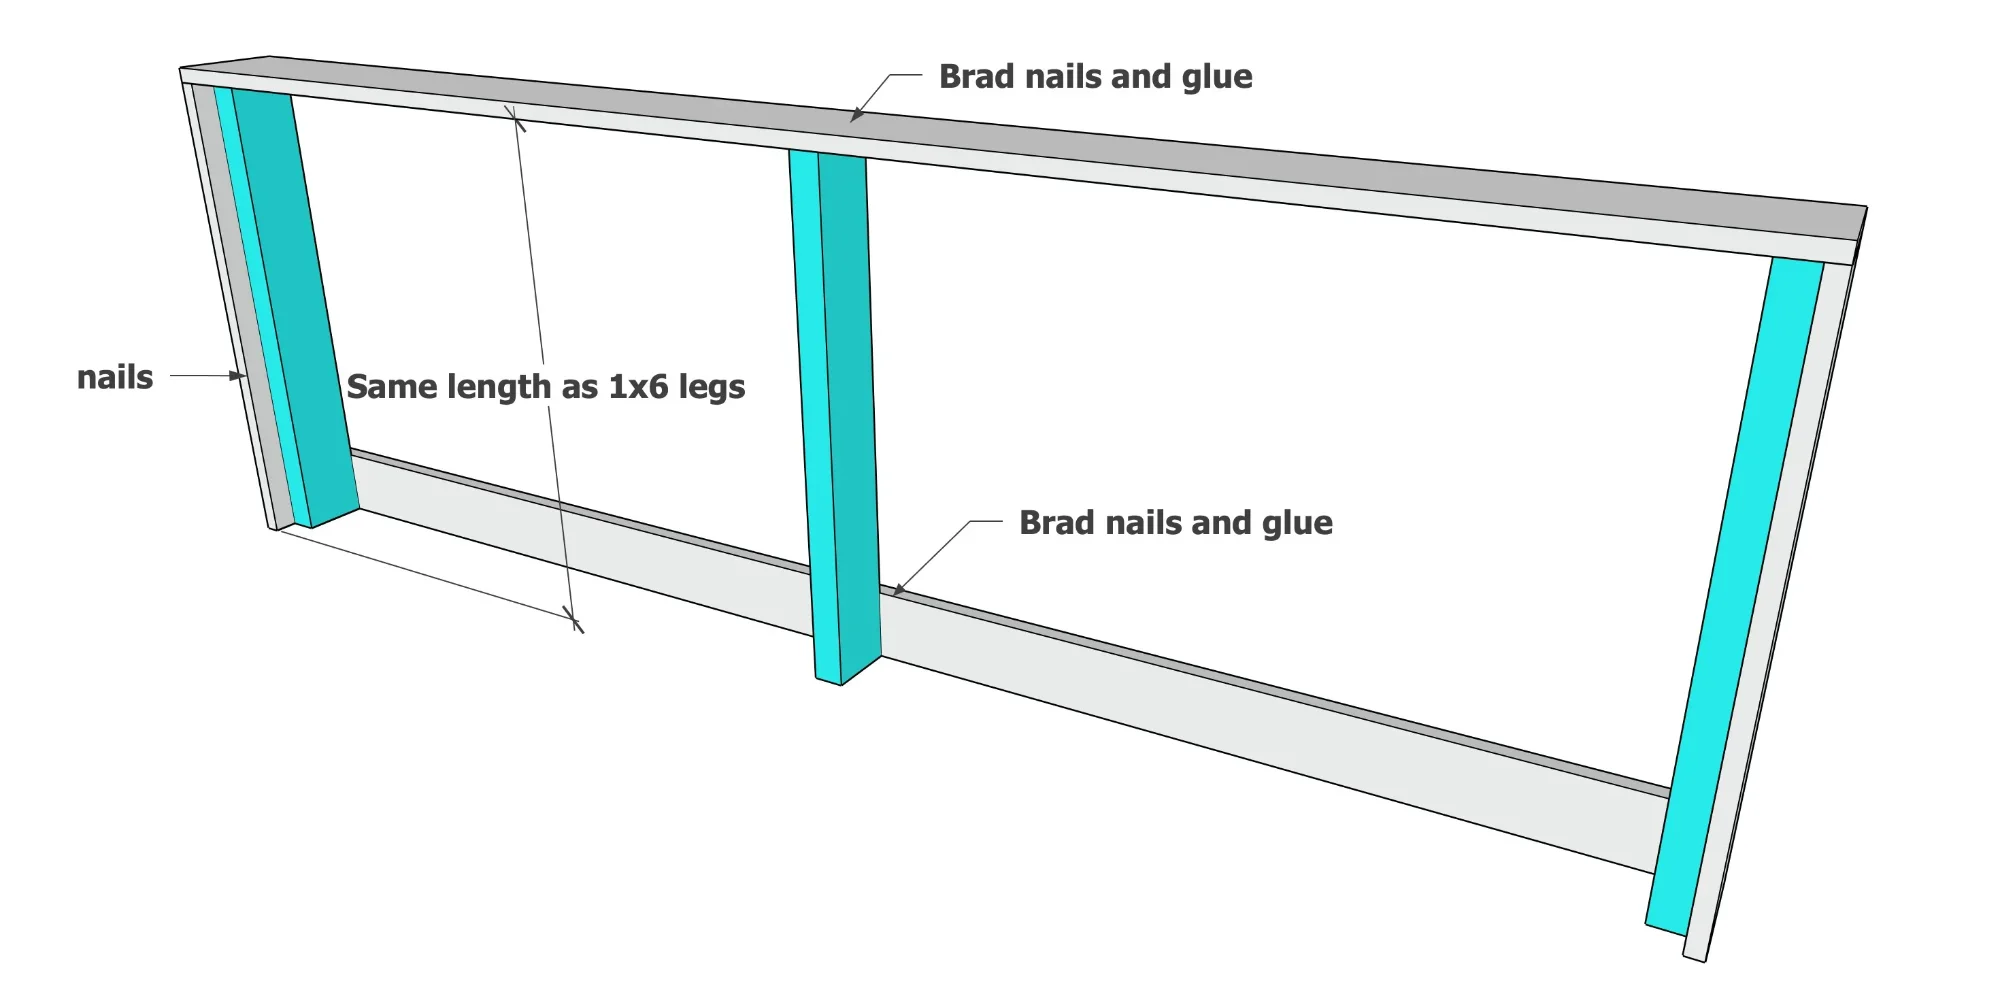
Add the Second Lower Support and Fit the Baseboard
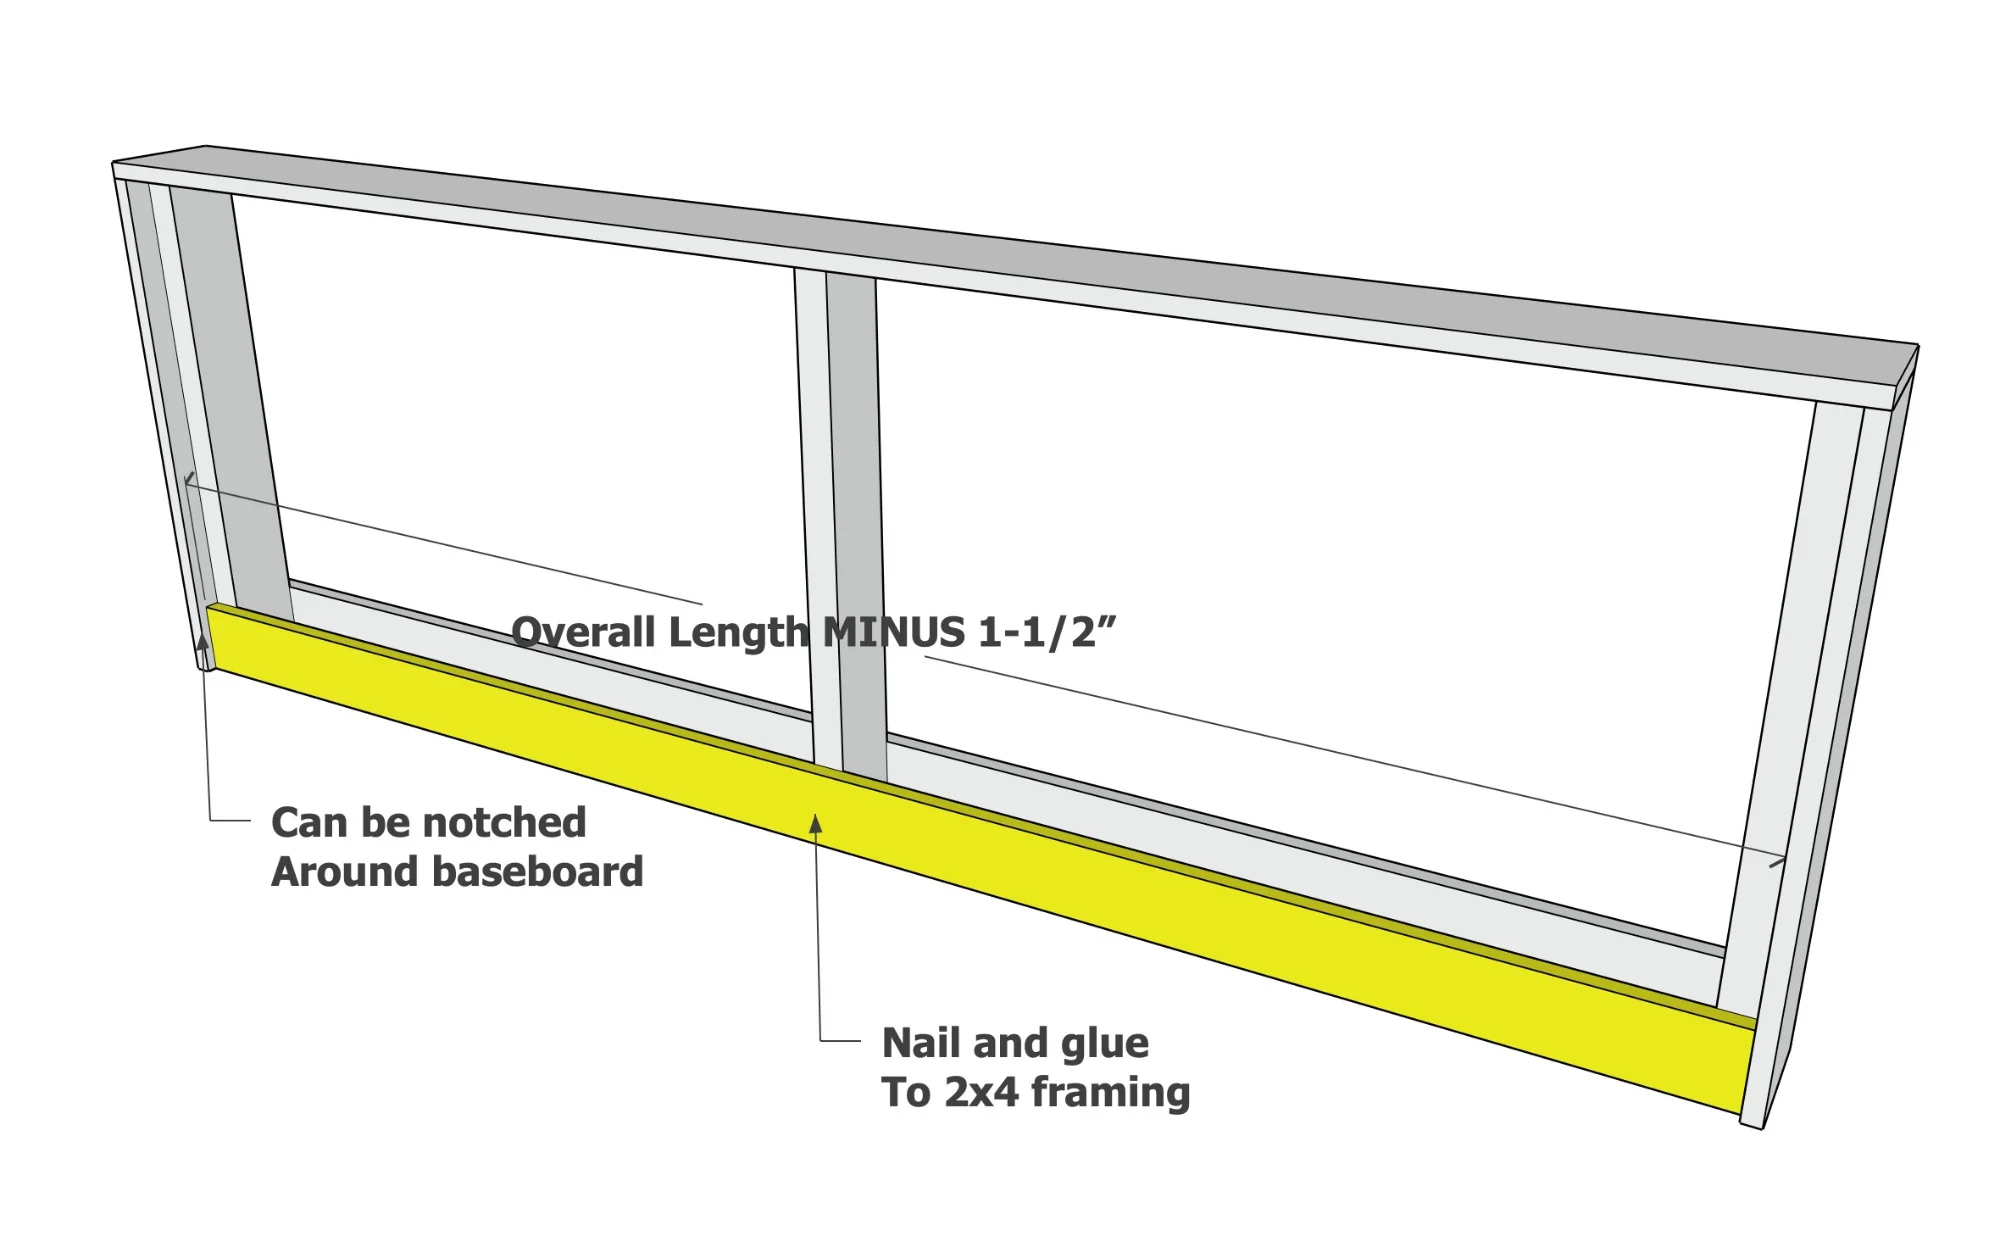
Cut the remaining 1x3 to the overall length minus 1-1/2 inches. Attach it to the 2x4 framing with glue and nails. If the table must sit tight against a wall, mark and notch the end as needed to clear the baseboard before final assembly.
Install the Charging Station and Place the Sofa
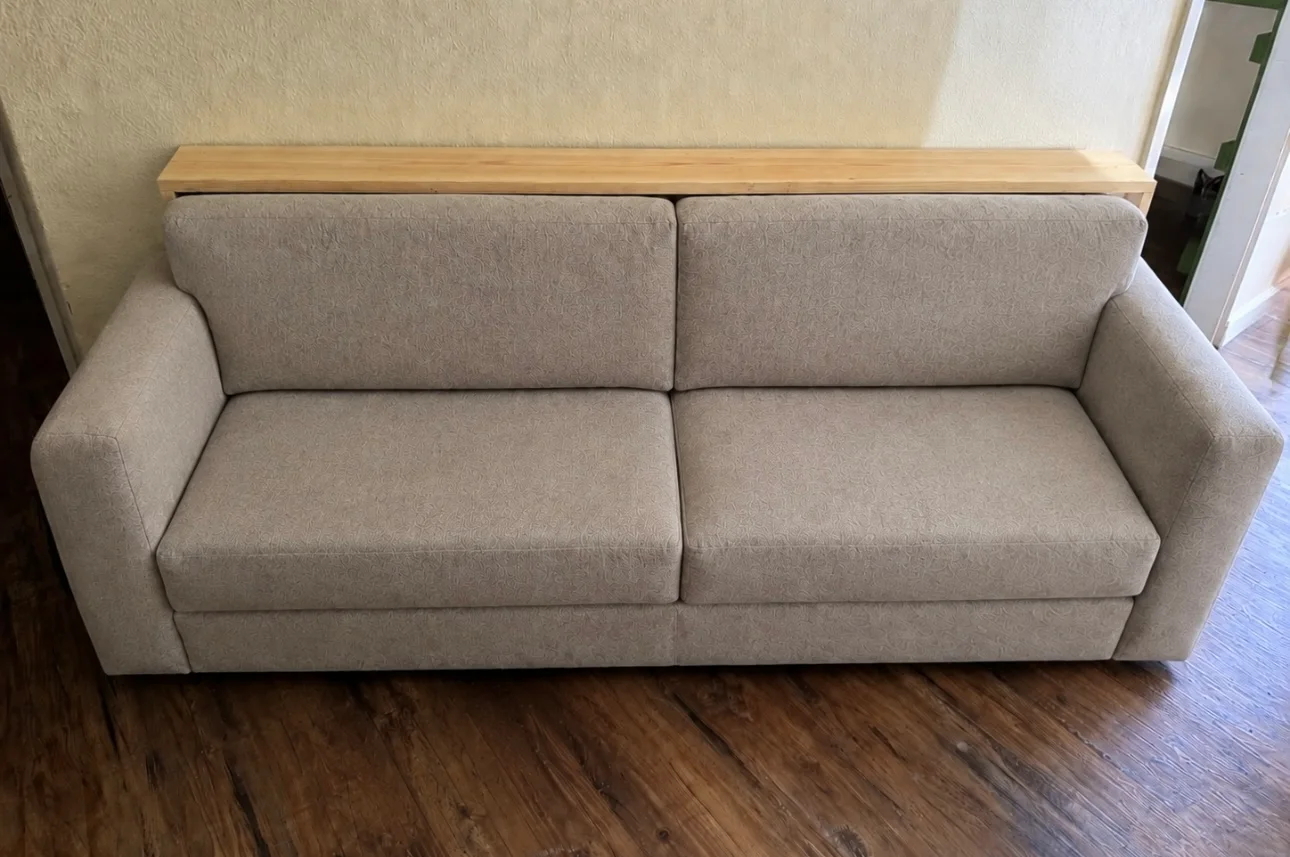
Use the charging outlet manufacturer’s template to mark and cut the opening in the tabletop. Install the outlet according to its instructions. Sand and finish the table, place it against the wall, and move the sofa in front. Anchor the table if needed so it cannot tip or shift.
Finishing
Sand all surfaces, starting with a medium grit and finishing with fine. Wipe off the dust, fill any holes or gaps with wood filler, and sand smooth once dry. Apply primer if you're painting, then finish with your choice of paint or stain and seal with a durable clear topcoat. For outdoor projects, use exterior-rated primer, paint or stain, and sealer so the piece stands up to the weather.
Source (temporary): https://www.ana-white.com/woodworking-projects/behind-sofa-table-charging-station