Benchmark Storage or Media Tower
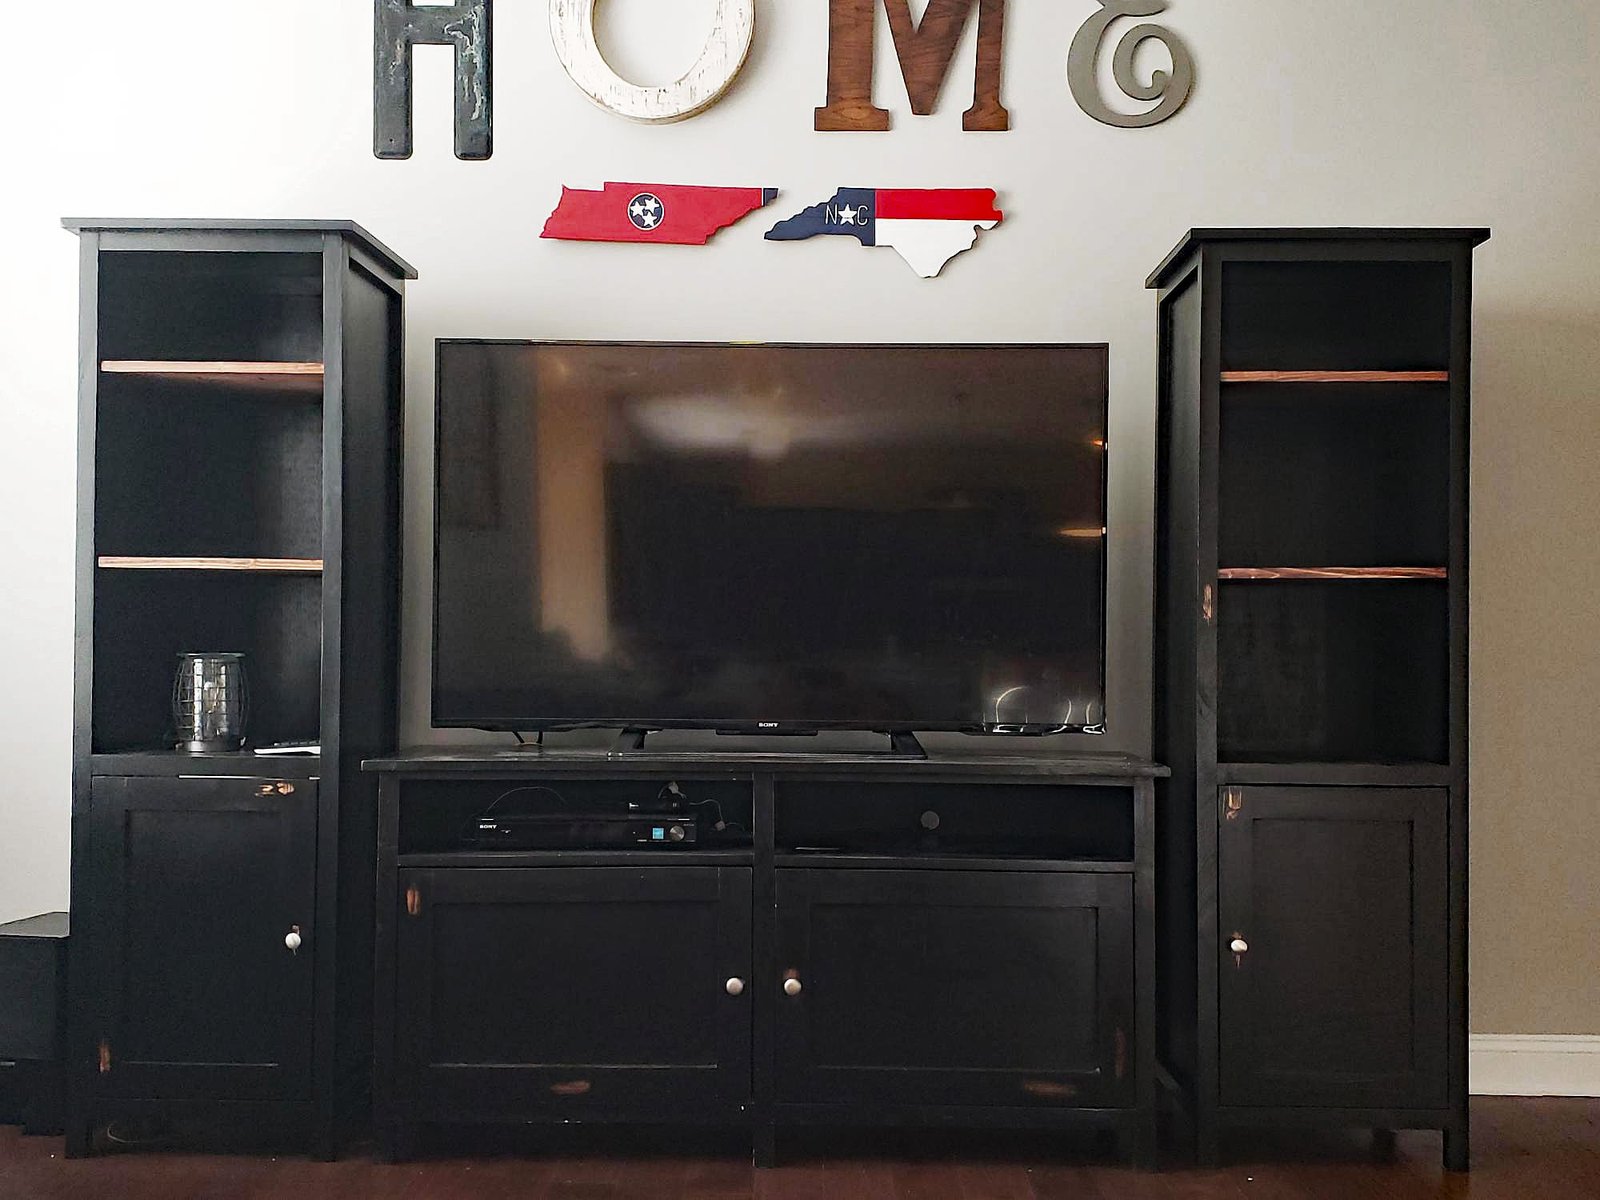
Create a gorgeous media wall by adding towers on either side of the matching center console. Or use it as a linen cabinet or even a nightstand! Free
Specifications
| Project type | Media and Entertainment Centers |
|---|---|
| Room | living room |
| Style | Farmhouse Furniture |
| Difficulty | Intermediate |
| Estimated cost | $50 - $100 |
Dimensions
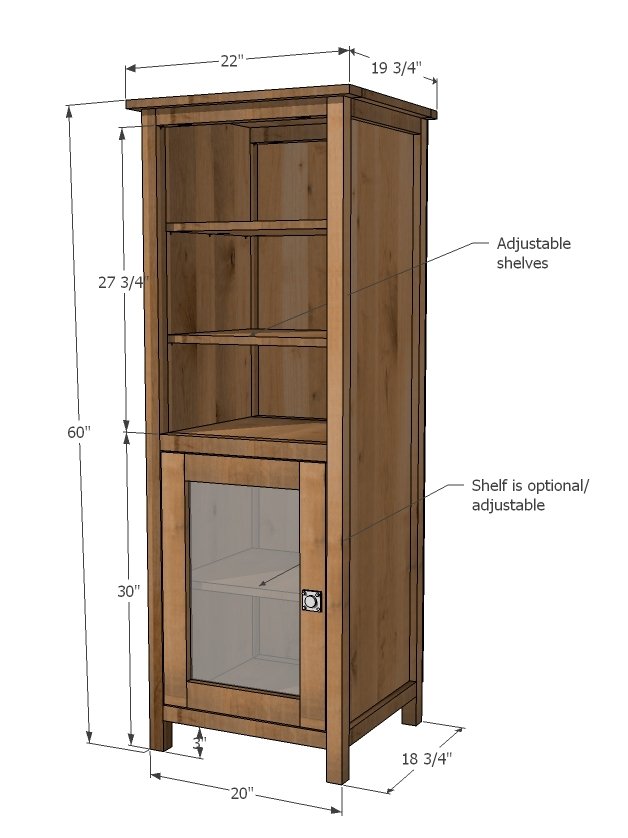
Use the size-specific shopping and cut lists below.
Shopping List
Shopping list is per one tower.
1 - Sheet 3/4" Plywood cut into strips 15 3/4" wide, 8 feet long
1 - Sheet 1/4" Plywood or other backing (for the back - if you are building two towers, you will not need an extra sheet for the second back)
5 - 2x2 @ 8 feet long
1 - 1x2 @ 8 feet long
1 - 1x3 @ 8 feet long
1 - knob
1 - set Euro Style hinges like these
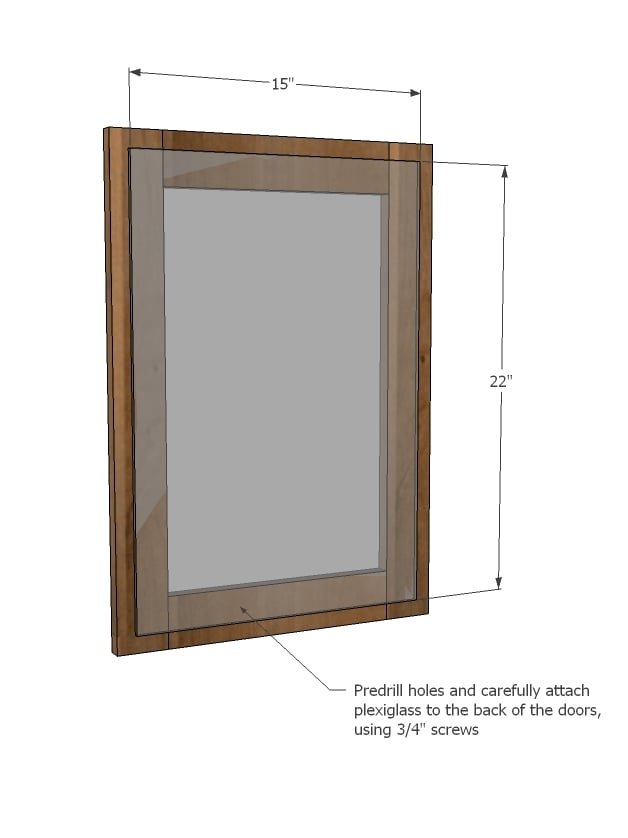
1 - sheet 1/4" acrylic glass, at least 15" x 22" (buy a 30" x 24" sheet if you are building two towers)
Cut List
- 2 - 3/4" plywood @ 15-3/4" x 56 1/4" (Sides)
- 4 - 1x2 @ 15 3/4" (Side Trim)
- 4 - 2x2 @ 59 1/4" (Legs)
- 6 - 2x2 @ 17" (Front/Back Trim)
- 5 - 3/4" plywood @ 15-3/4" x 17" (Shelves)
- 1 - 3/4" plywood @ 15-3/4" x 22" (Top)
- 1 - 1x3 @ 22" (Top)
- 1 - 1x2 @ 22" (Top)
- 1 - 1/4" plywood @ 20" x 55 1/4" (Back)
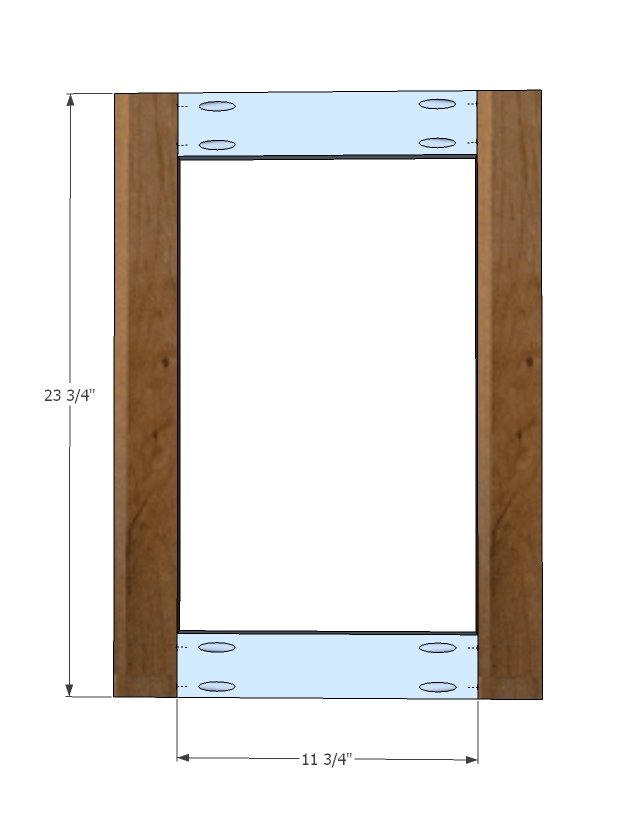
- 2 - 1x3 @ 11 3/4" (Door)
- 2 - 1x3 @ 23 3/4" (Door)
Tools
- measuring tape
- square
- pencil
- safety glasses
- hearing protection
- kreg-jig
- drill
- circular saw
- nailer
- sander
- level
- countersink drill bit
Step-by-step Instructions
Before any assembly, go through the plan and diagrams and mark and drill all pocket holes.
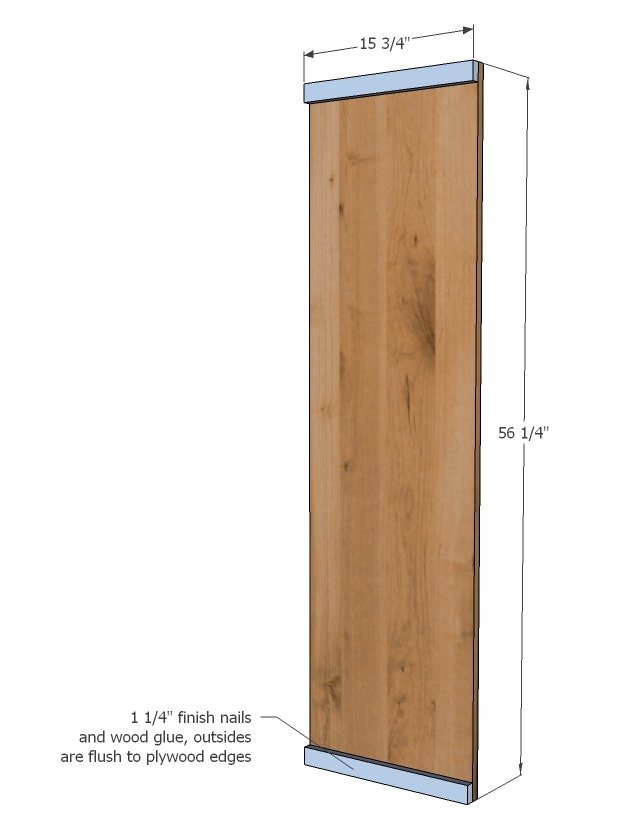
On each side, on the outsides where no pocket holes are drilled, attach side trim to top and bottom with 1 1/4" finish nails and wood glue. Outside edges are flush. You will need to build two.
Step 2
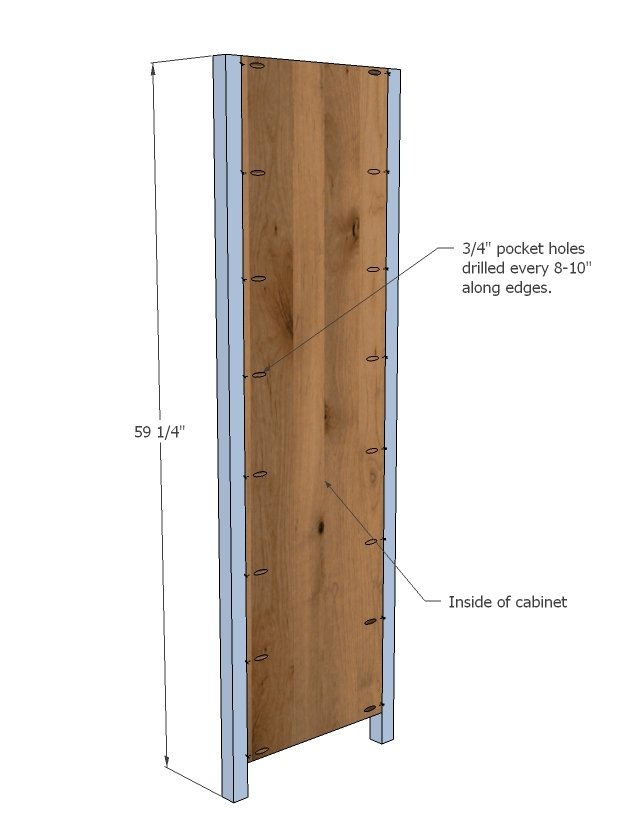
With top edges flush, attach legs using 1 1/4" pocket hole screws and glue. Do this on both sides.
Step 3
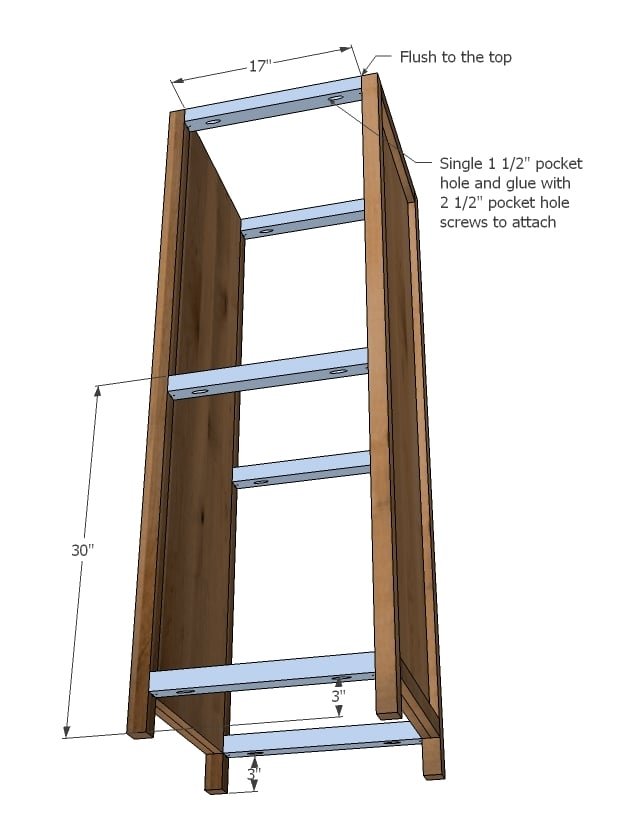
Measure and mark the placement of front/back trim boards as shown in diagram. Then attach with 2 1/2" pocket hole screws and wood glue.
Step 4
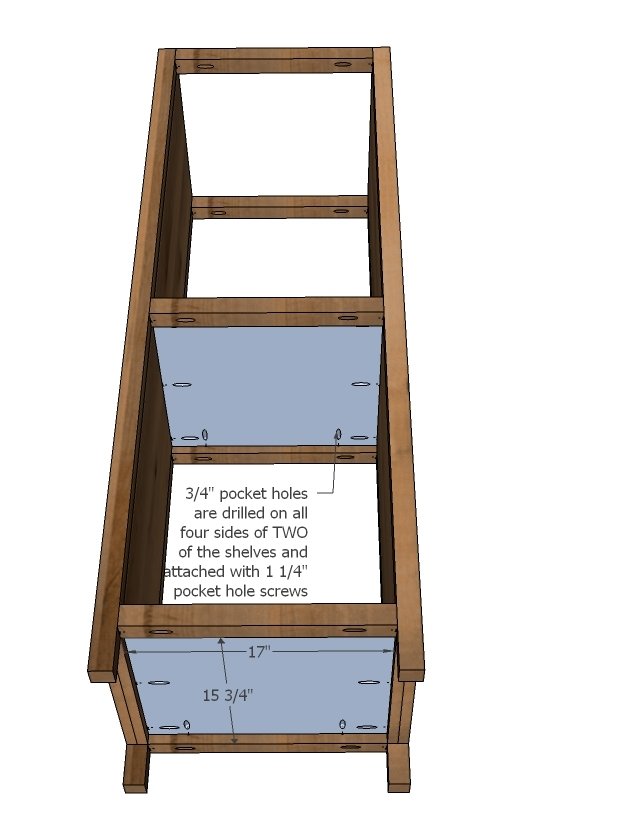
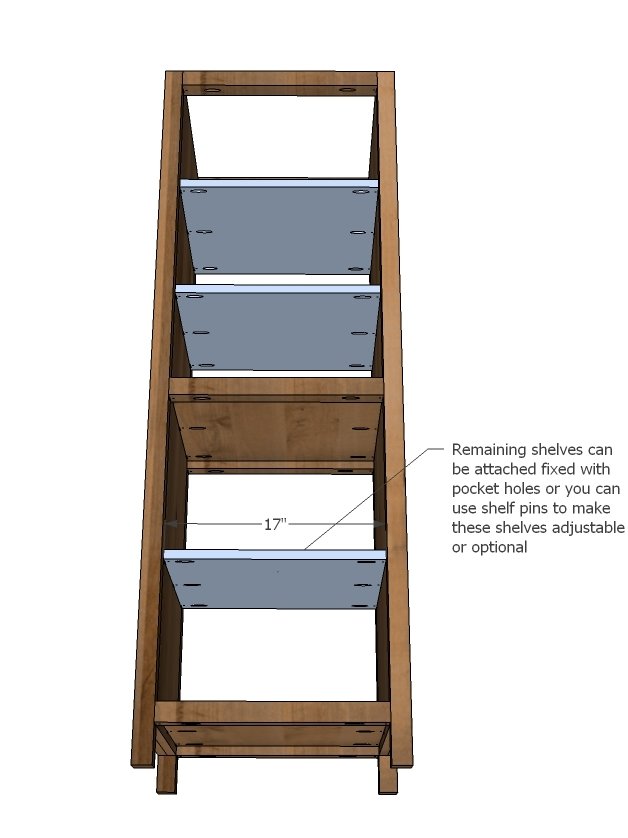
For the fixed shelves, drill 3/4" pocket holes on all sides. Place inside trim and sides and attach with 1 1/4" pocket holes and glue. Tops are flush.
Step 5
Step 6
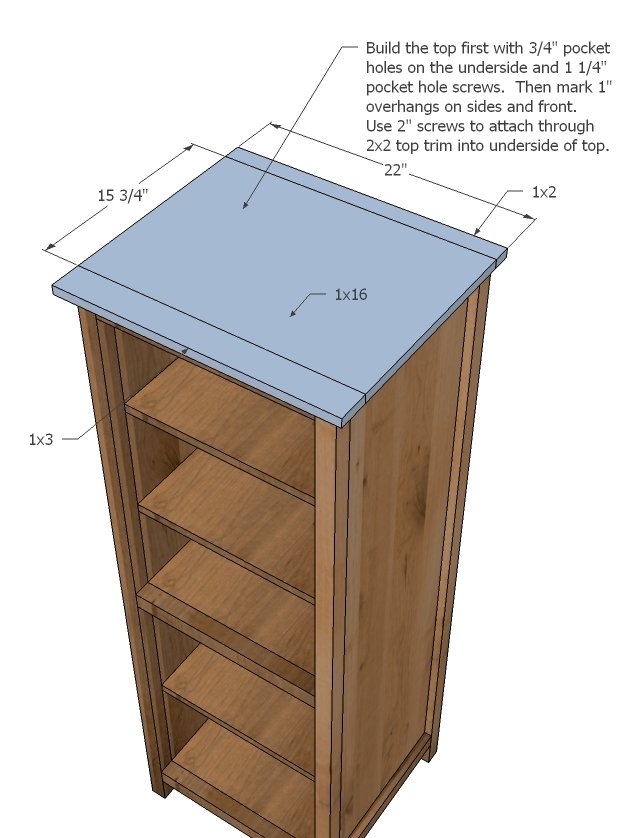
Build the top first with 3/4" pocket holes and 1 1/4" pocket hole screws. Then screw on from the underside with 2" screws and glue.
Step 7
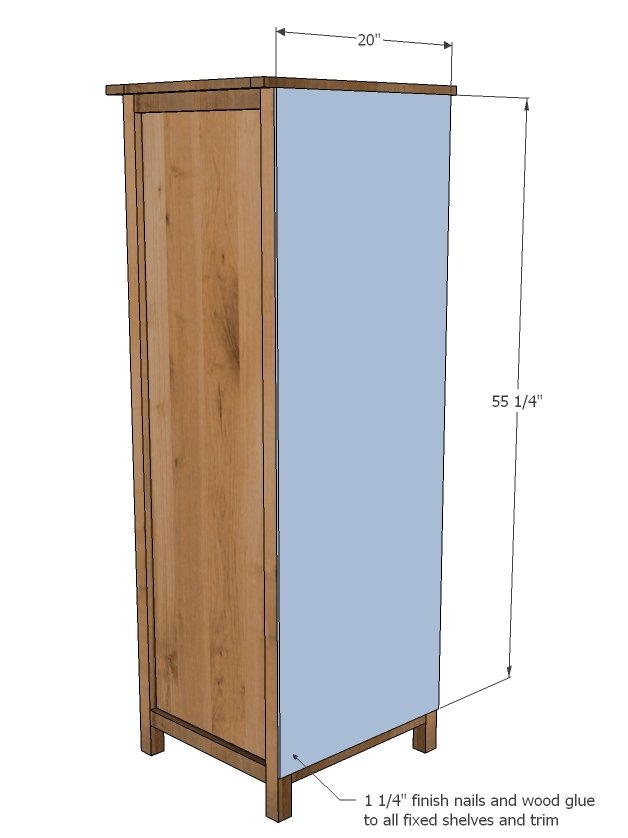
Back is easy step - cut your plywood and attach with glue and 1 1/4" finish nails. Just make sure you hit all fixed shelves. It would be a good idea to cut holes for cords at this stage.
Step 8
Drill 3/4" pocket holes on each end of the shorter door pieces and build your doors with glue and 1 1/4" pocket hole screws.
Step 9
Predrill holes in the acrylic glass and attach to back side of door frames. This acrylic glass should significantly strengthen your door. NOTE: You may wish to mark the location of your hinges (next step) and notch out a spot for the hinges so you have a nice flat spot to attach hinges - or you could just cut your acrylic glass shorter on the hinge side. This will depend on what type of hinge you use.
The hinge I recommend are these ones:
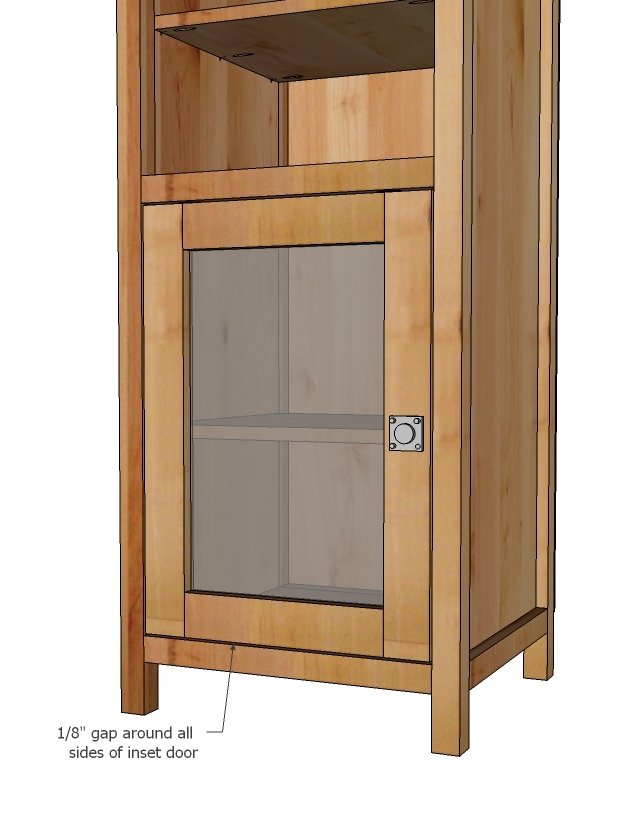
Seriously sweet hinges! But they do require more clearance, so do some fitting. Leave an 1/8" gap on all sides of your doors to enable your door to open and close smoothly.
Finishing
Sand all surfaces, starting with a medium grit and finishing with fine. Wipe off the dust, fill any holes or gaps with wood filler, and sand smooth once dry. Apply primer if you're painting, then finish with your choice of paint or stain and seal with a durable clear topcoat. For outdoor projects, use exterior-rated primer, paint or stain, and sealer so the piece stands up to the weather.
Source (temporary): https://www.ana-white.com/woodworking-projects/benchmark-storage-or-media-tower