Benchright Industrial Farmhouse Bench
This farmhouse style bench is industrial chic with the addition of a metal bar. This is easy to build, with step by step instructions, and you will only need simple basic tools, lumber like 2x4 boards, and pine boards. You can leave your pine furniture unfinished, or paint bench in any finish including a distressed or antiqued finish. We also have plans for a matching dining table.
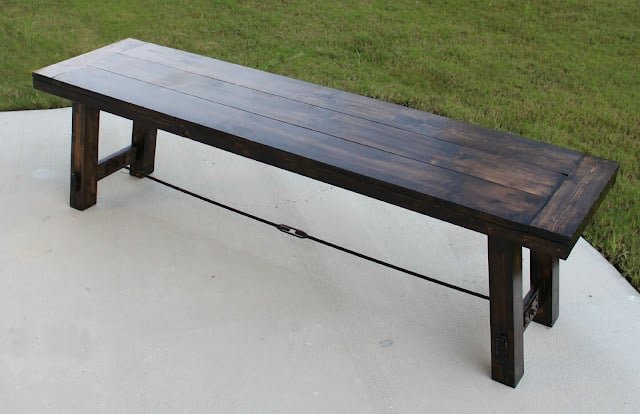
Specifications
| Project type | Bench |
|---|---|
| Room | dining room |
| Style | Farmhouse Furniture |
| Difficulty | Intermediate |
| Estimated cost | $20 - $50 |
Dimensions
Use the size-specific shopping and cut lists below.
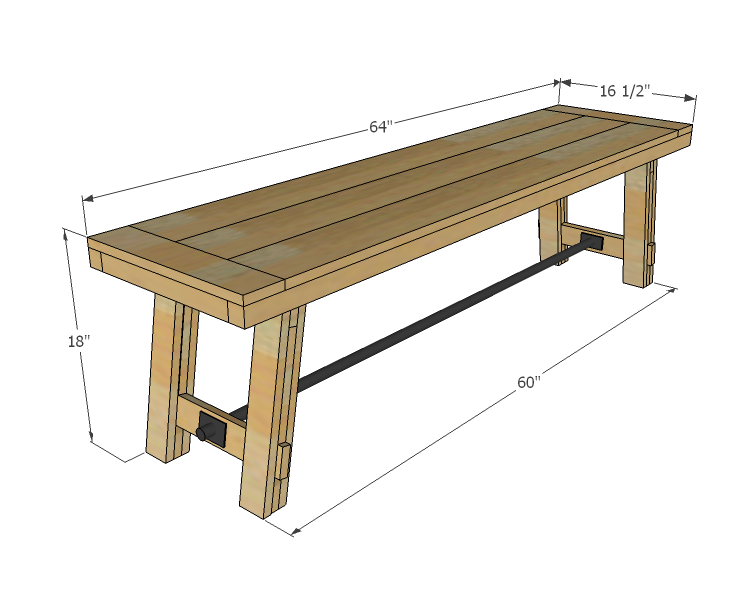
Shopping List
- 3 - 1x6 @ 6 feet long
- 1 - 1x4 @ 6 feet long
- 3 - 1x3 @ 8 feet long
- 1 - 2x4 @ 10 feet long
- 2 - 2x2 @ 8 feet long
Cut List
- 8 - 1x3 @ 17 1/2" (both ends beveled at 10 degrees off square, ends are parallel to each other)
- 2 - 1x4 @ 13 1/2" (End Aprons)
- 2 - 1x3 @ 14 1/2" (Stretcher)
- 4 - 1x3 @ 8 1/2" (Spacer)
- 4 - 1x3 @ 2 7/8" (Longest Point, one end beveled at ten degrees off square)
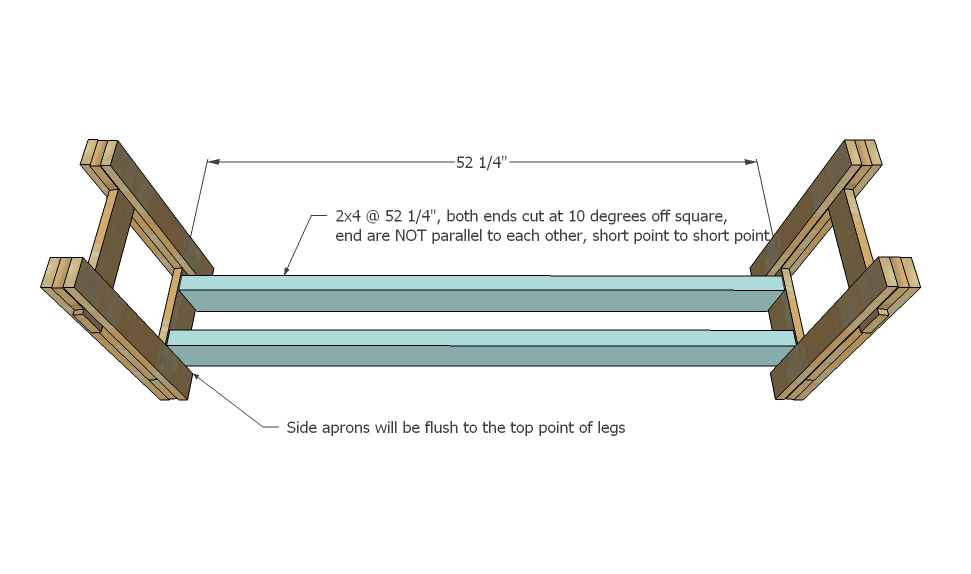
- 2 - 2x4 @ 52 1/4" (Short Point to short point, both ends cut at 10 degrees off square, NOT parallel to each other)
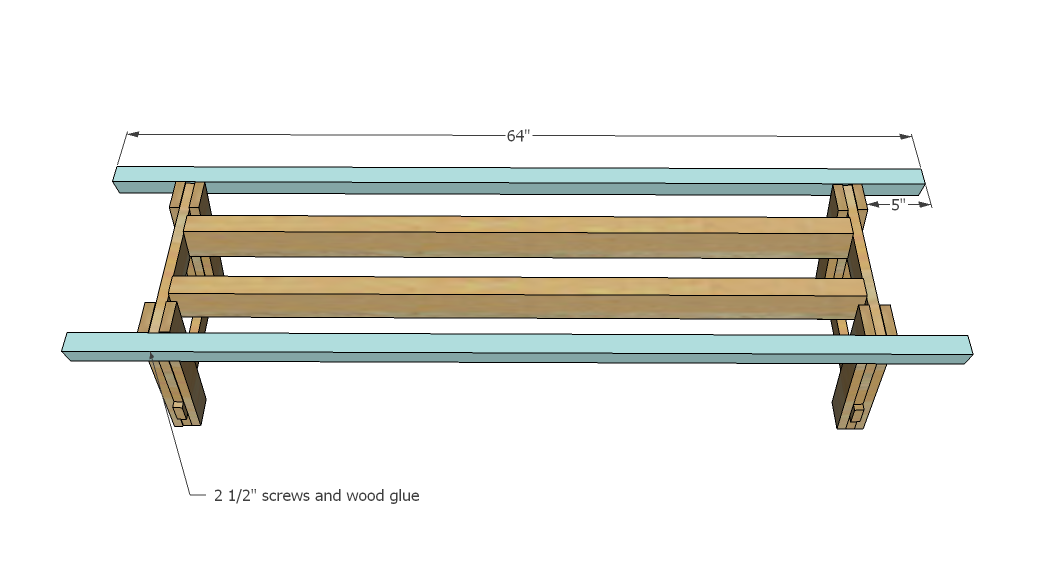
- 2 - 2x2 @ 64"
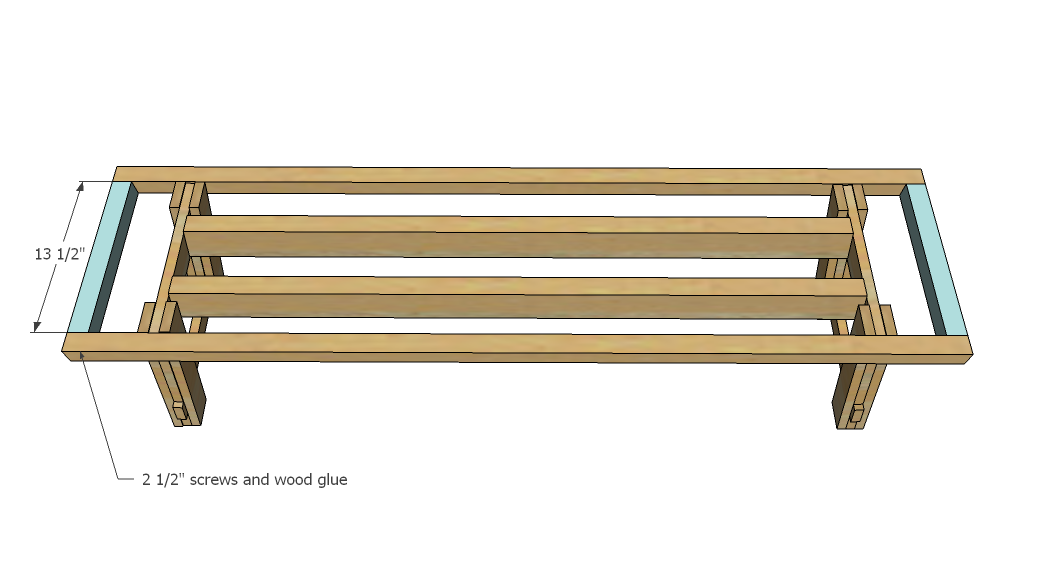
- 2 - 2x2 @ 13 1/2"
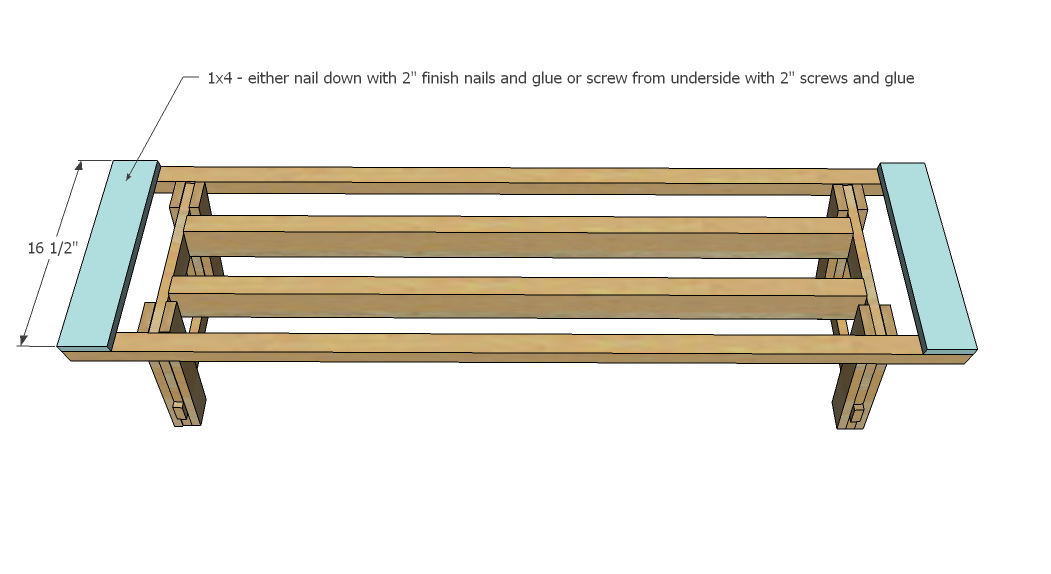
- 2 - 1x4 @ 16 1/2"
- 3 - 1x6 @ 57"
Tools
- measuring tape
- square
- pencil
- safety glasses
- hearing protection
- drill
- compound miter saw
- nailer
- sander
- level
- countersink drill bit
Step-by-step Instructions
Step 1
The most difficult part of this bench is surely getting these legs built square. Make sure you take diagonals and check for square. Construct with glue and 1 1/4" finish nails. Keep your outside edges as flush as possible, to give the illusion of a solid wood leg. Work from the bottom upward.
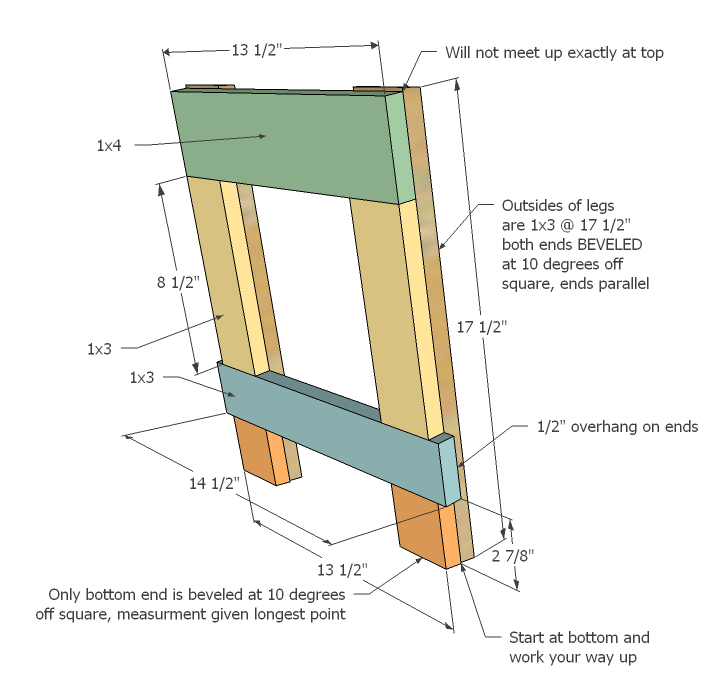
Step 2
Work again from bottom upward and sandwich remaining leg pieces to the legs.
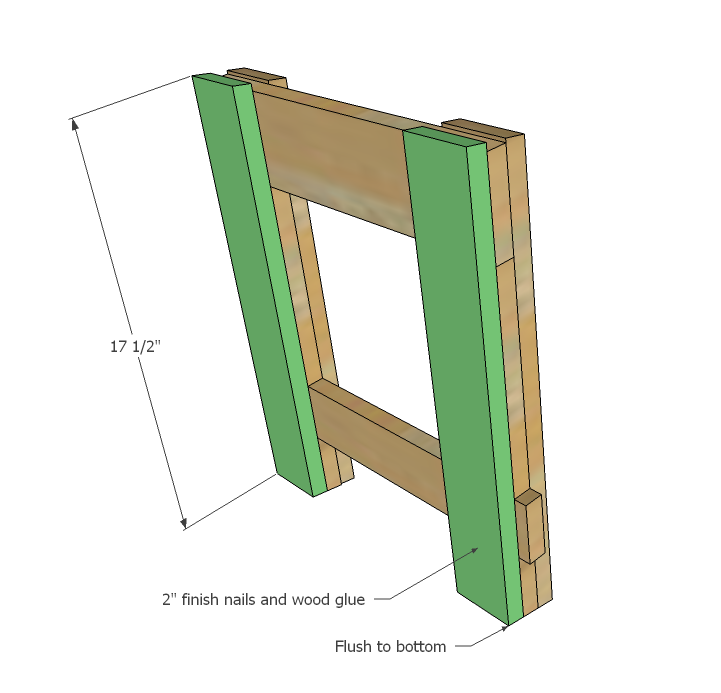
Step 3
Measure inside the aprons 3/4" and attach the 2x4 aprons as shown in diagram using 2 1/2" screws and wood glue. These are the main supports of the table.
Step 4
Now attach the 2x2 sides as shown above.
Step 5
Step 6
Breadboard ends - this should be cake at this point!
Step 7
Cut these to fit for the best fit.
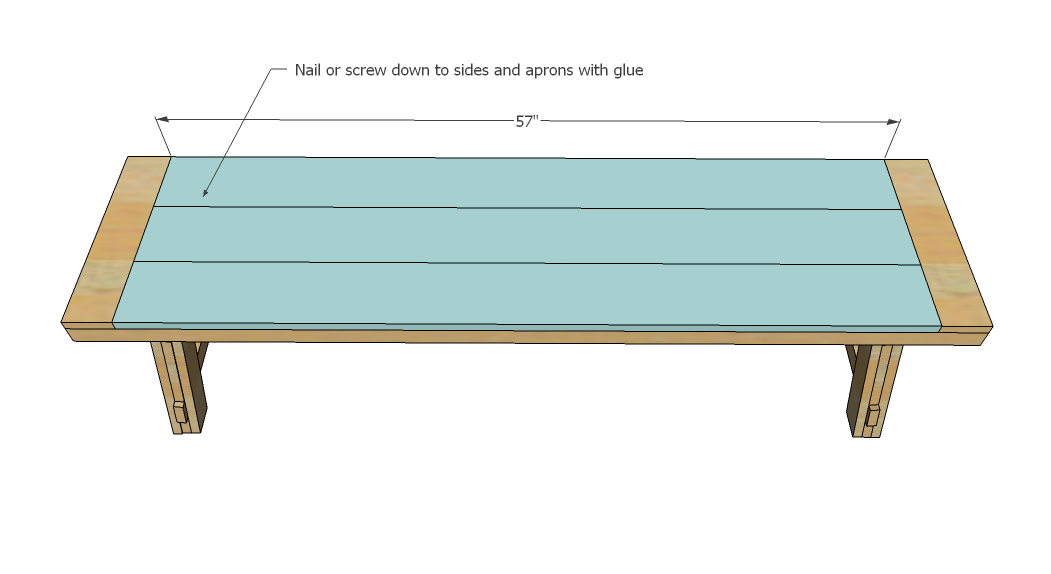
Step 8
Shown with a 1" diameter 60" long iron pipe, like this one from Lowes.
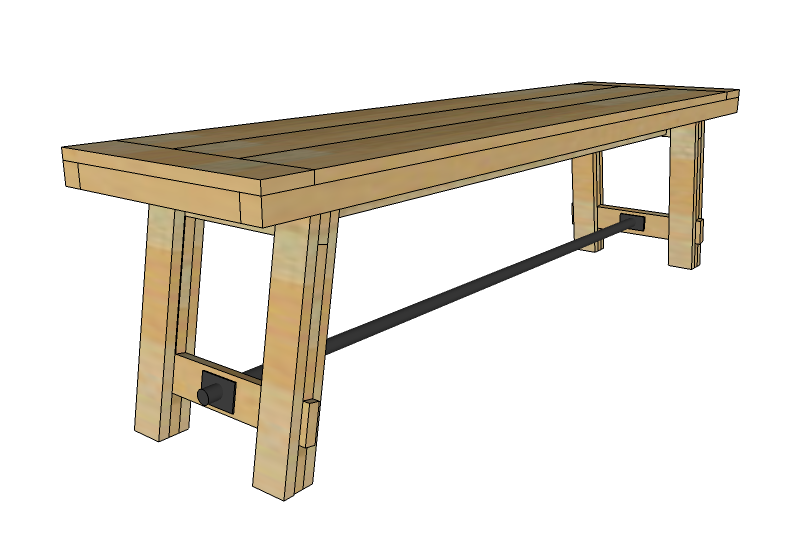
Finishing
Sand all surfaces, starting with a medium grit and finishing with fine. Wipe off the dust, fill any holes or gaps with wood filler, and sand smooth once dry. Apply primer if you're painting, then finish with your choice of paint or stain and seal with a durable clear topcoat. For outdoor projects, use exterior-rated primer, paint or stain, and sealer so the piece stands up to the weather.
Source (temporary): https://www.ana-white.com/woodworking-projects/benchright-industrial-farmhouse-bench