Benchwright Console Table
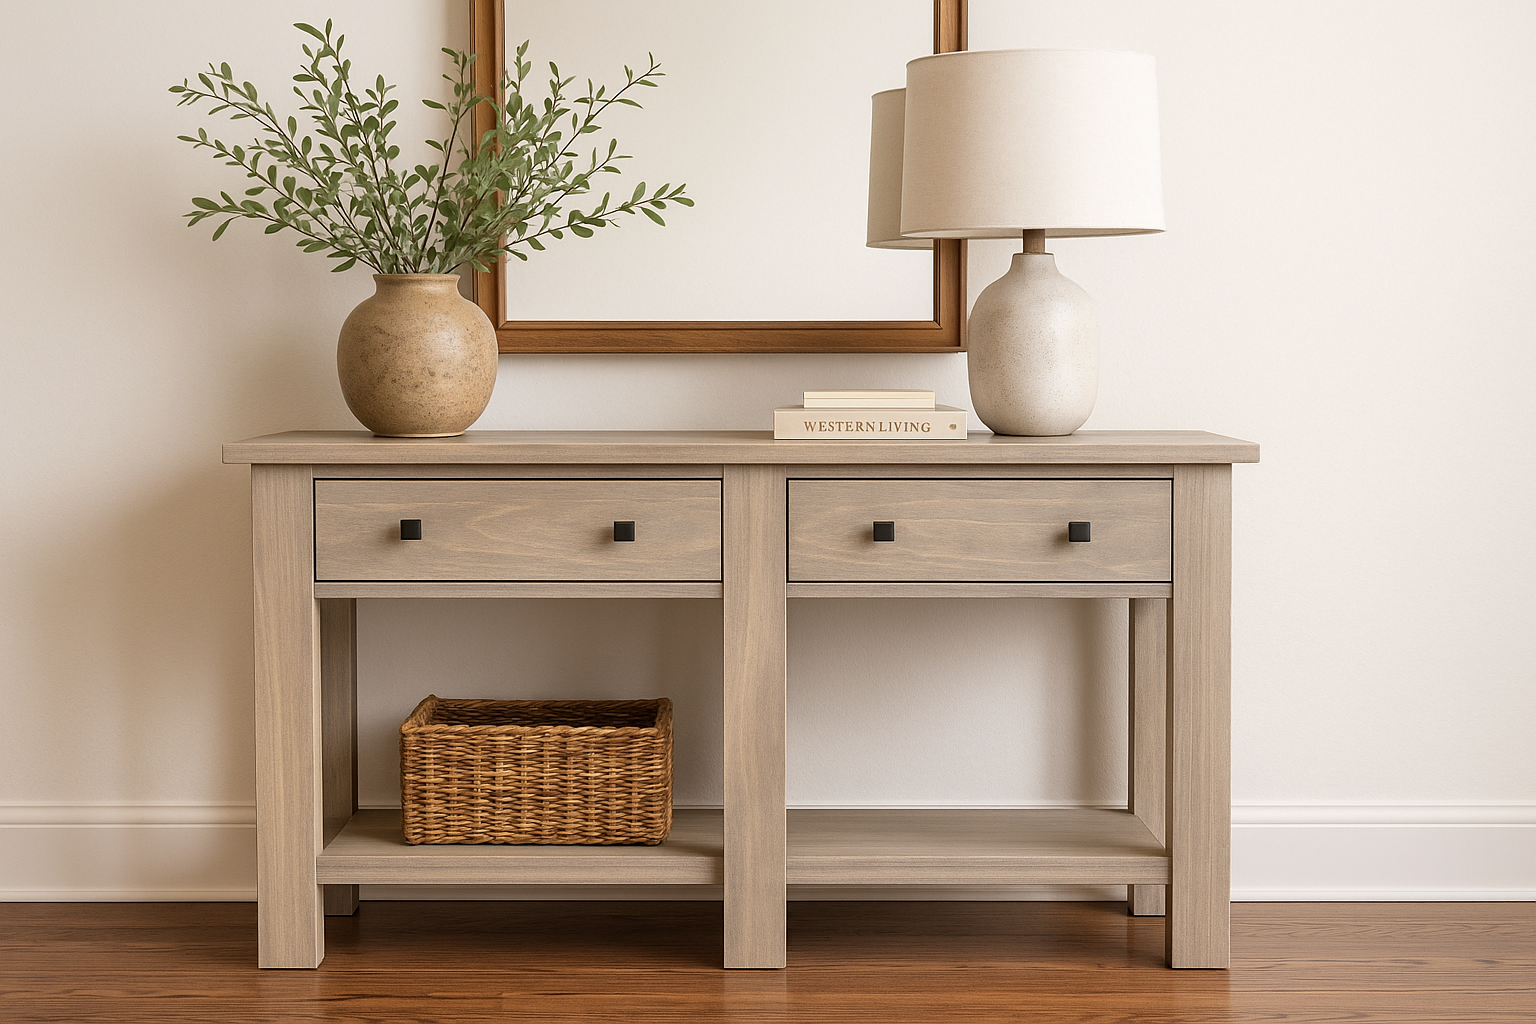
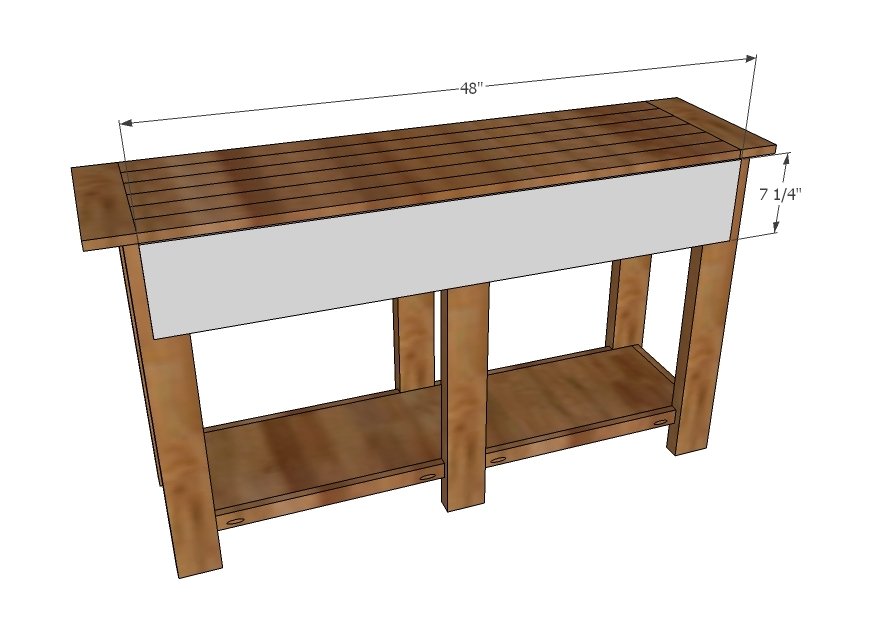
for console table with two drawers and open shelf on bottom. Solid wood design is easy to paint or stain. A beautiful piece! Step by step plans from
Specifications
| Project type | Console Table Plans |
|---|---|
| Room | dining room |
| Style | Farmhouse Furniture |
| Difficulty | Advanced |
| Estimated cost | $50 - $100 |
Dimensions
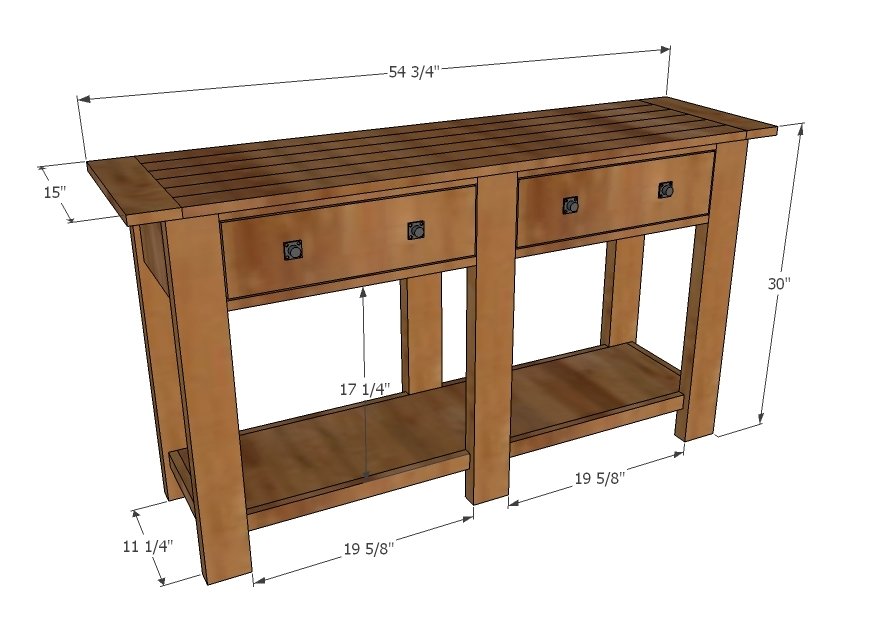
Use the size-specific shopping and cut lists below.
Shopping List
- 1 – 1x12 @ 10 feet long
- 2 – 2x4 @ 8 feet long
- 4 – 1x2 @ 8 feet long
- 2 – 1x4 @ 8 feet long
- 1 – 1x6 @ 4 feet long
- 4 - 1x3 @ 8 feet long
- 1/4 sheet 1/4” thick plywood or hardboard (drawer bottoms and back)
- 4 knobs
- 1 1/4" pocket hole screws
Cut List
- 2 – 1x12 @ 47 1/4" (shelves)
- 2 – 1x12 @ 7 1/4" (side aprons)
- 6 – 2x4 @ 29 1/4" (legs)
- 12 – 1x2 @ 19 5/8” (front/back shelf trim)
- 2 – 1x2 @ 11 1/4" (side shelf trim)
- 2 – 1x2 @ 11 1/4" (drawer guides)
- 1 – 1x4 @ 11 1/4” (center drawer guide)
- 2 – 1x4 @ 15” (breadboard ends - cut to fit)
- 6 – 1x3 @ 47 3/4" (top)
DRAWERS
- 4 – 1x4 @ 17 7/8
- 4 – 1x4 @ 13 ½”
- 2 – 1/4" plywood @ 19 3/8” x 13 1/2"
- 2 – 1x6 @ 19 3/8”
BACK
- 1/4" plywood 48" x 7 1/4"
Tools
- measuring tape
- square
- pencil
- safety glasses
- hearing protection
- kreg-jig
- drill
- circular saw
- nailer
- sander
- level
Step-by-step Instructions
Step 1
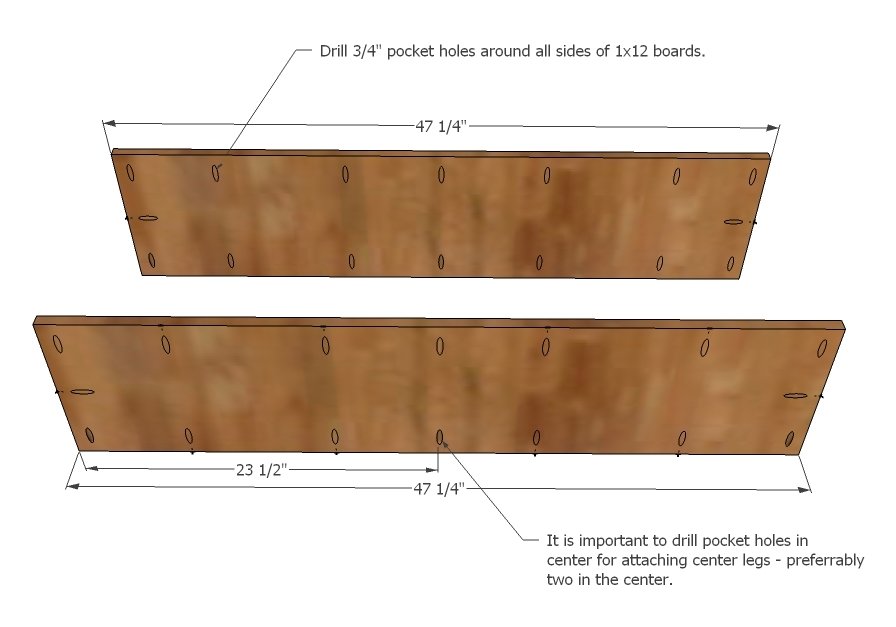
It is very important to drill all pocket holes first. Make sure you drill adequate holes for attaching legs on the ends and centered. Also, I’d drill at least two pocket holes on each end for attaching side aprons and end trim in later steps.
Step 2
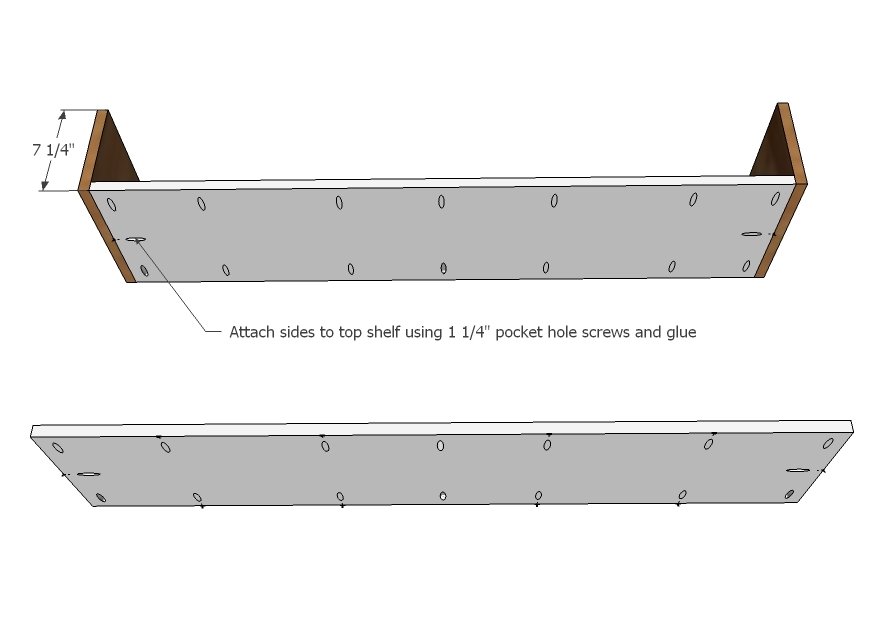
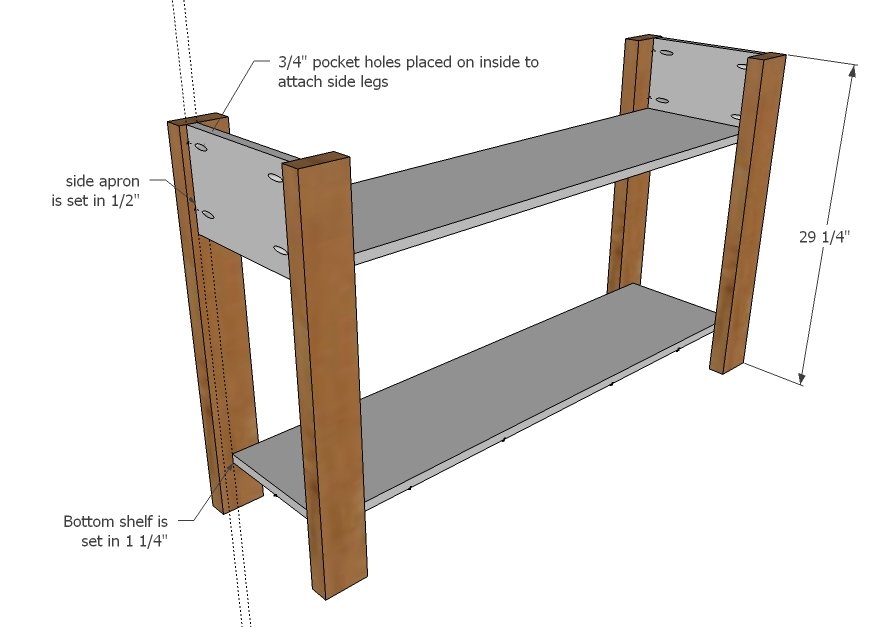
First drill 3/4” pocket holes along side edges of side aprons for later attaching legs – see next step, but place pocke tholes on insides. To the top shelf, attach the side aprons.
Step 3
Mark four legs 1/2” in from edge along top, at least 7” down. Then mark 1 1/4” line on the bottom 6” of the legs for attaching bottom shelf. Attach shelves and aprons with 1 1/4” pocket hole screws and glue.
Step 4
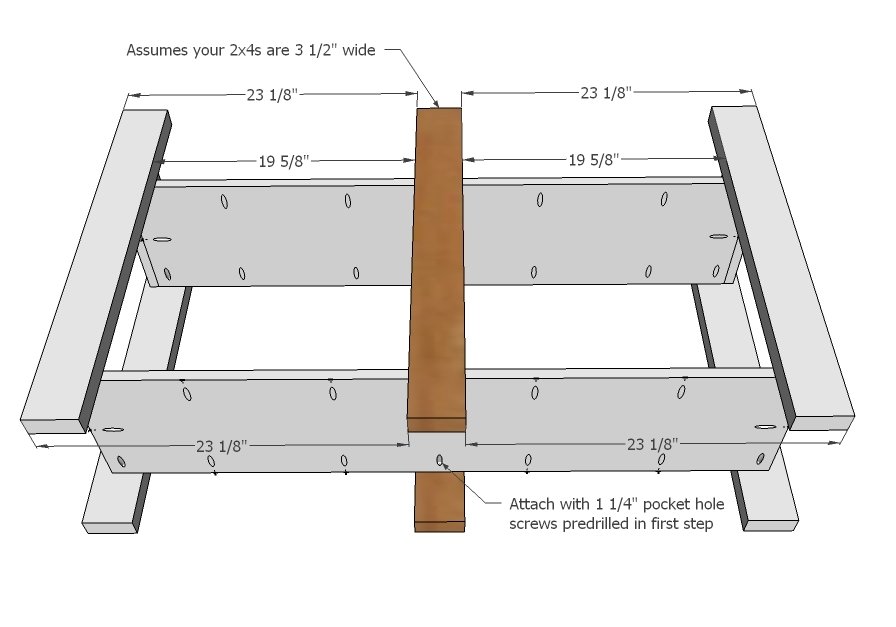
Next comes the middle leg. It’s super important to get just right and square. If your 2x4s are not 3 1/2” wide this could alter your measurements slightly. Attach legs through predrilled pocket holes.
Step 5
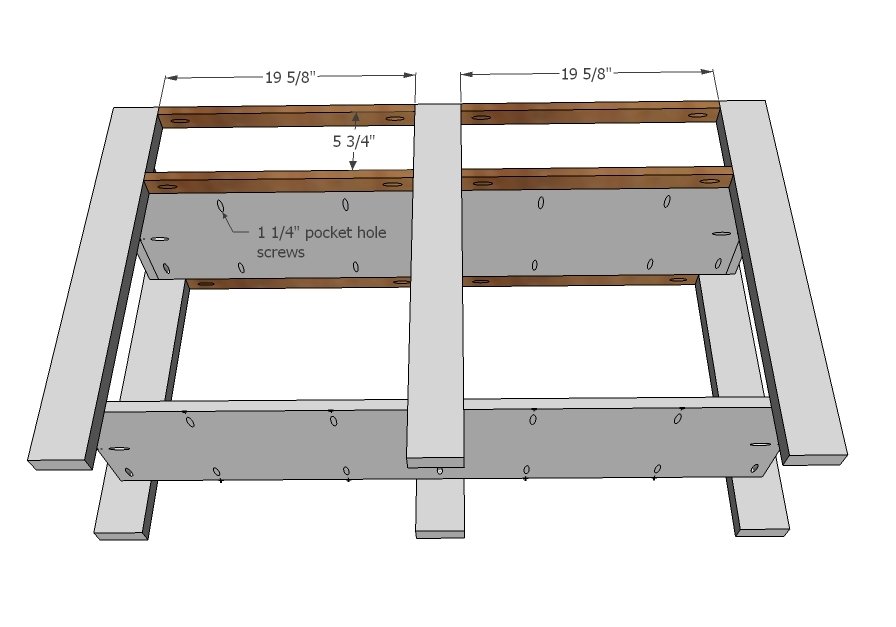
Add 1x2 trim between legs with pocket holes.
Step 6
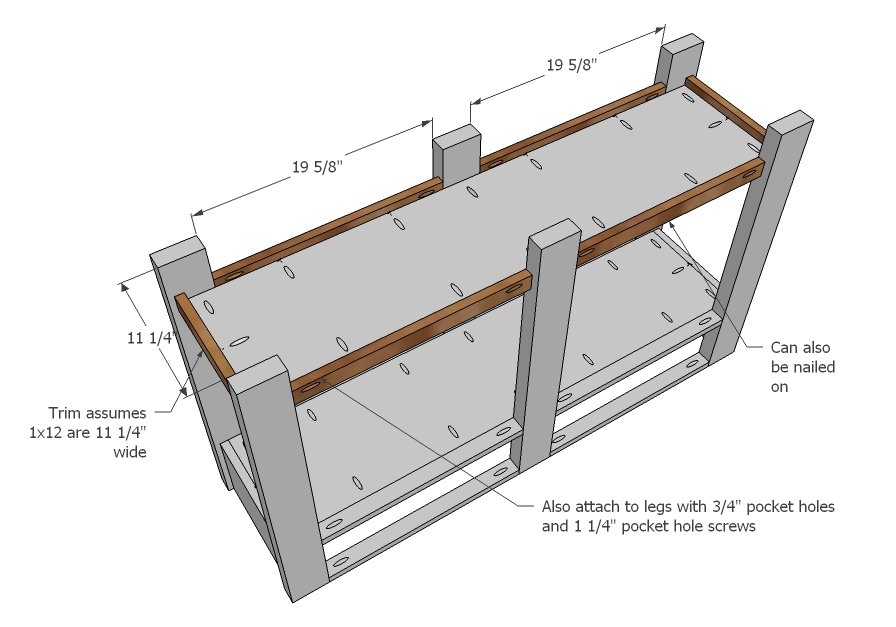
And then the lower shelf trim.
Step 7
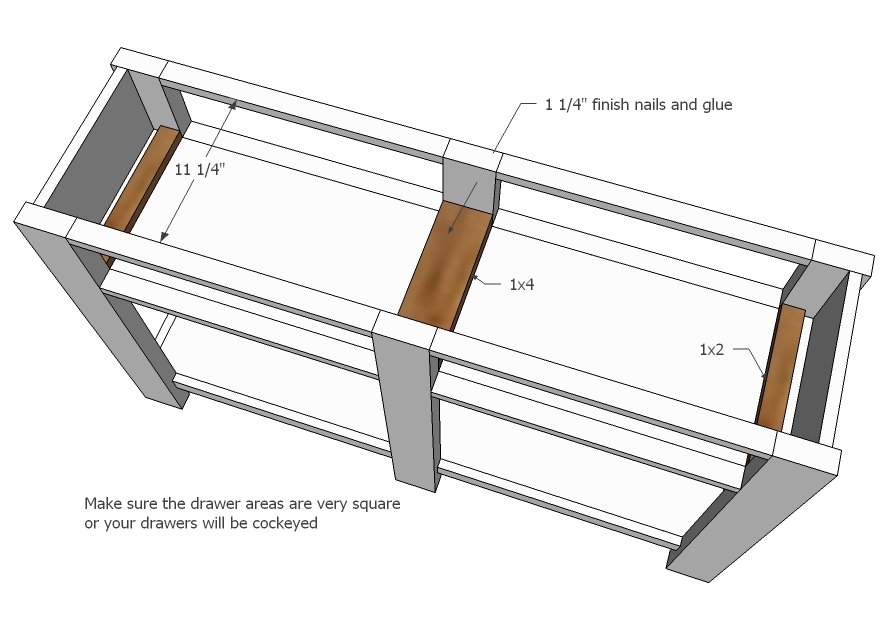
These are to guide your drawers. Because of how shallow these drawers are, and because console table drawers are relatively low use, I choose to just make very simple box drawers. One could add drawer slides if desired, but I felt it unnecessary. Make sure the distance between the drawer guides is square by taking a diagonal. Better yet, build your drawers first, and then fit around to make sure they slide just right.
Step 8
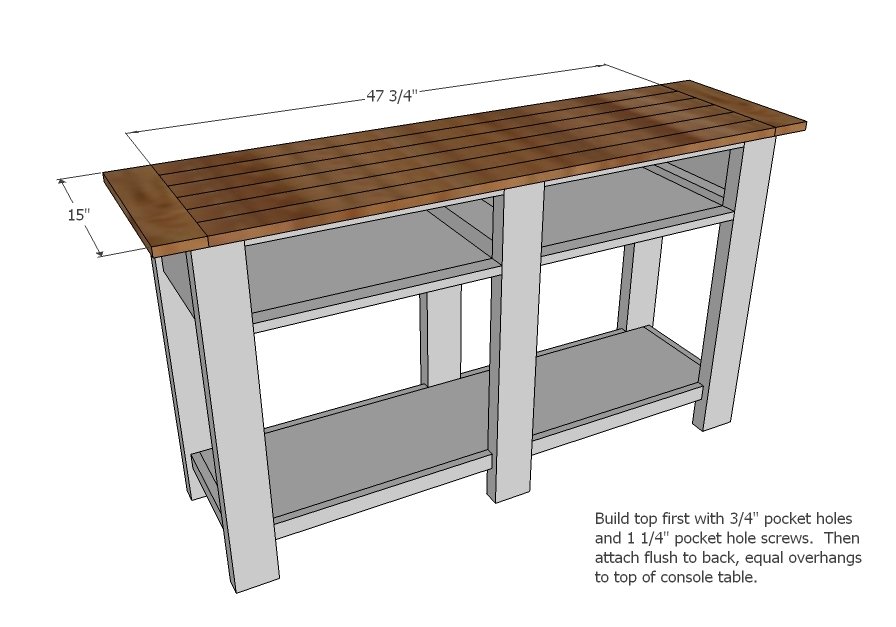
Build top separately, then attach through top 1x2 trim with 1 ¼” nails and glue.
Step 9
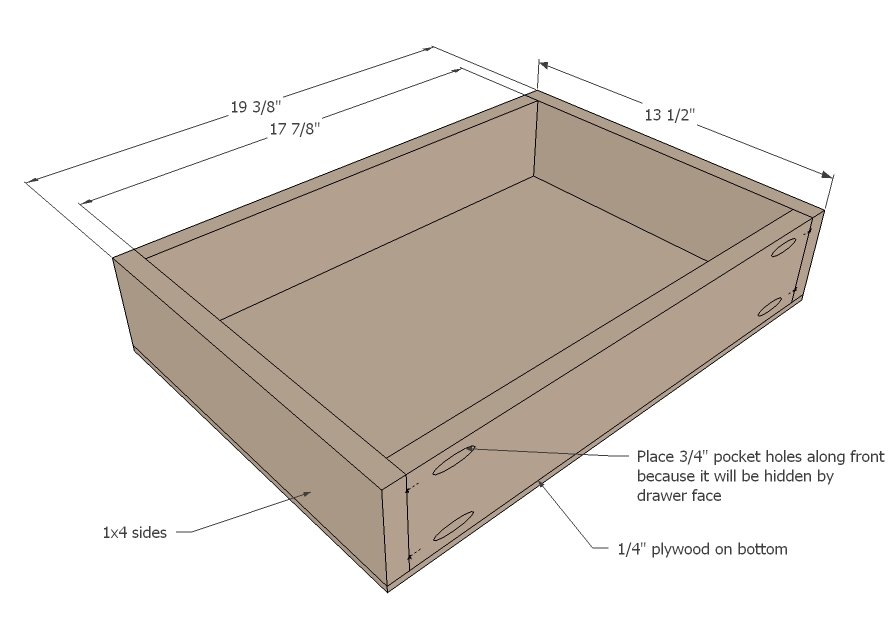
Here is the drawer diagram. I like to place pocket holes to the front, outsides. Then they get covered by the face.
Step 10
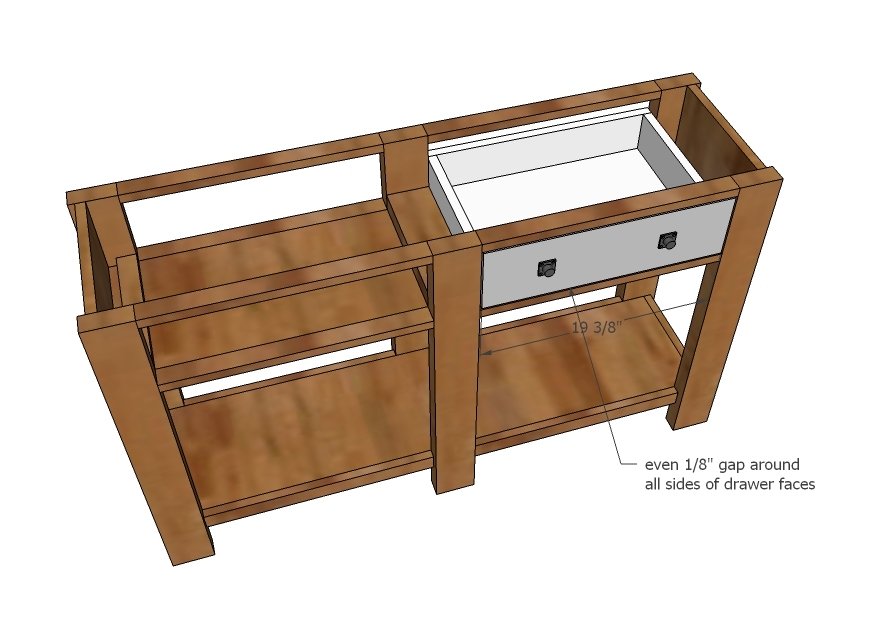
When you install the face, make sure there is an even 1/8” gap around all sides, including the bottom. Nail on with 1 1/4” finish nails and glue.
Step 11
Next, attach back. Use 1 ¼” nails and glue. The back will keep your drawers from sliding through.
Finishing
Sand all surfaces, starting with a medium grit and finishing with fine. Wipe off the dust, fill any holes or gaps with wood filler, and sand smooth once dry. Apply primer if you're painting, then finish with your choice of paint or stain and seal with a durable clear topcoat. For outdoor projects, use exterior-rated primer, paint or stain, and sealer so the piece stands up to the weather.
Source (temporary): https://www.ana-white.com/woodworking-projects/benchwright-console-table