BEST DIY Garage Shelves (Attached to Walls)
This is the fastest and easiest way to building garage shelves. At about $10 a linear foot to build for four shelves, up to 8 feet tall and 2 feet deep, you can add a ton of storage and organization to your home for a great value. Build with just a couple of tools. Need temporary garage shelving? T ry this freestanding plan.
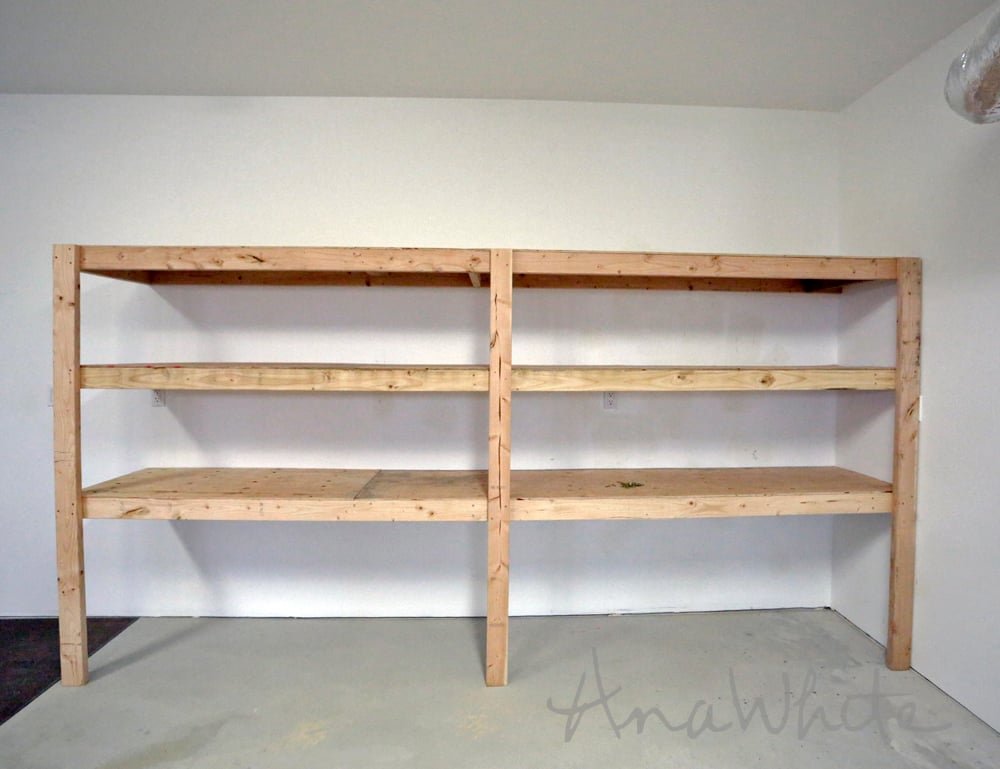
Specifications
| Project type | Garage Storage |
|---|---|
| Room | Garage and Workshop |
| Style | Industrial Style Furniture Plans |
| Difficulty | Beginner Projects |
| Estimated cost | $50 - $100 |
Dimensions
Use the size-specific shopping and cut lists below.
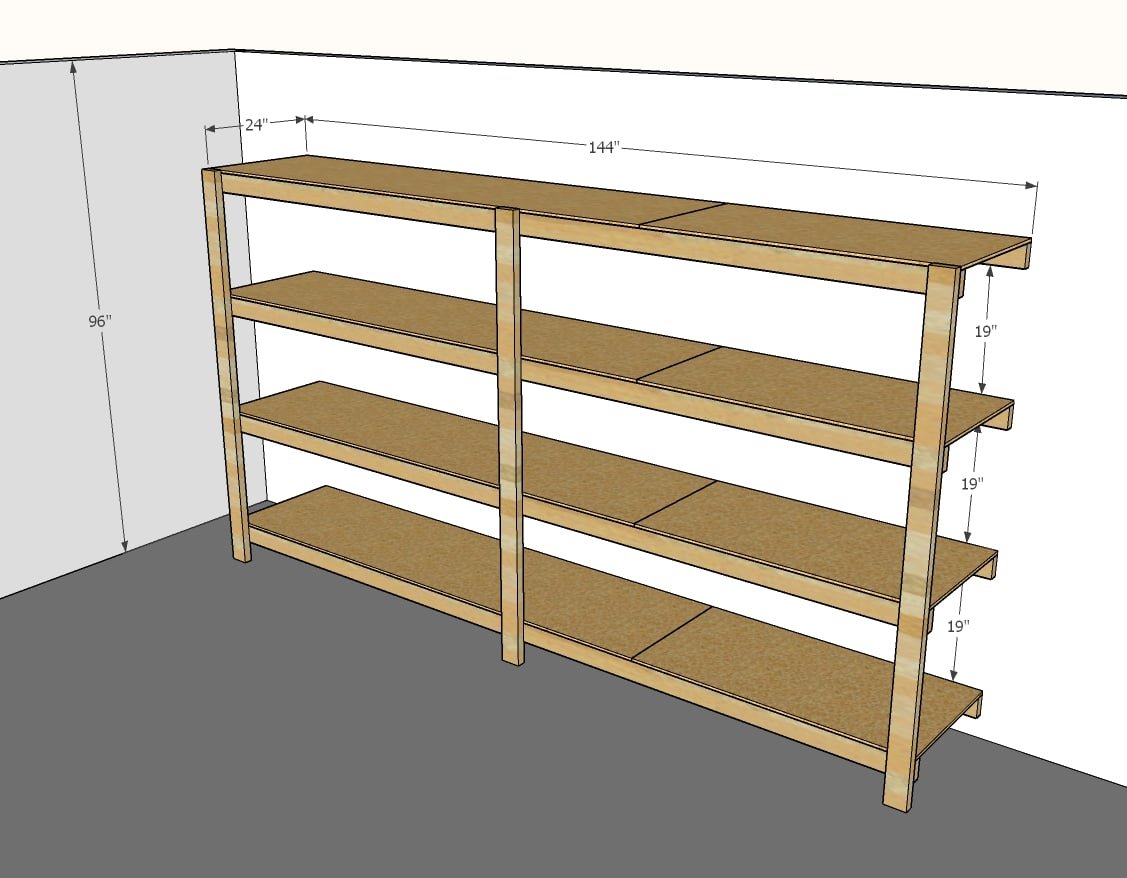
Shopping List
- 8 - 2x4 @ 12 feet long
- 6 - 2x4 @ 8 feet long or 92-5/8 stud length
- 3 sheets of 1/2" plywood, OSB or similar, ripped in half, two strips 24" wide x 8 feet long
- 3" self tapping wood screws (about 150)
- 2" self tapping wood screws (about 100)
Cut List
- 8 - 2x4 @ 12 feet long
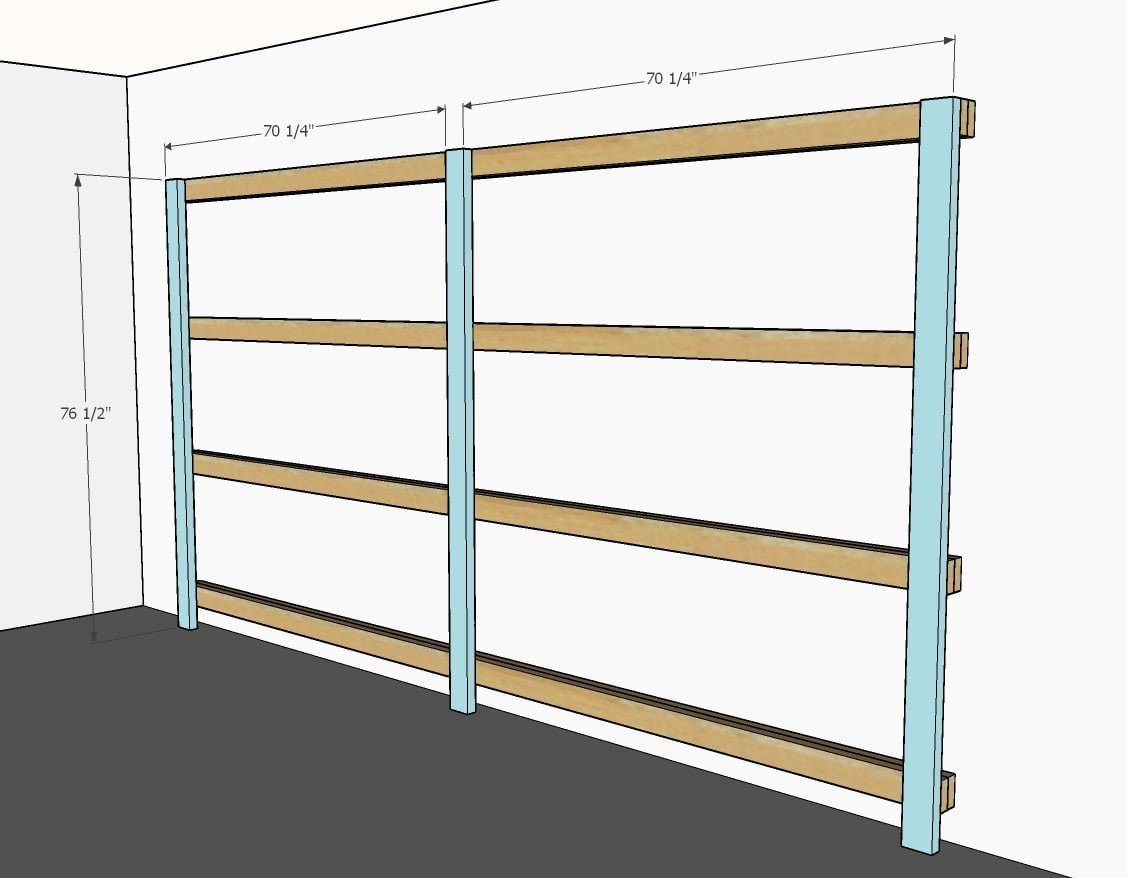
- 3 - 2x4 @ 76-1/2"
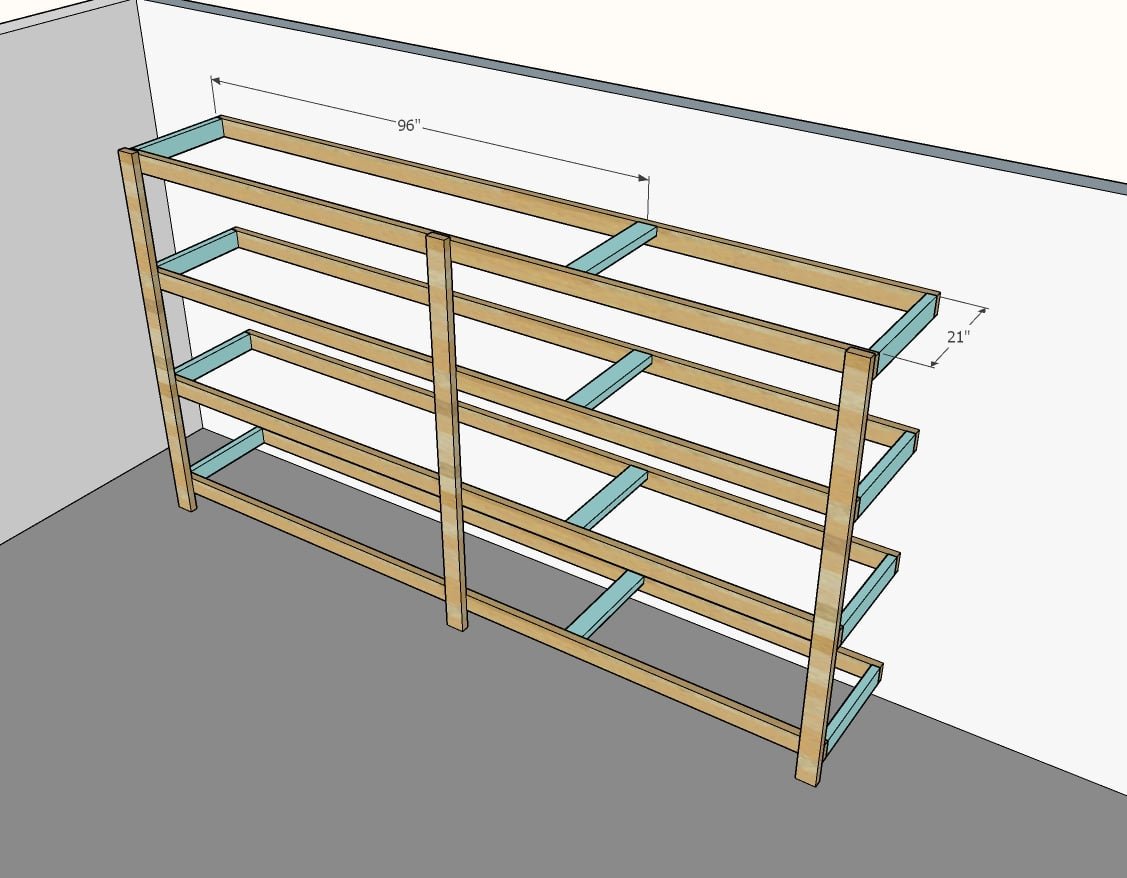
- 12 - 2x4 @ 21"
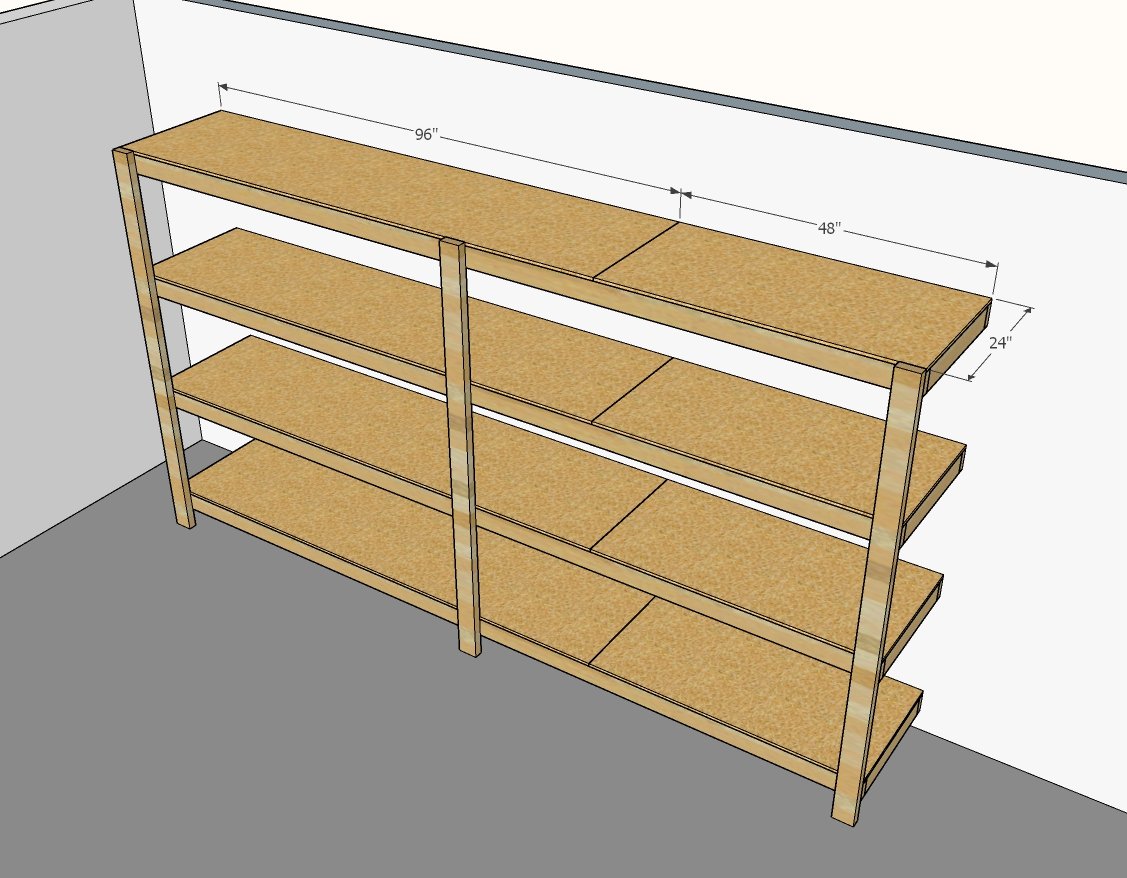
- 4 - 1/2" plywood @ 24" x 96"
- 4 - 1/2" plywood @ 24" x 48"
Tools
- measuring tape
- square
- pencil
- safety glasses
- hearing protection
- drill
- circular saw
- level
Step-by-step Instructions
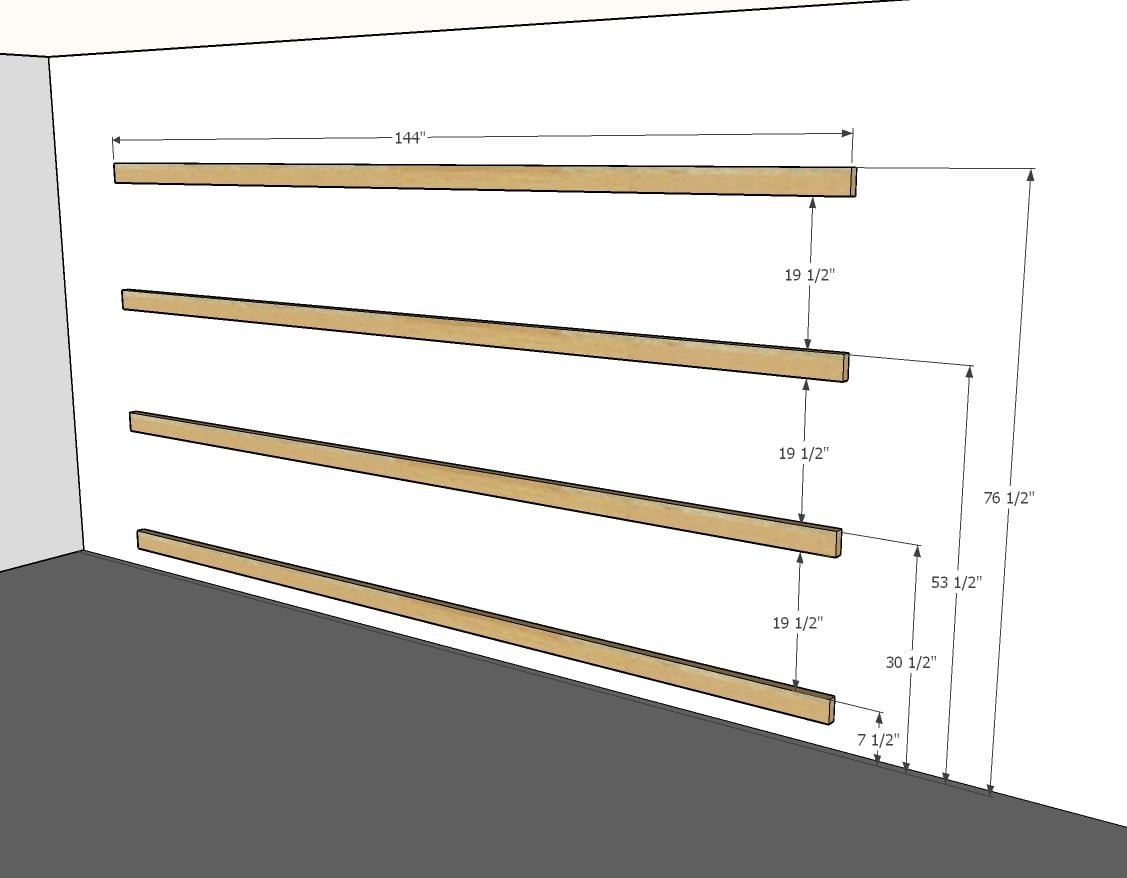
Locate studs in the wall and mark.
Use a level to mark the entire stud, vertically, on the surface of the drywall with a pencil. Mark heights of shelves. Attach 2x4s to the wall where the shelves will be placed with 3" screws into studs in the wall, two screws per stud in the wall.
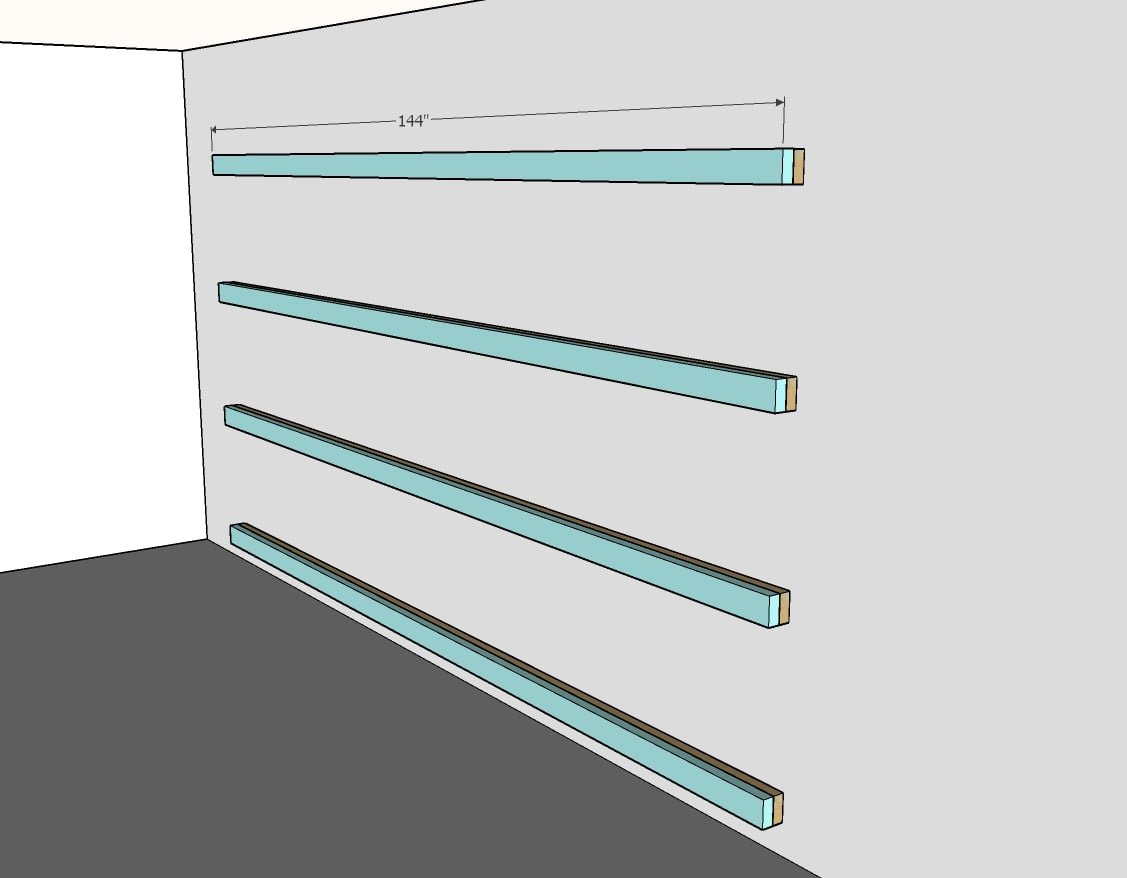
Step 2
Tack the second 2x4 on top of the first in two places, using 3" screws, avoid the ends and the middle where the legs will get attached in next step.
Step 3
Attach legs to the ends and middle with 3" screws. Use a level to make sure the leg is attached plumb.
Untack the front of the shelving from the back 2x4.
Attach 21" long 2x4s in between the front of the shelving and the back. Use a Kreg Jig if you have one, or screw at an angle to attach. Place flat 2x4s where there will be seams in the 8' long plywood shelving strips.
Lay plywood shelf tops on the framing.
Screw down with 2" screws, screws about every foot is fine.
Finishing
Sand all surfaces, starting with a medium grit and finishing with fine. Wipe off the dust, fill any holes or gaps with wood filler, and sand smooth once dry. Apply primer if you're painting, then finish with your choice of paint or stain and seal with a durable clear topcoat. For outdoor projects, use exterior-rated primer, paint or stain, and sealer so the piece stands up to the weather.
Source (temporary): https://www.ana-white.com/woodworking-projects/best-diy-garage-shelves-attached-walls