Birdhouse Frames
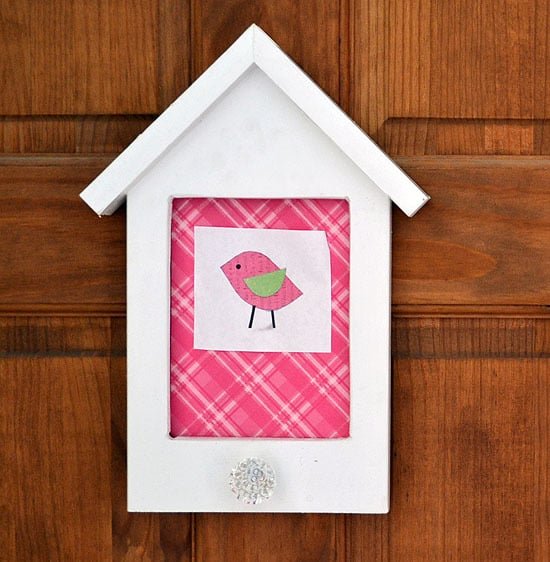
Make cute birdhouse frames from scrap wood!
Specifications
| Project type | Toys |
|---|---|
| Room | Teens |
| Style | Children's and Kid's Room Furniture and Toy Plans |
| Difficulty | Beginner Projects |
| Estimated cost | scraps |
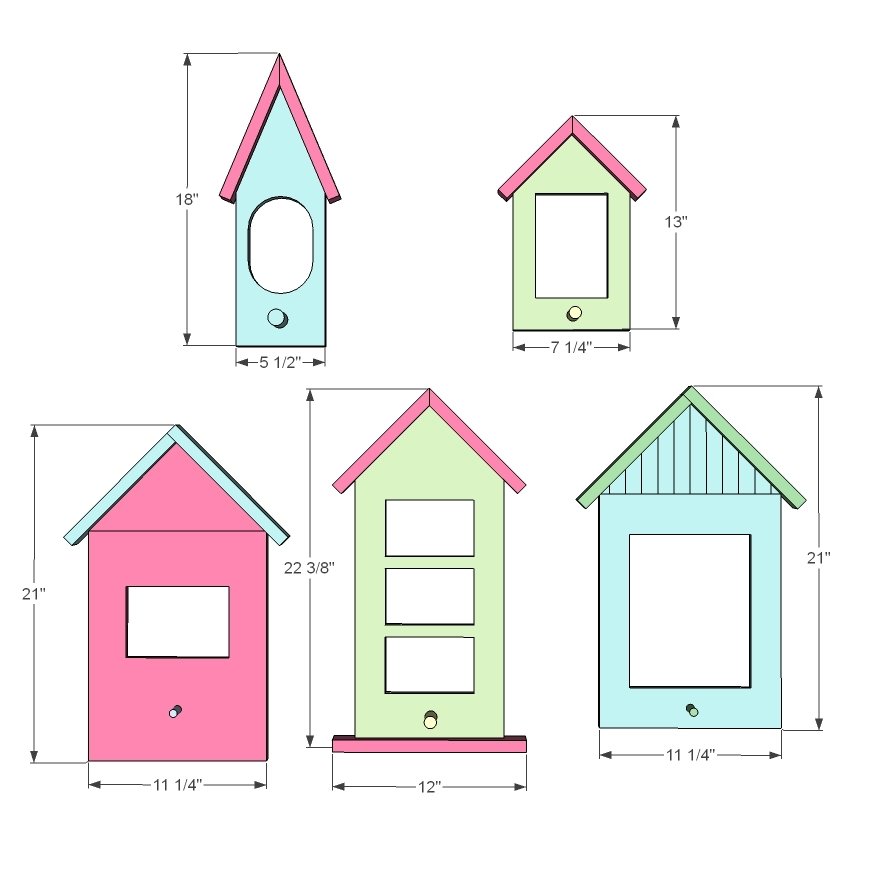
Dimensions
Use the size-specific shopping and cut lists below.
Shopping List
Scrap wood
router
command strips for haning
optional 1 1/4" nails for attaching roof
glue
knobs or dowels
paint
router (optional for routerng out picture groove)
Cut List
See each frame per cut list below
Tools
- measuring tape
- square
- pencil
- safety glasses
- hearing protection
Step-by-step Instructions
Step 1
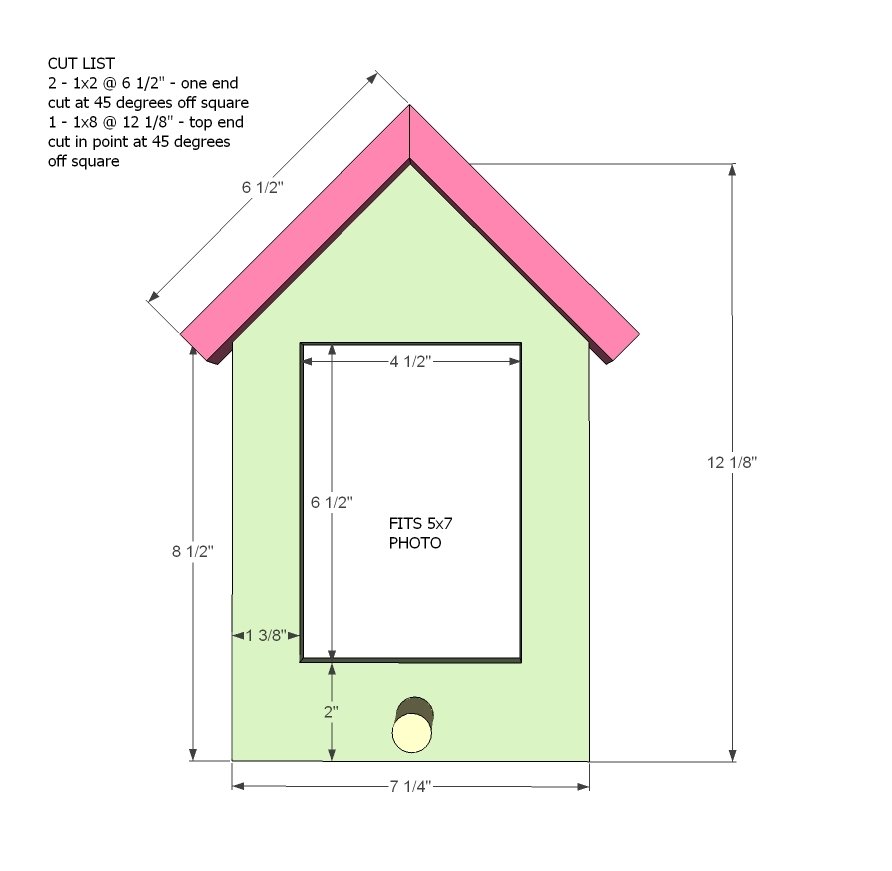
This is the one shown in the picture. It's sized just right for a 5x7 photo.
Step 2
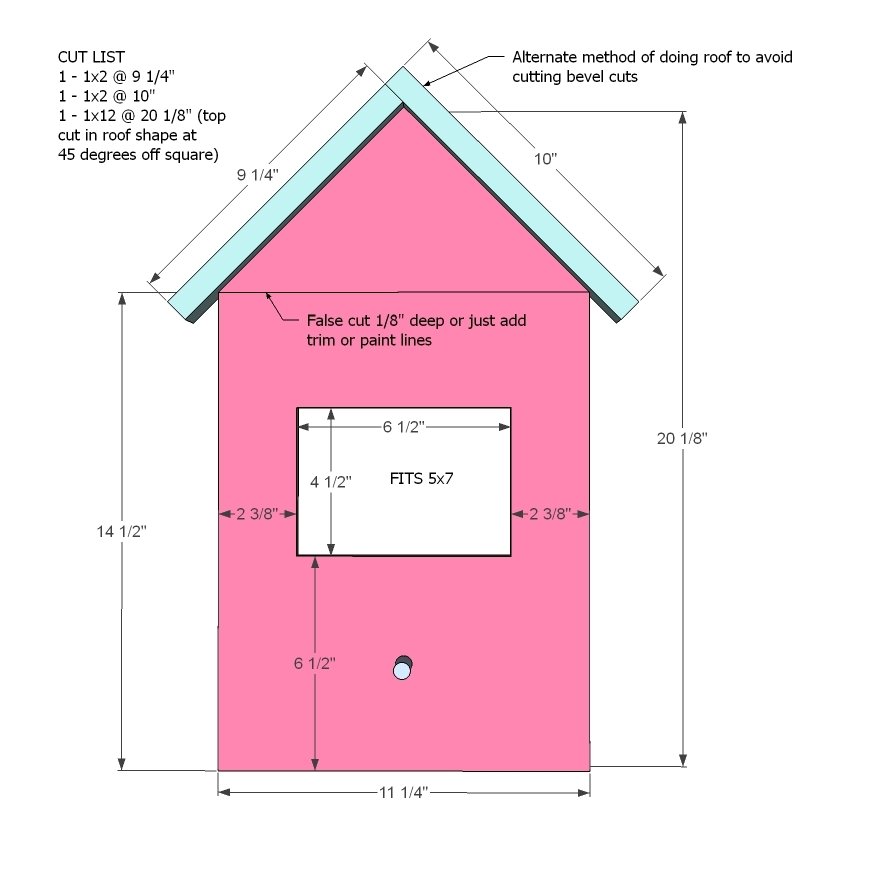
I did the roof a little different in this one in case you don't have a miter saw. You can use this roof style on all roofs made with 45 degree angles off square.
Step 3
This one is the same as the last, excpet fits a 8x10.
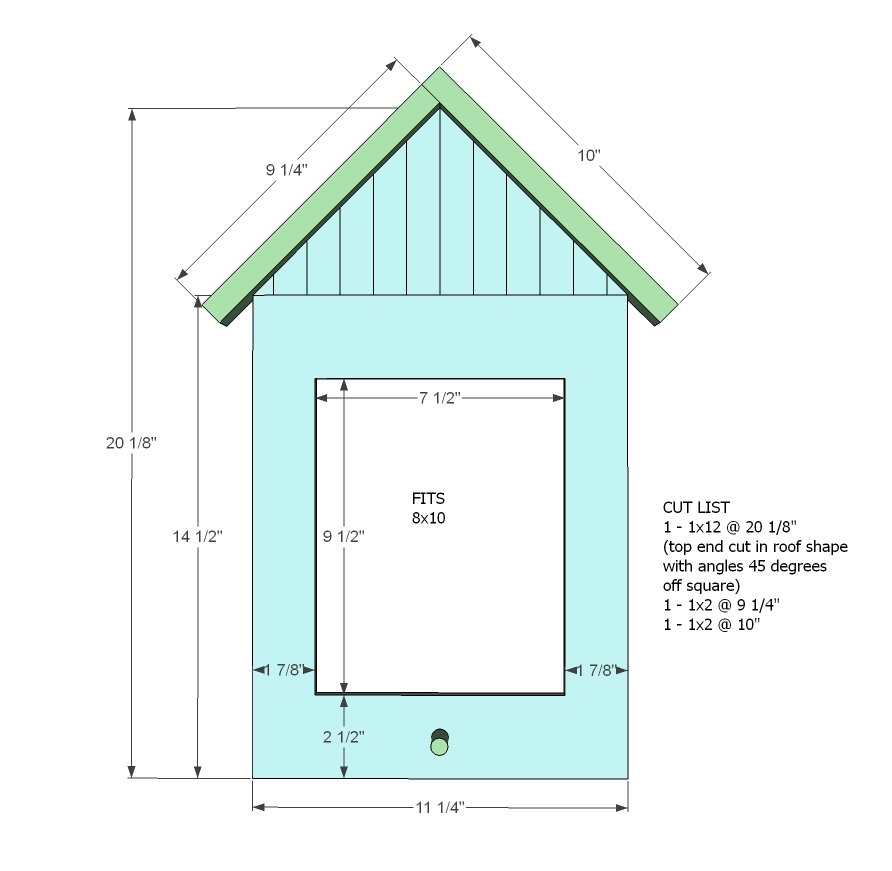
Step 4
My fav. You can add the base to any of the frames as well.
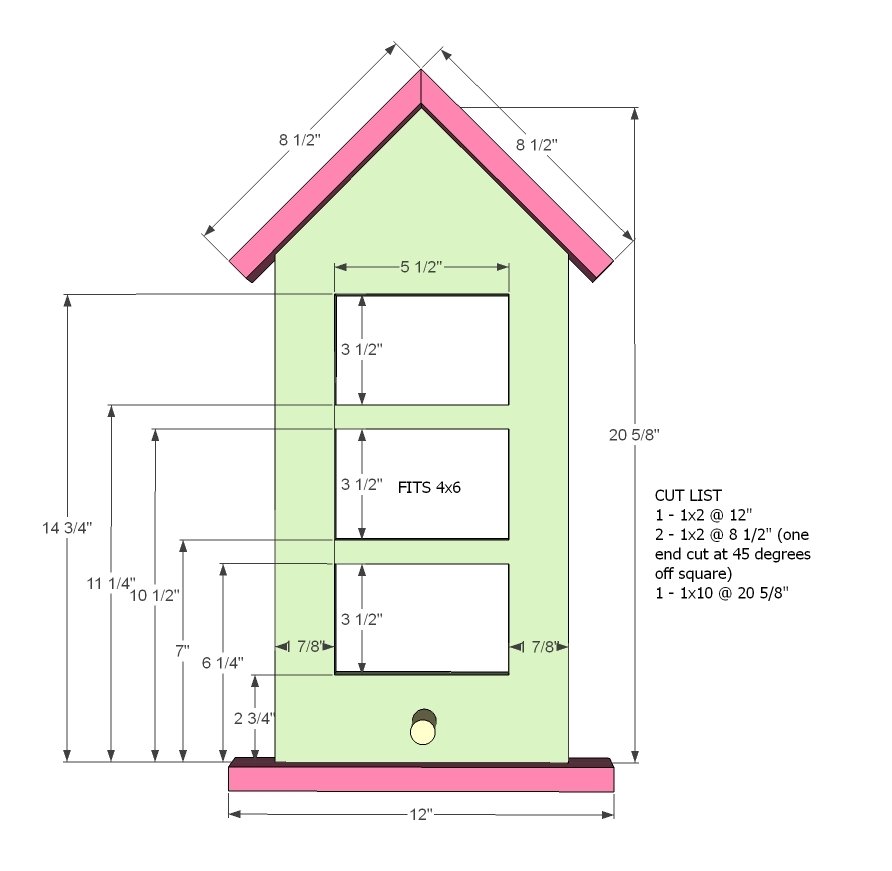
Step 5
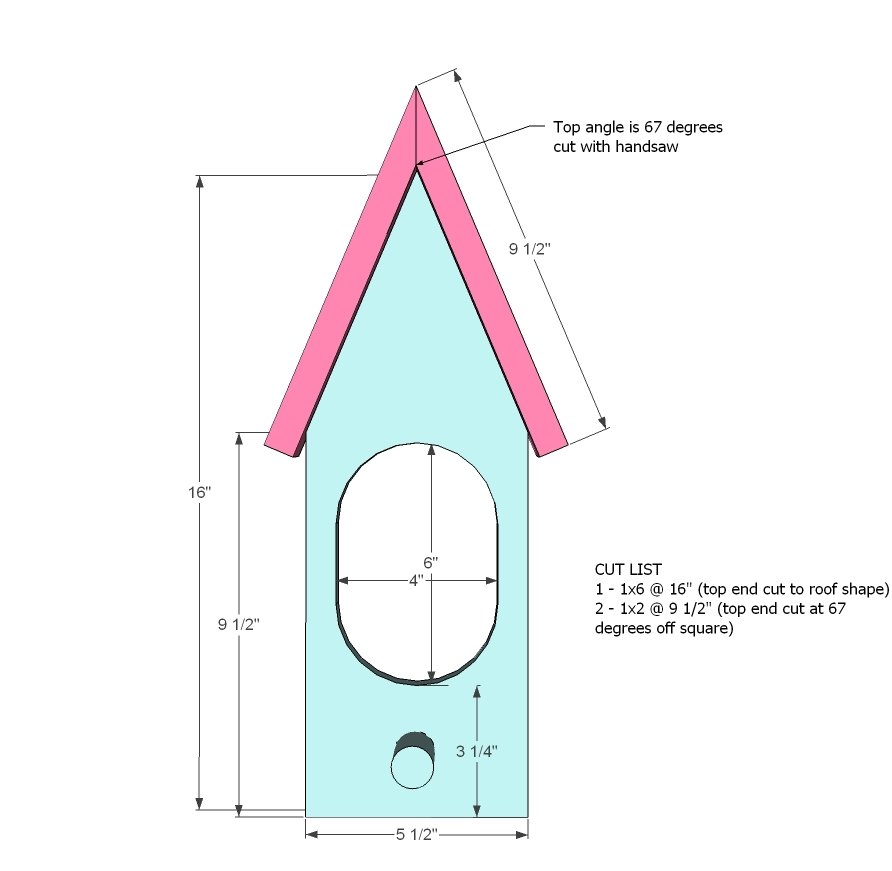
Finishing
Sand all surfaces, starting with a medium grit and finishing with fine. Wipe off the dust, fill any holes or gaps with wood filler, and sand smooth once dry. Apply primer if you're painting, then finish with your choice of paint or stain and seal with a durable clear topcoat. For outdoor projects, use exterior-rated primer, paint or stain, and sealer so the piece stands up to the weather.
Source (temporary): https://www.ana-white.com/woodworking-projects/birdhouse-frames