Board and Batten Bunk System
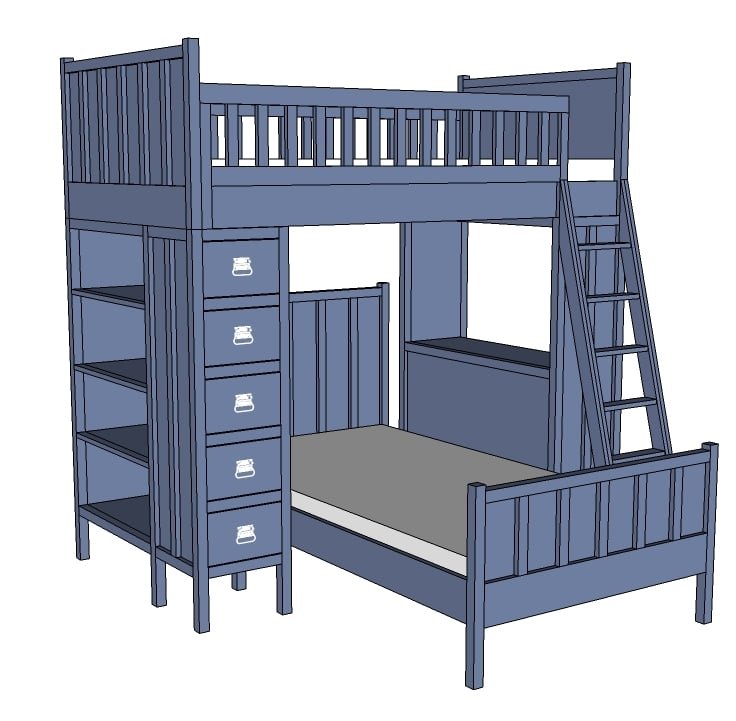
The top bunk for the Board and Batten Bunk System. Features full guardrails and slatted mattress support. Works with the rest of the Board and Batten Collection to create a complete storage and sleeping center. Board and Batten Collection – Classic and cozy board and batten style furniture you can build yourself. Perfect for bedrooms, guest spaces, and rustic-inspired homes. View the Full Collection
Specifications
| Project type | Beds and Bed Frames |
|---|---|
| Room | Kids and Toys |
| Style | Farmhouse Furniture |
| Difficulty | Intermediate |
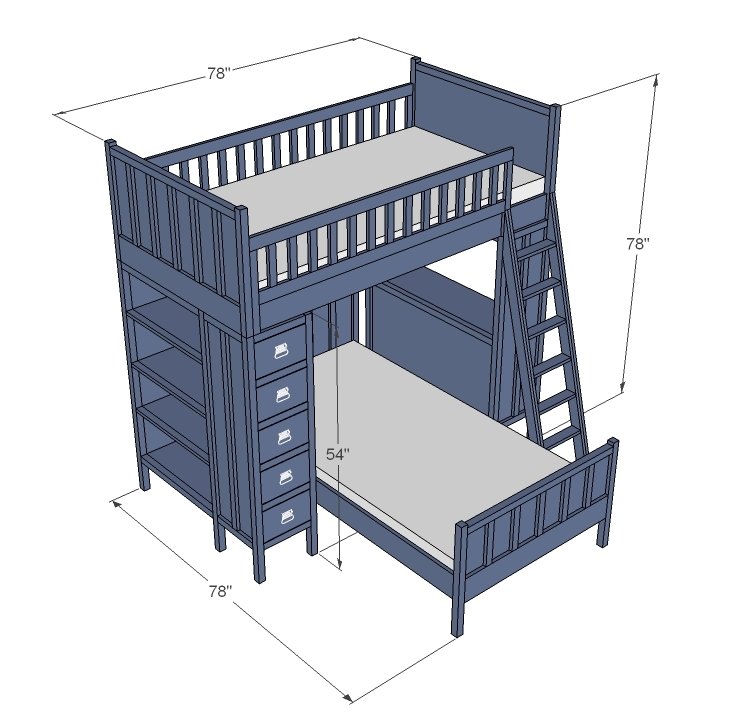
Dimensions
Use the size-specific shopping and cut lists below.
Shopping List
- 2 - 1x6 @ 10 feet long
- 1/2 Sheet - 3/4" plywood, MDF or particle board (4 feet x 4 feet)
- 4 - 2x2 @ 8 feet long
- 6 - 1x2 @ 8 feet long
- 4 - 1x3 @ 8 feet long
- This list does not include wood slats
Cut List
- 2 - 3/4" Plywood, MDF or Particle Board @ 39" x 21 3/4" (Panels)
- 2 - 2x2 @ 39" (Panel tops)
- 2 - 1x6 @ 39" (Panel bottom trim)
- 4 - 2x2 @ 24" (Legs)
- 2 - 1x6 @ 75" (Siderails)
- 28 - 1x2 @ 8" (Guardrail rails)
- 4 - 1x2 @ 16" (Guardrail ends)
- 1 - 1x3 @ 63 1/2" (Guardrail top, ladder side)
- 1 - 1x3 @ 75" (Guardrail top, back side)
- 1 - 1x3 @ 60 1/2" (Guardrail bottom, ladder side)
- 1 - 1x3 @ 72" (Guardrail bottom, back side)
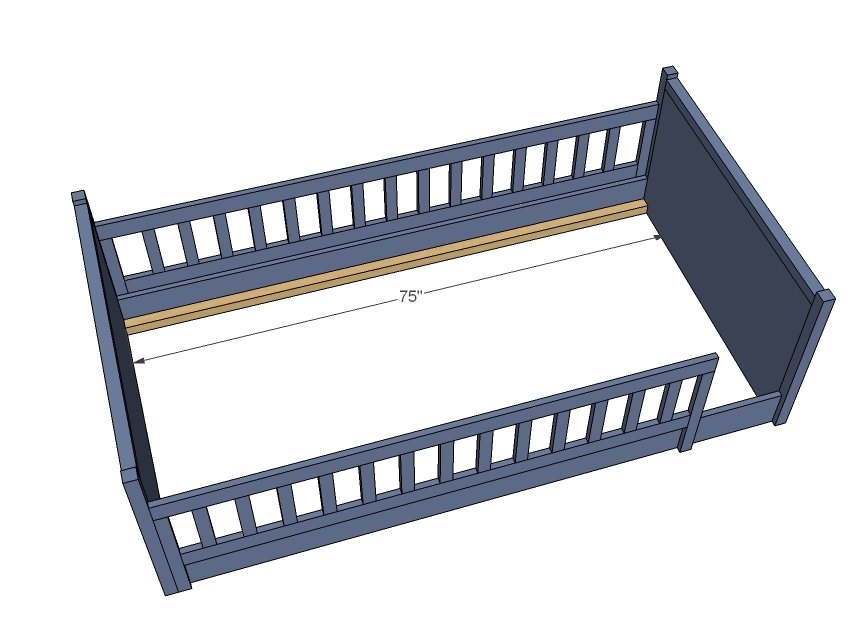
- 2 - 2x2 @ 75" (Cleats)
- Bunkie Board or 1x3s @ 39" to mattress specs
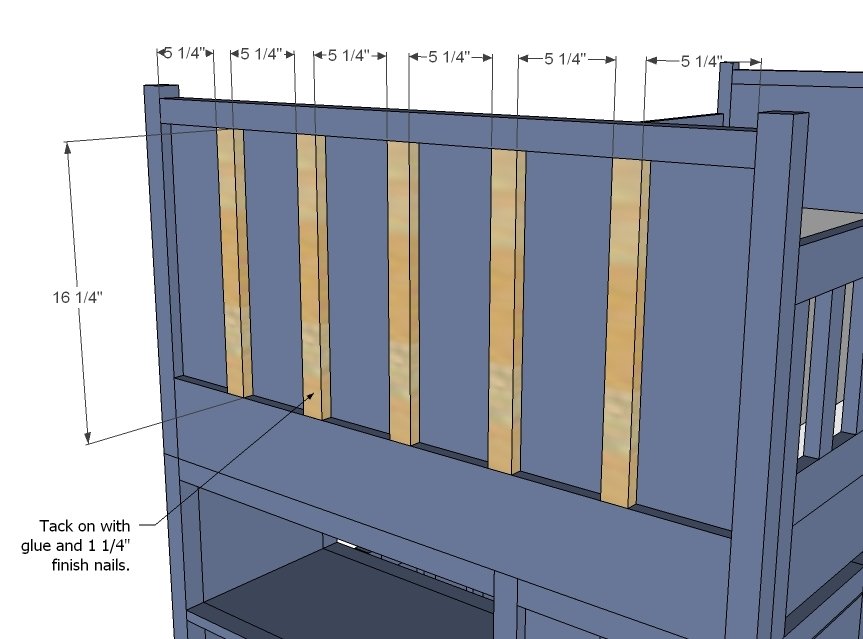
- 10 - 1x2 @ 16 1/4" (Headboard Trim)
Tools
- measuring tape
- square
- pencil
- safety glasses
- hearing protection
- kreg-jig
- drill
- circular saw
- nailer
- sander
- level
Step-by-step Instructions
Step 1
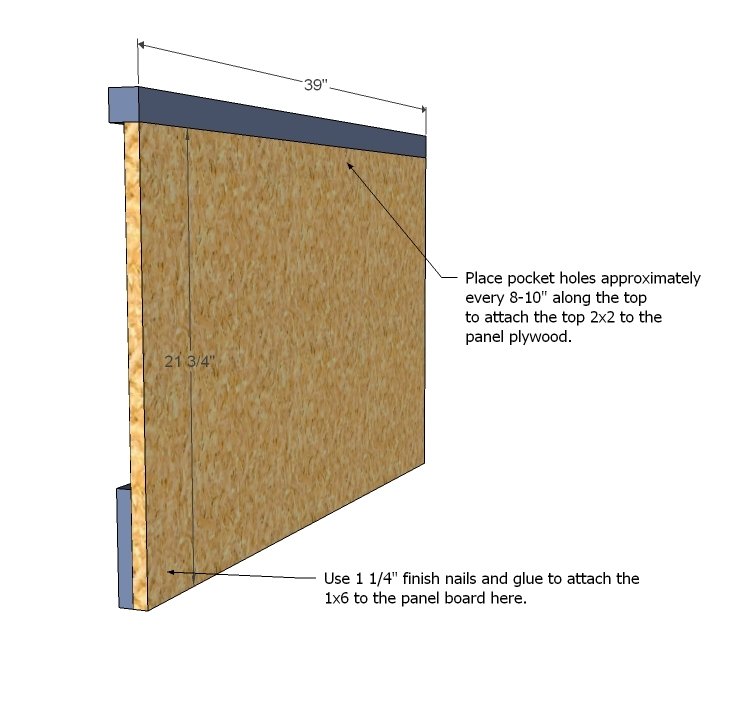
Start by building the panels as shown above. Make sure you have also drilled the pocket holes you will need for step 2.
Step 2
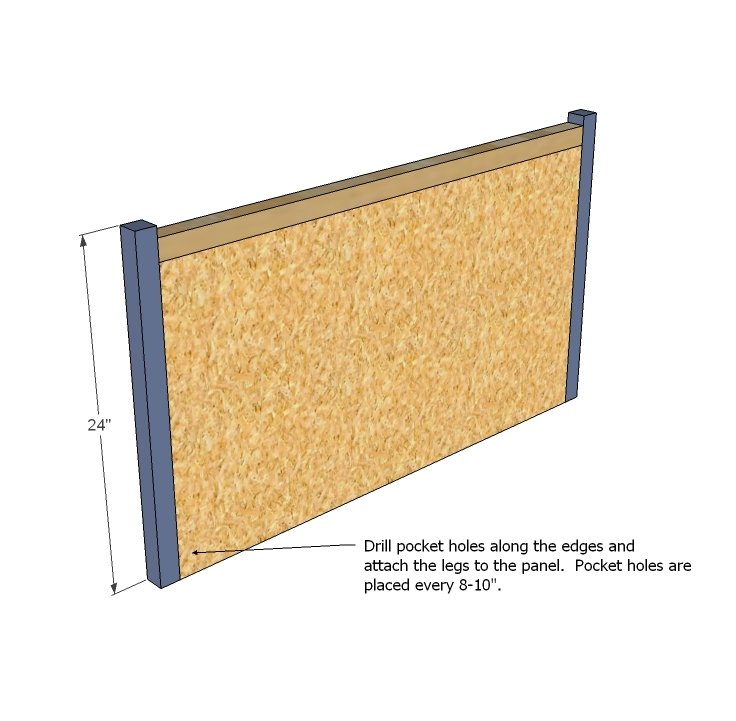
Add the legs with pocket holes. You should use pocket holes set for 3/4" stock here and glue. Use 1 1/4" pocket hole screws. Also attach to the header (you may wish to use a pocket hole set for 1 1/2" stock and 2 1/2" screws for the header, but a 2" nail would work just fine too if you panel pocket hole is at the top).
Step 3
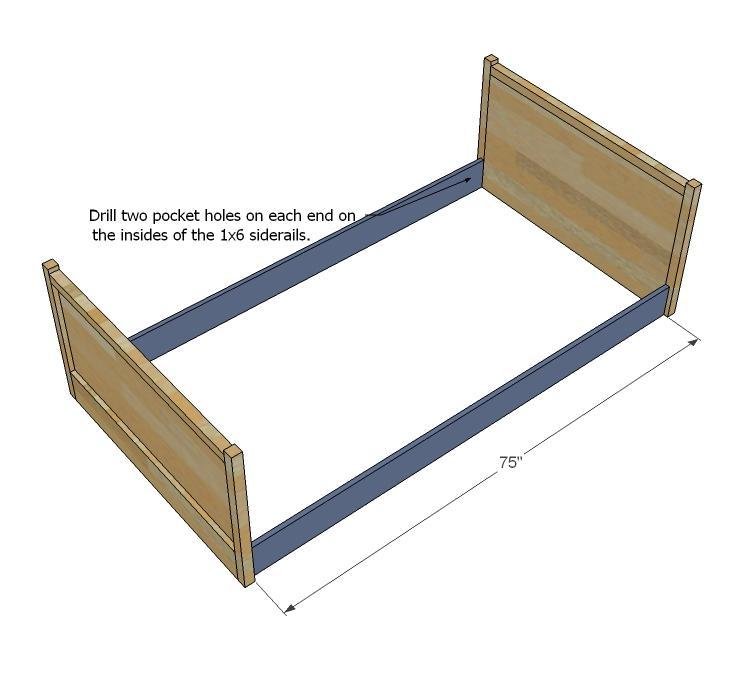
Drill you siderail pocket holes as shown above, set for 3/4" stock. If you plan to have a adult or large child/teen on the top bunk, you may wish to use brackets here.
Step 4
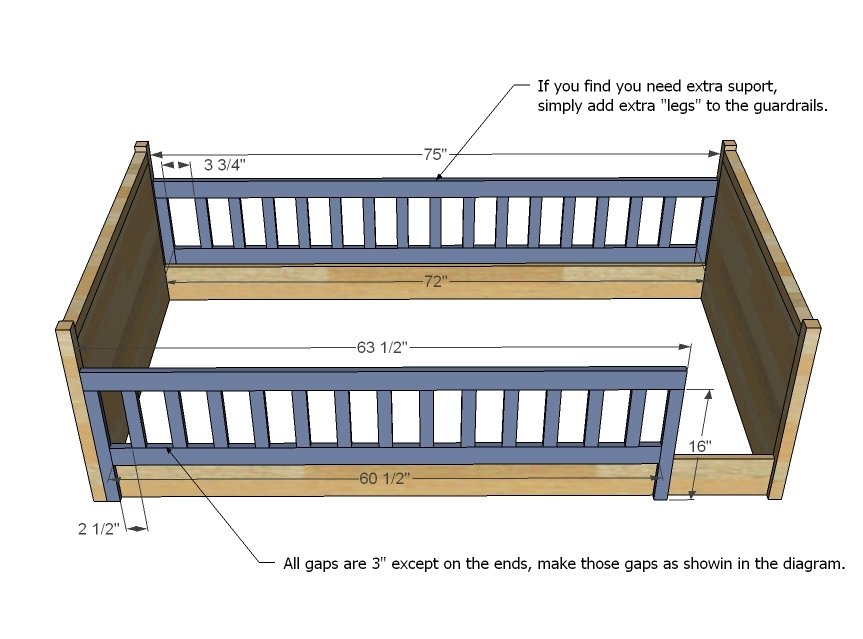
Now it's time for the guardrails, which are entirely optional. Begin by drilling one pocket hole on the inside of each of the rails, and one pocket hole on the top of each of the ends. Also drill two pocket holes on the ends of the bottom boards. Then build your rails as shown above. Attach directly to the siderail with bolts with nuts and washers. Carefully place your bolts in a symmetrical fashion.
Step 5
Step 6
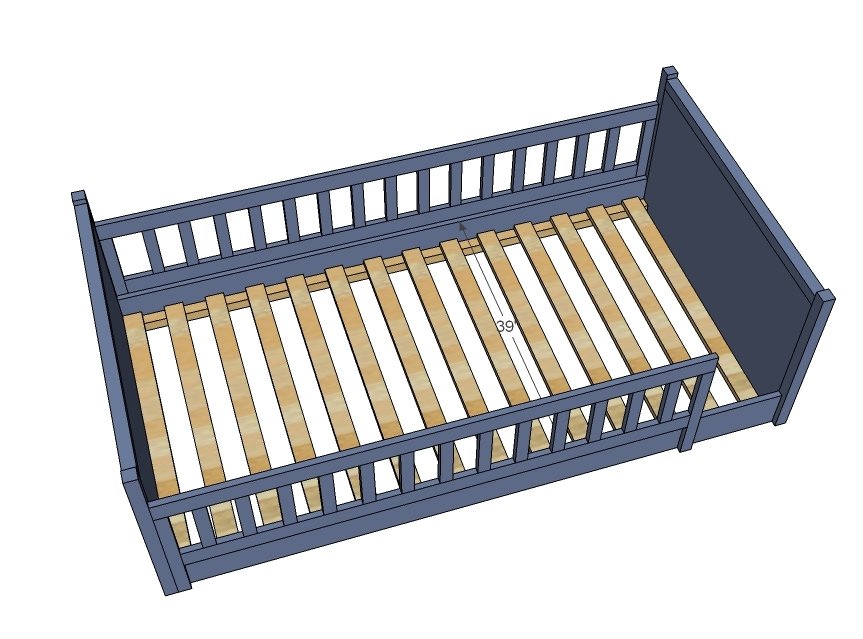
Either use a bunkie board as a mattress support system, or place 1x3s as slats, spaced according to your mattress recommendations. Screw the slats down with 1 1/4" screws. Do not use glue to make the slats removable.
Step 7
If you wish to add a little extra decoration to the headboards, you can use 1 1/4" finish nails and glue to add 1x2s as shown here.
Finishing
Sand all surfaces, starting with a medium grit and finishing with fine. Wipe off the dust, fill any holes or gaps with wood filler, and sand smooth once dry. Apply primer if you're painting, then finish with your choice of paint or stain and seal with a durable clear topcoat. For outdoor projects, use exterior-rated primer, paint or stain, and sealer so the piece stands up to the weather.
Source (temporary): https://www.ana-white.com/woodworking-projects/board-and-batten-bunk-system-top-bunk