Board and Batten Twin Bed
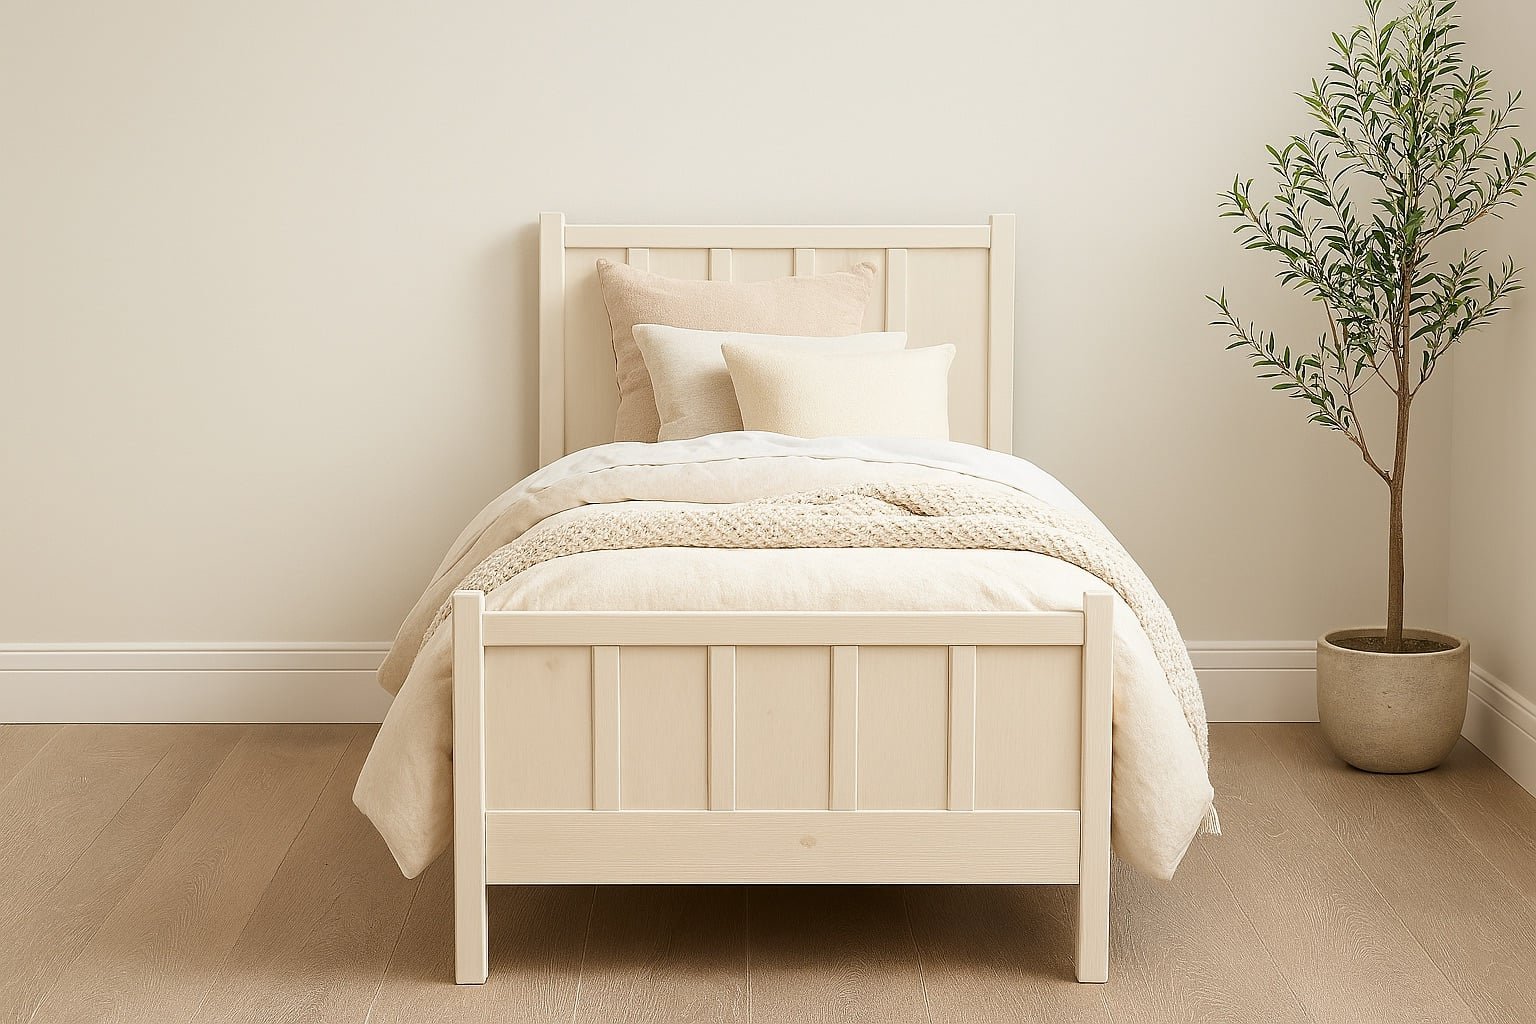
Build a beautiful twin bed with timeless style! This board and batten twin bed features clean lines, classic panel detailing, and sturdy construction—perfect for a child’s room, guest space, or cottage-style home. Designed to be built with basic tools and off-the-shelf lumber, it's a rewarding weekend project that delivers designer looks on a DIY budget. include diagrams, a full shopping list, and a detailed cut list to make building easy and beginner-friendly.
Specifications
| Project type | Beds and Bed Frames |
|---|---|
| Room | Bedroom |
| Style | Children's and Kid's Room Furniture and Toy Plans |
| Difficulty | Intermediate |
| Estimated cost | $20 - $50 |
Dimensions
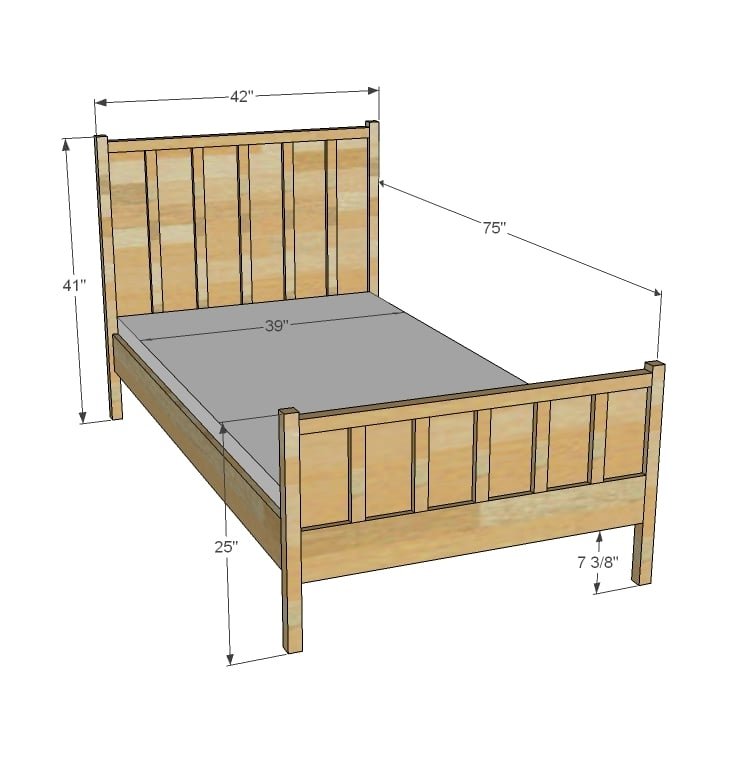
Use the size-specific shopping and cut lists below.
Shopping List
- 1 - 4x4 (Half Sheet) 3/4" Plywood Board
- 2 - 1x6 @ 10 feet long
- 5 - 2x2 @ 8 feet long (you may wish to use hardwood 2x2s for the legs)
- 2 - 1x2 @ 8 feet long
- 7 - 1x3 @ 8 feet long
Cut List
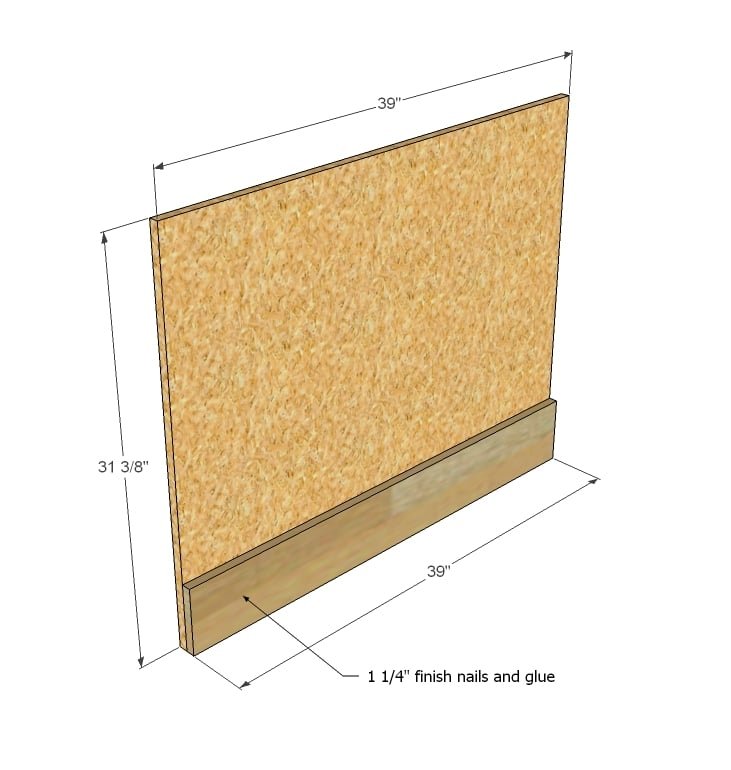
- 1 - 3/4" Plywood @ 39" x 31 3/8" (Headboard Panel)
- 1 - 3/4" Plywood @ 39" x 15 3/8" (Footboard Panel)
- 2 - 1x6 @ 39" (Bottom Trim)
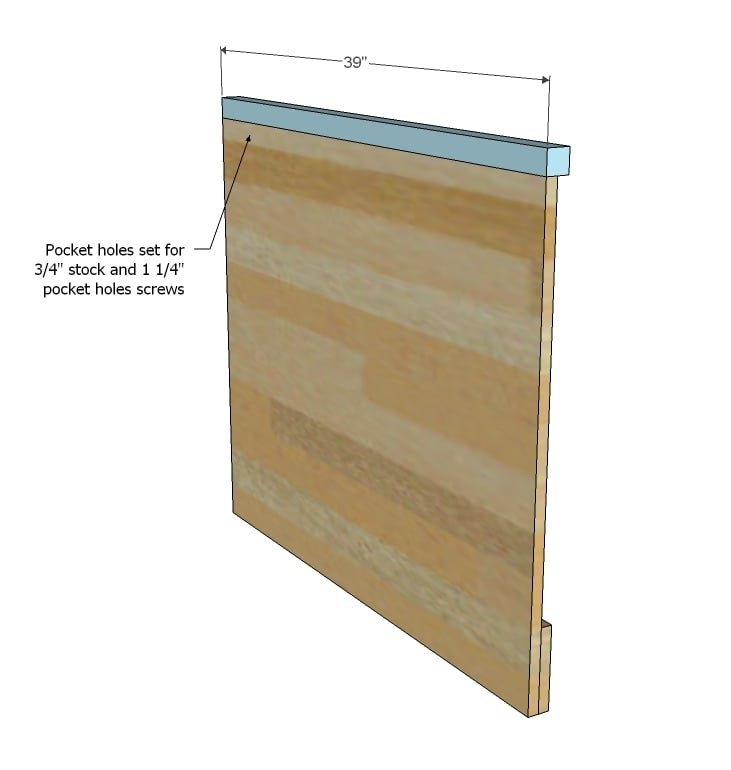
- 2 - 2x2 @ 39" (Top Trim)
- 5 - 1x2 @ 25 7/8" (Panel Trim, Headboard)
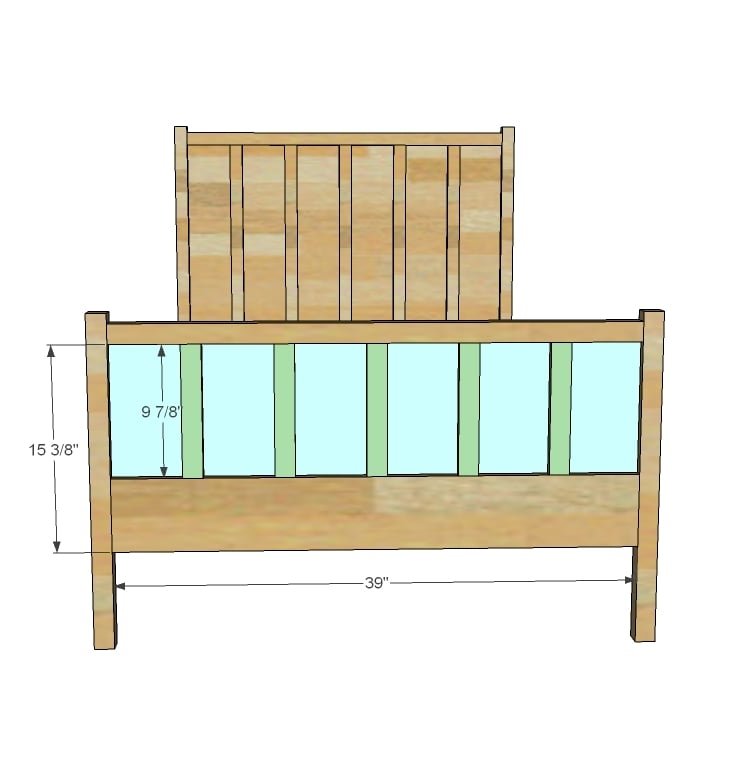
- 5 - 1x2 @ 9 7/8" (Panel Trim, Footboard)
- 2 - 2x2 @ 41" (Headboard Legs)
- 2 - 2x2 @ 25" (Footboard Legs)
- 2 - 1x6 @ 75" (Siderails)
- 2 - 2x2 @ 75" (Cleats)
- 14 - 1x3 @ 39" (Slats - you may need more or less)
Tools
- measuring tape
- square
- pencil
- safety glasses
- hearing protection
- kreg-jig
- drill
- circular saw
- nailer
- sander
- level
- countersink drill bit
Step-by-step Instructions
Step 1
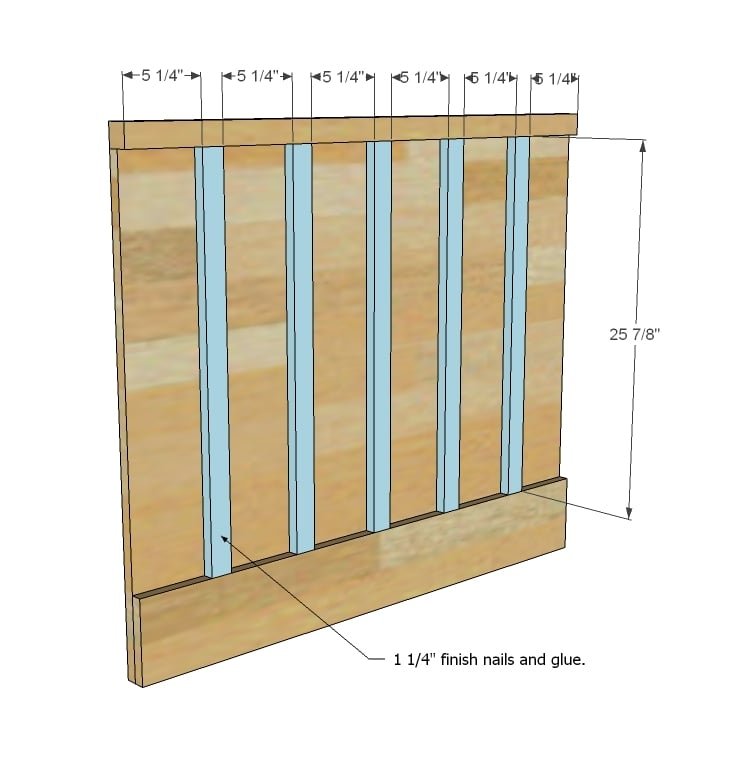
On the headboard panel (I just build a bed yesterday that is very similar, and used cheapo particle board for the panels because it's really mostly decorative) use 1 1/4" finish nails and glue to attach the 1x6 base trim as shown above.
Step 2
Now drill pocket holes along the top edge (and the side edges too for step 4) approximately every 8-12 inches and attach the 2x2 to the top as shown above. Drill the pocket holes set for 3/4" stock.
Step 3
Now just use your 1 1/4" finish nails and glue to attach the 1x2 trim boards as shown above.
Step 4
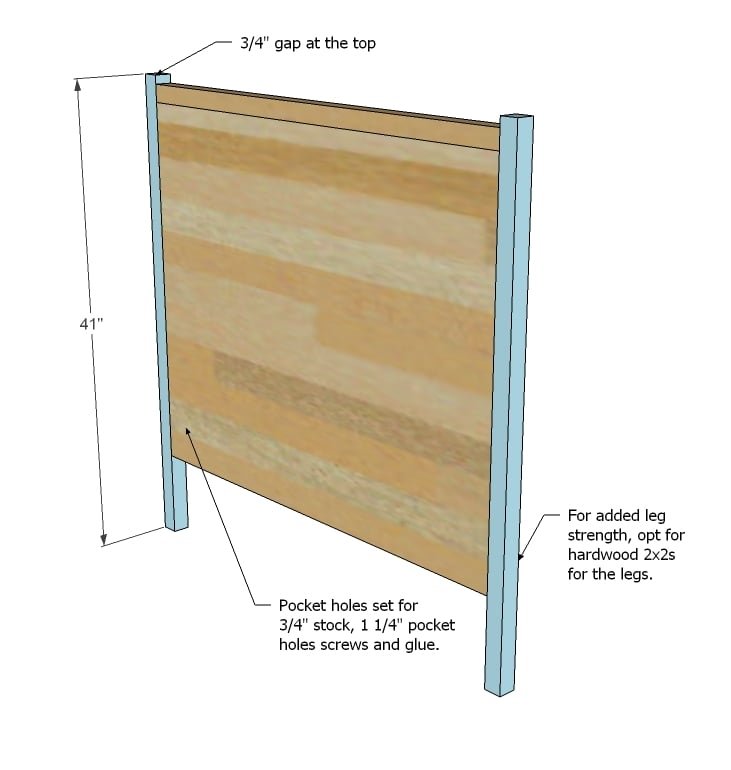
And you should already have pocket holes drilled from step 2, so just attach the legs with 1 1/4" pocket hole screws and glue.
Step 5
Step 6
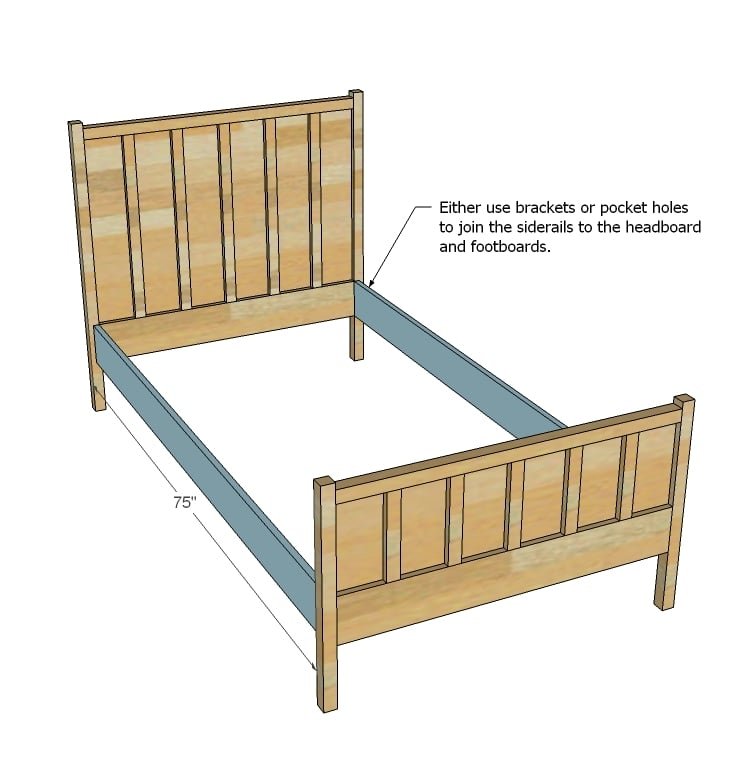
Now add the siderails. The easiest method is to drill pocket holes from the insides of the siderails and attach to the headboard and footboard. A stronger means would be to use brackets, available at most hardware stores.
Step 7
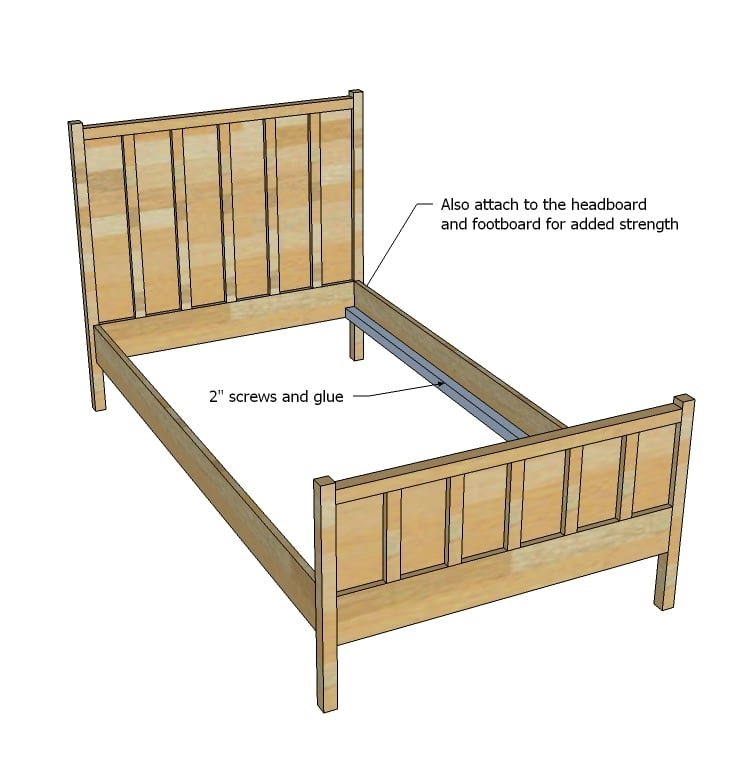
Now add the cleats to the insides of the siderails. If you are not using a box spring, you may wish to put your cleats at the top of the siderails, just don't forget that your slats will take up 3/4". Use glue and 2" screws. Also, for added support, you can attach the headboard and footboard to the cleats with screws too.
Step 8
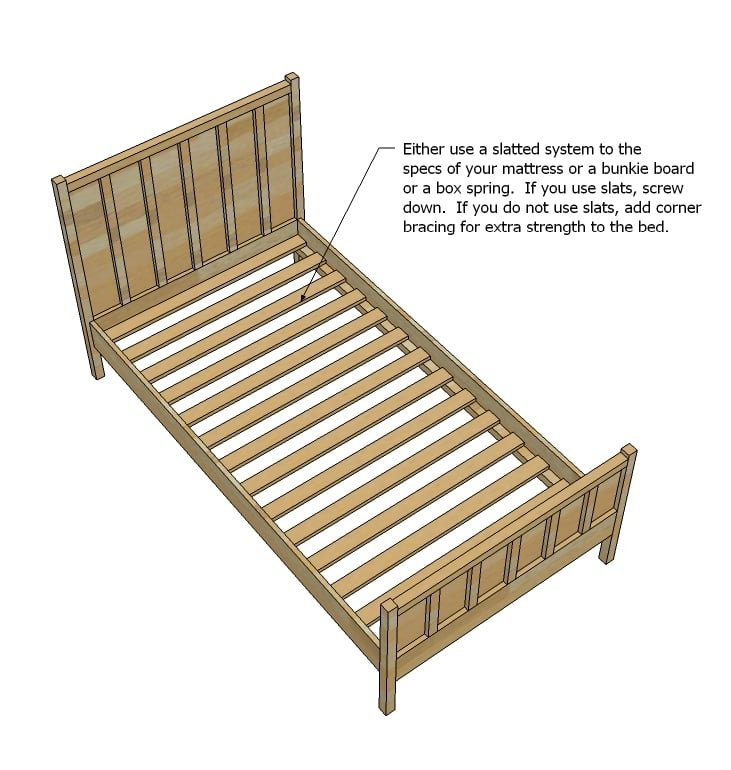
Now lay the slats on top of the cleats and screw down with 1 1/4" screws. If you are using a box springs, you will not need the slats. Be aware that some mattresses are firmer than others, and you may need less or more slats.
Finishing
Sand all surfaces, starting with a medium grit and finishing with fine. Wipe off the dust, fill any holes or gaps with wood filler, and sand smooth once dry. Apply primer if you're painting, then finish with your choice of paint or stain and seal with a durable clear topcoat. For outdoor projects, use exterior-rated primer, paint or stain, and sealer so the piece stands up to the weather.
Source (temporary): https://www.ana-white.com/woodworking-projects/board-and-batten-twin-bed-free-plans