Bold Modern L-Shape Rotating Desk
Modern, clean lines paired with a flexible design that can be configured to accommodate different room shapes, projects and users - this desk system features ample storage and a generous desktop. Finished on all sides, this desk can be centered in a room. It's built from two sheets of plywood and some 2x4s. The total cost was around $200. This is a free project plan with step by step instructions to help you build your own custom desk. Related: Mountain Modern Bookshelf Plans
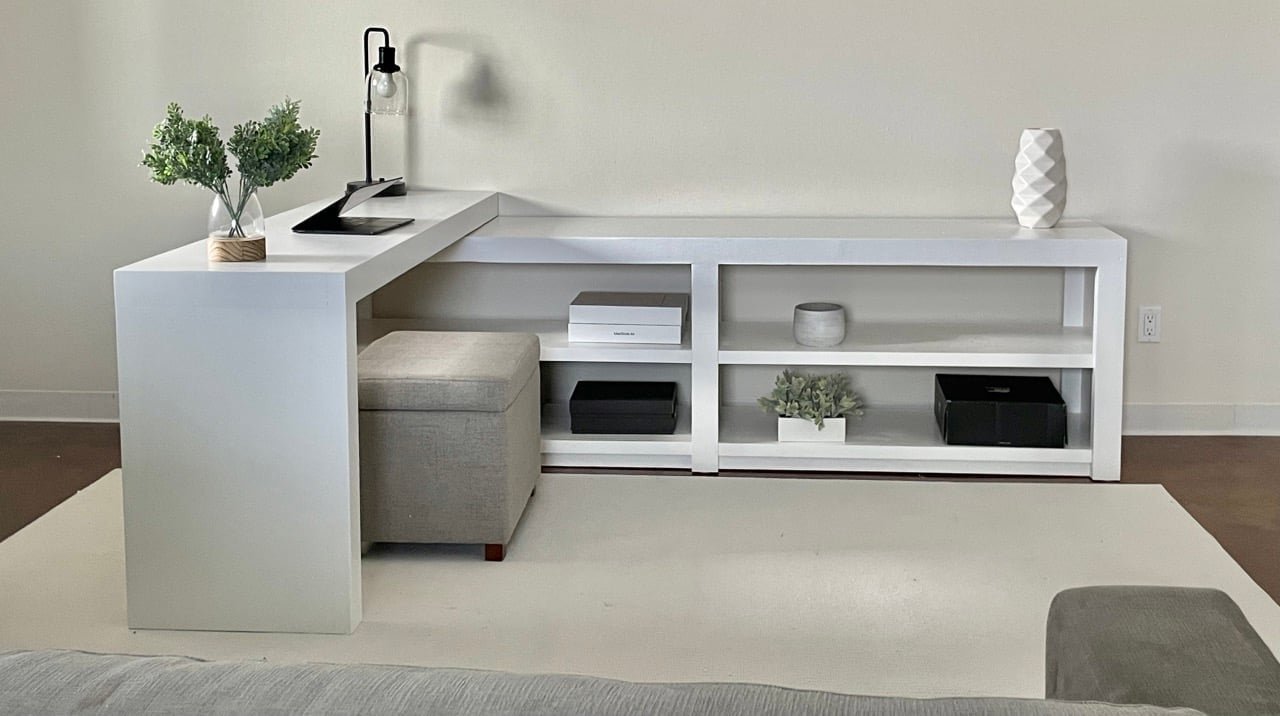
Specifications
| Project type | Desk, Desk Systems and Project Table Plans |
|---|---|
| Room | office |
| Style | Modern Style Furniture Plans |
| Difficulty | Advanced |
| Estimated cost | $150 - $200 |
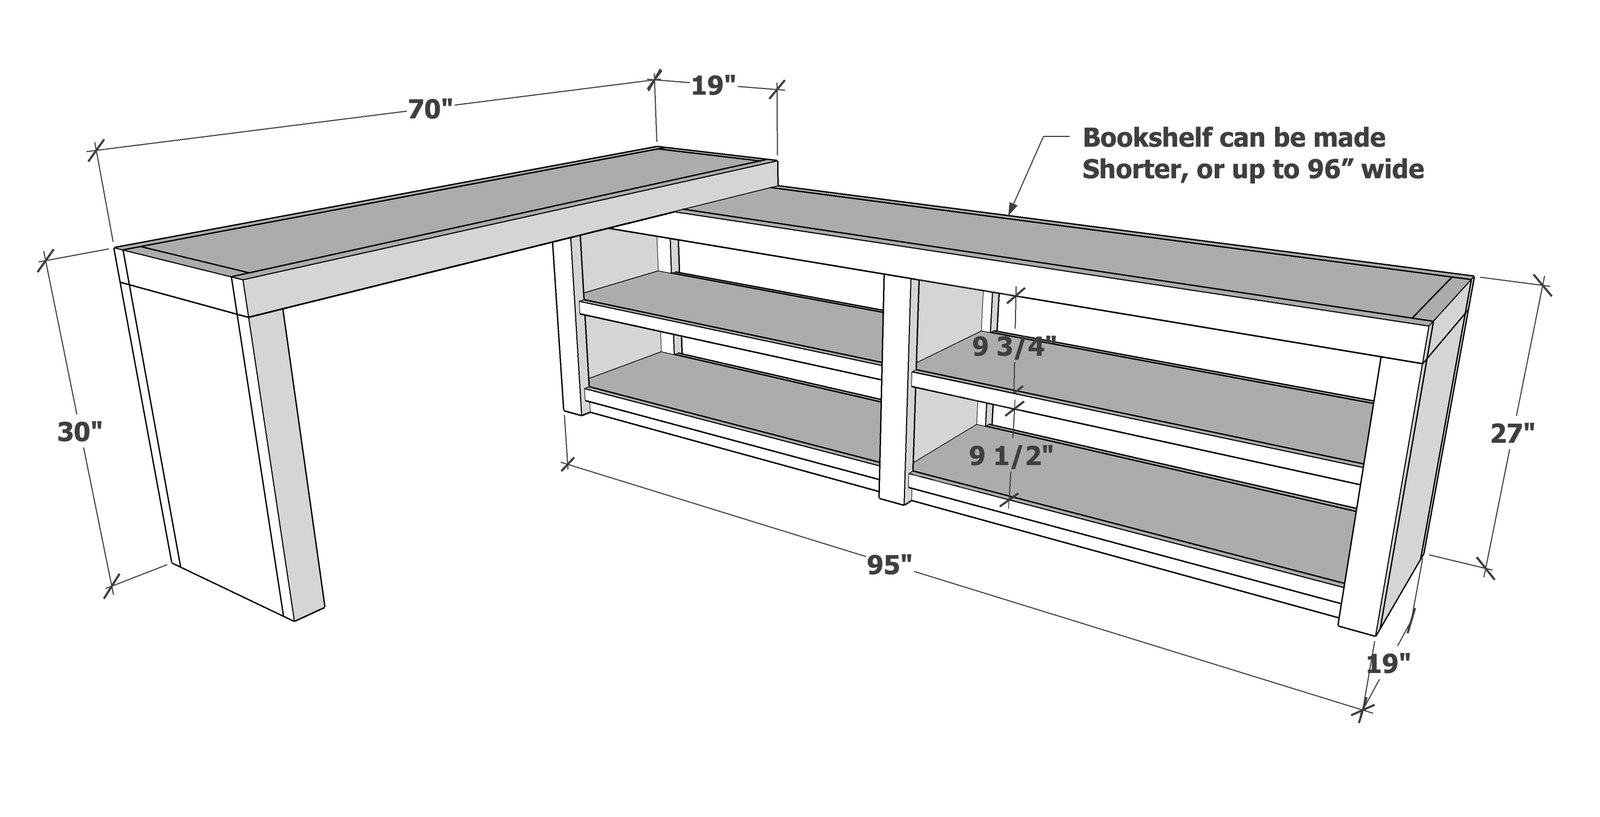
Dimensions
Use the size-specific shopping and cut lists below.
Shopping List
- 2 sheets of 3/4" thick cabinet grade plywood, ripped intro 6 strips, 15-3/4" wide x 8 feet long
- 6 - 2x4x10, pine (yellow toned), ripped down to 3" wide (take 1/4" off each side for square edges)
- 2 - 1x3 @ 8 feet long
- 5 - 1x2 @ 8 feet long
- 24 - 2-1/2" pocket hole screws
- 150 - 1-1/4" pocket hole screws
- 1-1/4" brad nails
- wood glue
- 12 felt pads (1" diameter or similar) for protecting bottoms of bookshelf, desk feet and bottom of desk where it sits on the bookshelf)
Cut List
3/4" Plywood Cuts - Rip the 3/4" plywood into 6 strips, each 15-3/4" wide
- 1 - 3/4" plywood @ 15-3/4" x 92" - bookshelf top (drill 3/4" pocket holes along all four edges)
- 2 - 3/4" plywood @ 15-3/4" x 24" - bookshelf sides (drill 3/4" pocket holes on top and side edges, place as shown in step 4)
- 1 - 3/4" plywood @ 15-3/4" x 26-1/4" - bookshelf center (drill 3/4" pocket holes on top and side edges, place as shown in step 4)
- 4 - 3/4" plywood @ 15-3/4" x 46-3/8" - shelves (drill 3/4" pocket holes on ends only)
- 1 - 3/4" plywood @ 15-3/4" x 67" - desk top (drill 3/4" pocket holes along all four edges)
- 1 - 3/4" plywood @ 27" - desk leg - matches height of bookshelf (drill 3/4" pocket holes along top and side edges)
- 1 - 3/4" plywood @ 29-1/4" - desk inside leg (drill 3/4" pocket holes on top edge only)
2x4 cuts - rip 2x4s down to 3" wide first
- 4 - 2x4 @ 15-3/4" - ends for tabletops (drill 1-1/2" pocket holes on each end)
- 2 - 2x4 @ 95" - sides of bookshelf tabletop - measure and cut to fit
- 6 - 2x4 @ 24" - bookshelf legs (drill two 1-1/2" pocket holes on one end)
- 2 - 2x4 @ 70" - sides of desk tabletop - measure and cut to fit
- 2 - 2x4 @ 27" - matches height of the bookshelf - desk legs (drill two 1-1/2" pocket holes on one end)
1x Trim Pieces
- 4 - 1x3 @ 46-3/8" - bottom supports (drill 3/4" pocket holes on ends and along top edge)
- 8 - 1x2 @ 43" - shelf trim, cut to fit
- 2 - 1x2 @ 27" - desktop leg trim
Tools
- measuring tape
- square
- pencil
- safety glasses
- kreg-jig
- drill
- compound miter saw
- table saw
- nailer
- sander
Step-by-step Instructions
Step 1
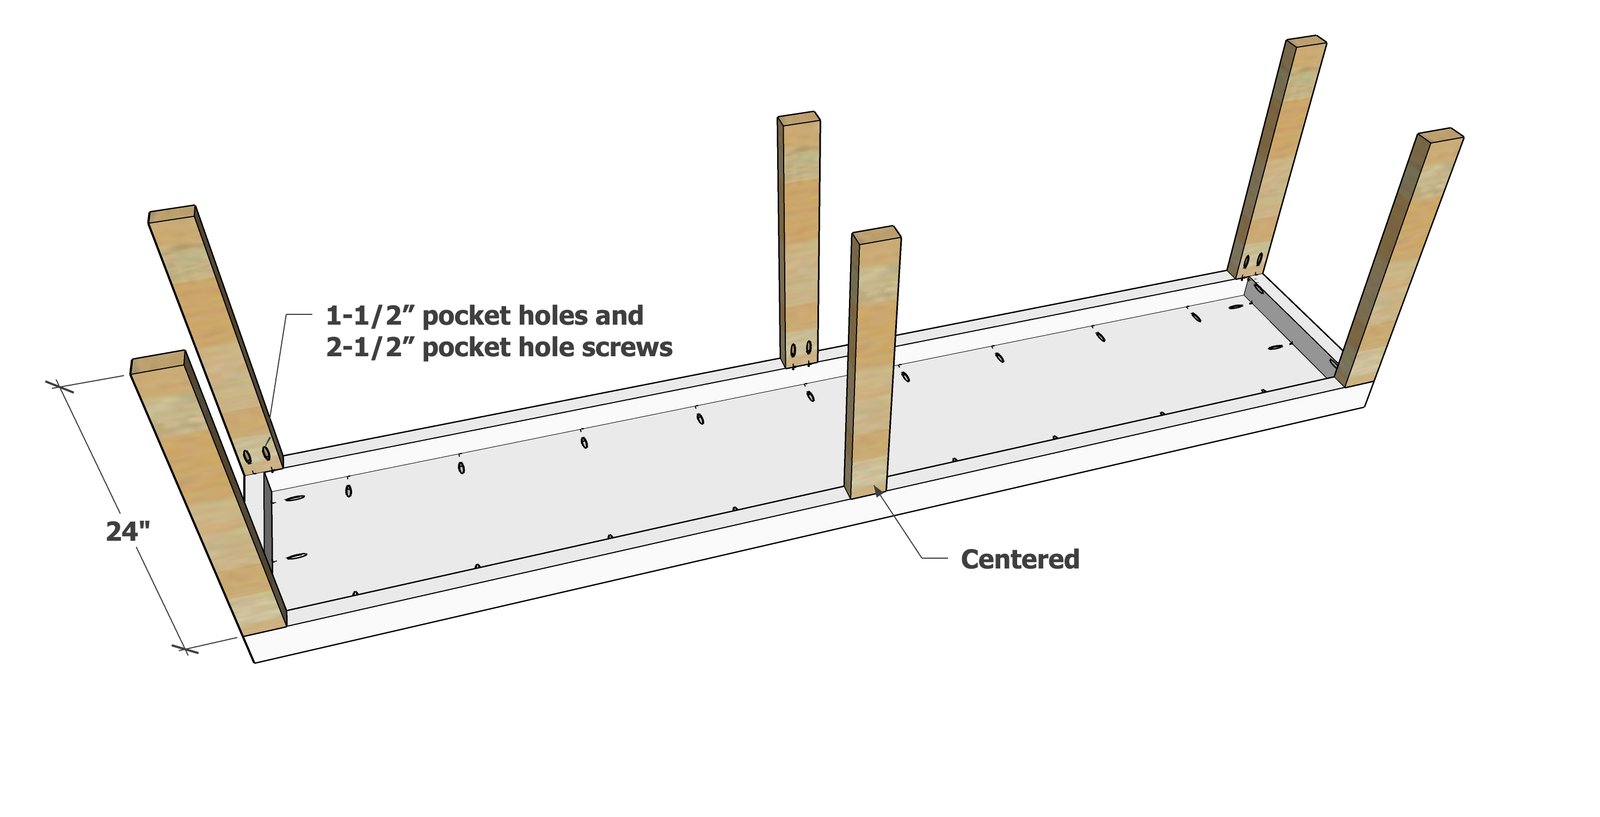
Attach the 2x4 ends to the bookshelf tabletop.
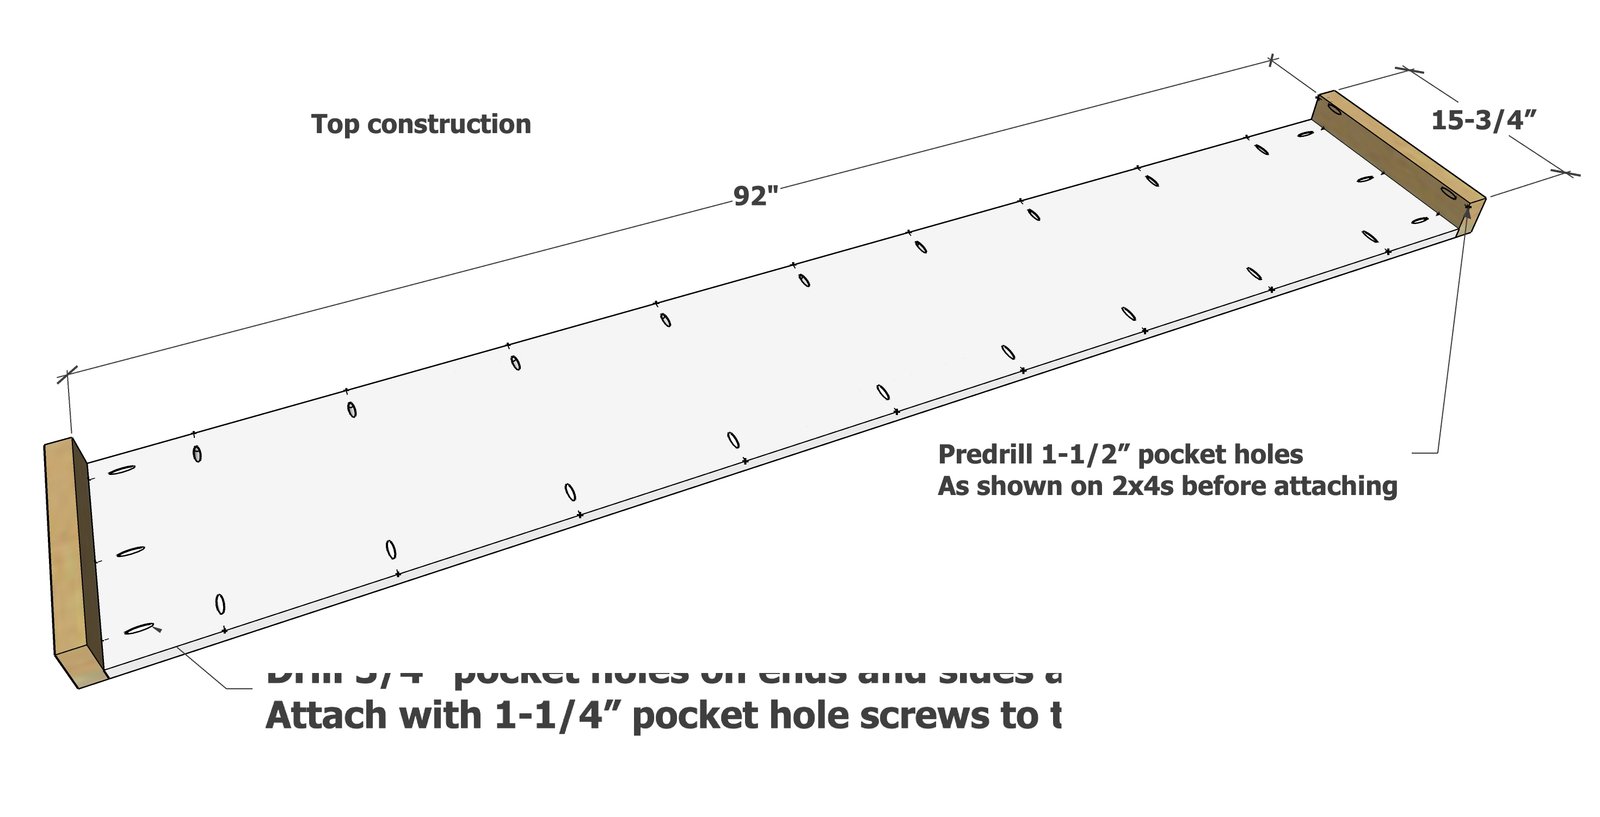
Step 2
Then attach the 2x4 side trim. Also attach the two 2x4 pieces together with the predrilled 1-1/2" pocket hole.
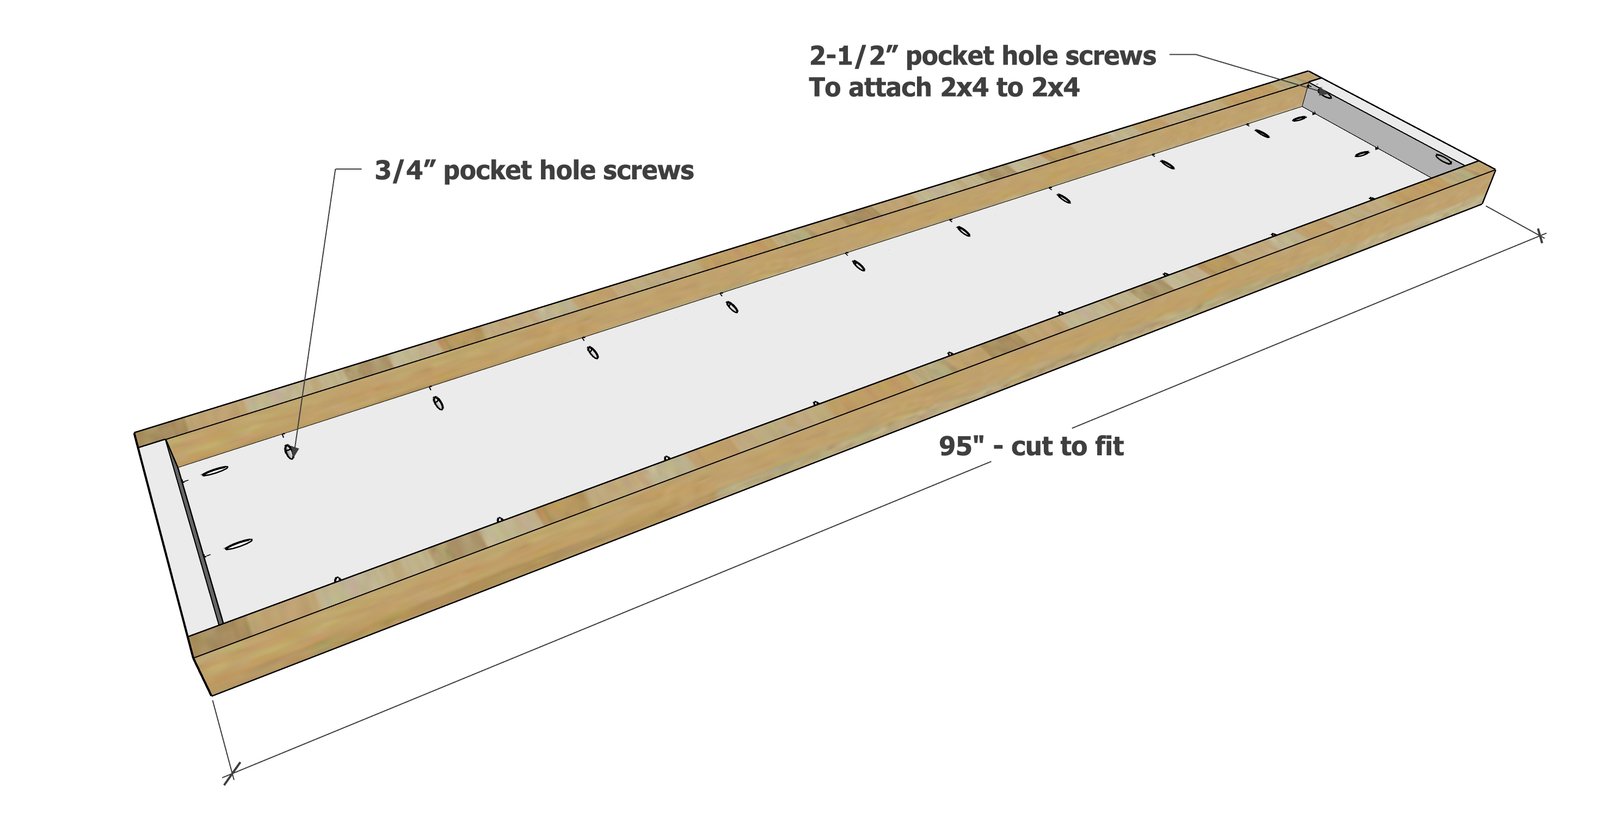
Step 3
Attach the legs to the 2x4 frame.
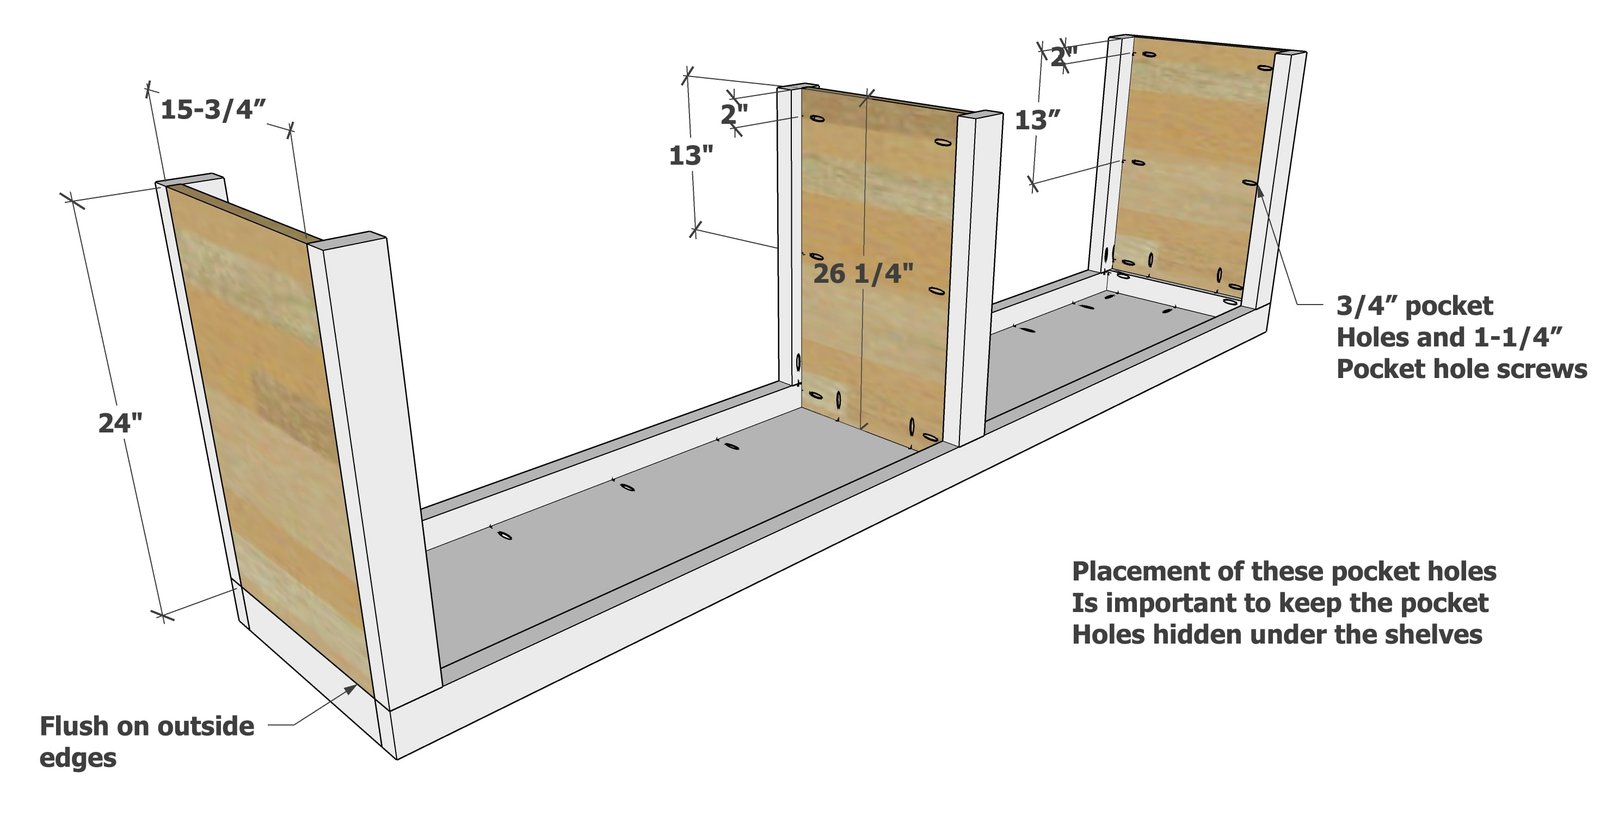
Set the 3/4" plywood inside the 2x4s and attach with pocket hole screws.
The center panel needs to be perfectly centered on the desktop. IMPORTANT: The pocket holes in the plywood panels are carefully placed so they are hidden under the shelves.
Step 5
Attach the 1x3 trim to the bottom.
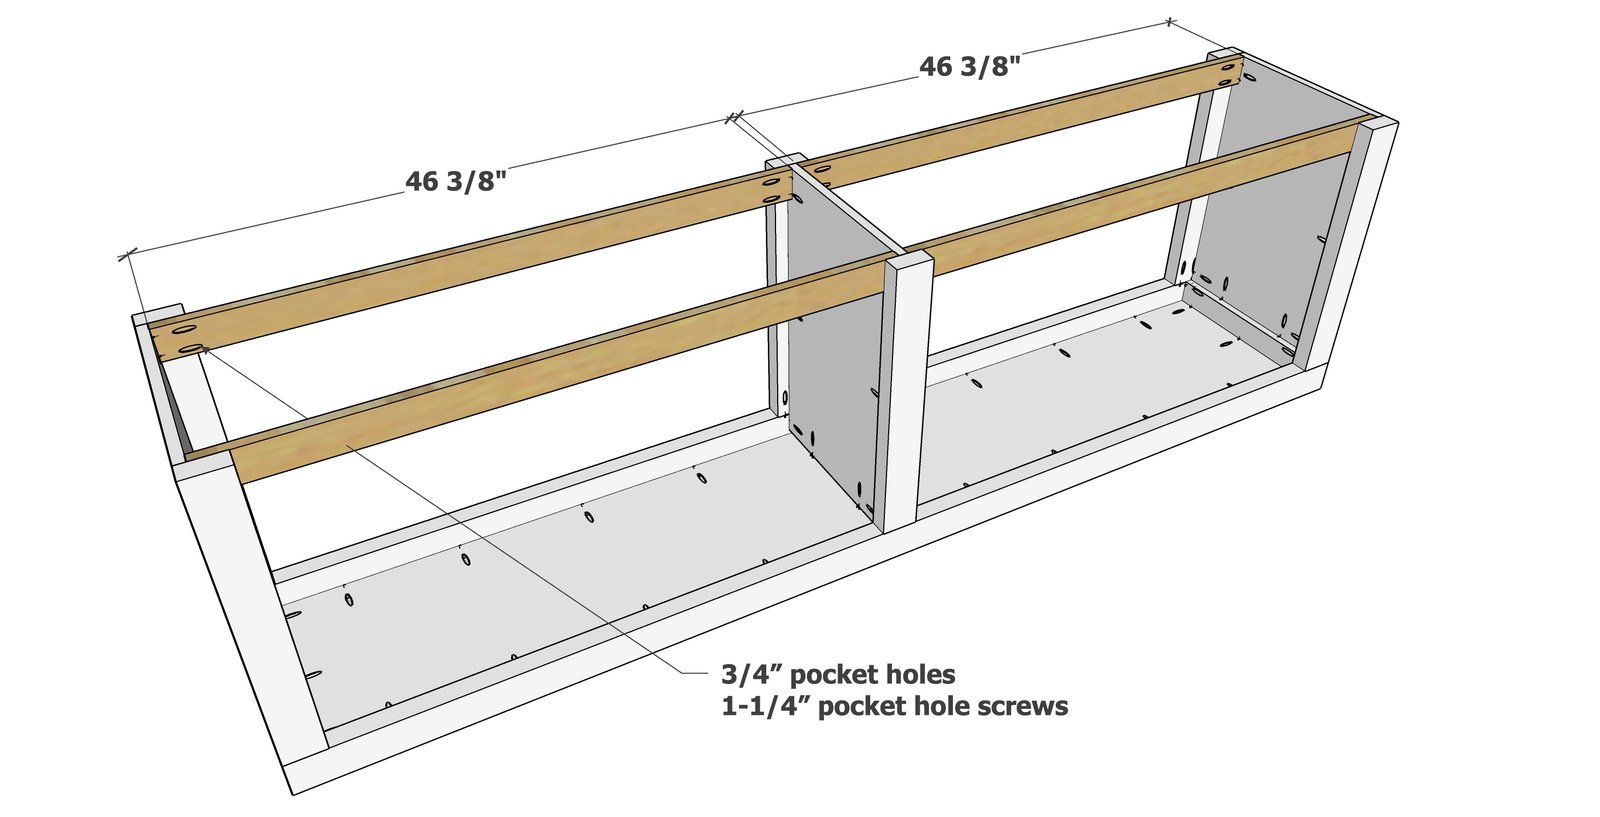
Step 6
Set the shelves in and attach.
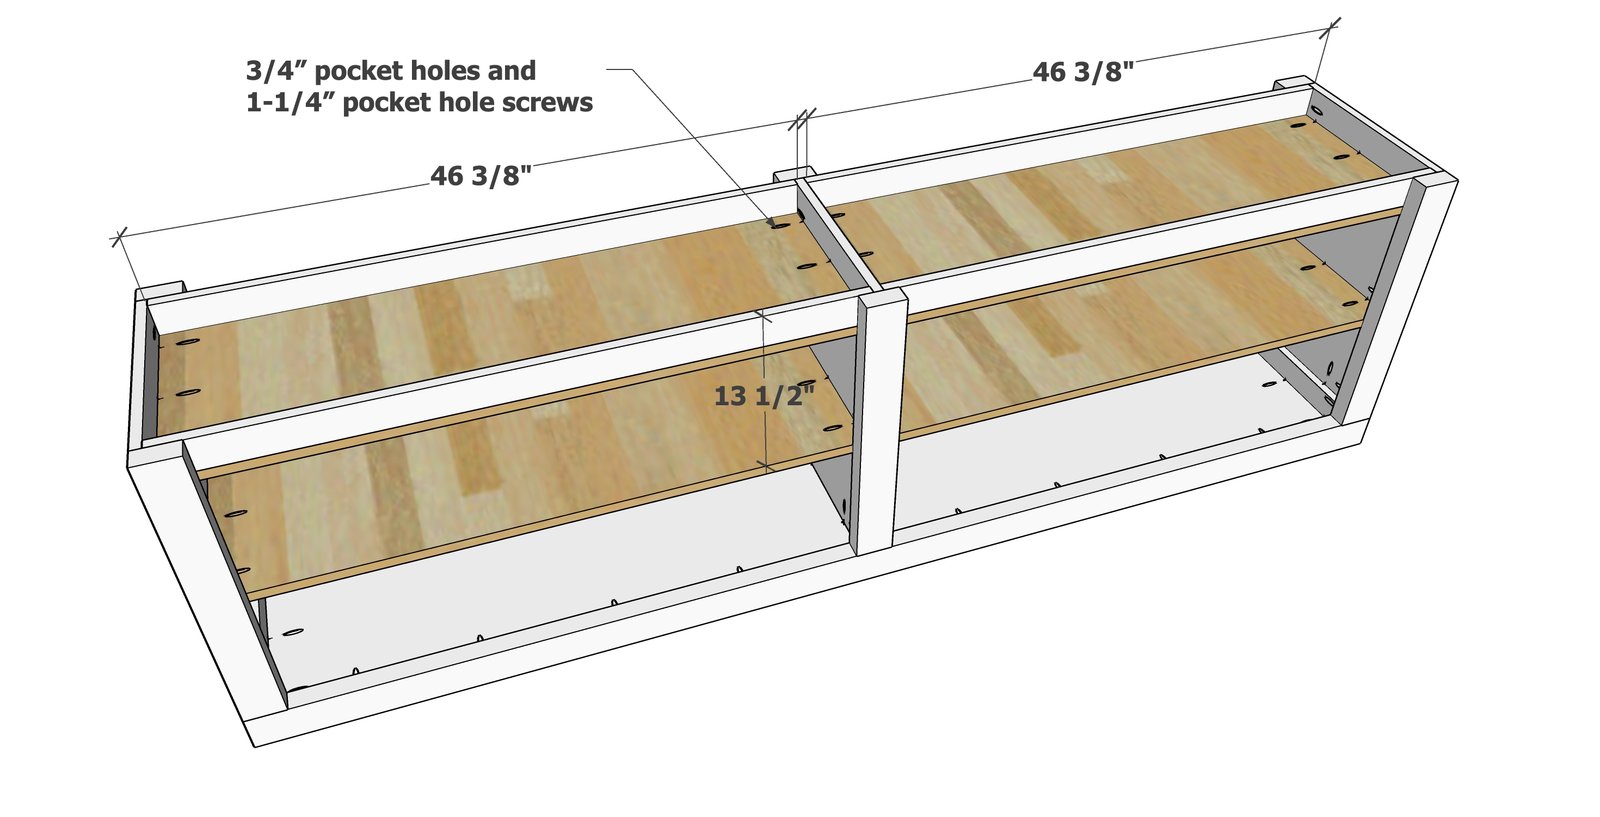
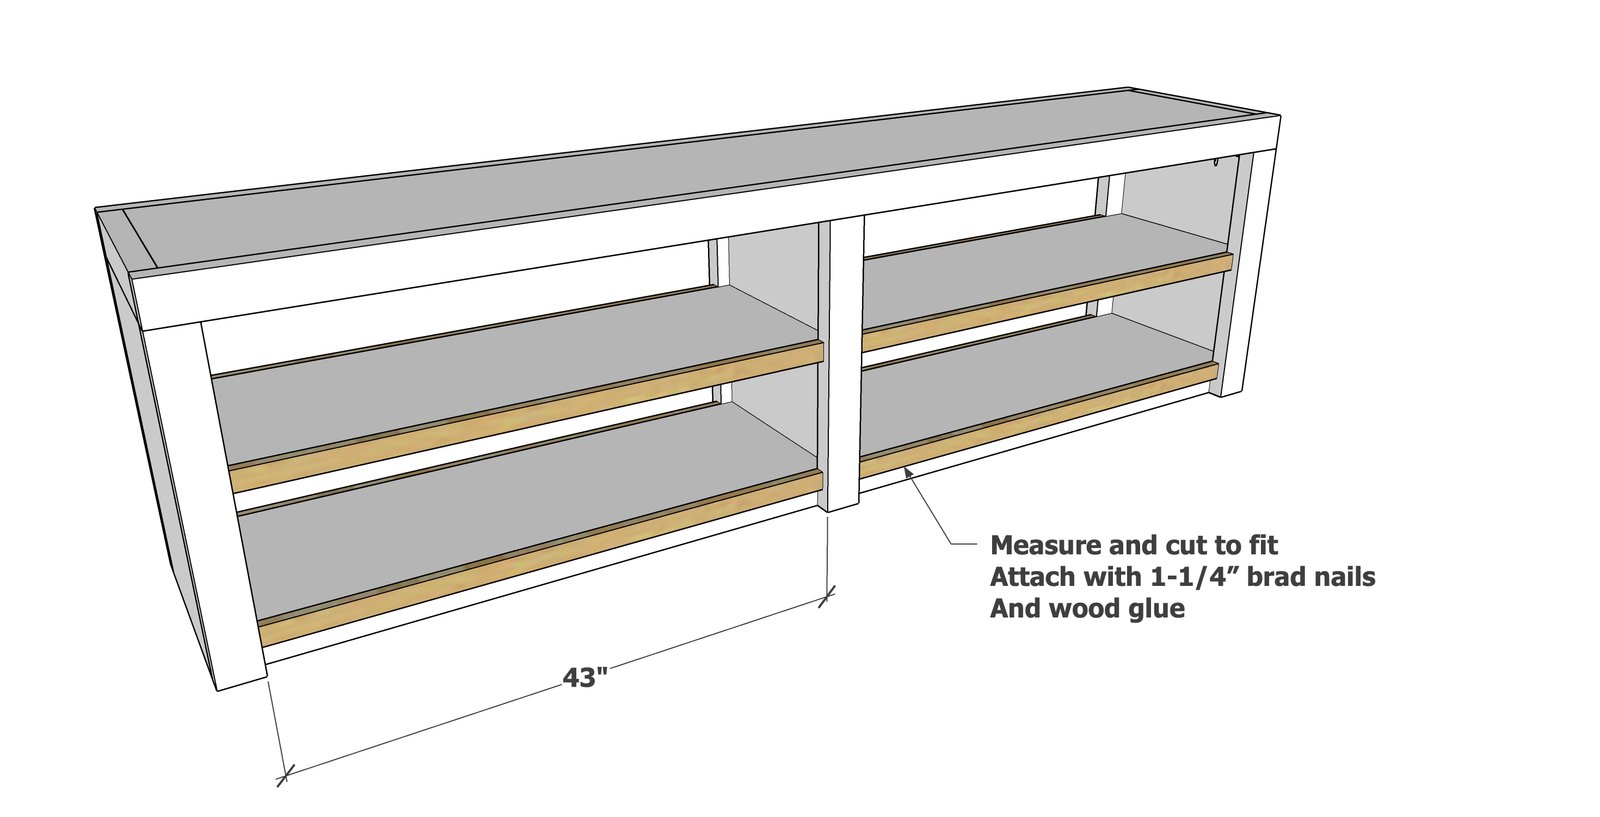
Trim the shelves with 1x2s and attach with glue and 1-1/4" brad nails.
This completes the bookshelf portion.
Step 8
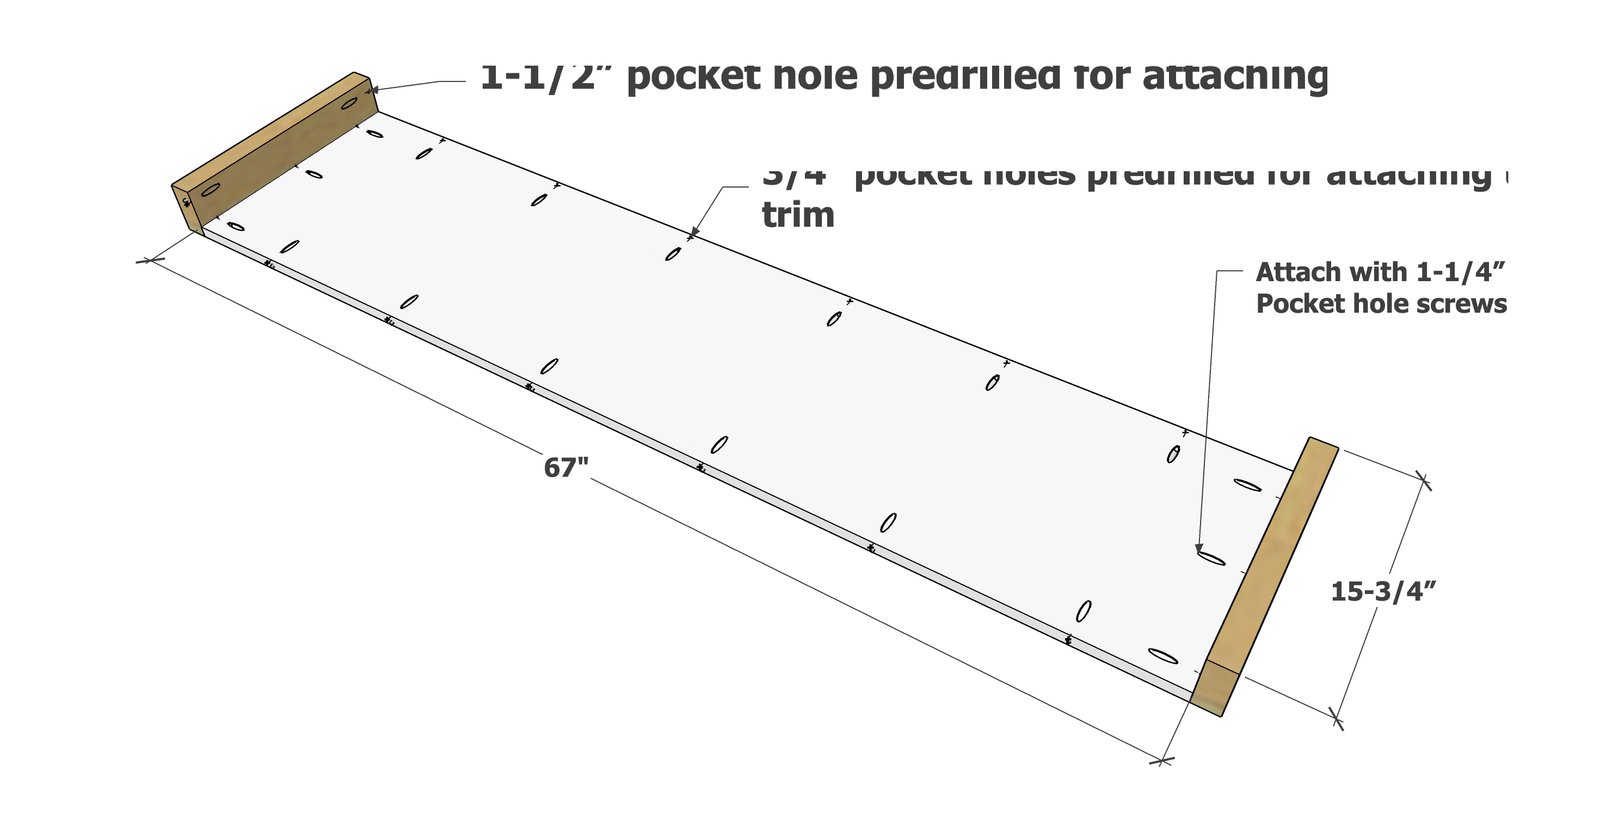
Repeat steps to build the desk tabletop.
Step 9
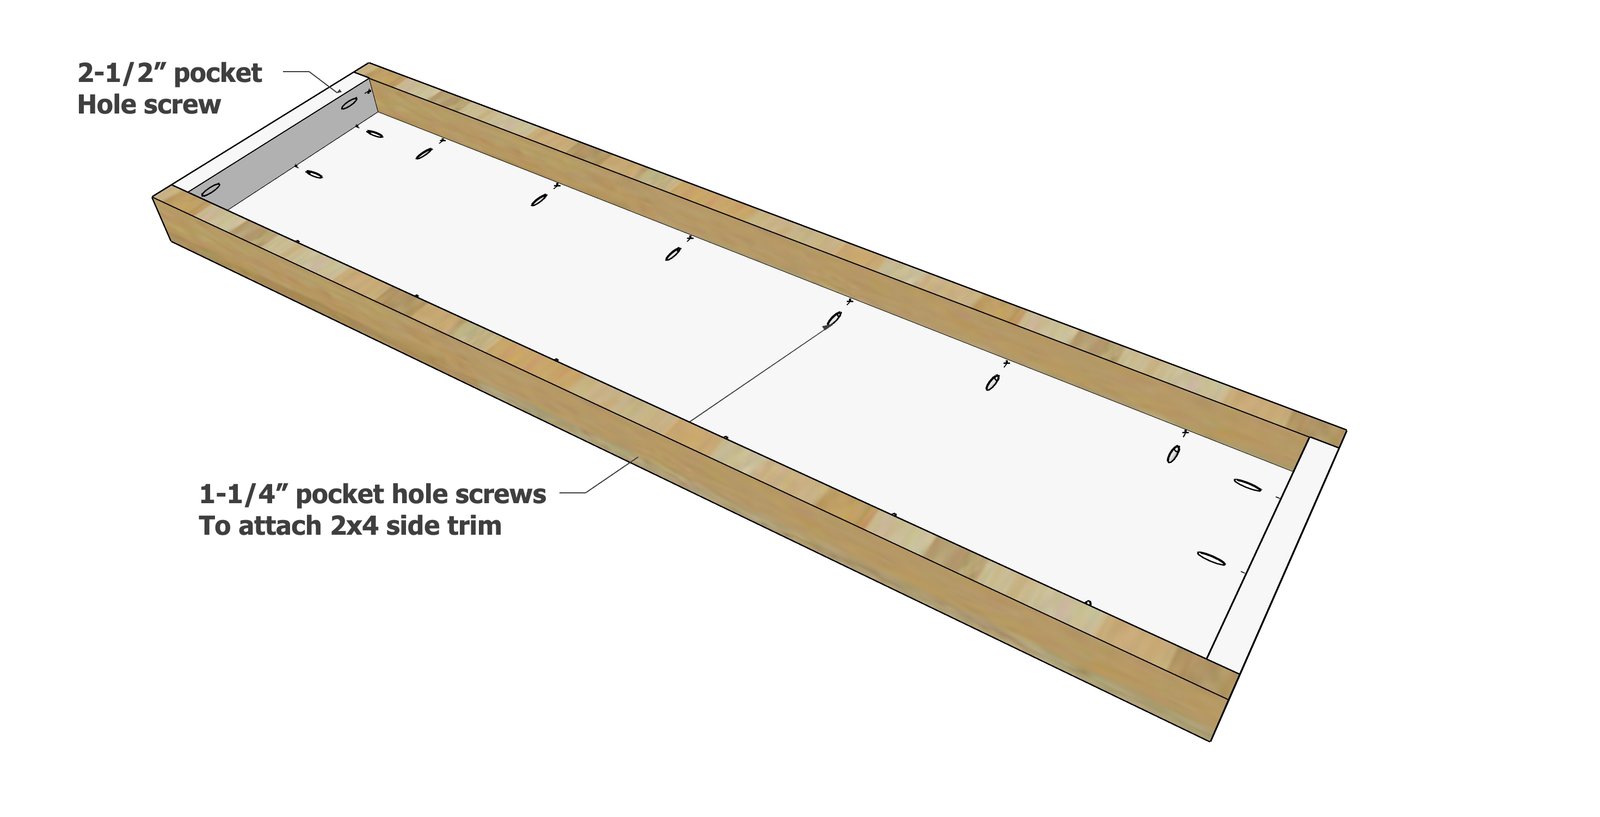
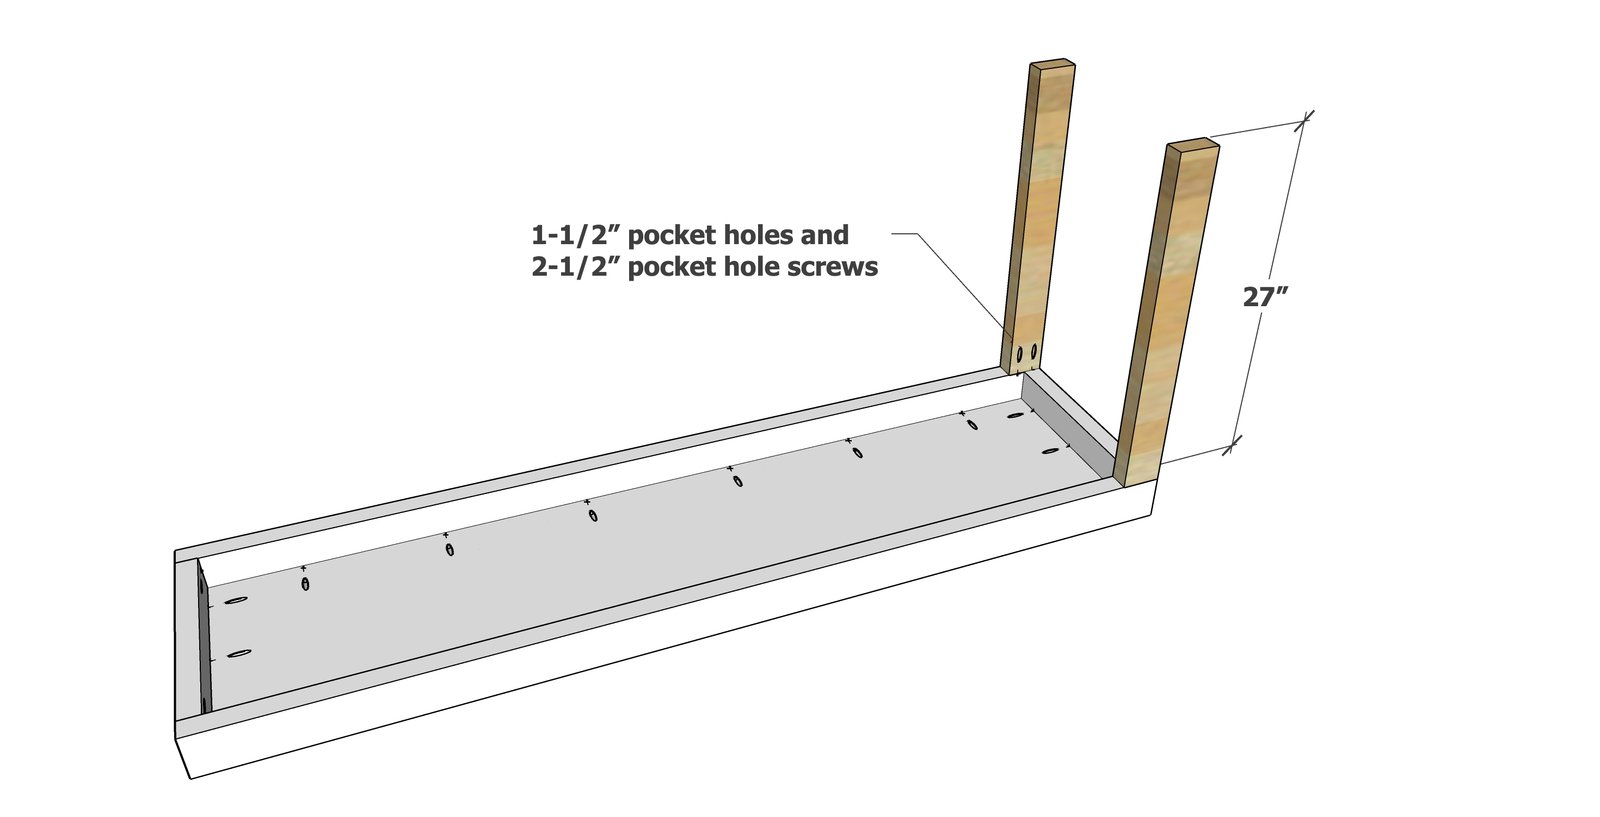
Add legs to one side of the desk tabletop.
NOTE: The legs need to be the same height as the bookshelf. Measure the bookshelf overall height and make sure it matches, or cut the legs to match.
Step 11
Add the plywood panel flush to the outside.
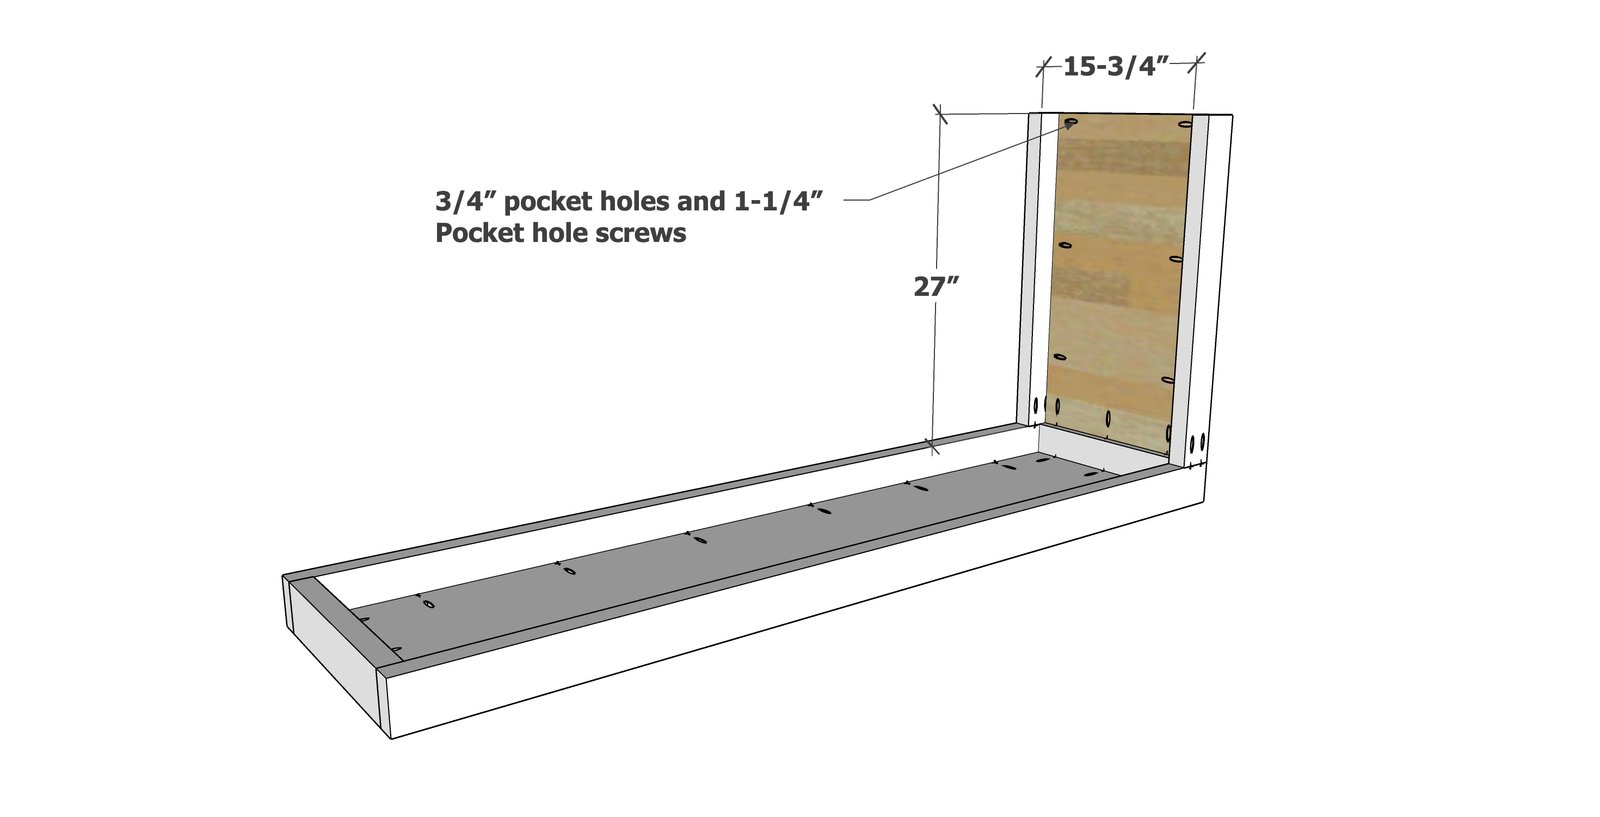
Step 12
Nail on 1x2 cleats on the inside.
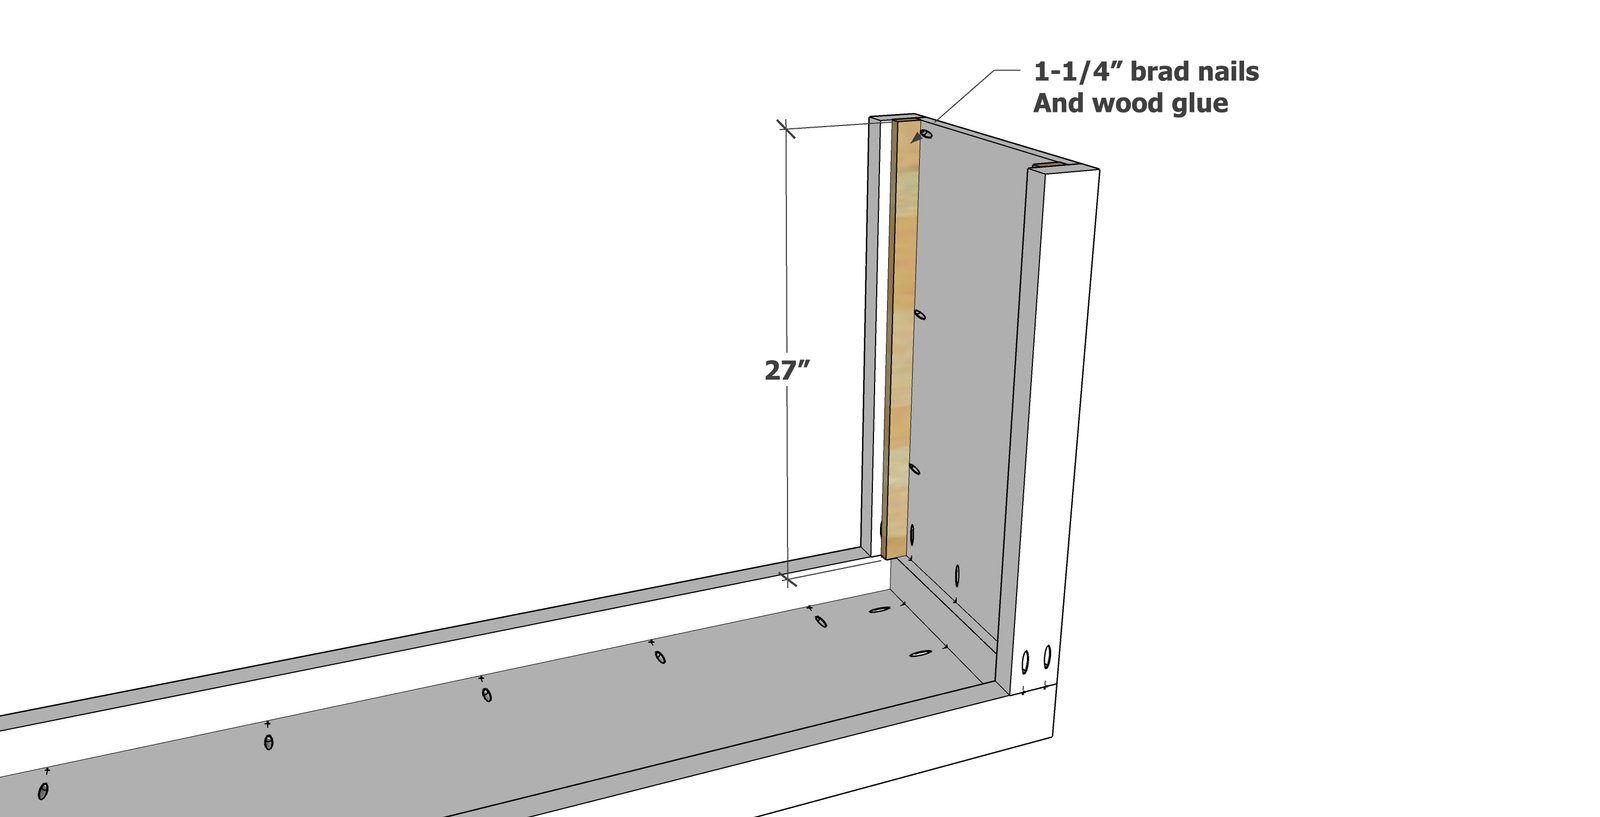
Step 13
Attach the remaining plywood panel to the inside of the desk leg with 1-1/4" brad nails and glue.
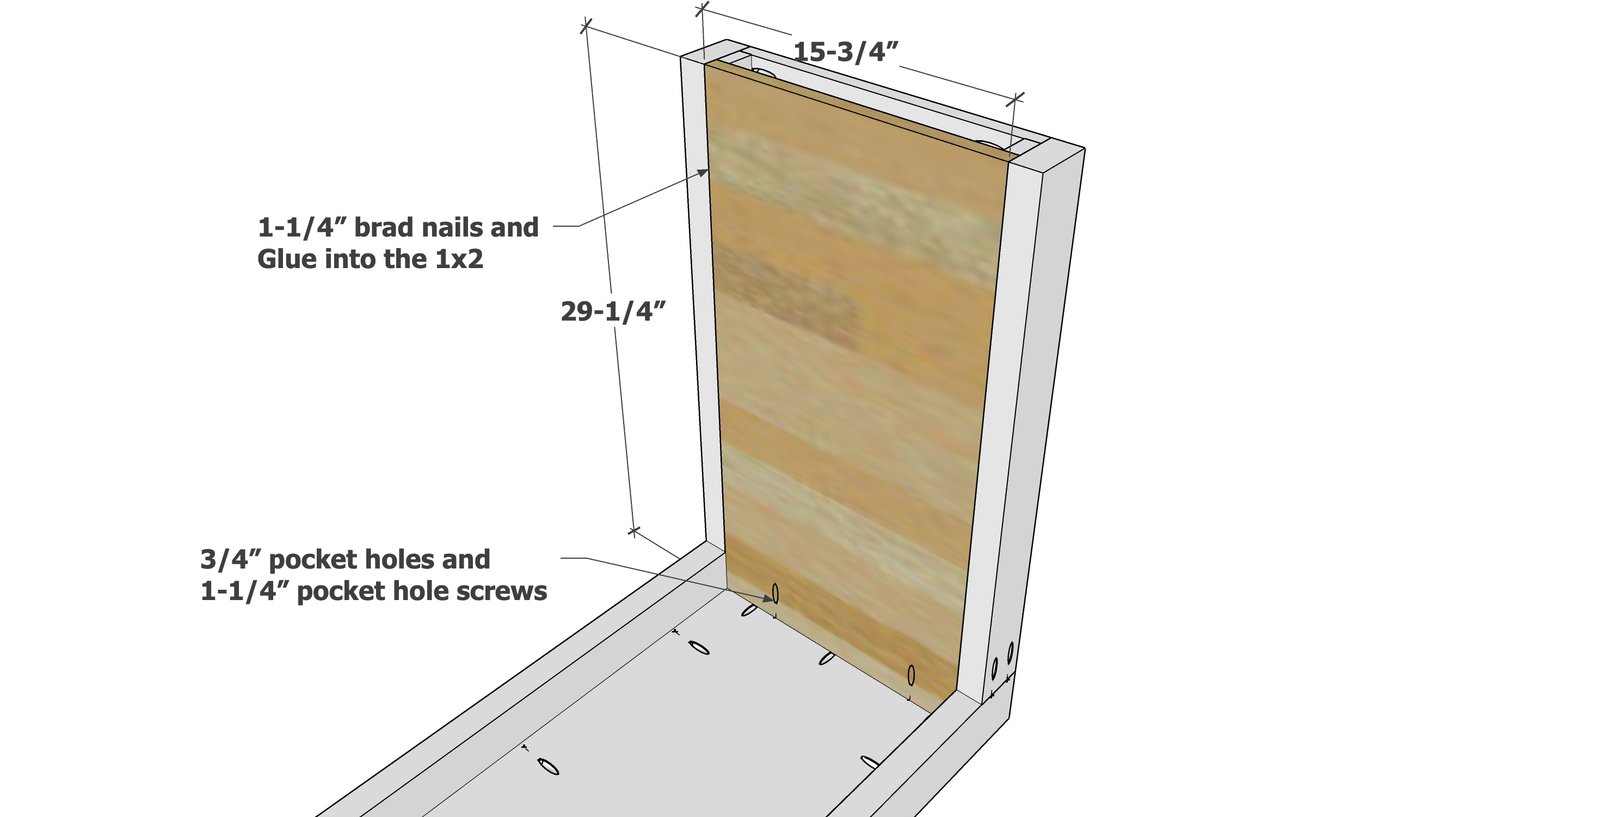
Finishing
Sand all surfaces, starting with a medium grit and finishing with fine. Wipe off the dust, fill any holes or gaps with wood filler, and sand smooth once dry. Apply primer if you're painting, then finish with your choice of paint or stain and seal with a durable clear topcoat. For outdoor projects, use exterior-rated primer, paint or stain, and sealer so the piece stands up to the weather.
Source (temporary): https://www.ana-white.com/woodworking-projects/bold-modern-l-shape-rotating-desk-ada