Bold Modern Nightstand
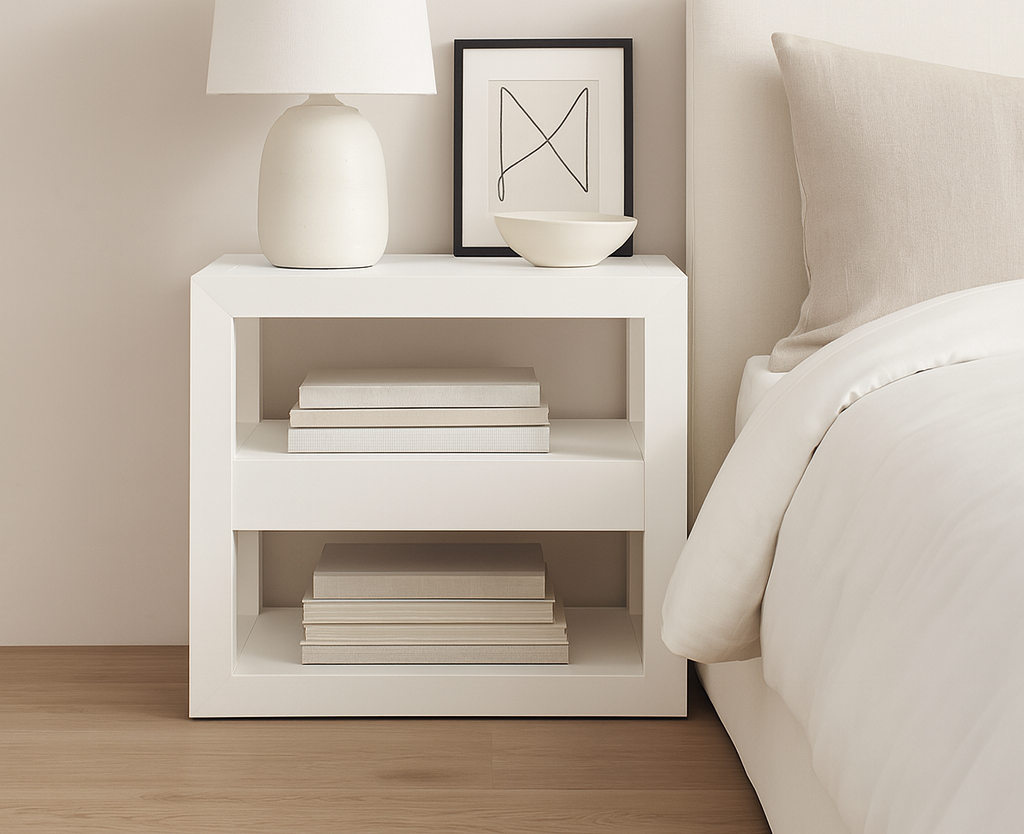
Modern Nightstand – Build this sleek, modern nightstand with. Designed with clean mitered corners and a bold drawer section, it’s the perfect mix of style and storage for any bedroom. include: • Optimized shopping list for less waste and trips to the hardware store • Detailed diagrams and cut lists • A quick build video to show you how this nightstand is built • Real step by step build photos • Brag photos from readers, so you can see how others made their This nightstand is part of our free collection of BOLD modern furniture plans, giving you everything you need to furnish your home with professional-quality pieces you can build yourself. 👉 Get the, video, and build inspiration today!
Specifications
| Project type | Nightstands |
|---|---|
| Room | Bedroom |
| Difficulty | Intermediate |
Dimensions
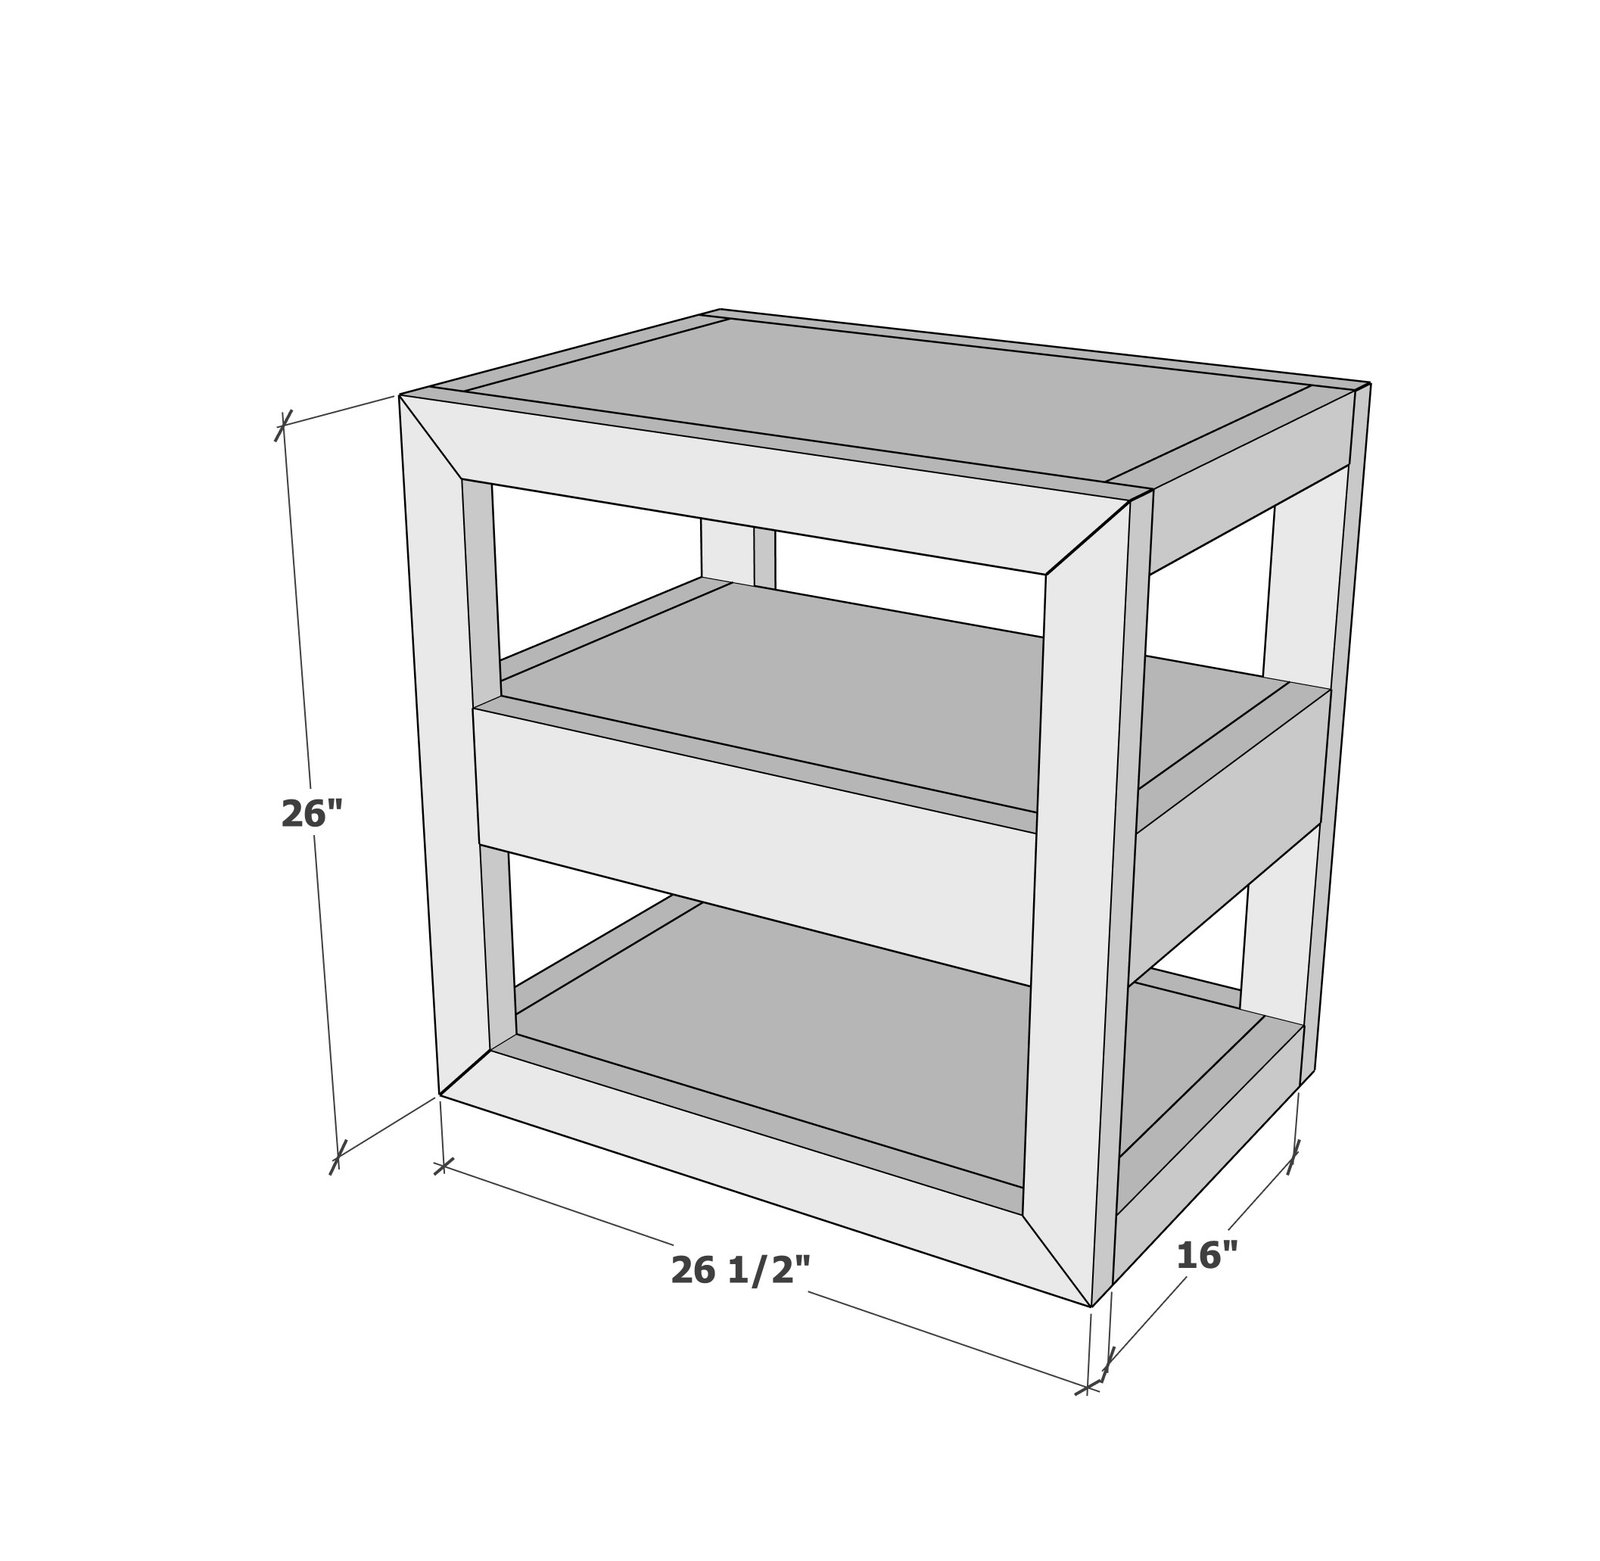
Use the size-specific shopping and cut lists below.
Shopping List
- 3 - 2x3 @ 8 feet long
- 1 - 16" wide project panel or 3/4" plywood @ 72" long
- 1 - 2x6 @ 8 feet long or stud length
- 1 - 1x3 @ 8 feet long
- 1/4" plywood 16" x 19-1/2"
- 3/4" pocket hole screws
- 1-1/4" pocket hole screws
- 2" brad nails
- 1-1/4" brad nails
- 3/4" brad nails or staples
- 2" self tapping star bit trim screws
- wood glue
- 16" euro drawer slide, white bottom corner mount
Cut List
- 4 - 2x3 @ 26" - both ends cut at 45 degrees, long point to long point measurement, ends NOT parallel - legs
- 4 - 2x3 @ 26-1/2" - both ends cut at 45 degrees, long point to long point measurement, ends NOT parallel - top and bottom frame
- 1 - 2x6 @ 21-1/2" - back frame center
- 3 - 16" wide project panel or plywood @ 23-1/2" - shelving tops
- 4 - 2x3 @ 16" - sides of top and bottom
- 2 - 2x6 @ 16" - sides of middle shelf
- 4 - 2x3 @ 4-1/2" - drawer blocking
- 2 - 1x3 @ 16" - drawer sides
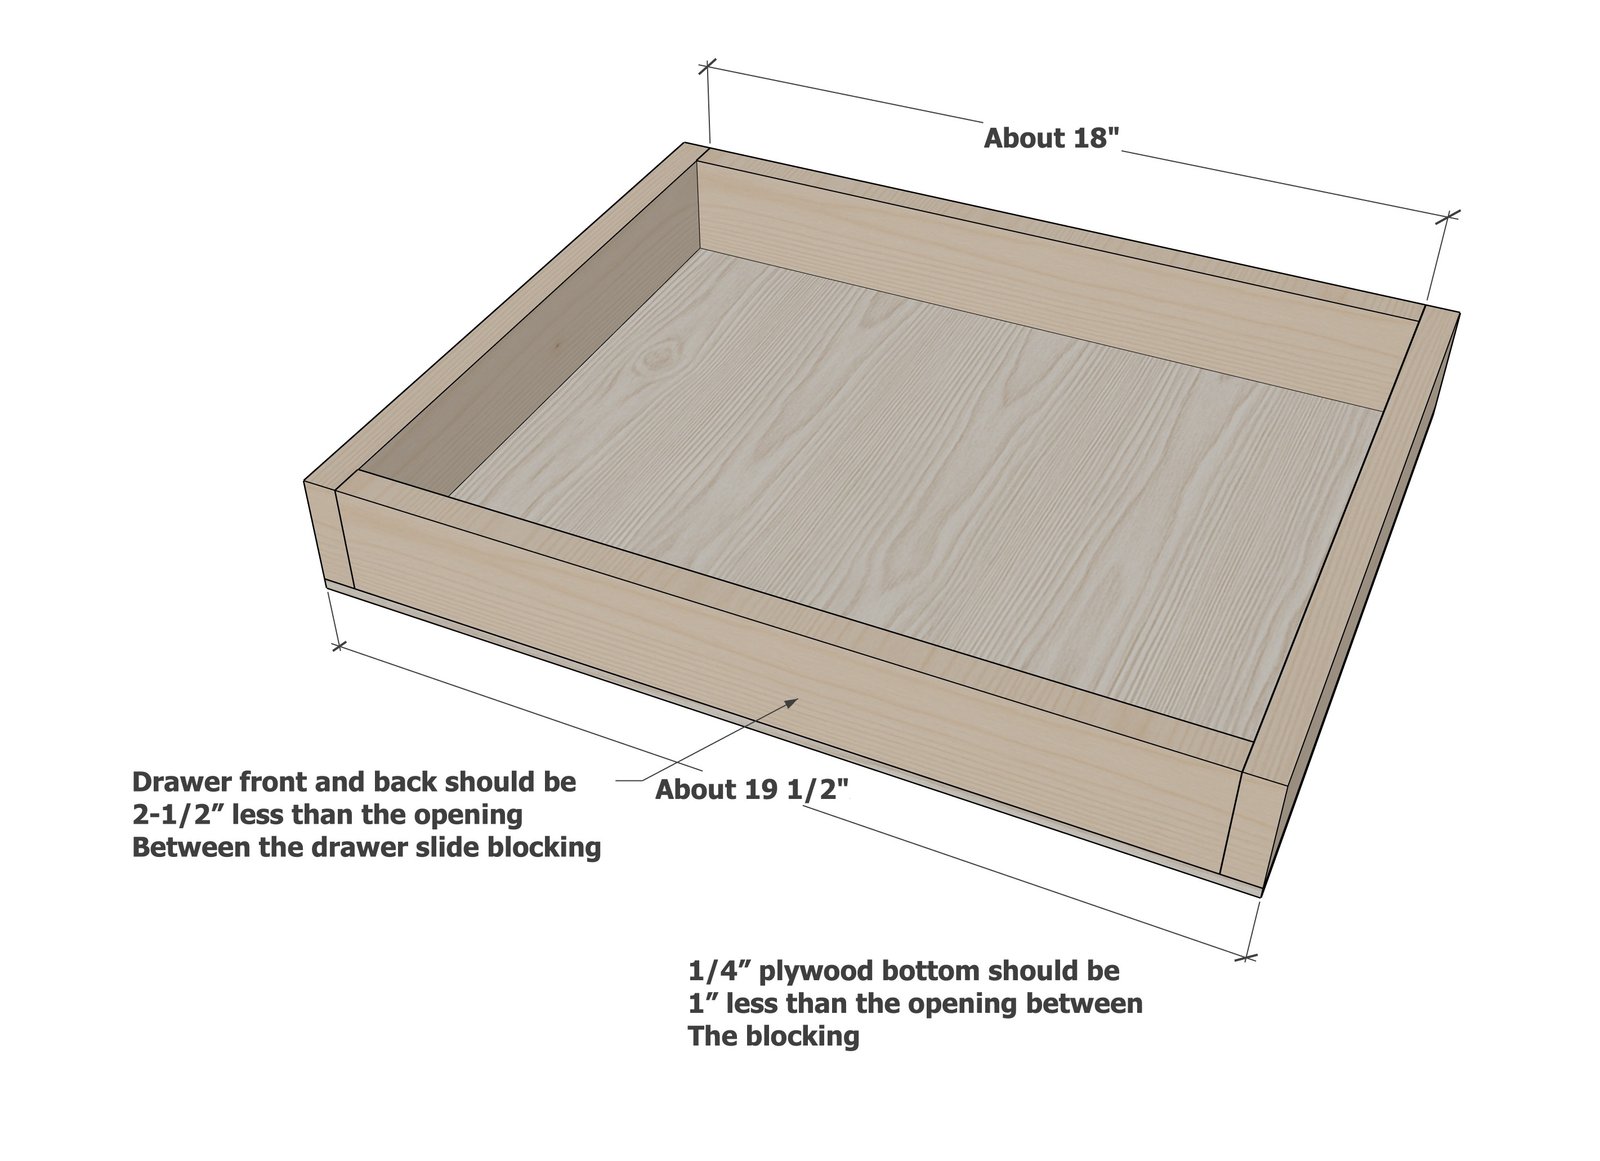
- 2 - 1x3 @ 18" - drawer front and back, needs to be measured and cut to fit, 2-1/2" less than opening width
- 1 - 1/4" plywood @ 16" x 19-1/2" - drawer bottom, the 19" measurement should be measured and cut to fit, 1" less than the opening
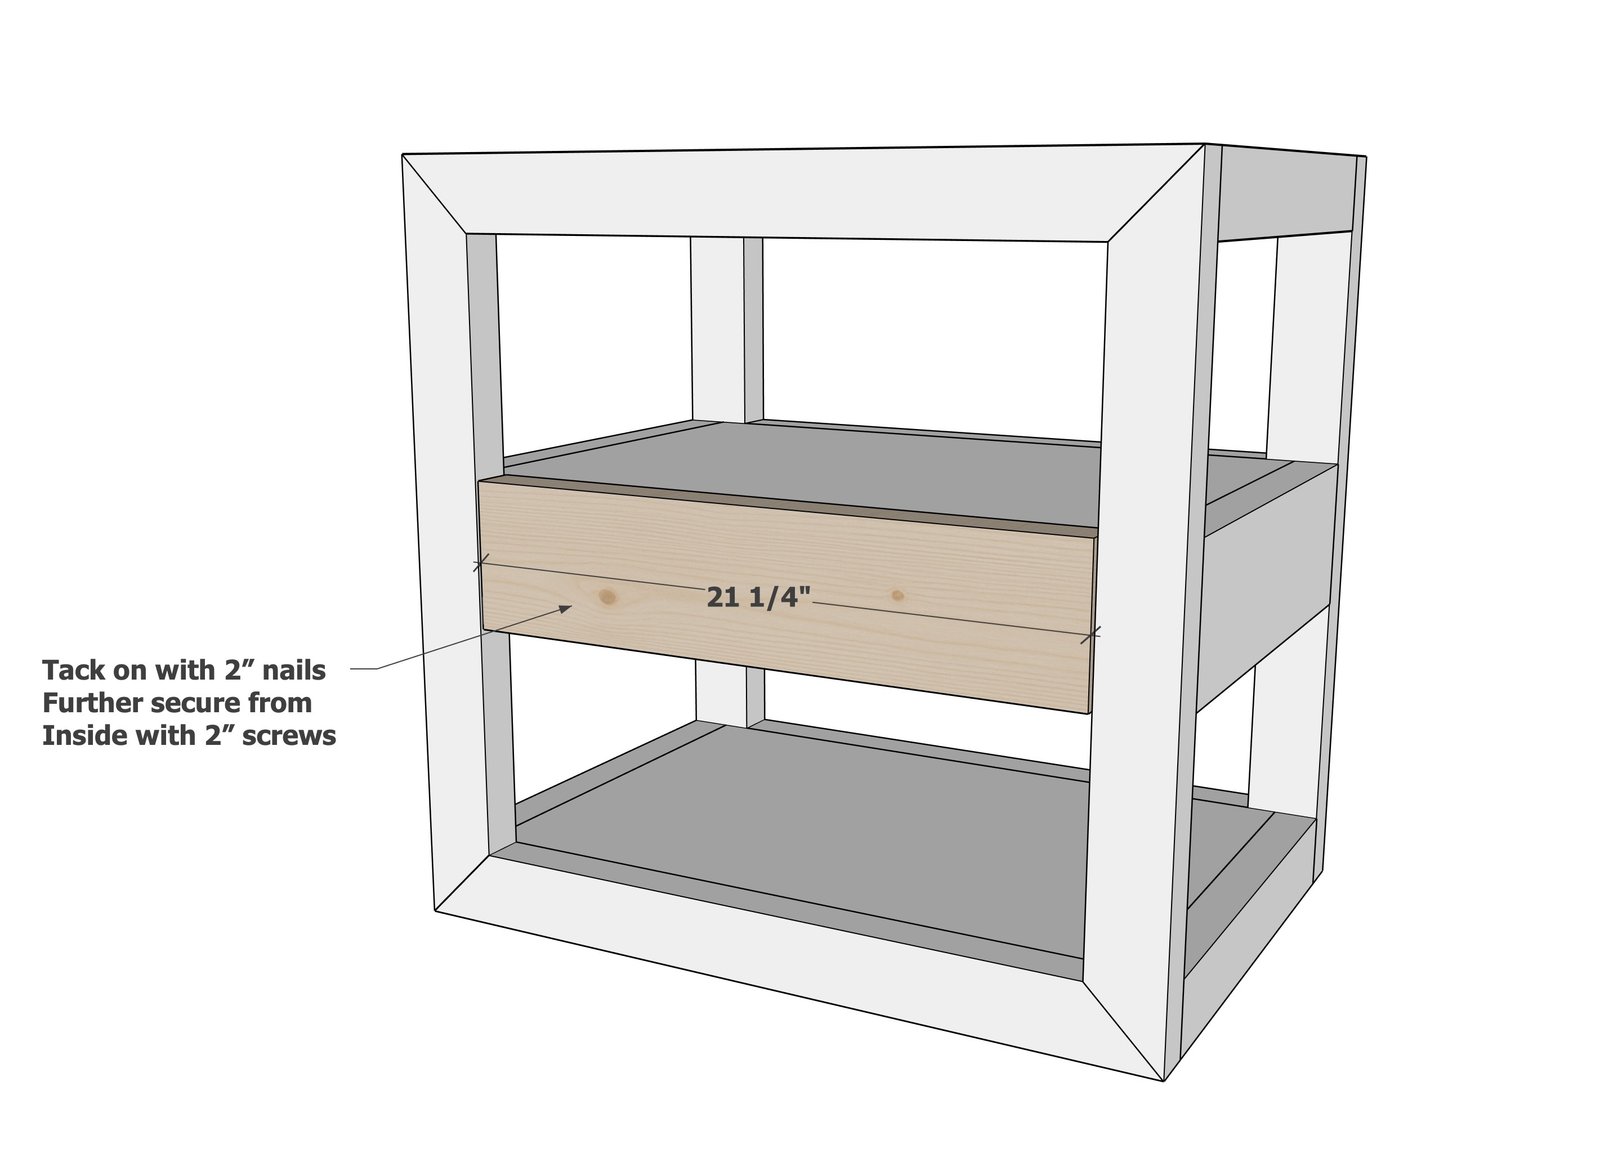
- 1 - 2x6 @ 21-3/8" - drawer face
Tools
- measuring tape
- square
- pencil
- safety glasses
- kreg-jig
- drill
- circular saw
- compound miter saw
- table saw
- nailer
- sander
Step-by-step Instructions
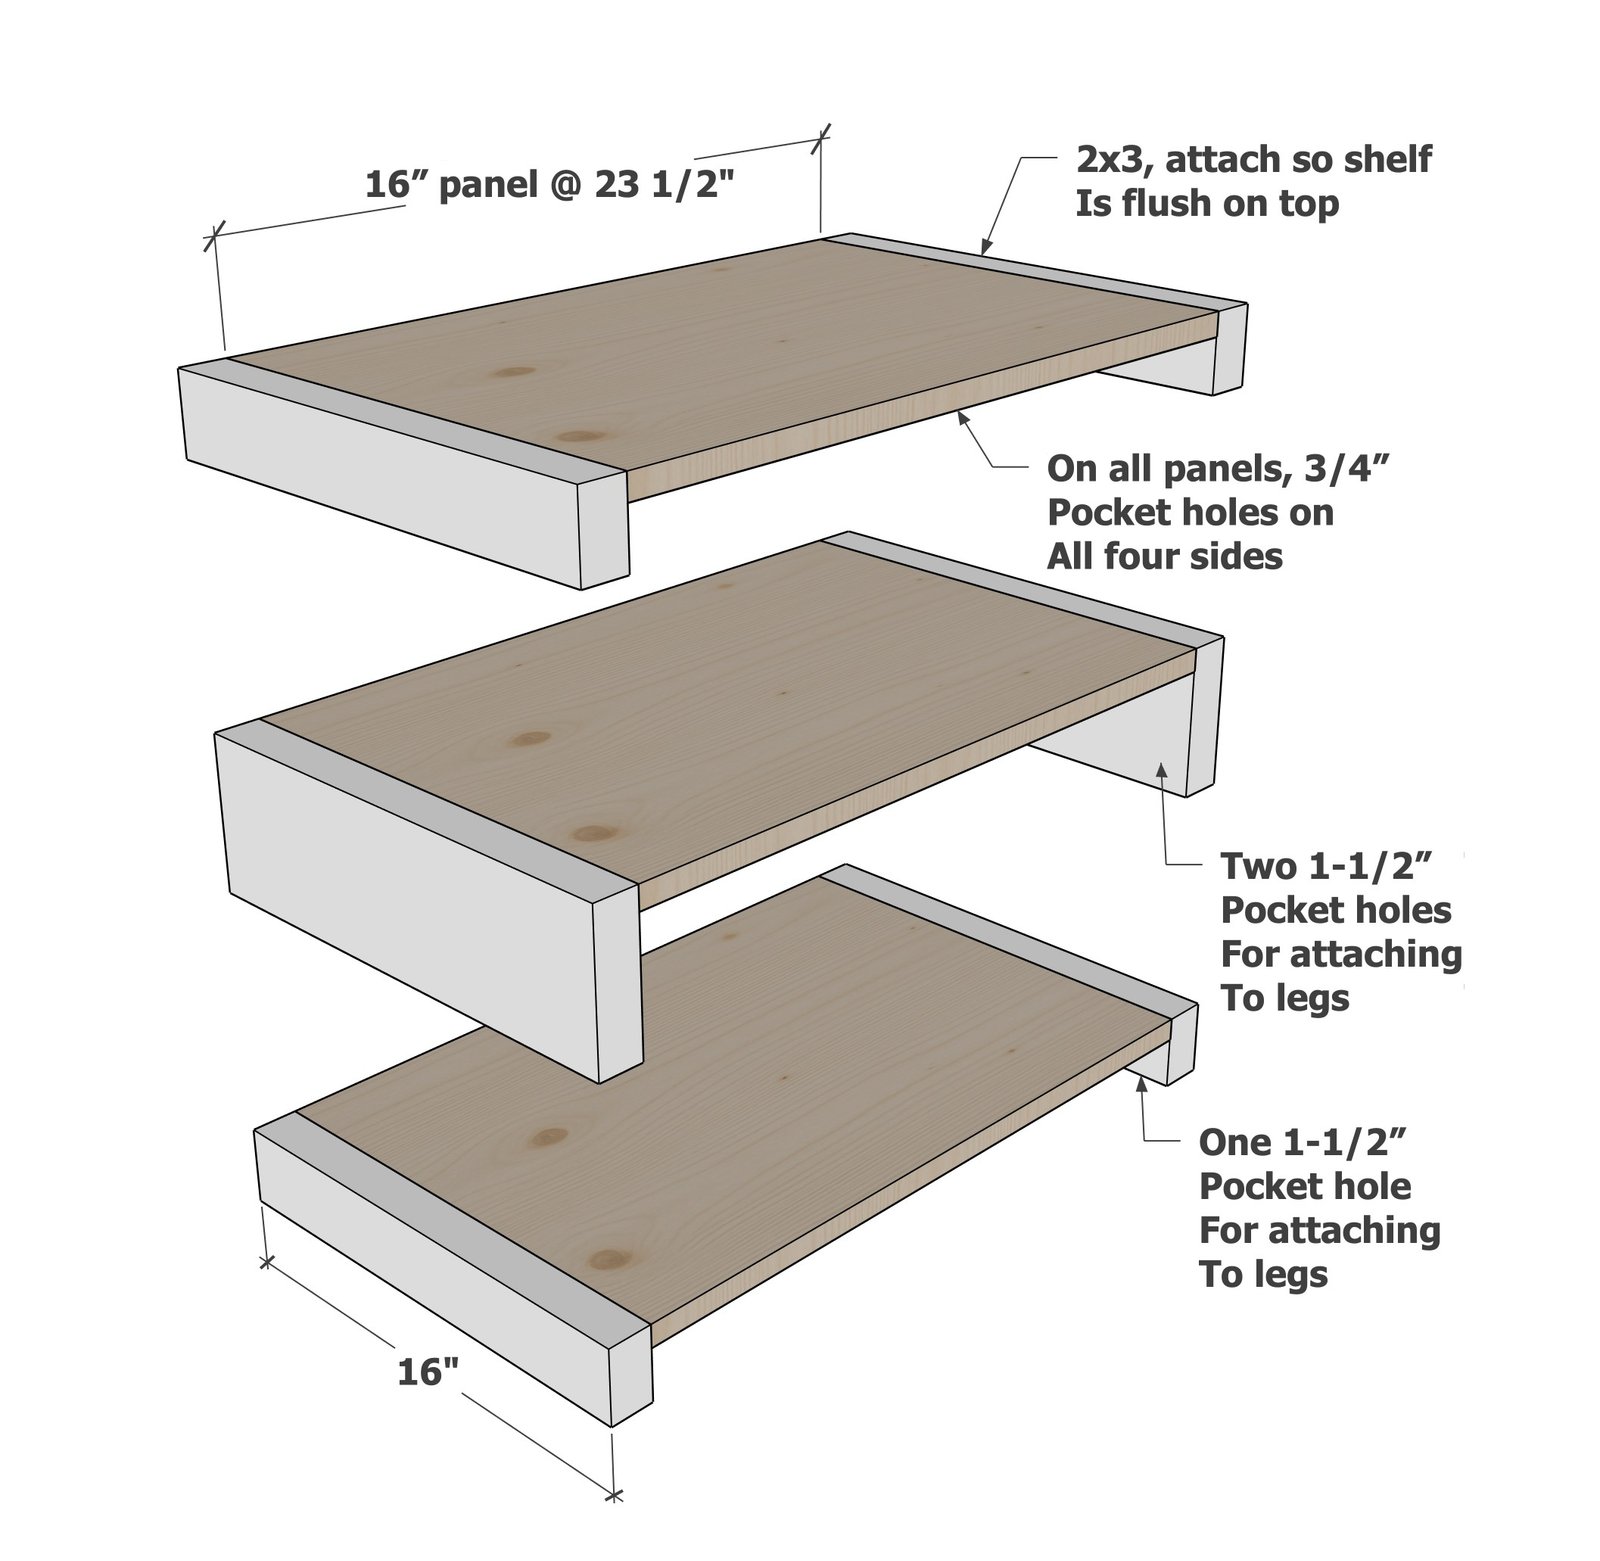
On all of the plywood panels, drill three pocket holes on the 3/4" setting, on all four sides.
On the 2x3 and 2x6 side trim pieces, drill 1-1/2" pocket holes, but place so they won't be covered with the 3/4" plywood shelving pieces (toward the bottom of the 2x boards). Attach the plywood panels to the side trim, two with 2x3 trim, and one with 2x6 trim, as shown in the diagram. Use 1-1/4" pocket hole screws. Keep top edges flush.
Step 2
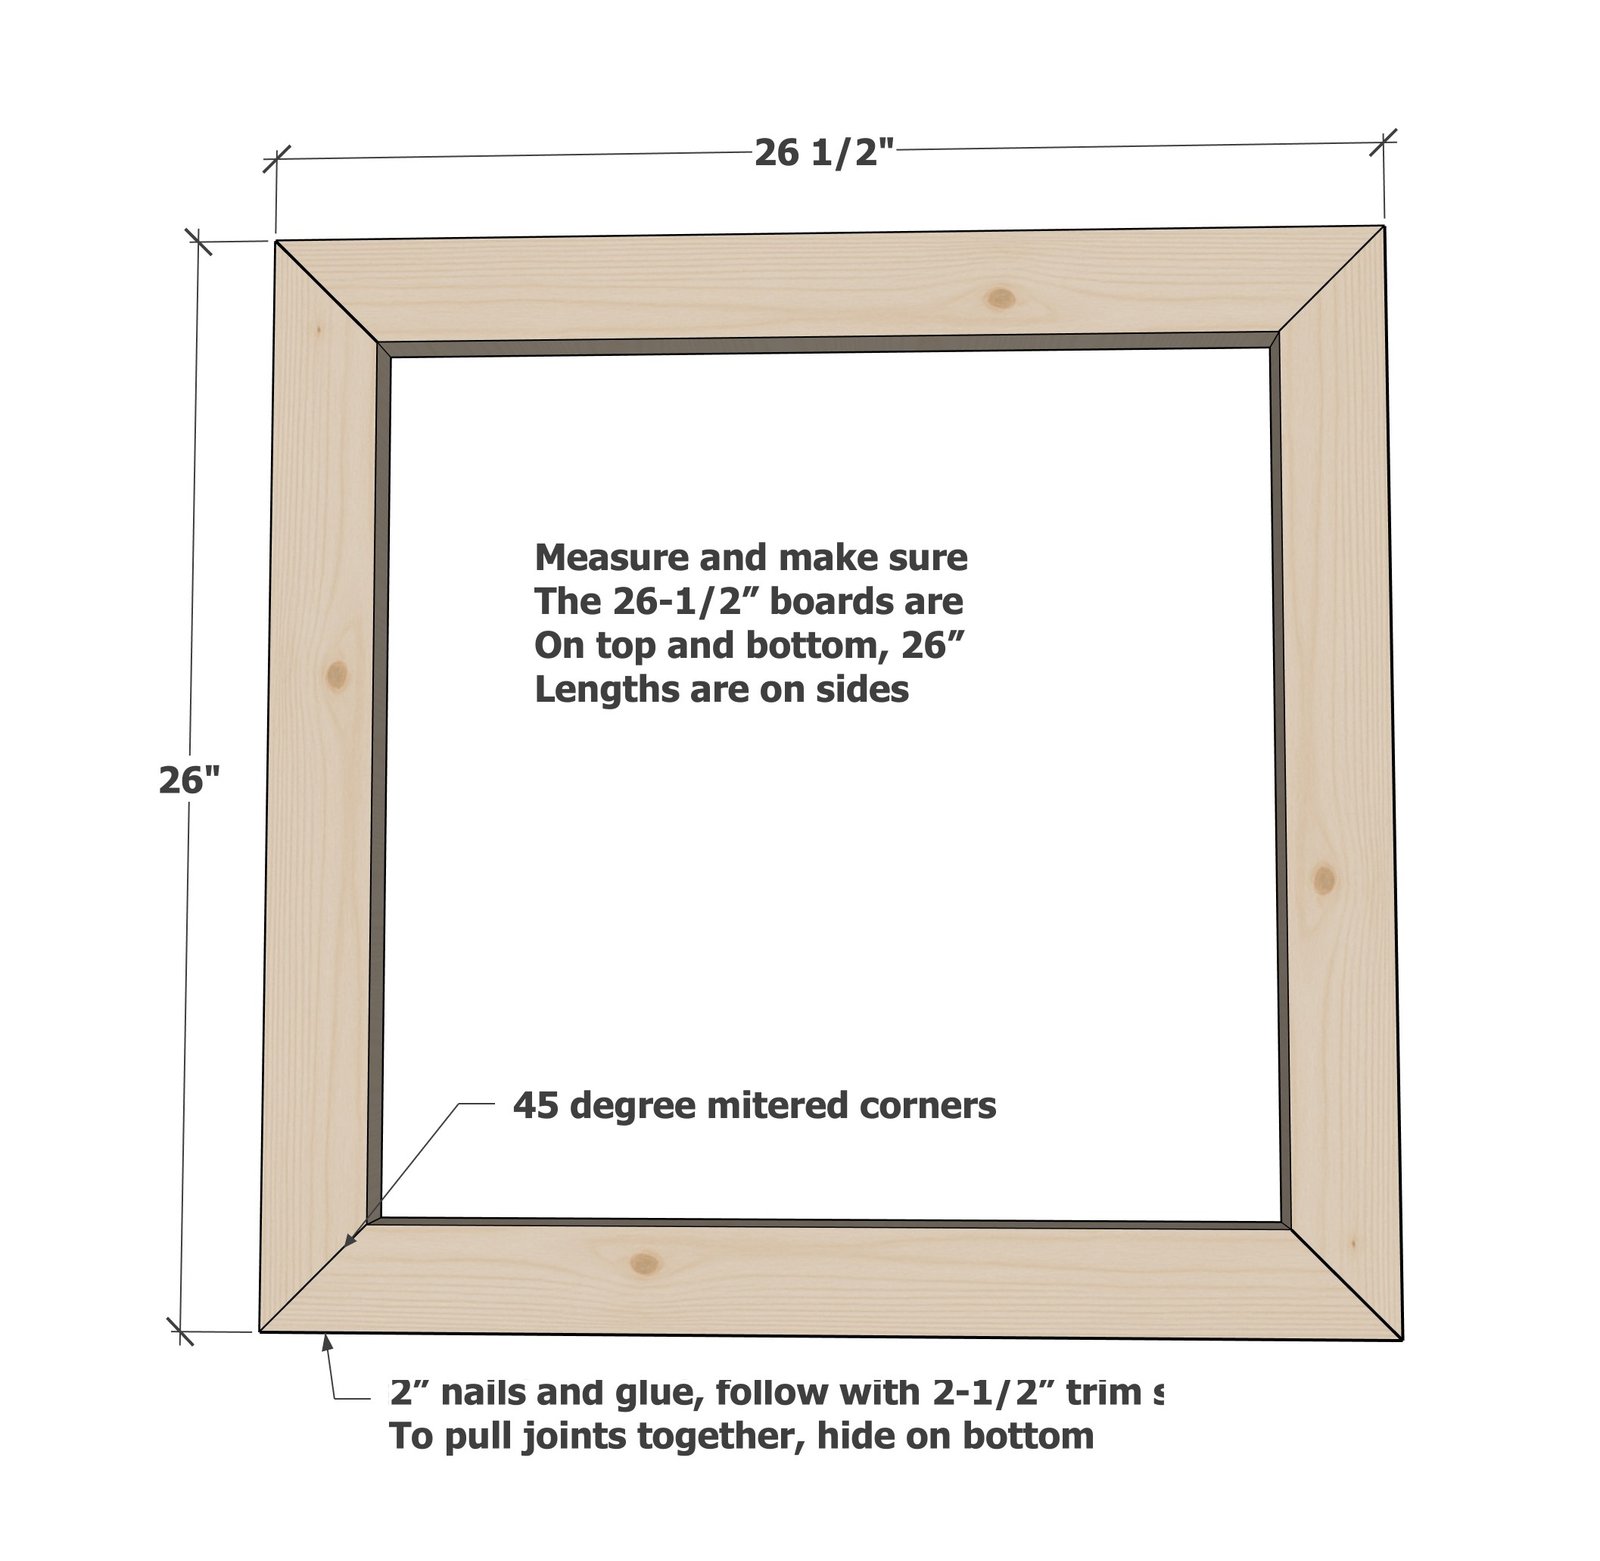
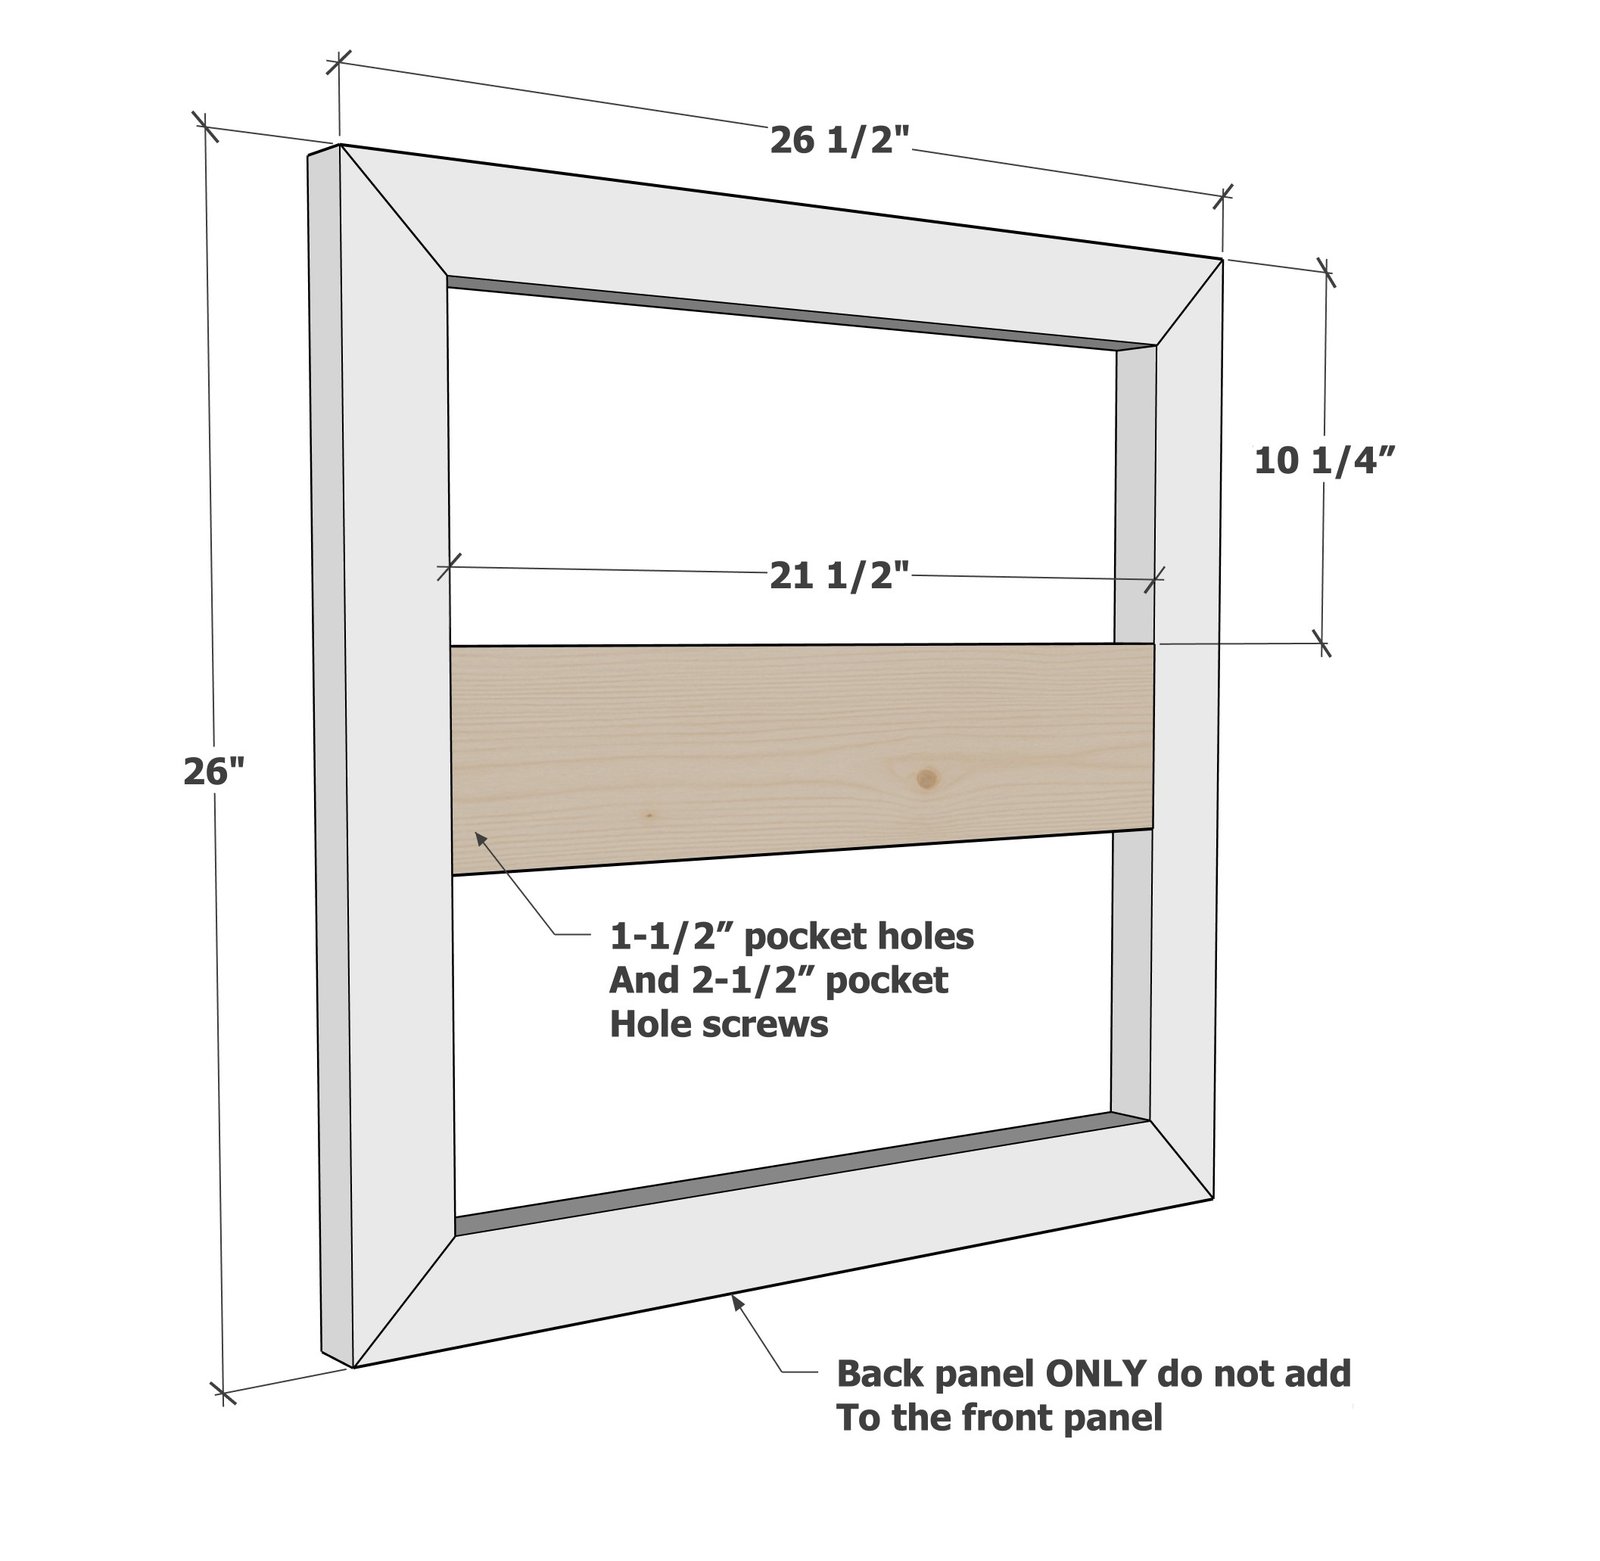
Build two face frames as shown with 45 degree mitered corners. I couldn't use pocket holes here because they would have been visible, so I first tacked in place with 2" brad nails, and then further secured with 2-1/2" trim screws.
Step 3
For the back, I added the 2x6 back piece. Use the less attractive face frame for the back, and add the 2x6 with 1-1/2" pocket holes and 2-1/2' pocket hole screws.
Step 4
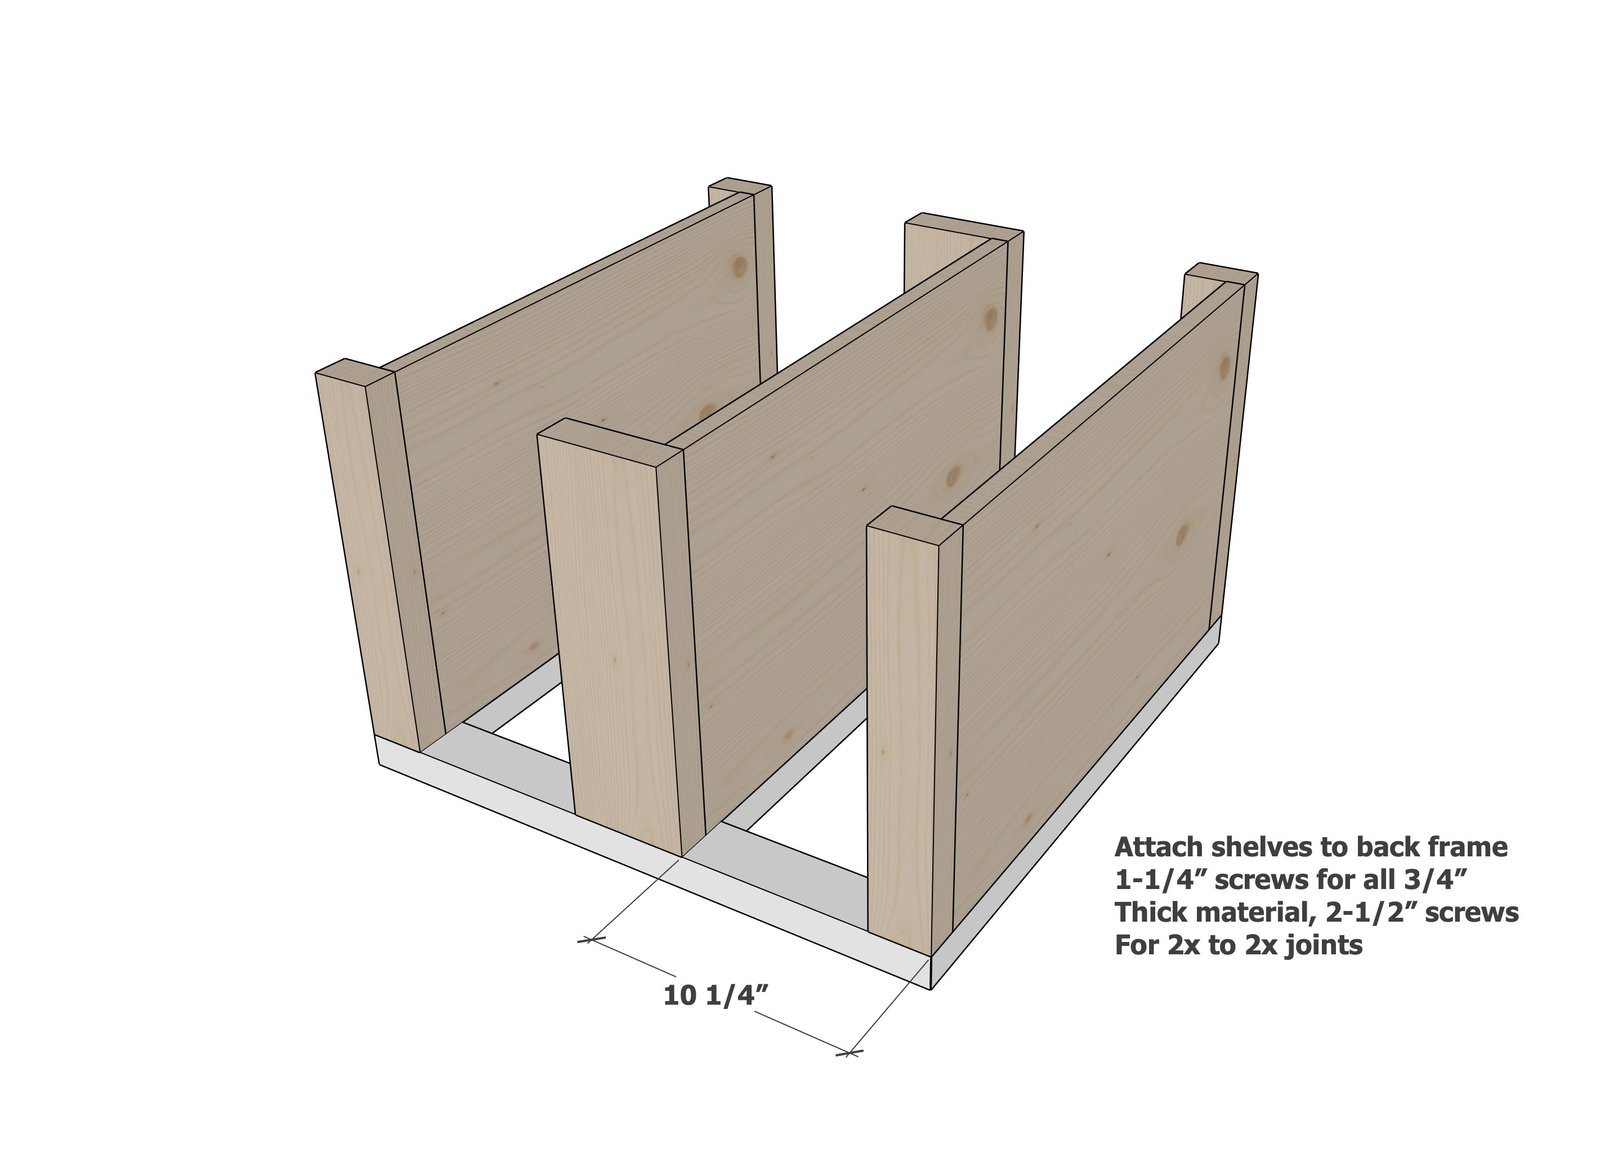
Then attach the shelves to the back, using 1-1/4" pocket holes screws for the 3/4" pocket holes, and 2-1/2" pocket hole screws for the 1-1/2" pocket holes.
Step 5
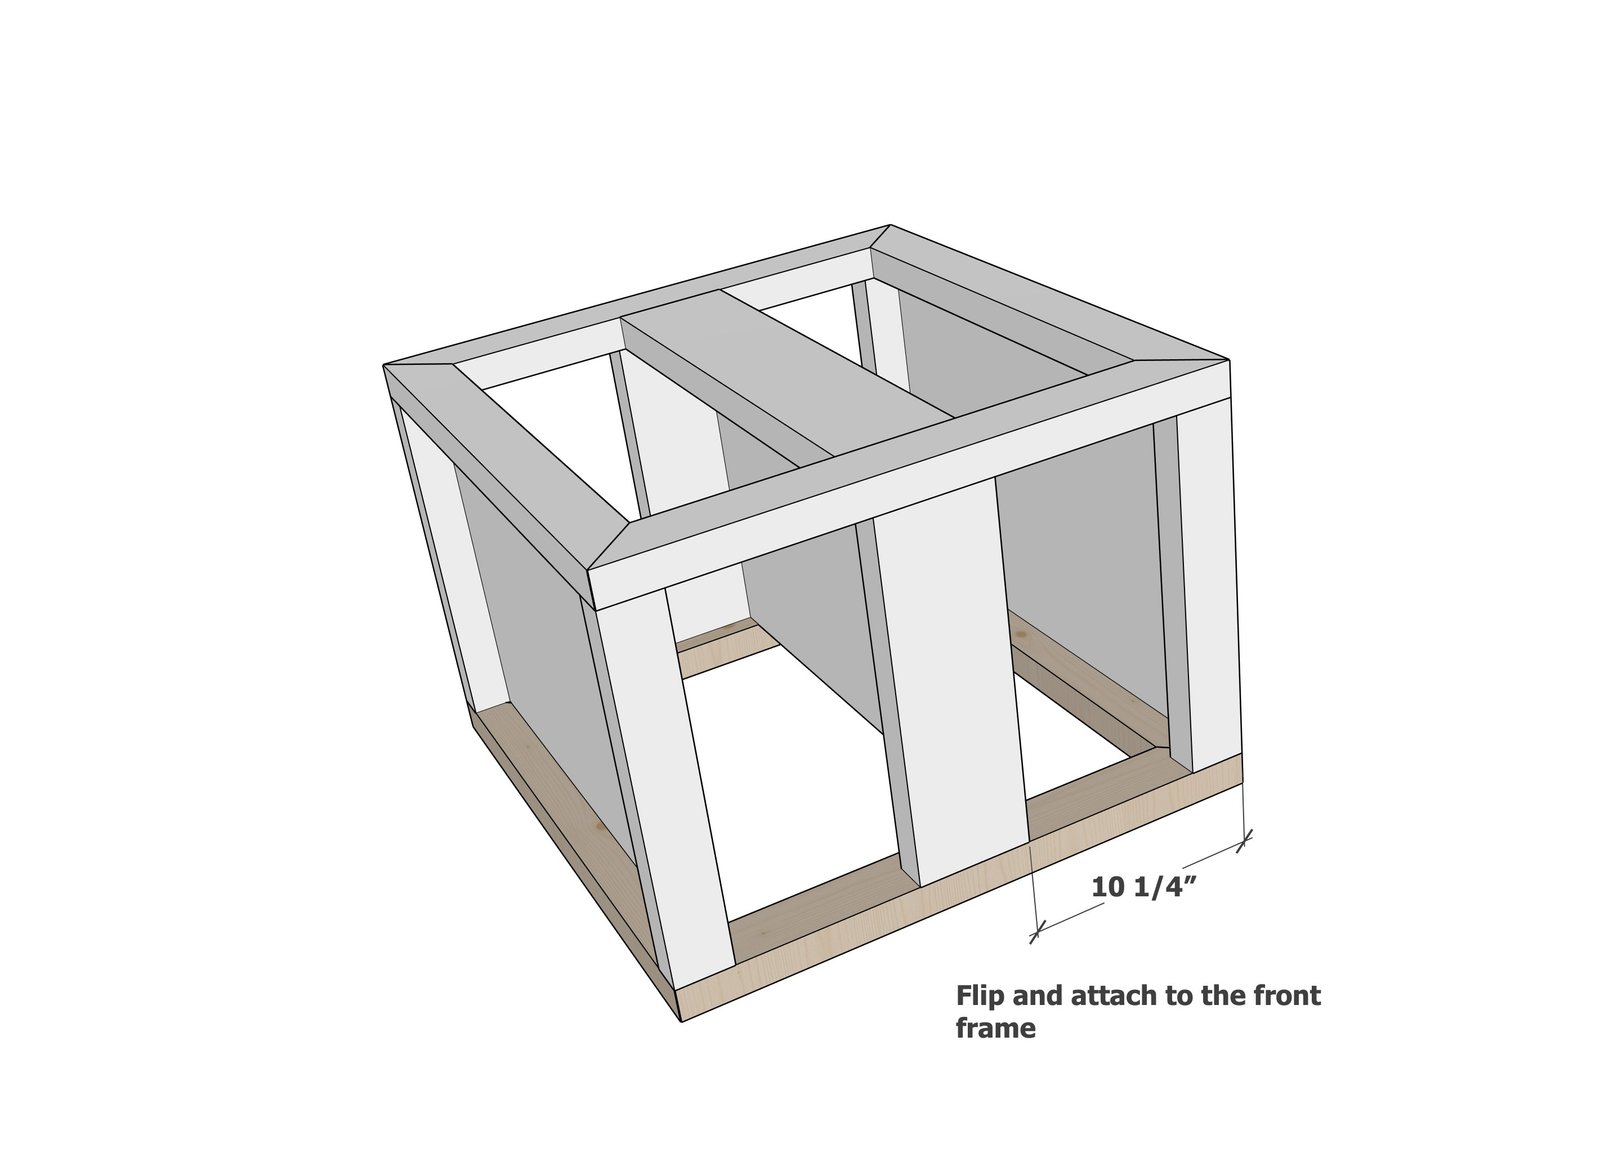
Repeat for the front face frame.
Step 6
Block out the insides for the drawer slides with screw 2x3 material as shown, I use nailed in place with glue with 2" brad nails.
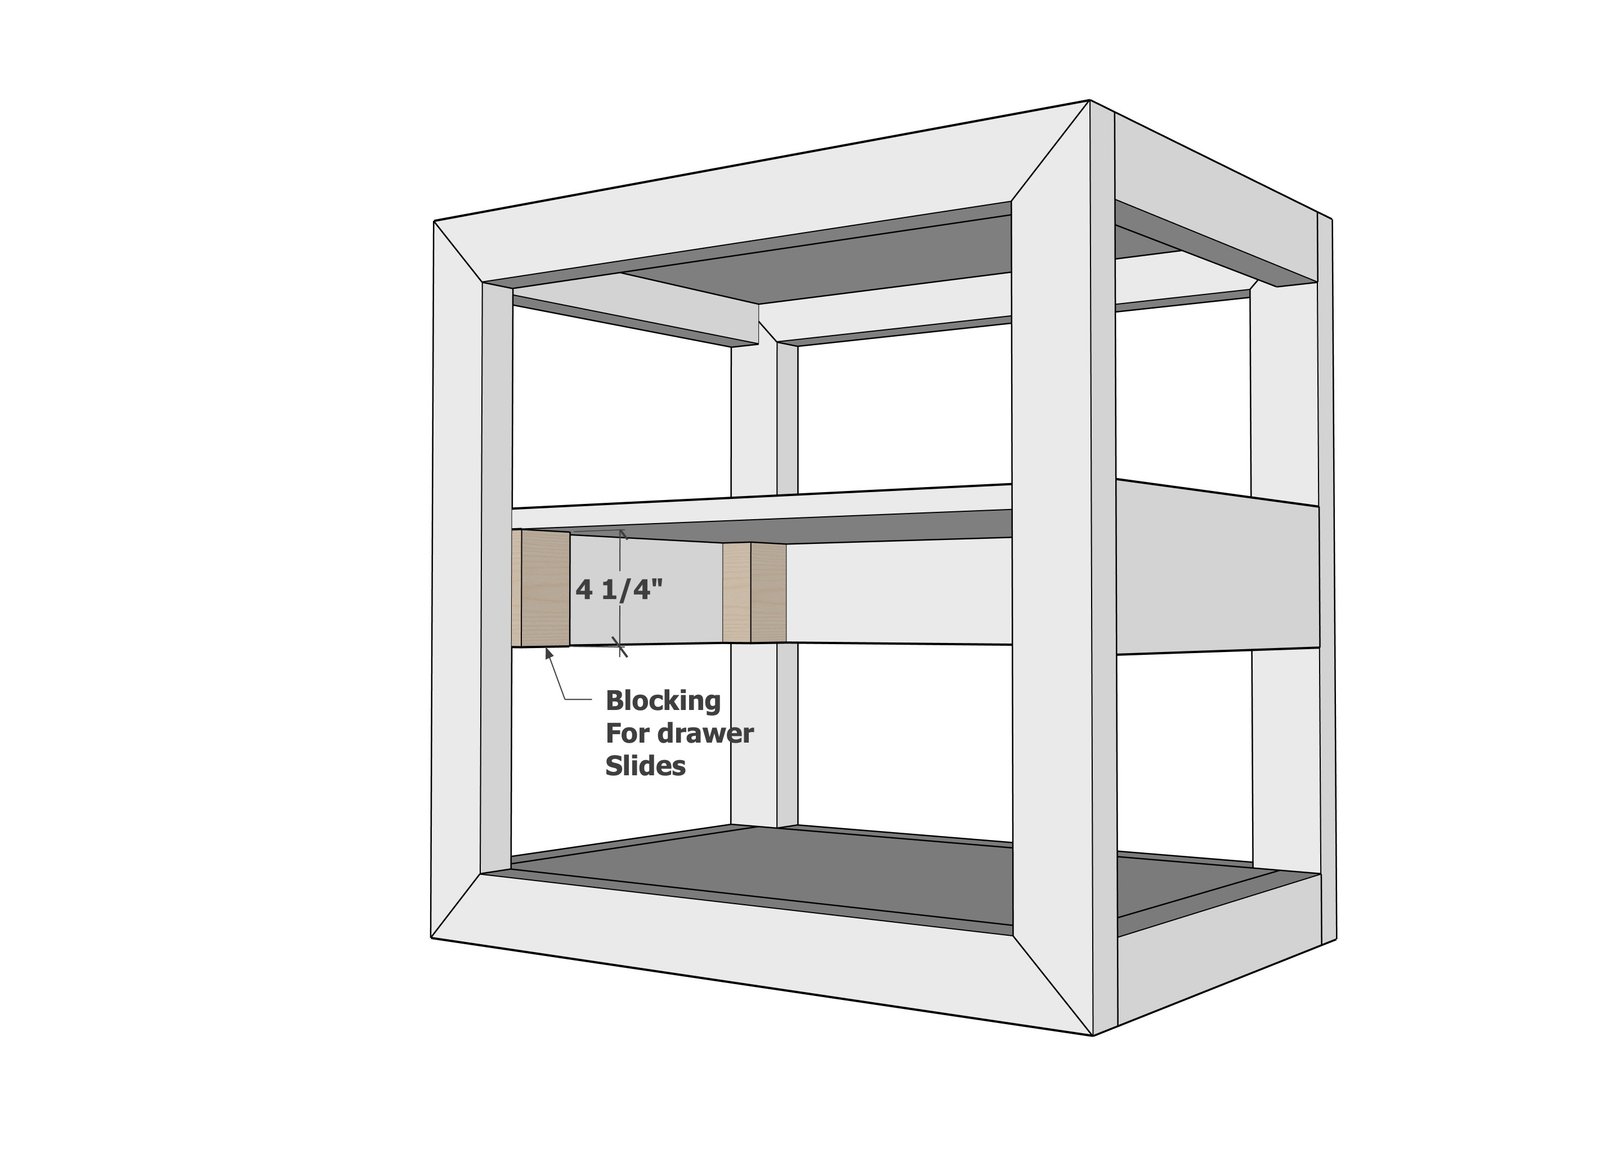
For the drawer, please watch this video and build your drawer slides to fit your opening.
Step 8
After your drawer is installed and tuned, add the 2x6 front drawer face, first by tacking with 2" brad nails, and then by securing with 2-1/2" screws from the back (can be pocket hole screws)
Finishing
Sand all surfaces, starting with a medium grit and finishing with fine. Wipe off the dust, fill any holes or gaps with wood filler, and sand smooth once dry. Apply primer if you're painting, then finish with your choice of paint or stain and seal with a durable clear topcoat. For outdoor projects, use exterior-rated primer, paint or stain, and sealer so the piece stands up to the weather.
Source (temporary): https://www.ana-white.com/woodworking-projects/bold-modern-nightstand