Box Frame Coffee Table with Lift Top
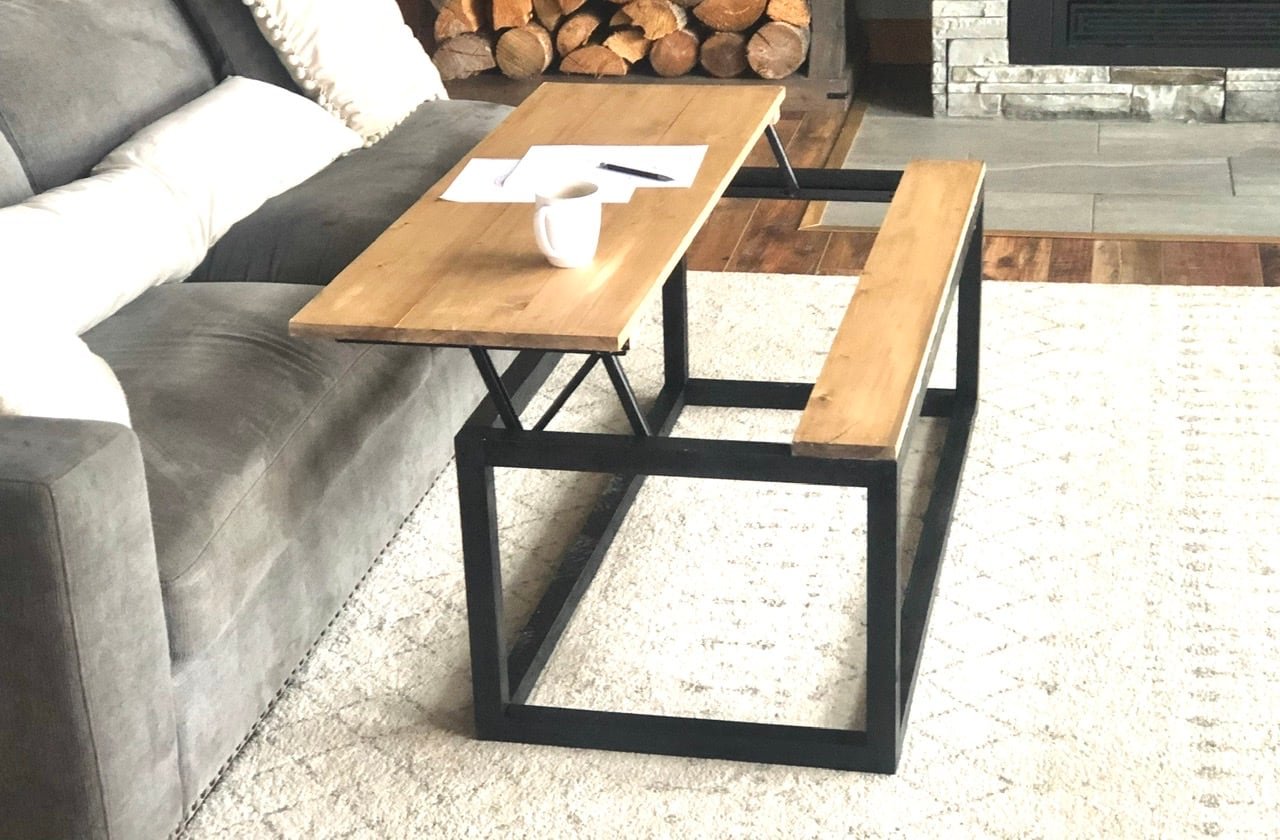
This coffee table has a lift top so you can use it as a table. This is a free, diy project plan that you can use to build your own lift top coffee table. Modify with a bottom shelf or X bracing on the ends. Free
Specifications
| Project type | Coffee Tables |
|---|---|
| Room | living room |
| Difficulty | Intermediate |
Shopping List
- 2 - 1x6 @ 8 feet long
- 4 - 2x2 @ 8 feet long
- 1 - 1x2 or 1x3 @ 8 feet long
- 1 - 15" long lift top hinge like this one (affiliate link)
- 2-1/2" pocket hole screws (recommended) or 2-1/2" long self tapping star bit screws
- wood glue
- 1-1/4" brad nails or 1-1/4" long self tapping star bit wood screws
For the bottom shelf addition:
- 2 - 1x6 @ 8 feet long
For the X bracing on ends:
- 1 - 2x2 @ 8 feet long
Cut List
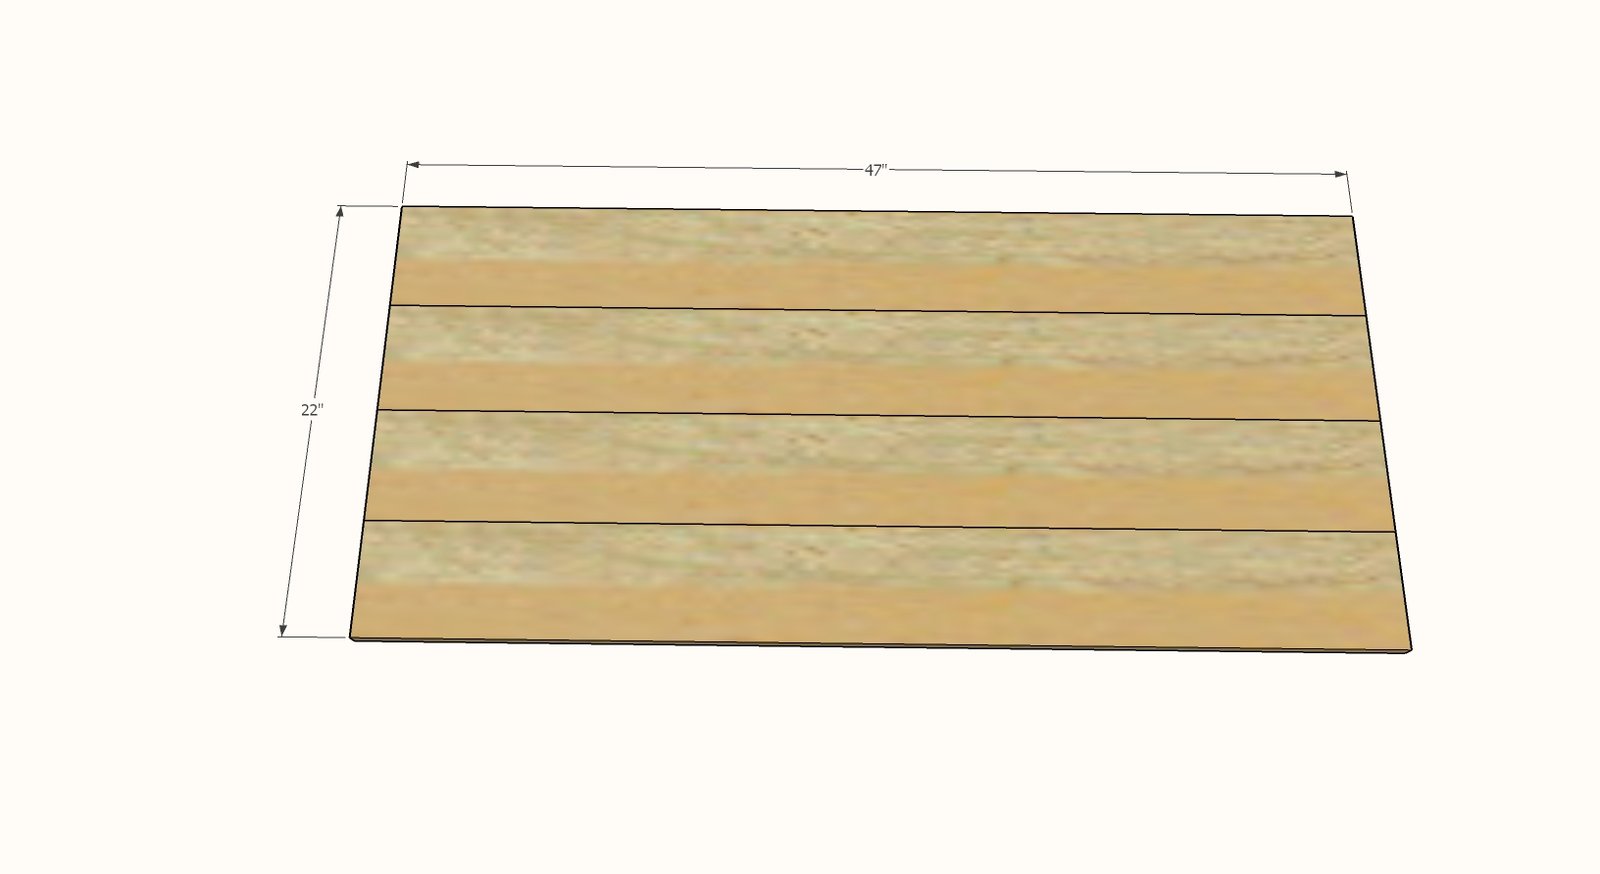
4 - 1x6 @ 47" - tabletop
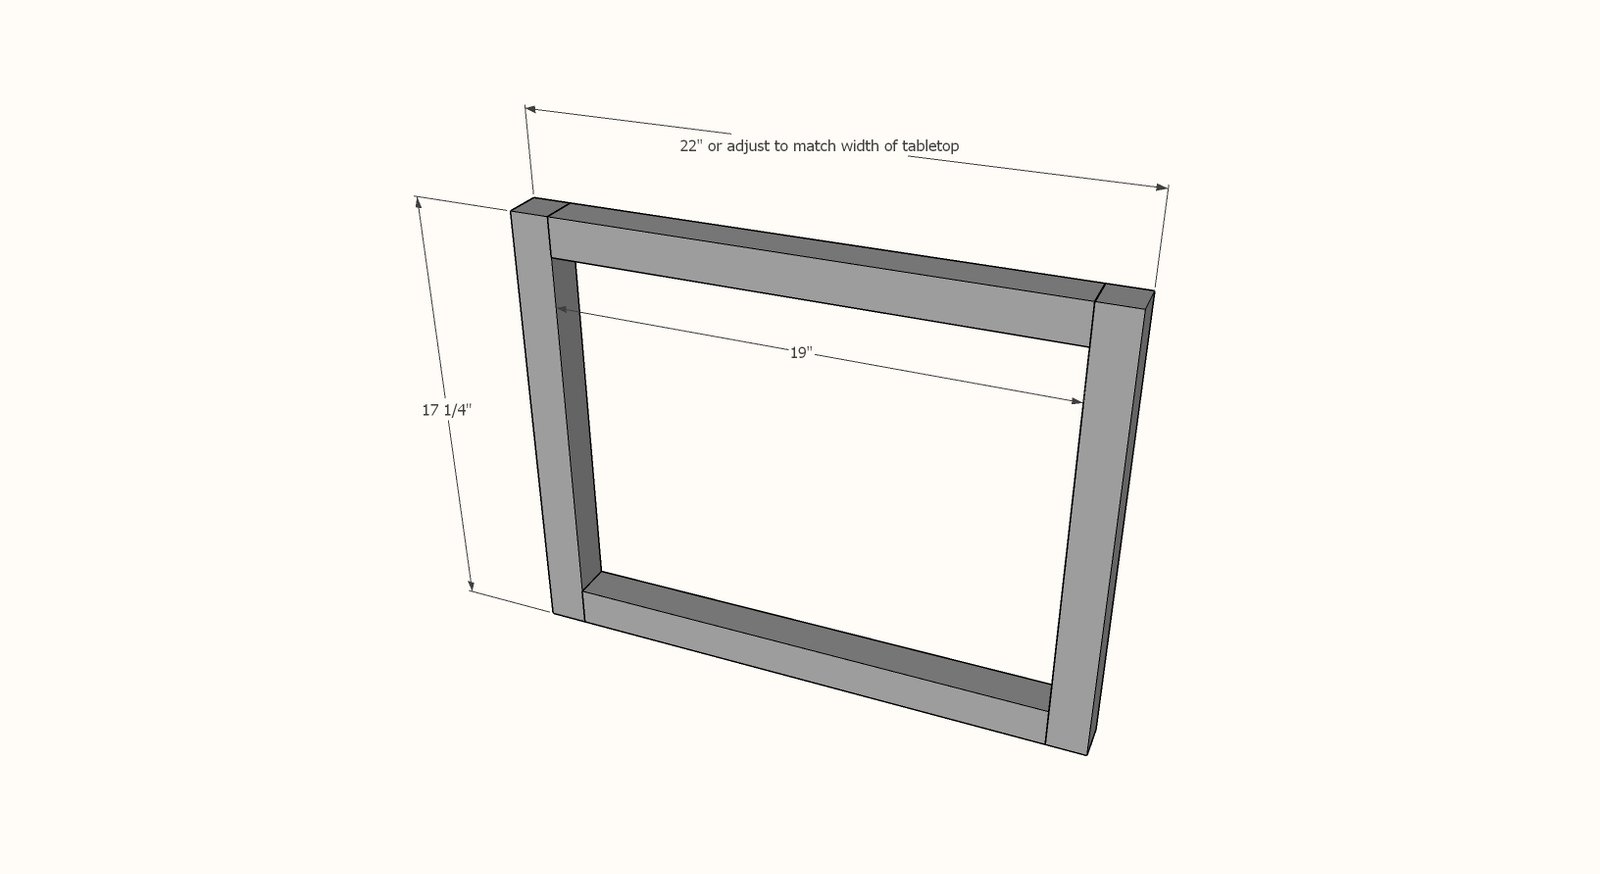
4 - 2x2 @ 17-1/4" - legs
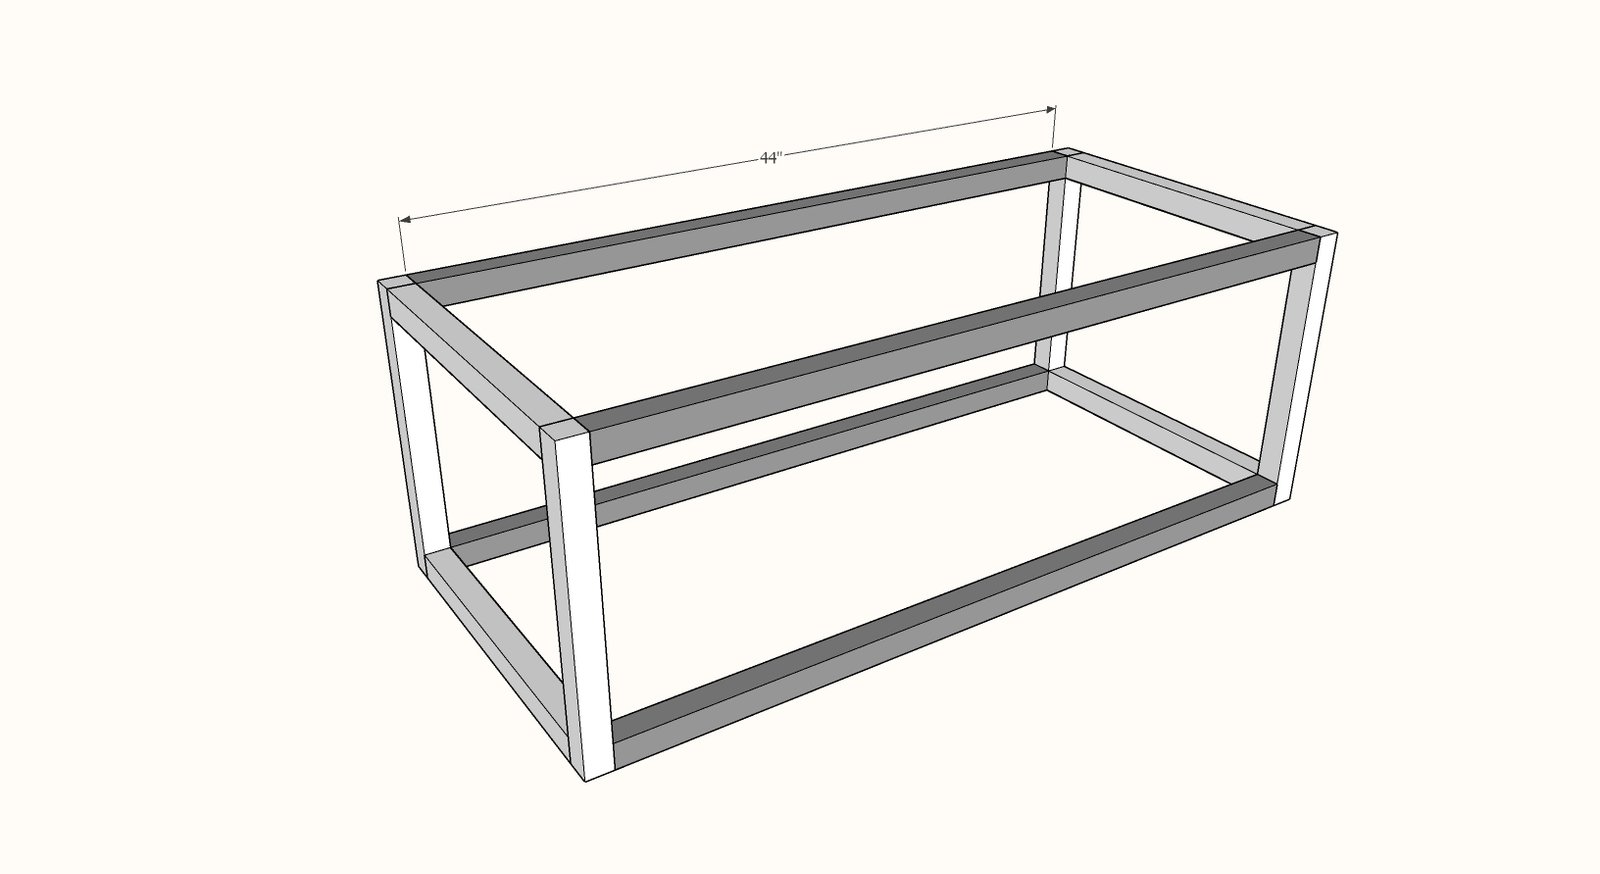
4 - 2x2 @ 44" - long aprons
4 - 2x2 @ 19" - end aprons
4 - 1x6 @ 47" - optional bottom shelf
Tools
- measuring tape
- square
- pencil
- safety glasses
- kreg-jig
- drill
- compound miter saw
- nailer
- sander
Step-by-step Instructions
Layout the tabletop boards and check to see if they match the diagram above.
If not, adjust the end 2x2 lengths so that the end 2x2 plus two legs is equal to the width of your tabletop. If using pocket holes, attach three of the tabletop boards together edge to edge with 3/4" pocket holes and 1-1/4" pocket hole screws, one screw about every 8".
Step 2
Build the end frames with 1-1/2" pocket holes and 2-1/2" pocket hole screws (recommended) on tops and bottoms or 2-1/2" self tapping screws.
Step 3
Repeat with the longer aprons to create the coffee table frame.
Layout the tabletop boards face down and place the coffee table frame on top.
Position the hinges as shown and attach to the tabletop. Add the 1x2 or 1x3 supports with 1-1/4" brad nails and glue or 1-1/4" screws. Make sure the frame is square.
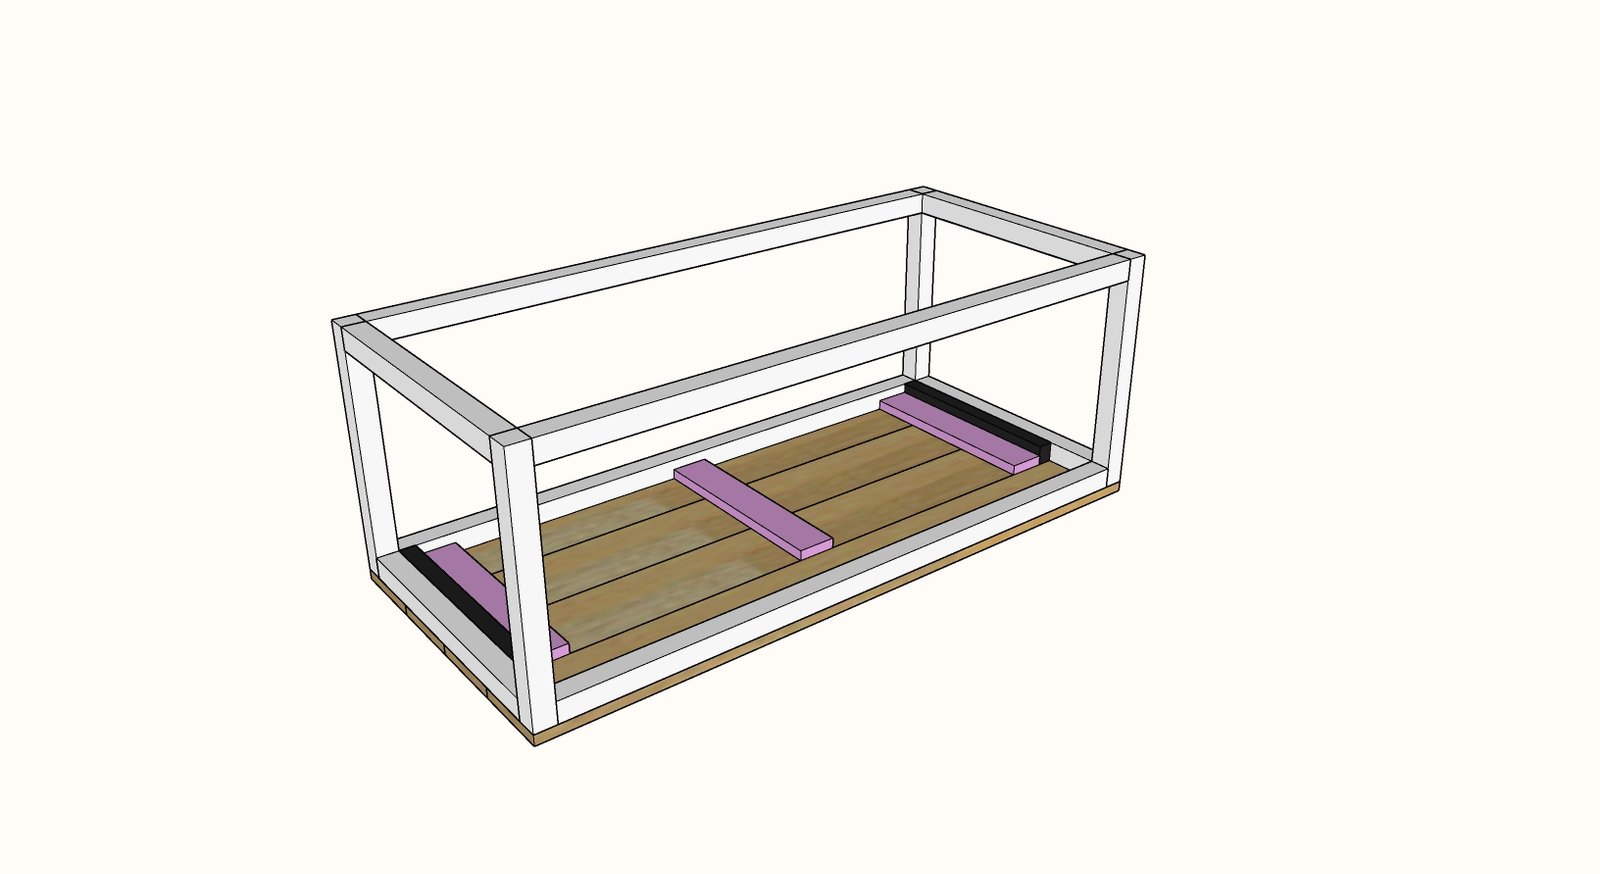
Make sure the frame is square.
Attach the remaining tabletop board on the frame with 1-1/4" brad nails and glue (or screws). This board creates alot of structure for the tabletop and is very important.
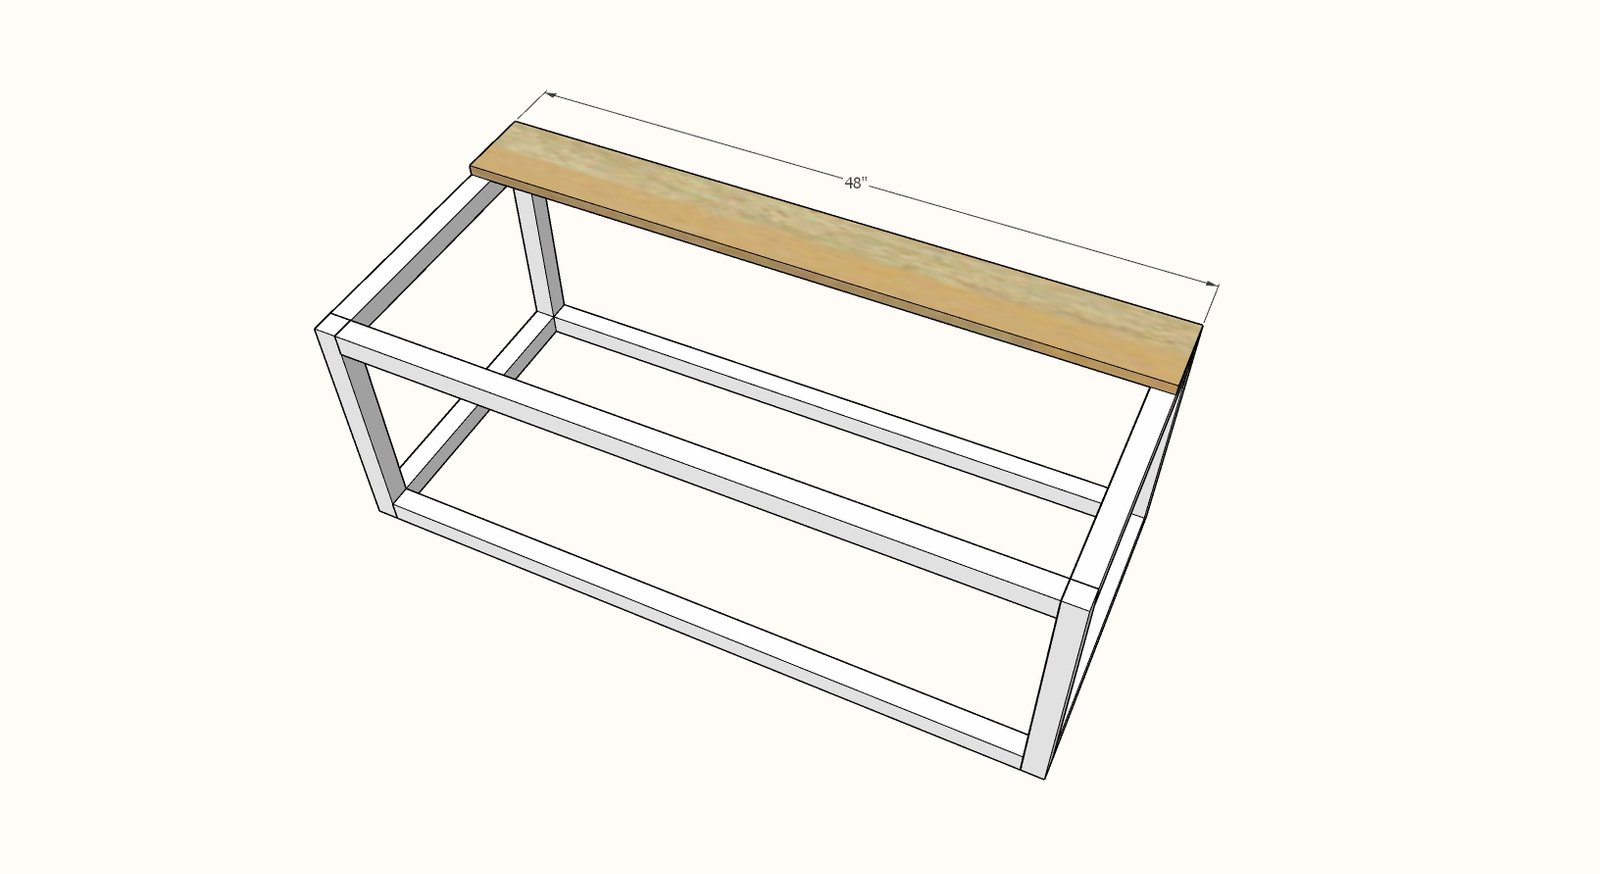
Step 6
For the optional shelf, notch out the corners of the outside 1x6s with a jigsaw to fit around the legs. Fit shelf boards in the frame and glue and nail or screw down with the 1-1/4" fasteners.
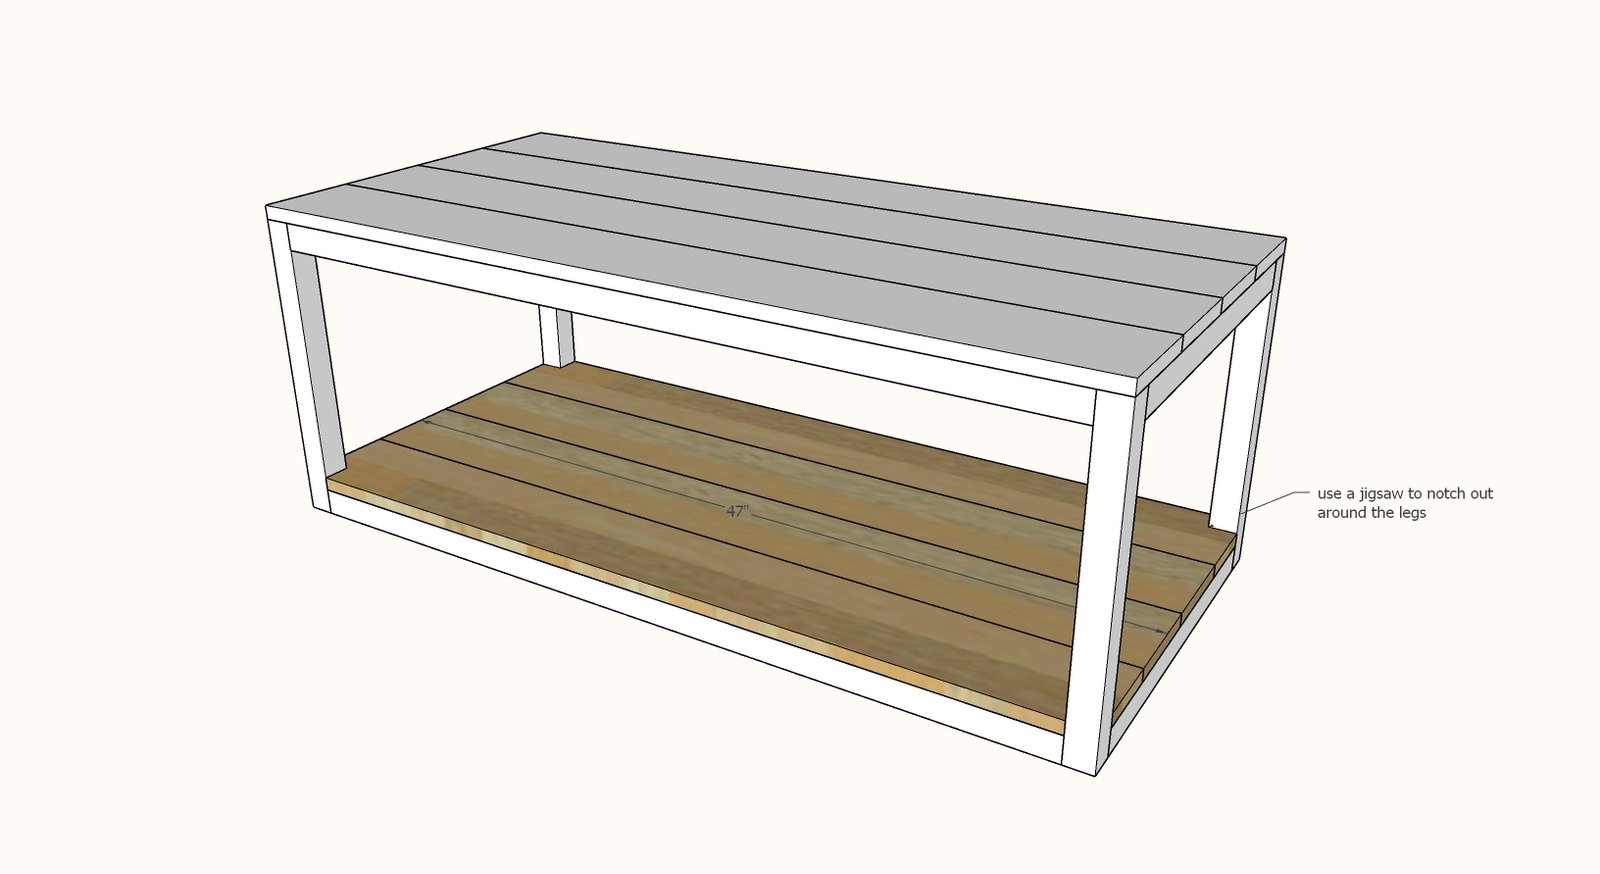
Step 7
For the X detailing (can be done without the bottom shelf too), place the 2x2 alongside where you wish to attach it and pencil mark the overlap. Cut along the pencil marks. Repeat same steps to create the shorter X pieces. Attach with glue and screws.
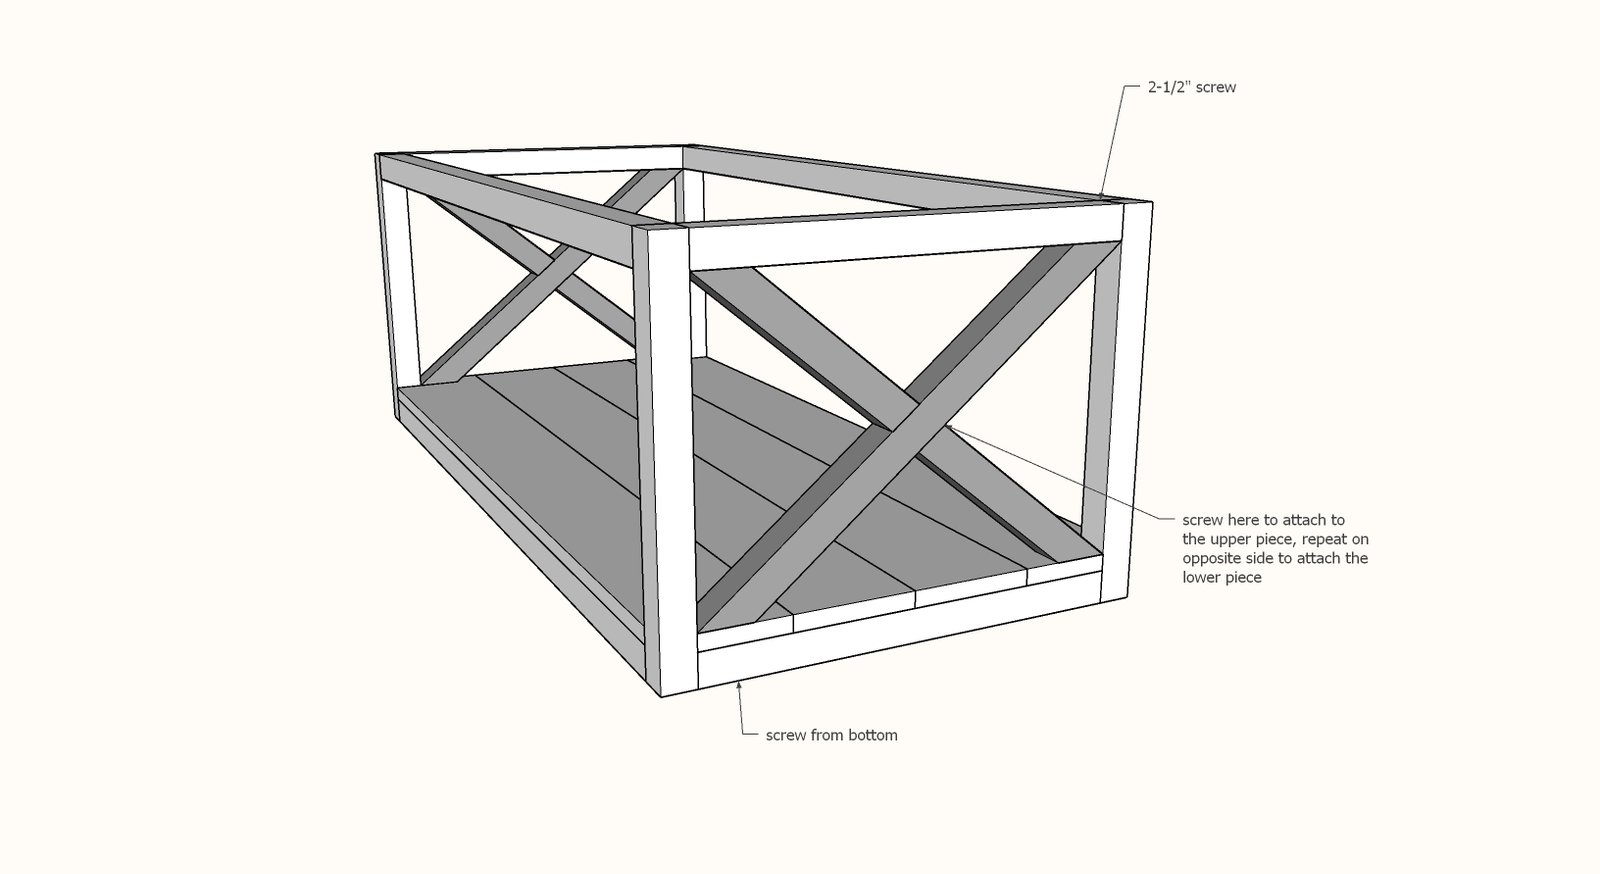
Finishing
Sand all surfaces, starting with a medium grit and finishing with fine. Wipe off the dust, fill any holes or gaps with wood filler, and sand smooth once dry. Apply primer if you're painting, then finish with your choice of paint or stain and seal with a durable clear topcoat. For outdoor projects, use exterior-rated primer, paint or stain, and sealer so the piece stands up to the weather.
Source (temporary): https://www.ana-white.com/woodworking-projects/box-frame-coffee-table-lift-top