Braden Entryway Hutch
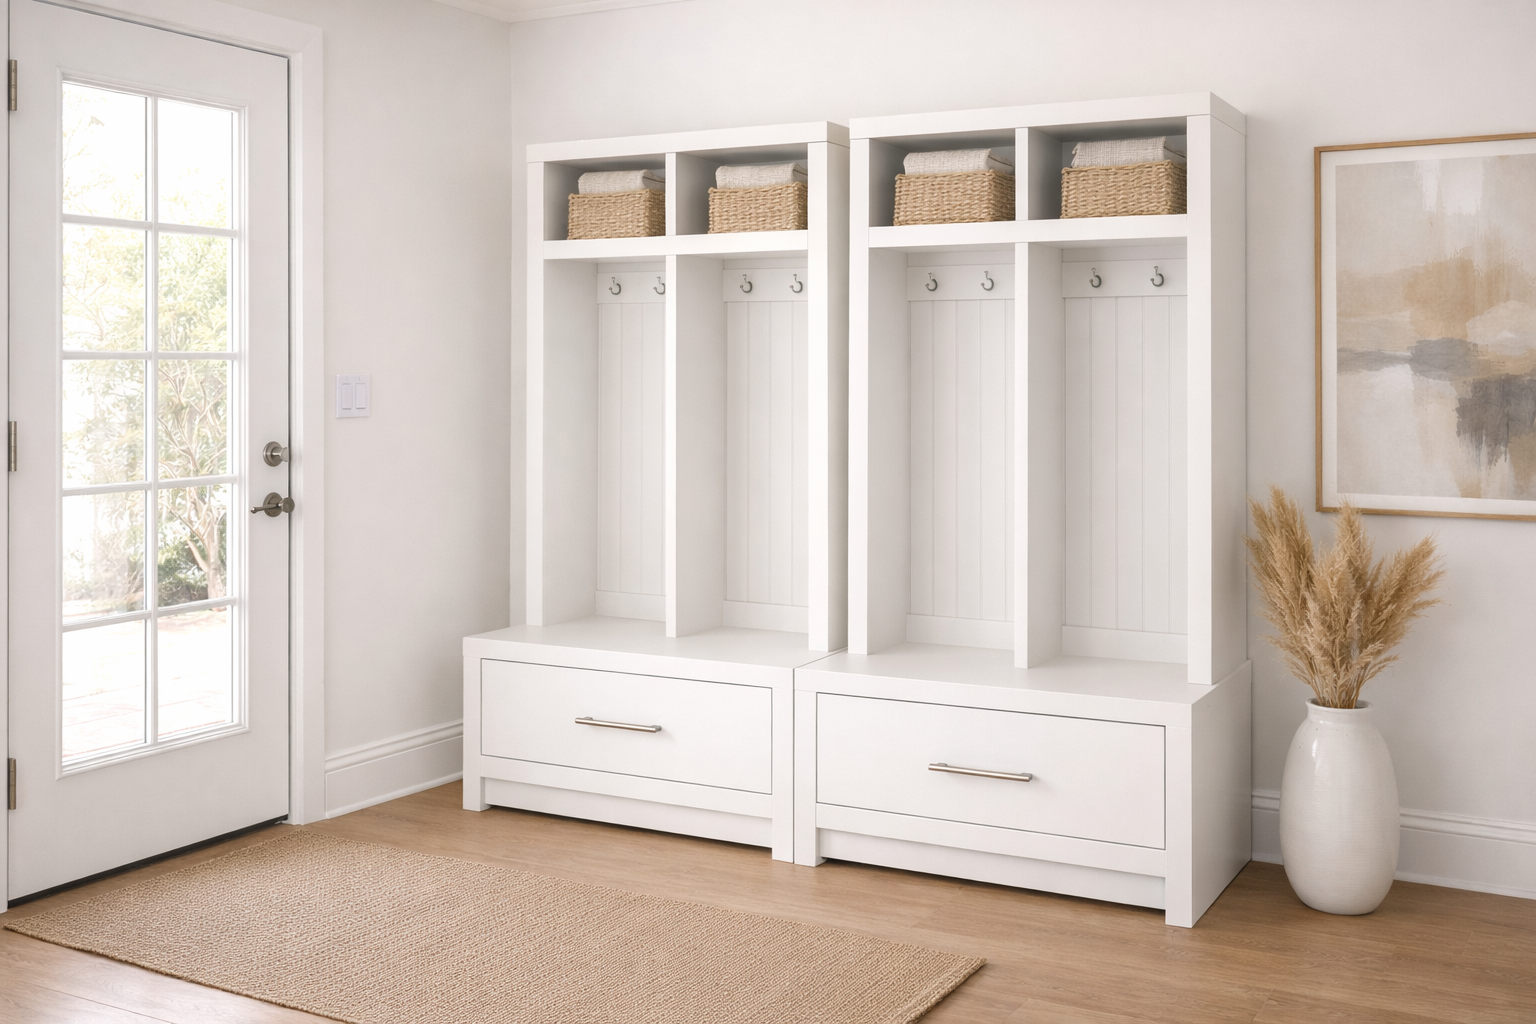
Build your own entryway system! This is a to build the hutch that fit over drawers or benches to create a beautiful entryway system or hall tree. with step by step diagram, shopping and cut list and lots of real reader submitted photos. See more plans in this collection
Specifications
| Project type | Cubby Project Plans |
|---|---|
| Room | Storage Solutions |
| Difficulty | Intermediate |
| Estimated cost | $50 - $100 |
Dimensions
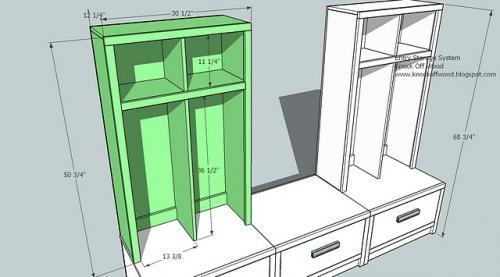
Use the size-specific shopping and cut lists below.
Shopping List
- 3 - 1x12 @ 8 feet long
- 2 - 1x2 @ 8 feet long
- 1 - 1x4 @ 30" long
- 1/4" plywood for the back
Cut List
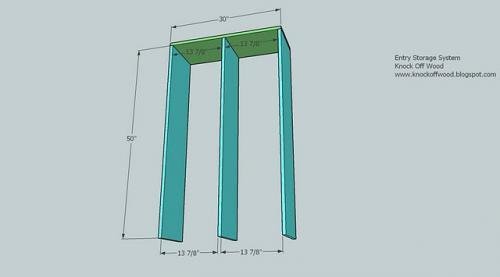
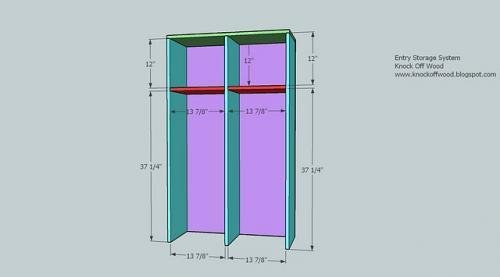
- A) 1 – 1×12 @ 30″ (Top, Shown in Green)
- B) 3 – 1×12 @ 50″ (Sides, Middle, shown in Turquoise)
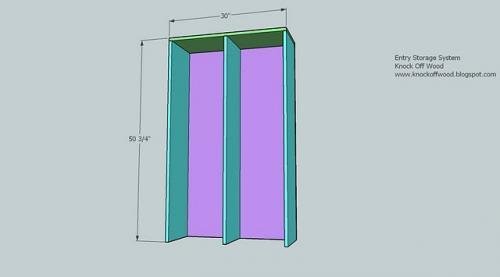
- C) 1 – 1/4″ to 1/2″ plywood @ 30″ x 50 3/4″ (Back, shown in purple)
- D) 2 – 1×12 @ 13 7/8″ (Bottom of Top Cubbies, shown in red)
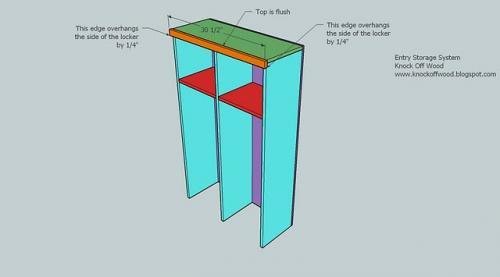
- E) 1 – 1×2 @ 30 1/2″ (Top Trim, Orange)
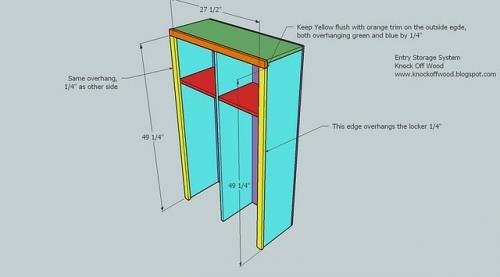
- F) 2 – 1×2 @ 49 1/4″ (Side Trim, Yellow)
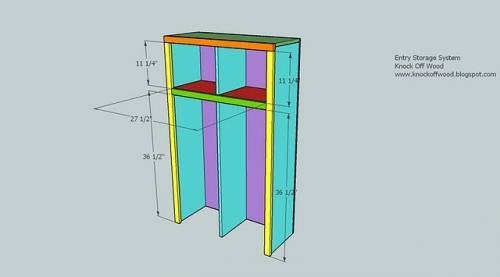
- G) 1 – 1×2 @ 27 1/2″ (Shelf Trim, Green)
- H) 2 – 1×4 @ 13 7/8″ (Bottom Supports, Blue)
Tools
- measuring tape
- square
- hammer
- safety glasses
- drill
- circular saw
- nailer
Step-by-step Instructions
Step 1
Begin by using nails and glue to nail through the top, shown in green, into the top edges of the sides and middle, shown in Turquoise above. Use the above measurements to guide you. Use 2″ nails.
Step 2
Square up the locker. See the HOW-TO section for a video on checking for square. Then glue and nail the plywood to the back of the locker. Make sure you nail into all the Sides, Middle, and Top boards. Use 1 1/4″ nails.
Step 3
Use the measurements above to guide you as you fasten D, shown in red above, in place. Nail at an angle (toenail) through the face of D into the the middle board. Then nail at an angle from the middle board into the side edges of D. Use 2″ nails and glue. Also nail through the back into the back edge of D.
Step 4
Use 2″ nails and glue to fasten the top trim in place. Follow the instructions in the diagram to center the top trim on the locker, end edges overhanging 1/4″ on each side.
Step 5
Step 6
Add the shelf trim, shown in green above, using 2″ nails and glue. The above diagram shows the measurements. Keep the top edges flush. Make sure you nail through the face of the green board into both the edges of the turquoise and red boards above.
Step 7
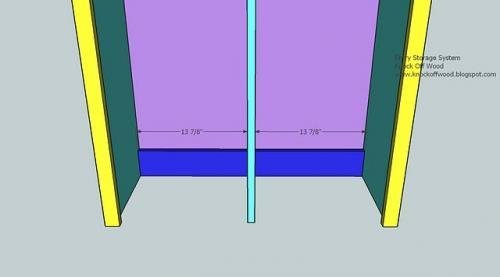
Fasten the blue boards above, the bottoms supports, in place, using glue and 2″ nails. Nail through the sides into the end edges. Also nail from the supports in to the center board, shown in turquoise, at an angle. Then use 1″ nails to fasten the plywood to the supports (shown in blue).
Finishing
Sand all surfaces, starting with a medium grit and finishing with fine. Wipe off the dust, fill any holes or gaps with wood filler, and sand smooth once dry. Apply primer if you're painting, then finish with your choice of paint or stain and seal with a durable clear topcoat. For outdoor projects, use exterior-rated primer, paint or stain, and sealer so the piece stands up to the weather.
Source (temporary): https://www.ana-white.com/woodworking-projects/braden-entryway-hutch