Brooklyn Limestone Farmer's Market Stand
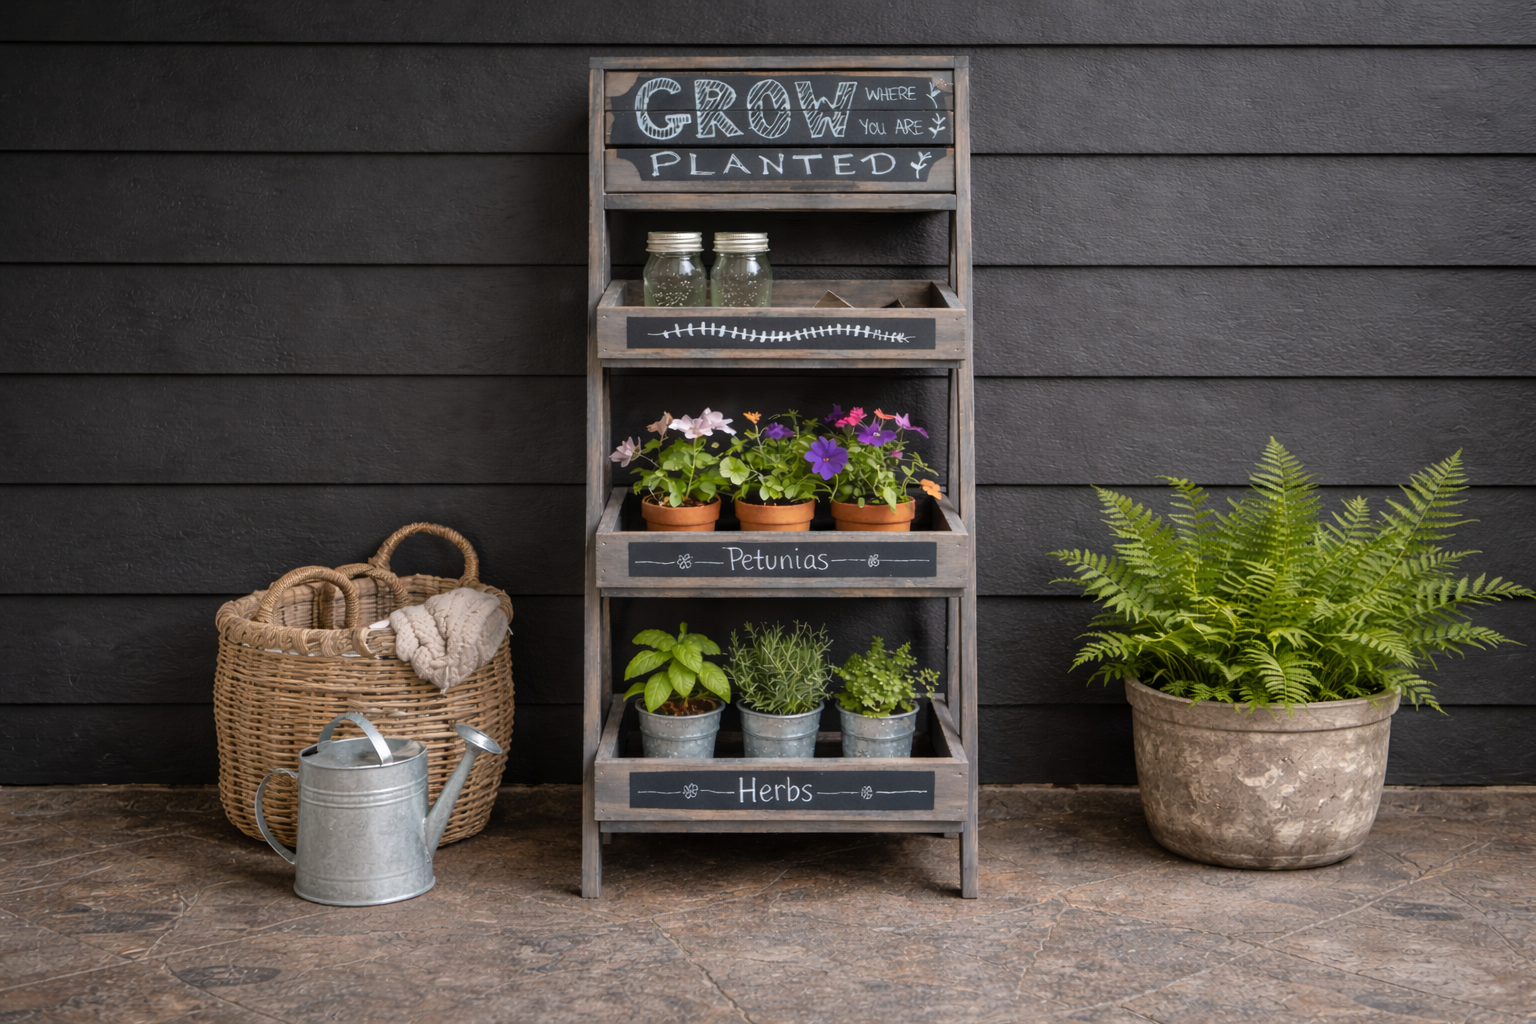
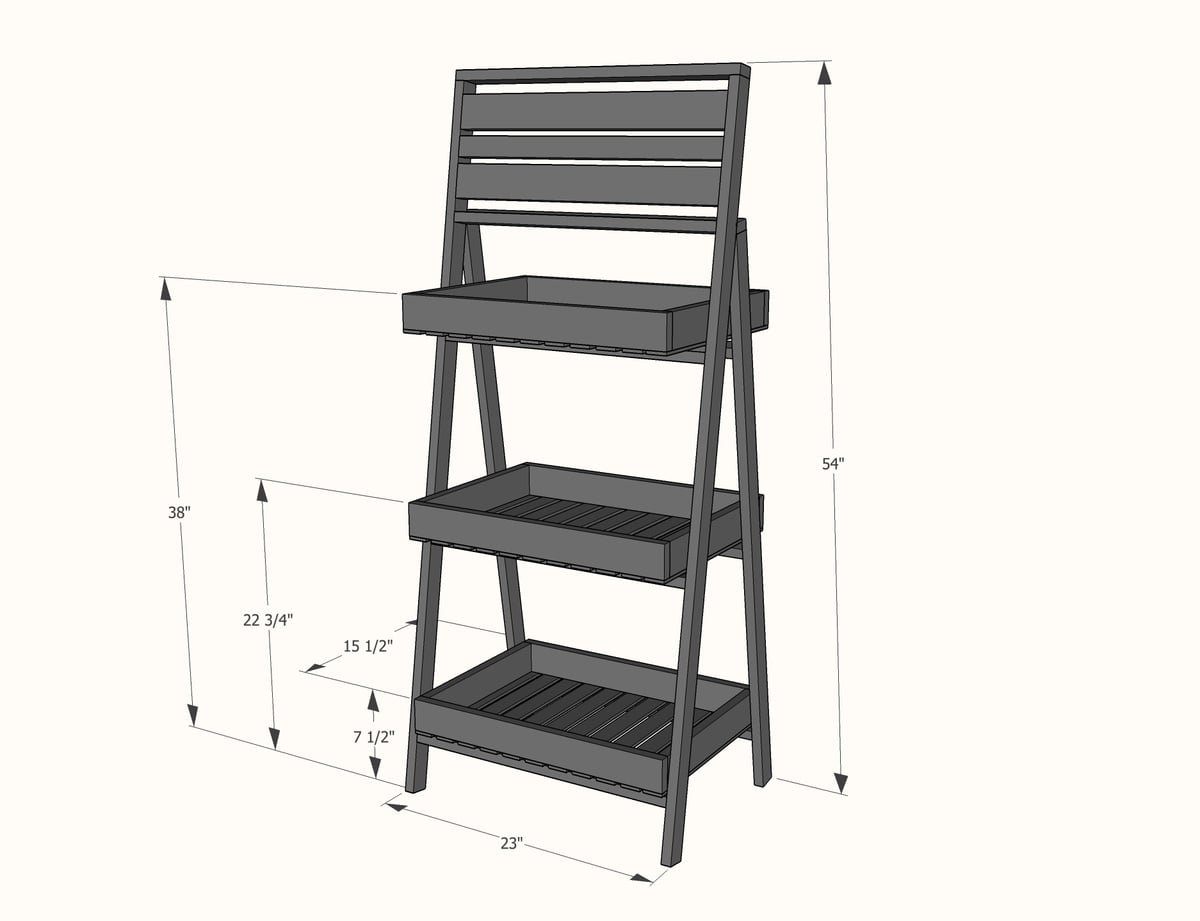
Build your own DIY farmer’s market display stand with this, complete with detailed diagrams and easy-to-follow instructions. This three-tier plant stand is designed to be both functional and decorative—perfect for displaying flowers, herbs, produce, or home décor on a patio, porch, or market setup. With its compact footprint (approximately 23" wide and 54" tall), this vertical display maximizes space while creating a beautiful, organized presentation. The tiered trays and optional chalkboard fronts make it ideal for labeling plants or products, giving it a charming farmhouse market feel. This beginner-friendly project uses basic tools and standard lumber, making it an affordable and approachable build. The included diagrams walk you through each step, from cutting and assembly to finishing touches, so you can confidently build a professional-looking display stand. Perfect for: • Farmers market booths • Front porch plant displays • Garden organization • Small-space vertical storage Download the and start building your own stylish market stand today.
Specifications
| Project type | Bookshelf and Bookcase Plans |
|---|---|
| Room | Outdoor |
| Difficulty | Beginner Projects |
Dimensions
Use the size-specific shopping and cut lists below.
Shopping List
- 5 - 1x2 @ 8 feet long
- 3 - 1x3 @ 8 feet long
- 7 - 48" long x 1-1/2" wide wood lath pieces
- 2" self tapping wood screws (#8) or 1-1/4" pocket hole screws (for building frames)
- 3/4" finish nails or staples or small screws (for attaching bottoms to trays)
- 2 - basic butt hinges (for attaching frame pieces together)
- Also recommend 1-1/4" screws for attaching frames to the trays
Cut List
for the front face of the A frame
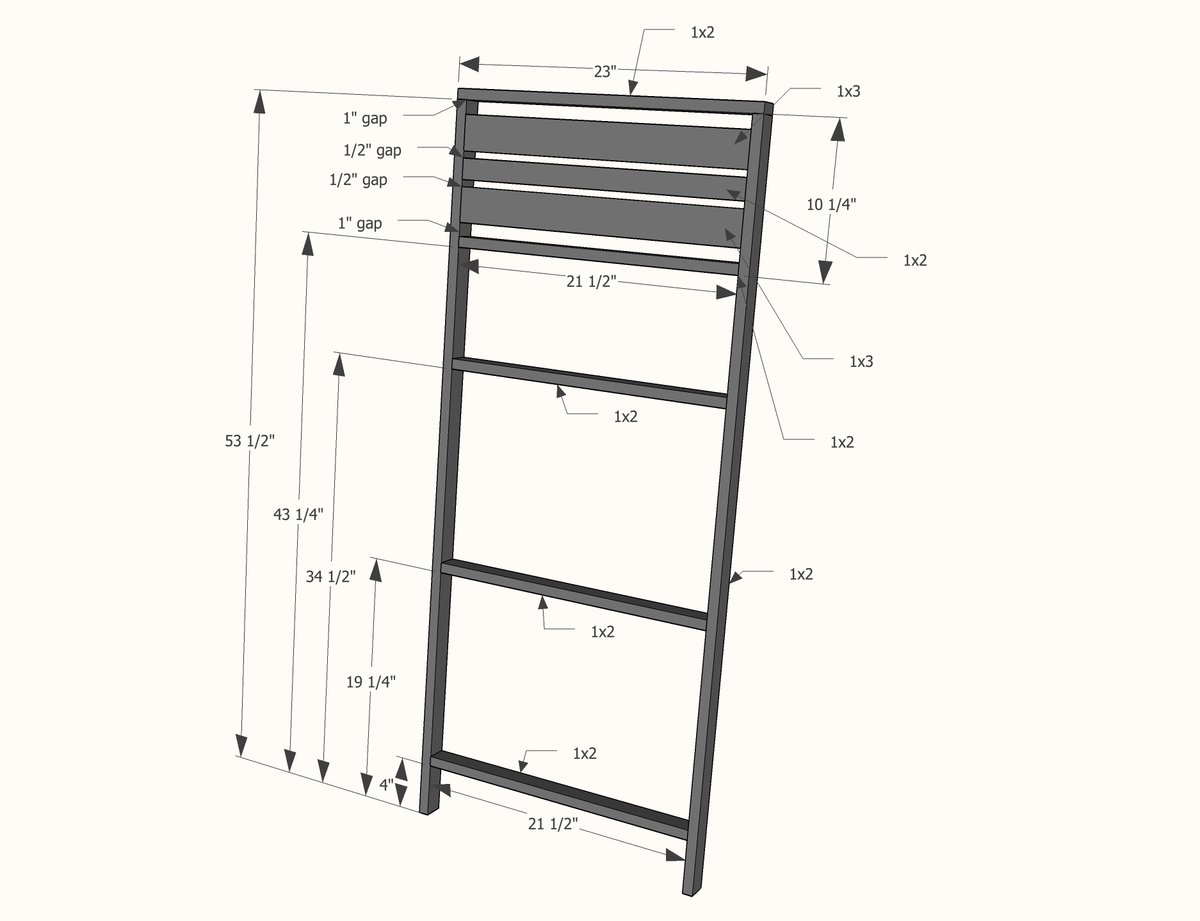
- (2) 1x2 @ 53-1/2"
- (1) 1x2 @ 23"
- (4) 1x2 @ 21-1/2"
for the back face of the A frame
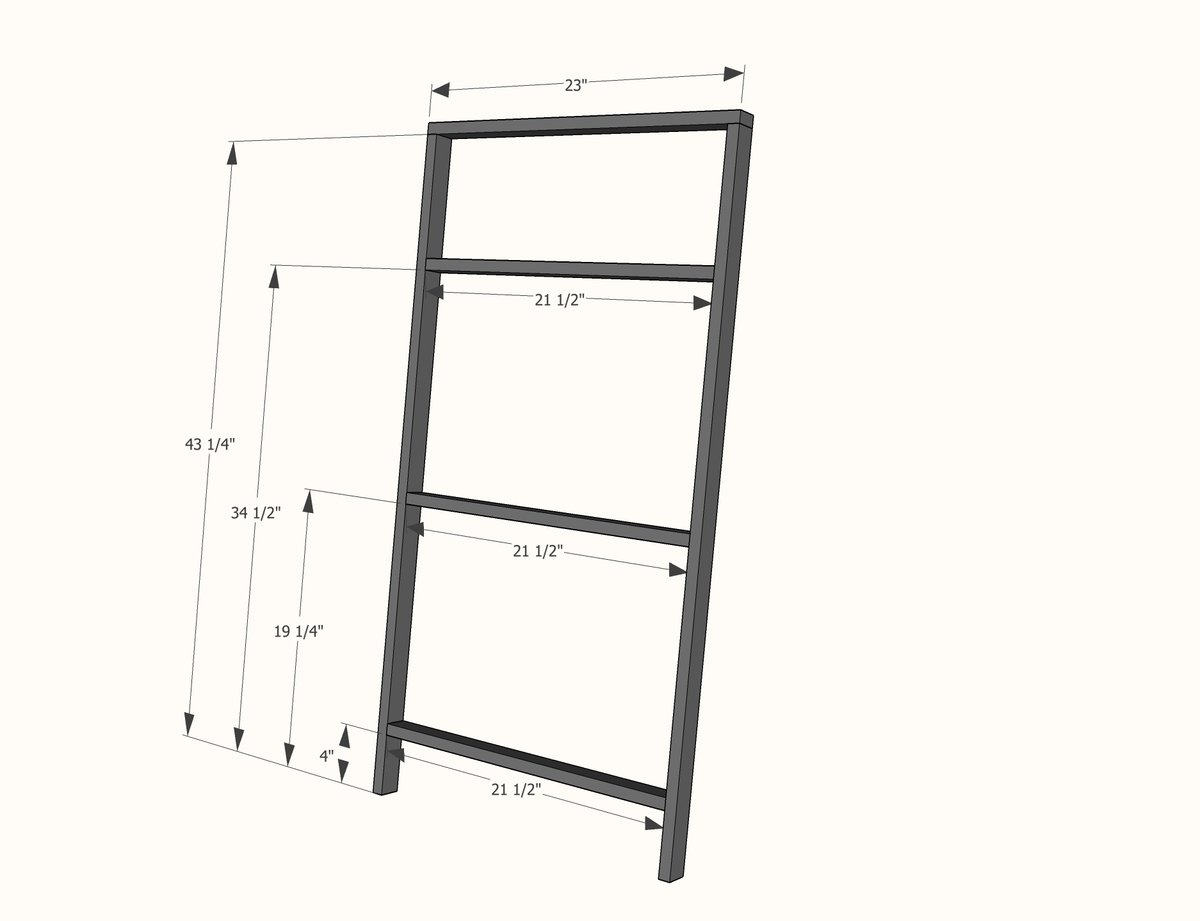
- (2) 1x2 @ 43-1/4"
- (1) 1x2 @ 23"
- (3) 1x2 @ 21-1/2" for the trays
- (6) 1x3 @ 21-1/2" long
- (6) 1x3 @ 14" long
- (21) 1-1/2" wide wood lath @ 15-1/2 inches long
Tools
- measuring tape
- square
- pencil
- safety glasses
- hearing protection
- drill
- circular saw
- nailer
Step-by-step Instructions
Step 1
Start by building the front frame. Stefanie used wood screws, but if you have a Kreg Jig, you can also use that, set on the 3/4" setting with 1-1/4" pocket hole screws.
Step 2
Build the back frame just like the front frame.
Step 3
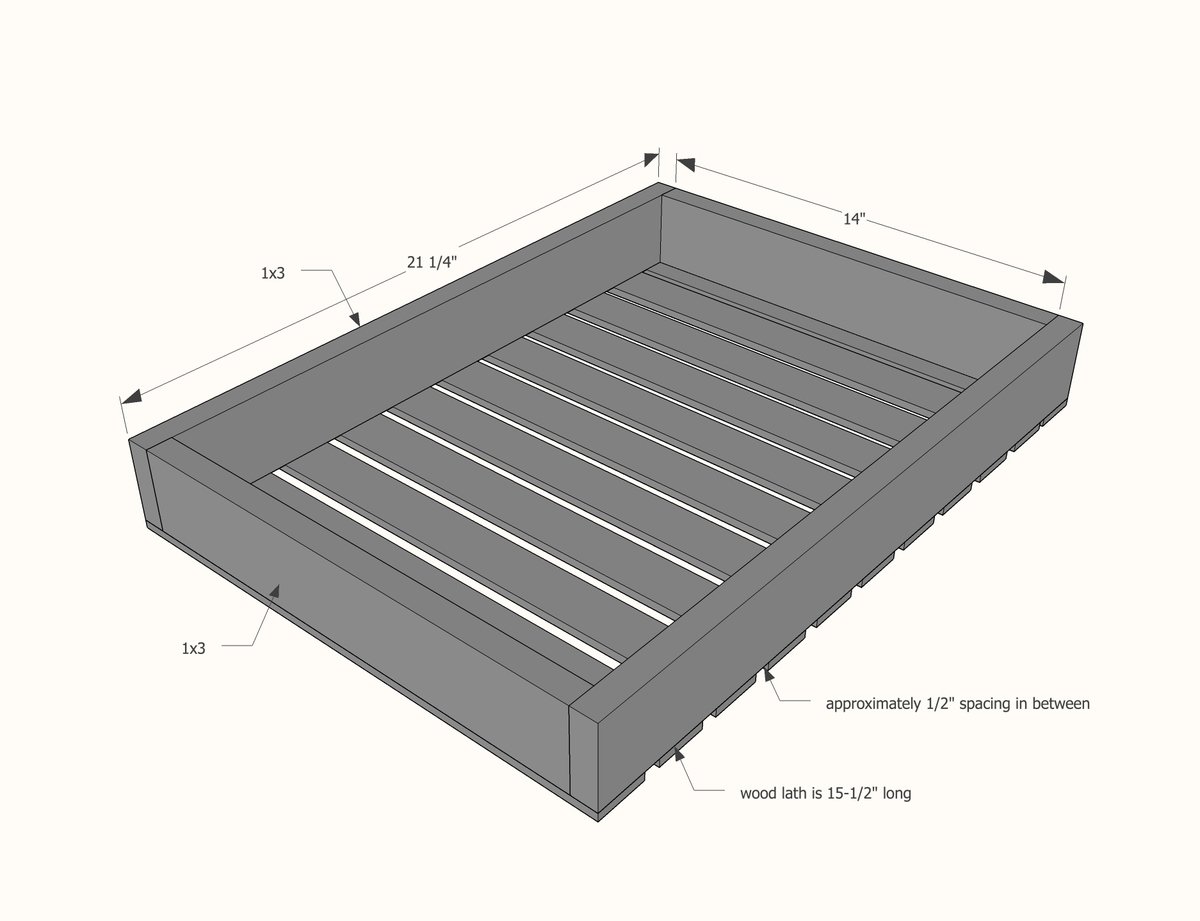
Next, build three of the crates. Use the wood screws or your Kreg Jig set for 3/4" stock. The wood lath can just be nailed and glued (or stapled) to the bottom with 3/4" fasteners, as the weight will be distributed to the front and back frames.
Step 4
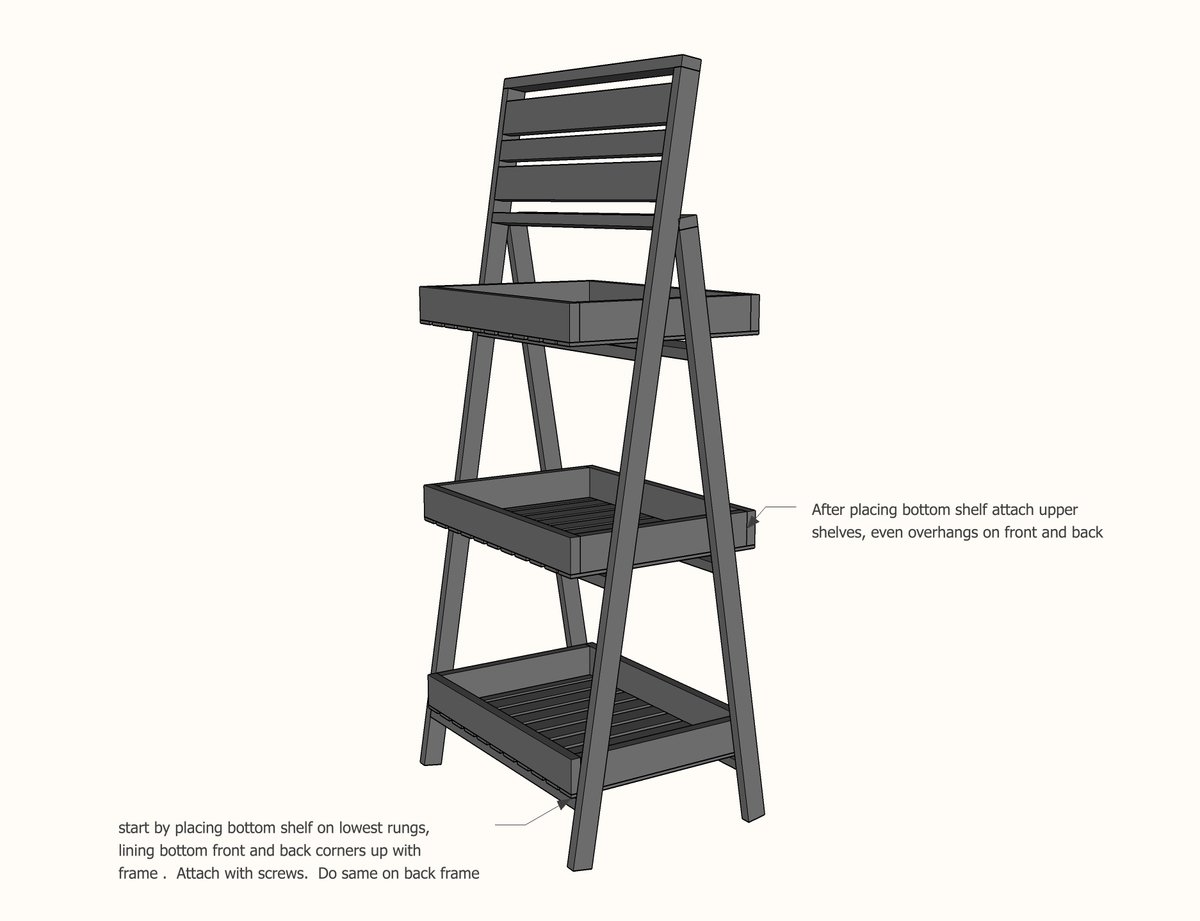
Attach the two frames together with the hinges. Then set the bottom tray on the bottom rungs, and work upward. For more stability, attach the frames to the crates.
Step 5
Finishing
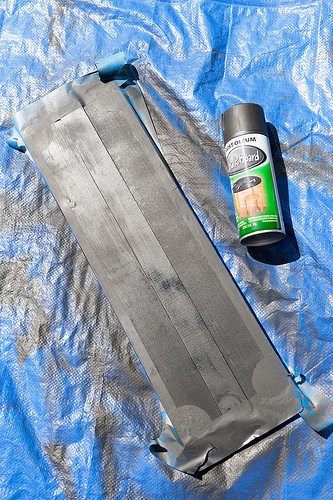
Sand all surfaces, starting with a medium grit and finishing with fine. Wipe off the dust, fill any holes or gaps with wood filler, and sand smooth once dry. Apply primer if you're painting, then finish with your choice of paint or stain and seal with a durable clear topcoat. For outdoor projects, use exterior-rated primer, paint or stain, and sealer so the piece stands up to the weather.
Source (temporary): https://www.ana-white.com/woodworking-projects/brooklyn-limestone-farmers-market-stand