Brookstone Desk
Build your own farmhouse style desk with! Uses off the shelf lumber and easy building techniques. Matching hutch plans also available here.
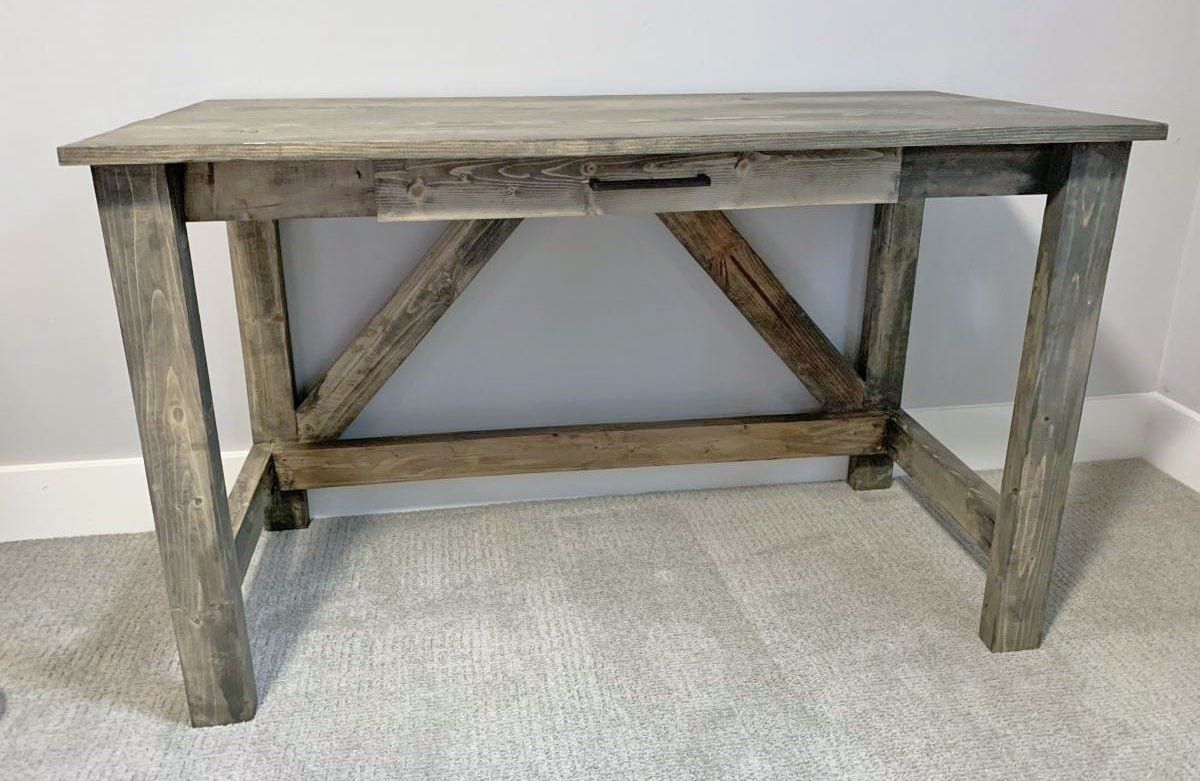
Specifications
| Project type | Kids Tables and Chairs |
|---|---|
| Room | office |
| Style | Farmhouse Furniture |
| Difficulty | Intermediate |
| Estimated cost | $50 - $100 |
Dimensions
Use the size-specific shopping and cut lists below.
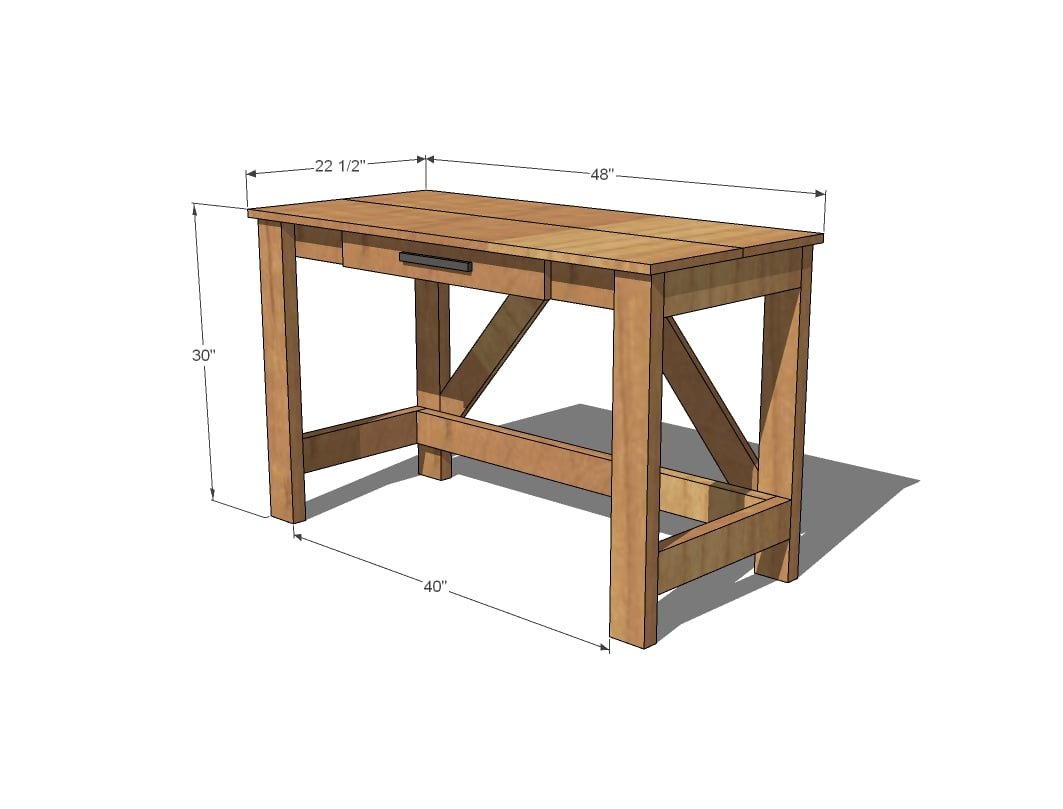
Shopping List
- 4 - 2x4 @ 8 feet long or stud length
- 1 - 1x4 @ 8 feet long
- 1 - 1x3 @ 8 feet long
- 1 - 1x12 @ 8 feet long
- 1 - 1/4" plywood piece @ 16" x 22-1/2"
- 1 set of 16" drawer slides
- About 30 - 2-1/2" long star bit self tapping screws
- 1 - 1/4" brad nails and wood glue
Cut List
4 - 2x4 @ 29-1/4" - legs
4 - 2x4 @ 18" - supports
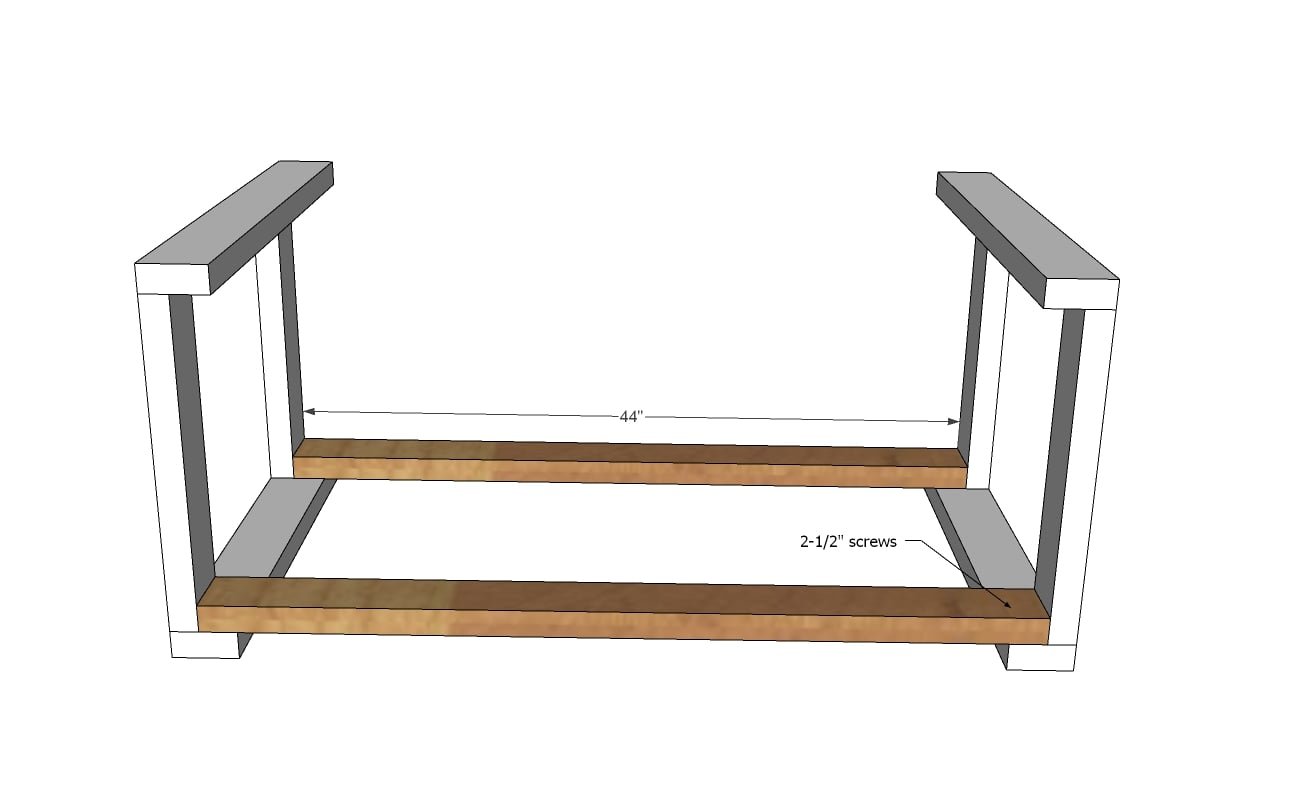
2 - 2x4 @ 44" - back support
4 - 2x4 @ 10-1/4" - drawer supports
2 - 1x4 cross supports for back - scribe to fit
2 - 1x12 @ 48" long - top
2 - 1x3 @ 16" - drawer sides
2 - 1x3 @ 21" - drawer front and back
1 - 1/4" plywood piece @ 22-1/2" x 16" - drawer bottom
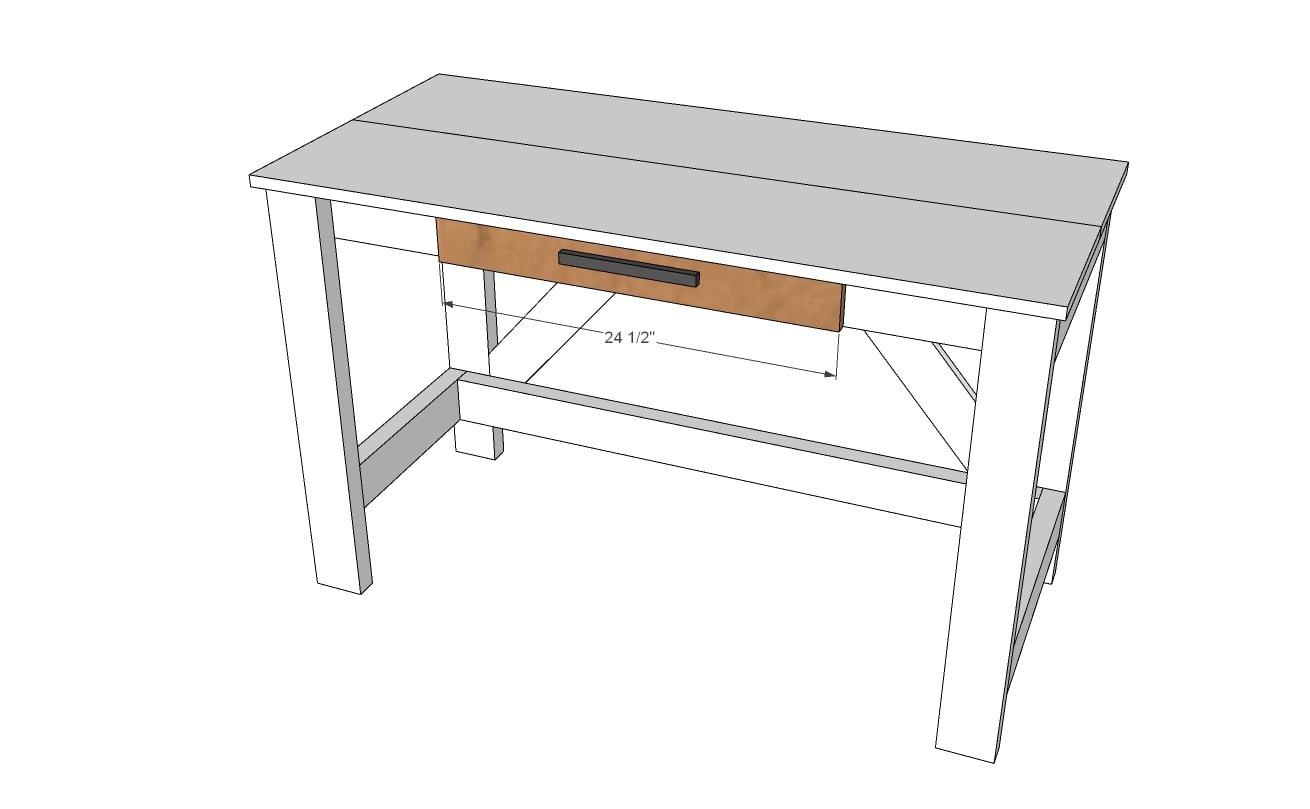
1 - 1x4 @ 24-1/2" - drawer face
Tools
- measuring tape
- square
- pencil
- safety glasses
- drill
- compound miter saw
- nailer
- sander
Step-by-step Instructions
Step 1
Build two leg sets using the self tapping screws.
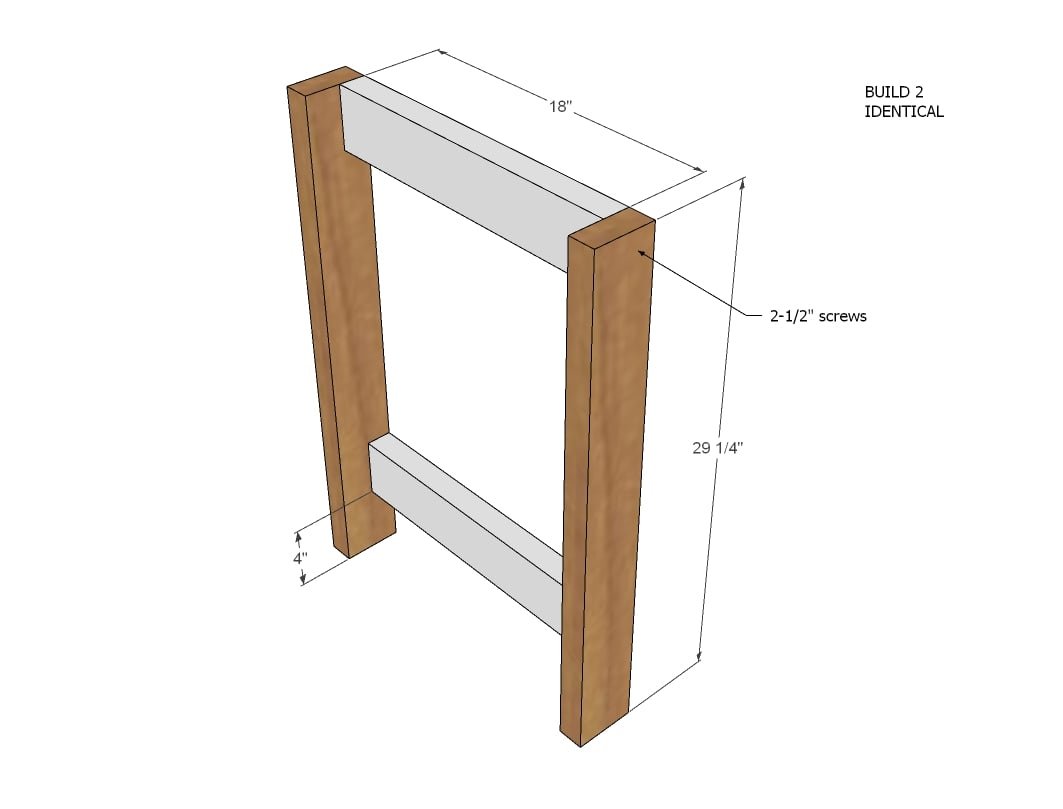
Step 2
Attach leg sets together with the back supports.
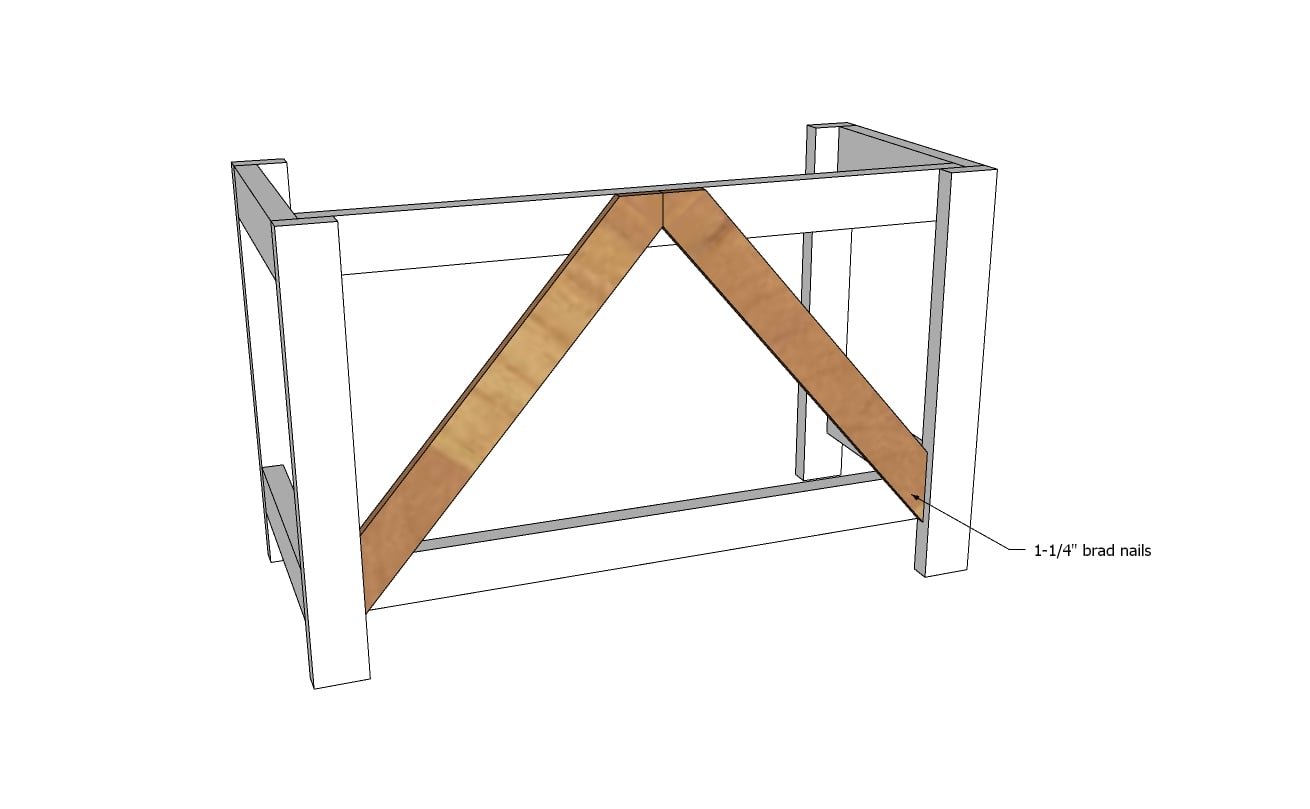
Reserve 24-1/2" of the 1x4 for the desk drawer face.
Using the remaining 1x4, scribe the back cross support pieces and cut. Attach with 1-1/4" brad nails and glue.
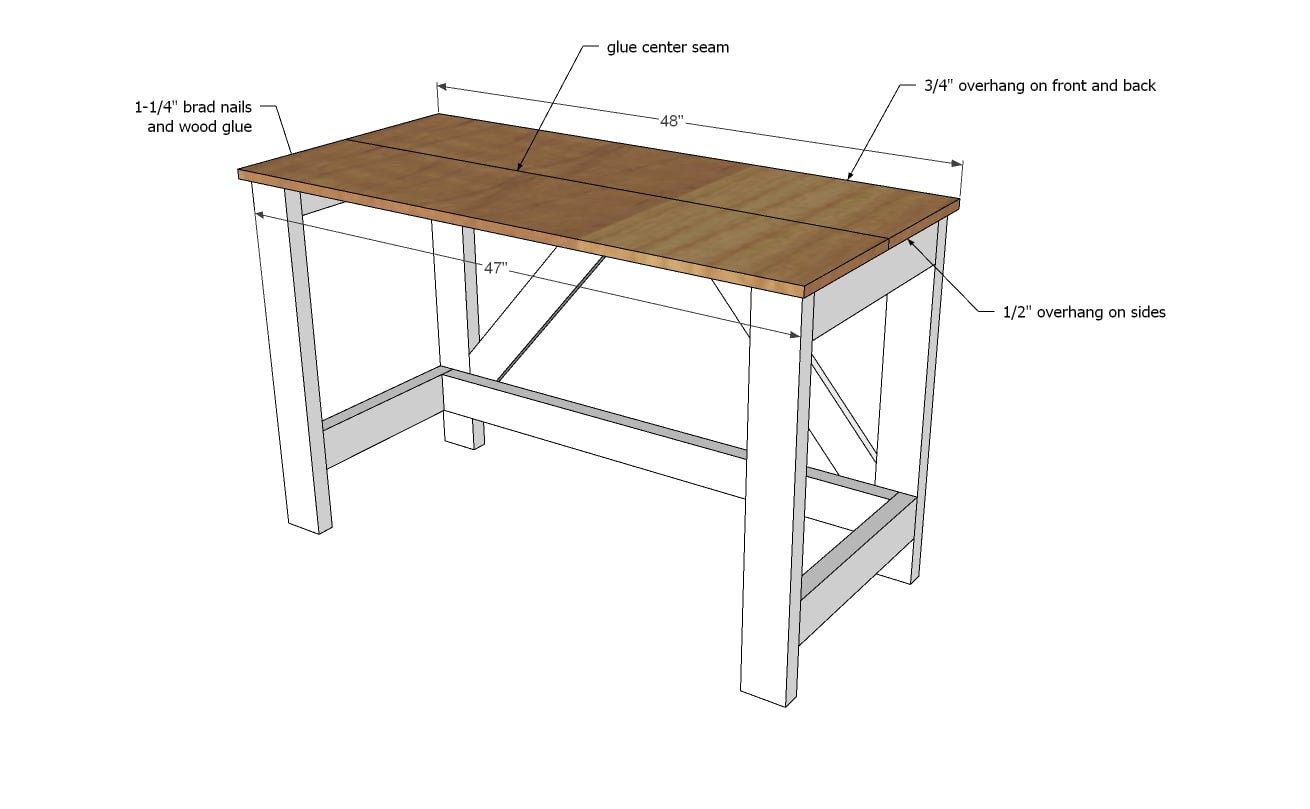
If you have a Kreg Jig, join the top pieces together first.
Otherwise, attach with glue and 1-1/4" brad nails to the top of the desk, keeping outside overhangs even.
Step 5
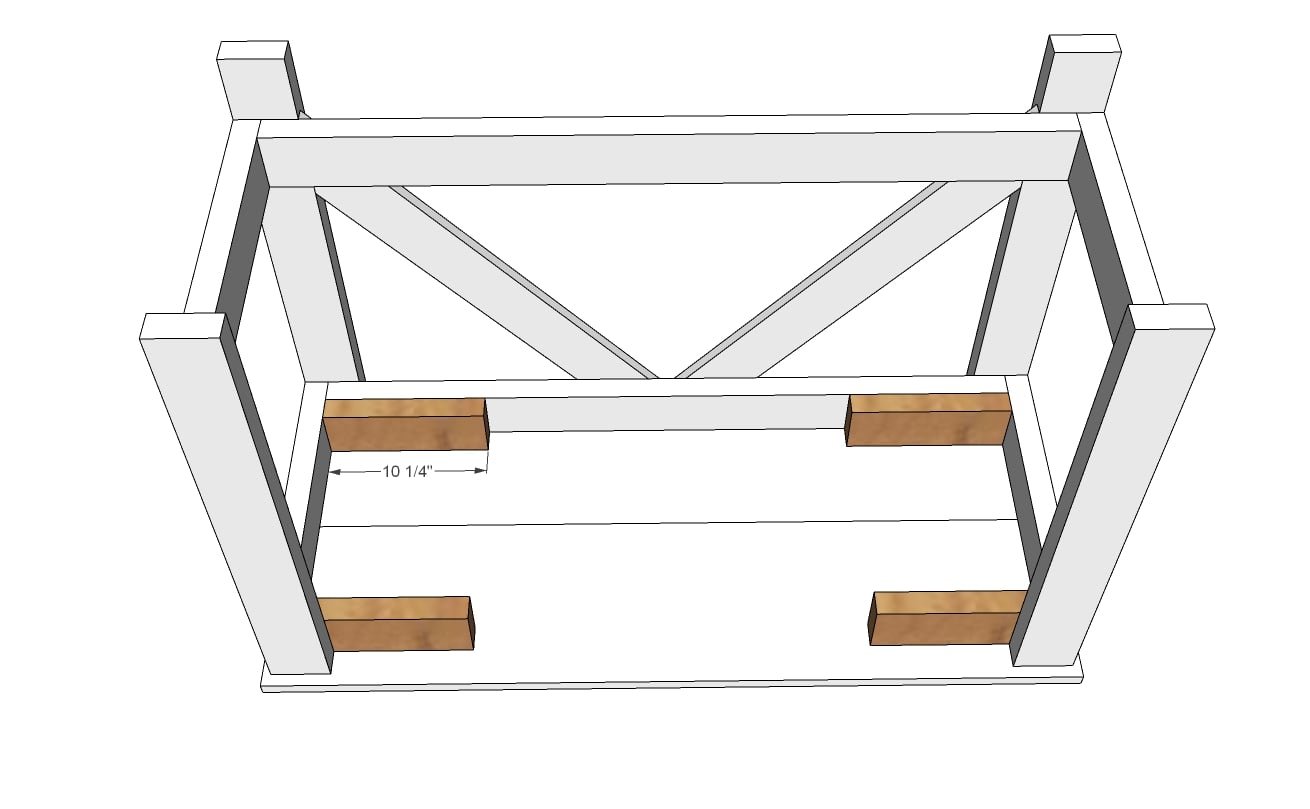
Add drawer framing supports under the desktop. These supports also help keep the desktop from sagging in the middle. Use glue and 2-1/2" screws to attach.
Step 6
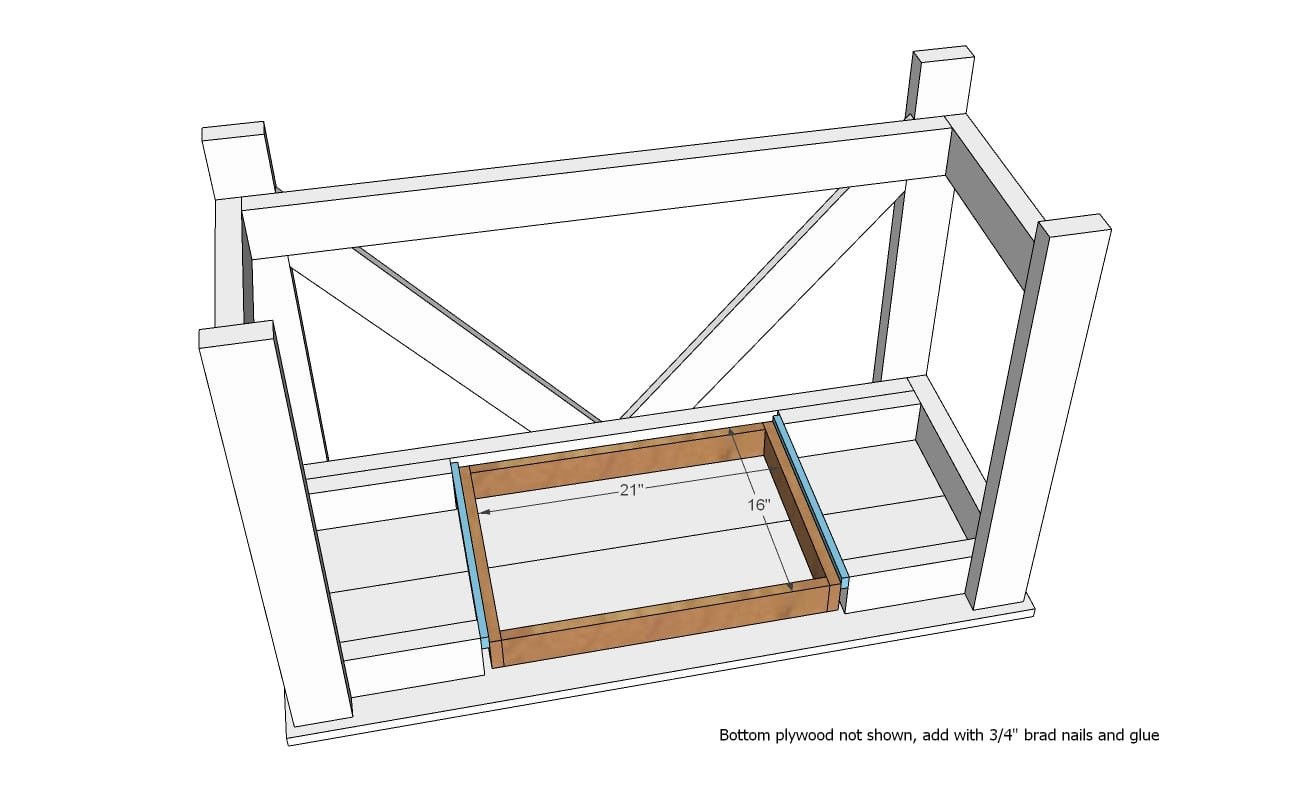
Build the drawer box to fit in the opening and attach with the drawer slides as shown. You can use pocket holes (best option) or 1-1/4" brad nails to build the drawer box. The bottom is attach with 3/4" brad nails and glue.
Step 7
Attach drawer face to front of project, holding down about an 1/8" to allow the drawer face to open and close under the desktop. Attach with 1-1/4" brad nails and wood glue, avoiding the handle location.
Finishing
Sand all surfaces, starting with a medium grit and finishing with fine. Wipe off the dust, fill any holes or gaps with wood filler, and sand smooth once dry. Apply primer if you're painting, then finish with your choice of paint or stain and seal with a durable clear topcoat. For outdoor projects, use exterior-rated primer, paint or stain, and sealer so the piece stands up to the weather.
Source (temporary): https://www.ana-white.com/woodworking-projects/brookstone-desk