Brookstone Queen Headboard
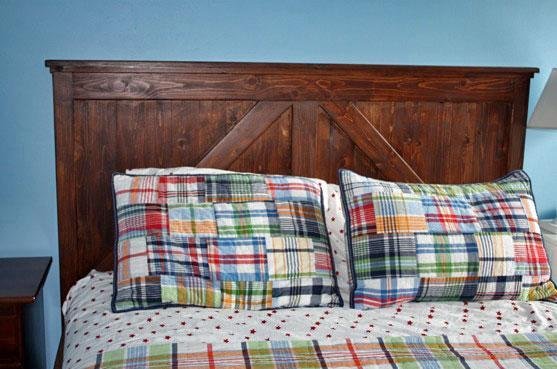
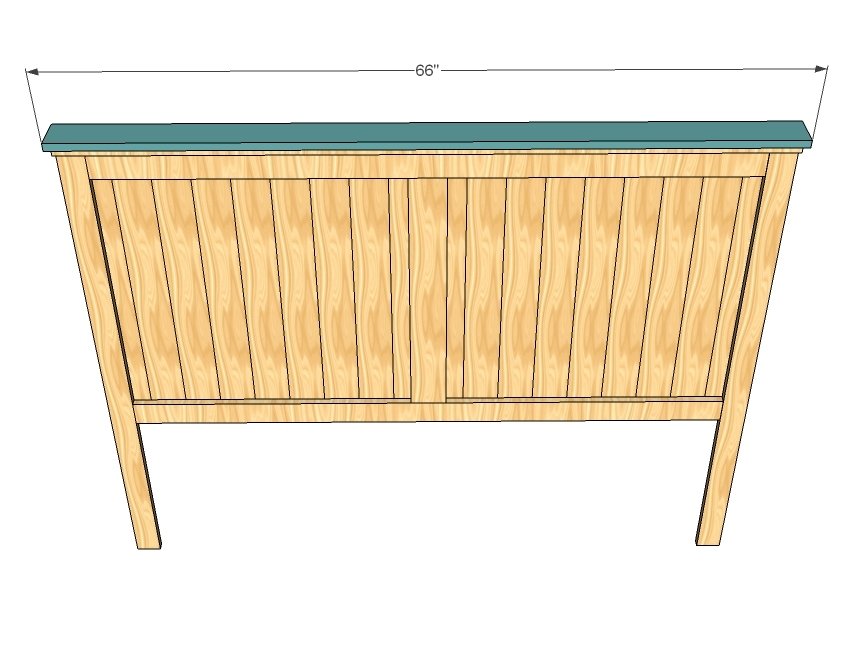
A rustic headboard that looks like an old barn door.
Specifications
| Project type | Headboard |
|---|---|
| Room | Bedroom |
| Style | Farmhouse Furniture |
| Difficulty | Beginner Projects |
| Estimated cost | $20 - $50 |
Dimensions
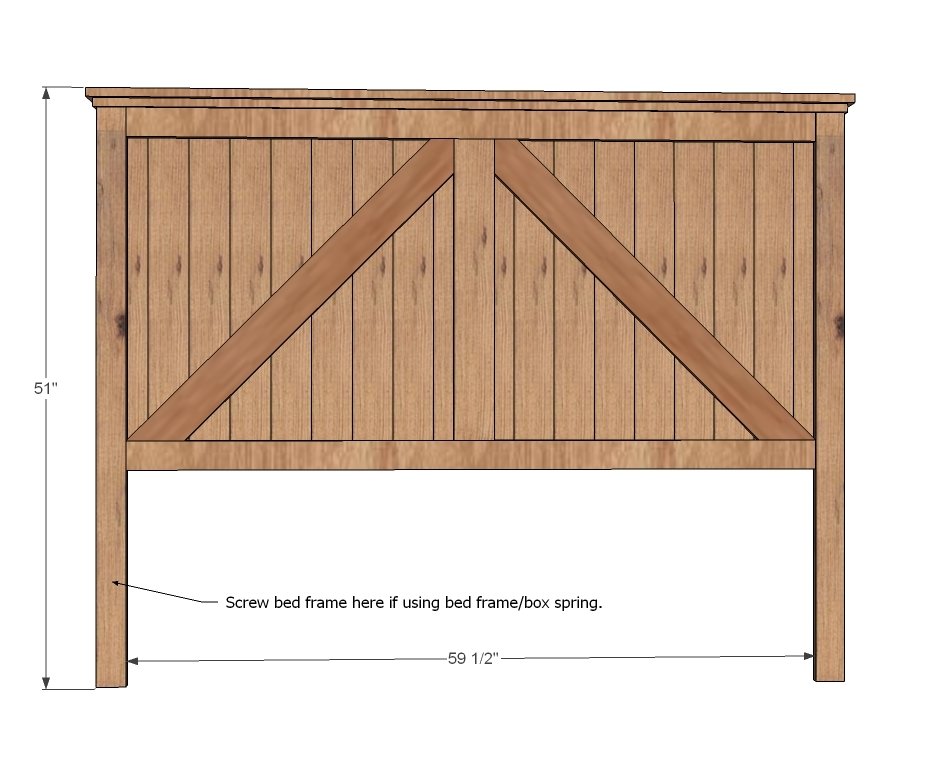
Use the size-specific shopping and cut lists below.
Shopping List
8 1×4, 8’ Long
2 1x2s, 8’ Length
3 1×3, 8’ Length
1 1/4” Finish Nails
2” Finish Na
Cut List
18- 1×4 @ 31” Panel Boards
2 – 1×2 @ 49 1/2 “ Side Legs
2 – 1×3 @ 49 1/2” Front Legs
2 – 1×3 @ 38 1/2” Back Supports
2 – 1×4 @ 38 1/2” Front Trim
1 – 1×4 @ 26” Center Trim
1 – 1×3 @ 44” Top Trim
1 – 1×4 @ 45” Top Trim
2 – 1×4 @ 30” Ends cut at 30 degrees off square, parallel, see last step
Tools
- measuring tape
- square
- pencil
- safety glasses
- hearing protection
- drill
- circular saw
- jigsaw
- compound miter saw
- nailer
- sander
- countersink drill bit
Step-by-step Instructions
Headboard Panel
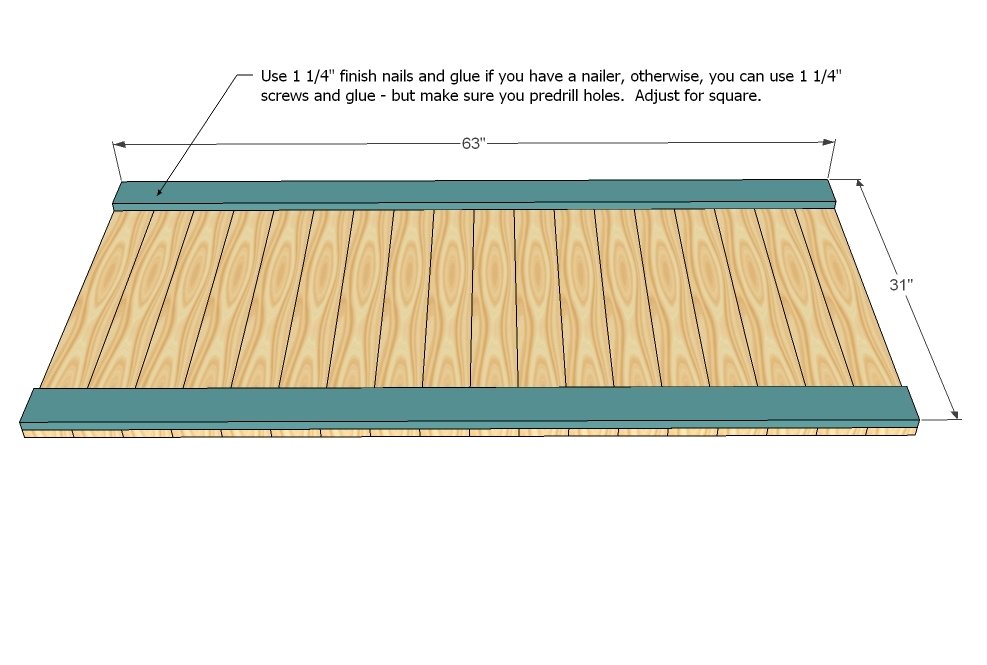
Start by lining all the 1×4 panel boards up, rotating the grain so the bark side is up, then down. Adjust for square. Then if you have a nailer, glue and nail the top and bottom trim in place. Otherwise, screw from the back to hide your screw holes. Shown above back side up, so you would just screw through the trim into the back side of the panel boards.
Legs
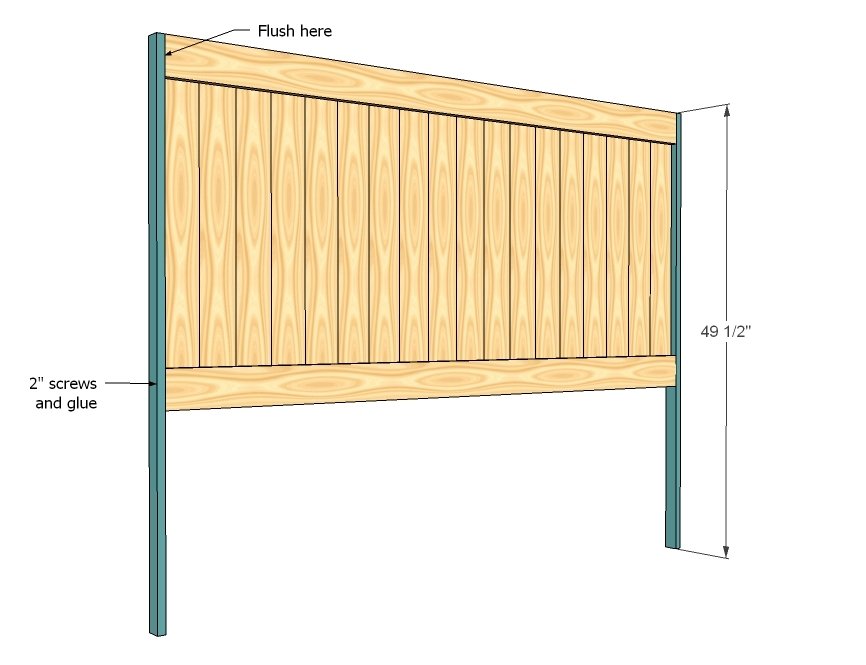
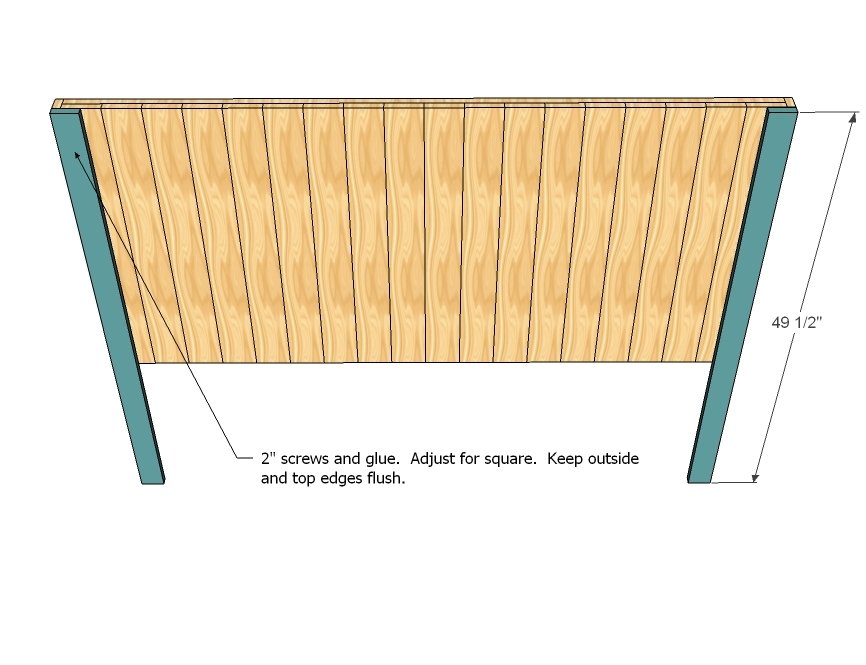
Now screw the legs on with glue and 2″ screws.
Leg Fronts
Nailer would be handy here, but if you don’t have one, you can screw the leg fronts to the legs. Use glue and 2″ screws or nails.
Front Trim
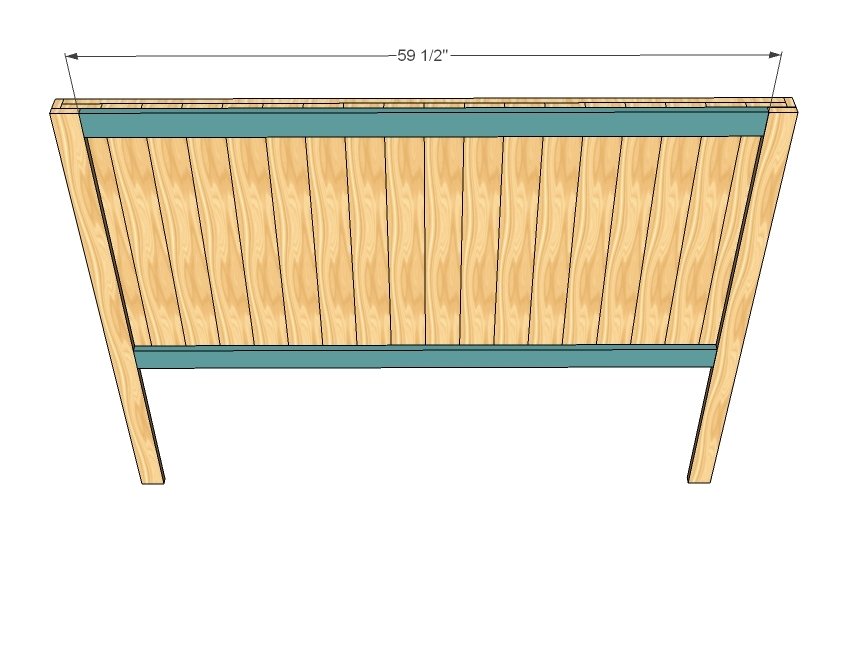
I highly recommend measuring and cutting these to fit. Nails would hide best, and even if you don’t have a nailer, if you plan to stain, I suggest using a hammer and finish nails to hide any holes. If you plan to paint, go ahead with the screws and glue.
Step 5
Top Trim
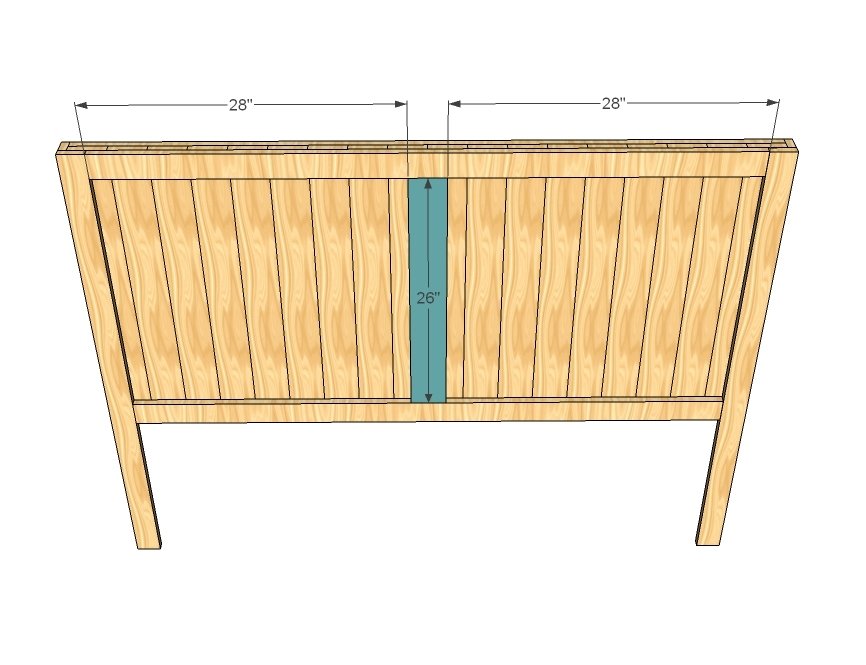
Now add the top trim with screws or nails and glue. Center on the top.
Header
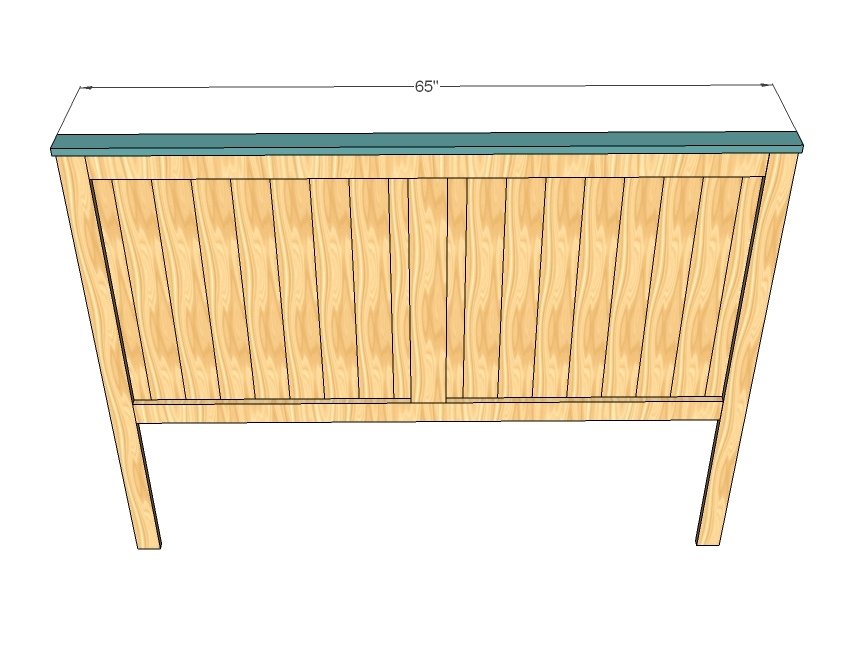
Use finish nails and glue to attach the top to the top trim. Center on the top.
Cross Supports
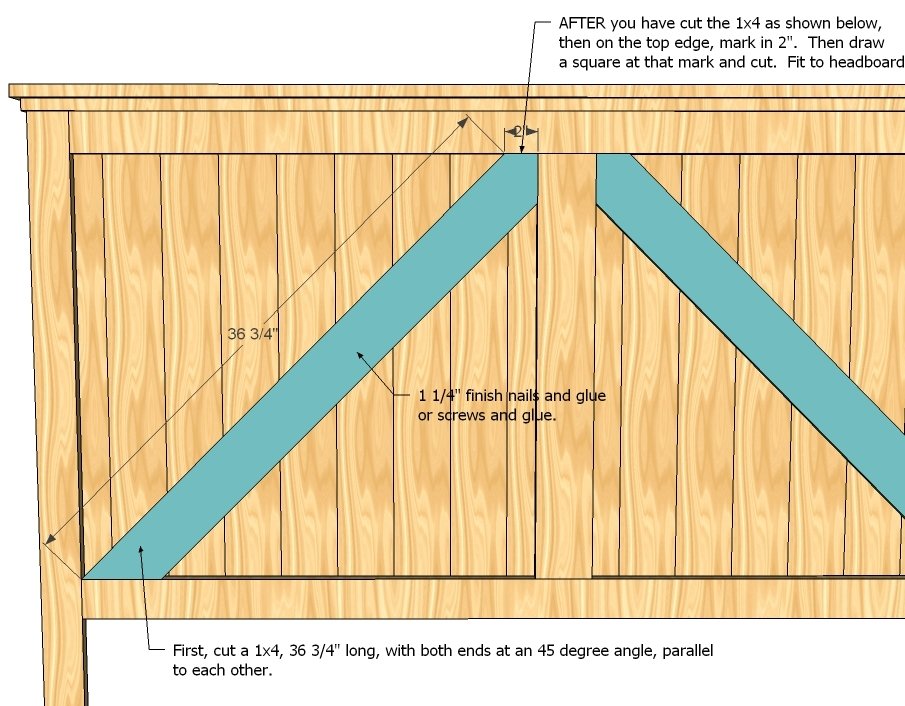
Start by cutting 2 1x4s 36 3/4″ long, with both ends cut at 45 degrees off square, parallel to each other. Then on the top end, measure in 2″ and mark a line square with the top edge (see above diagram). Cut this line. Attach the cross supports to the headboard with 1 1/4″ finish nails and glue, nailing into all of the panel boards.
Finishing
Sand all surfaces, starting with a medium grit and finishing with fine. Wipe off the dust, fill any holes or gaps with wood filler, and sand smooth once dry. Apply primer if you're painting, then finish with your choice of paint or stain and seal with a durable clear topcoat. For outdoor projects, use exterior-rated primer, paint or stain, and sealer so the piece stands up to the weather.
Source (temporary): https://www.ana-white.com/woodworking-projects/brookstone-queen-headboard