Build a Beautiful Nursery Wall
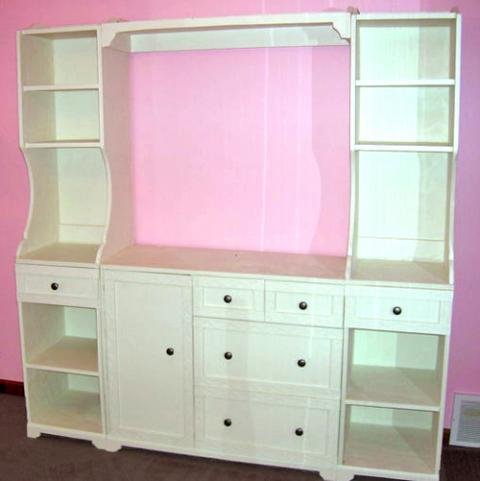
With two shelves and a drawer, necessities for baby like diapers, wipes, and lotions, can be kept within reach. A beautiful footer adds charm to this piece. Works with the rest of the Madeline Collection of plans.
Specifications
| Project type | Nightstands |
|---|---|
| Room | Storage Solutions |
| Style | Farmhouse Furniture |
| Difficulty | Intermediate |
| Estimated cost | $20 - $50 |
Dimensions
Use the size-specific shopping and cut lists below.
Shopping List
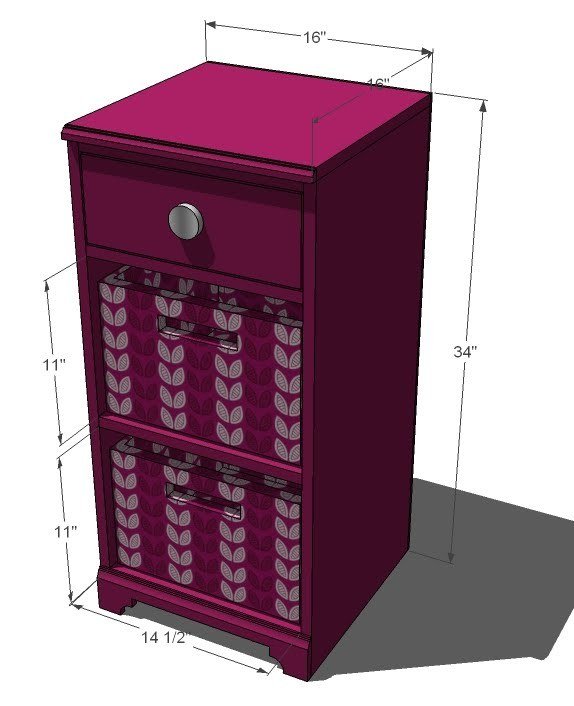
1 Sheet of 3/4″ MDF or 3/4″ A1 Plywood, cut into 1×16 boards 1 – 1×6 Board (you only need about 5′ feet) 1 – 1×2 Board (you only need about 3′ feet) 3 1/4″ Floor trim or base moulding 3/4″ Edge Trim (3/4″ wide) 1 – Wood Knob 2″ Nails 1 1/4″ Nails Wood Glue Wood Filler Sand Paper Finishing Supplies Optional 12″ Drawer Slides, side mount, 1/2″ overall clearance on the sides Knob for drawer
Cut List
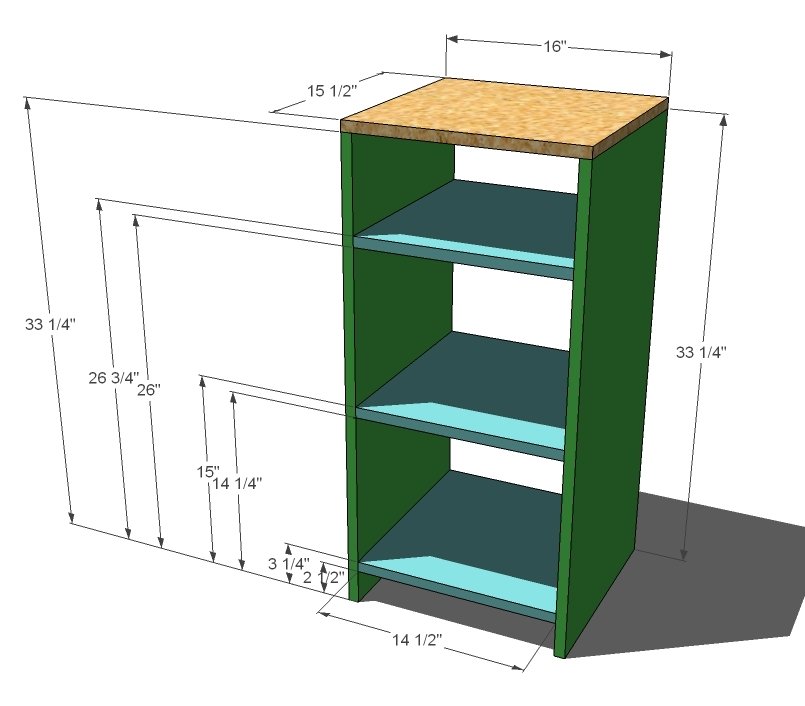
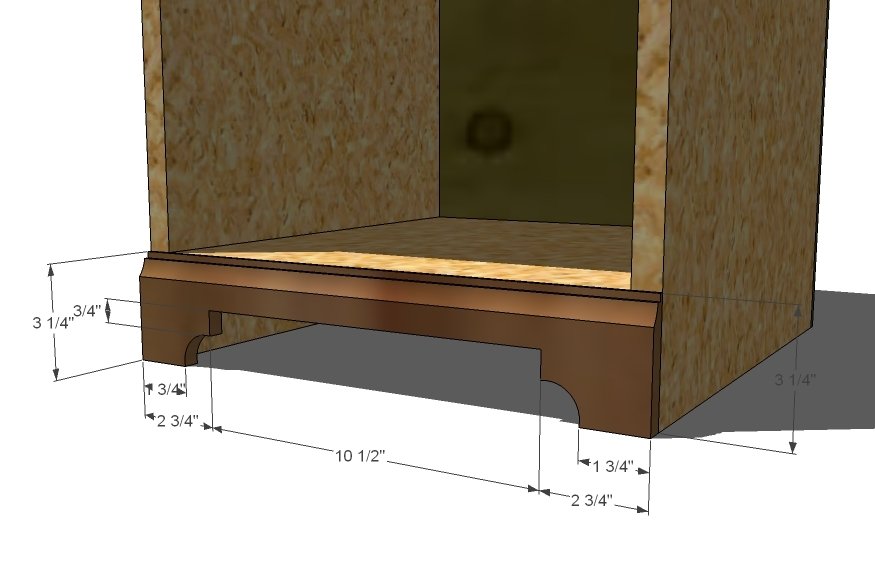
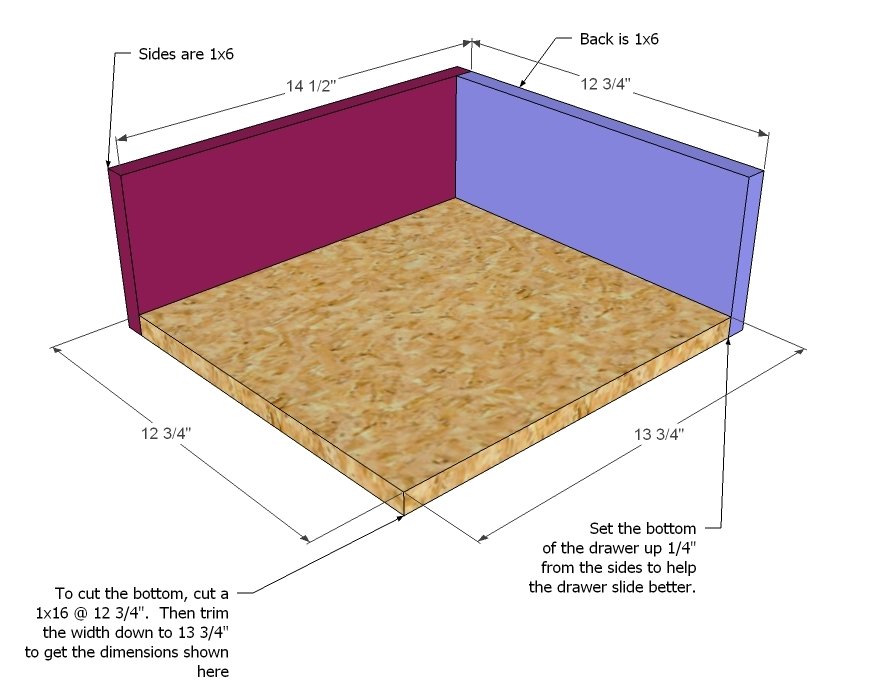
Please note that I choose to build these plans 16″ deep as opposed to 19″ to conserve building materials (you can get 50% more 1x16s out of a sheet of plywood or MDF than you could get 1x19s out of the plywood or MDF). Changing pads are tradditionally 16″ wide. You can modify these plans for a wider depth by using a wider width plywood or MDF strip. And yes, the cubbies will fit the Pottery Barn Kids storage boxes. Cutting List for the Box 2 - 1×16 @ 33 1/4″ (Sides) 3 – 1×16 @ 14 1/2″ (Shelves) 1 – 1×16 @ 16″ (Top) Cutting List of Trim 2 – 1×2 @ 14 1/2″ (Inner Trim) 1 – 3/4″ Edge Trim @ 16″ (Front Edge Trim) 1 – 3 1/4″ Base Moulding or Floor Trim @ 16″ (Base Moulding) Cutting List for Drawer 2 – 1×6 @ 14 1/2″ (Drawer sides) 1 – 1×6 @ 12 3/4″ (Drawer back) 1 – 1×6 @ 14 1/4″ (Drawer Face) 1 - 1×16 @ 12 3/4″ (Drawer Bottom, trim the width down to 12 3/4″ x 13 3/4″)
Tools
- measuring tape
- square
- pencil
- hammer
- safety glasses
- hearing protection
- kreg-jig
- drill
- circular saw
- jigsaw
- nailer
- sander
Step-by-step Instructions
Step 1
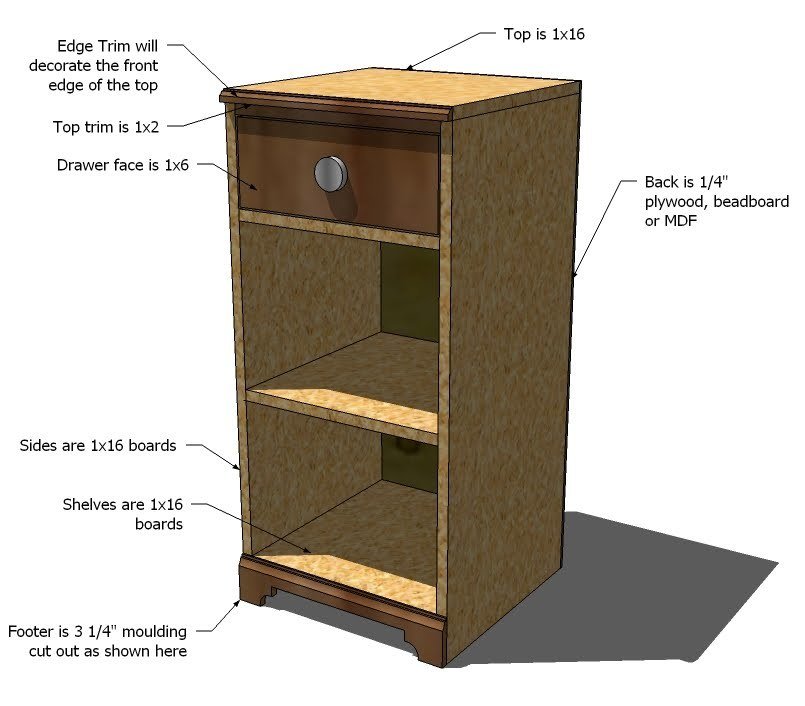
Composition is shown above. Use 3/4″ MDF for painting with pine boards, 3/4″ A1 plywood for staining, with hardwood boards (boards are shown in dark brown above)
Step 2
Build the Box. Start by marking your sides as shown in the left of the diagram above. Mark both the inside and the outsides of the side boards so you know where to fasten and where to line the boards up at. With the sides marked, fasten the shelves in place, keeping the front edges flush. Then fasten the top in place.
Step 3
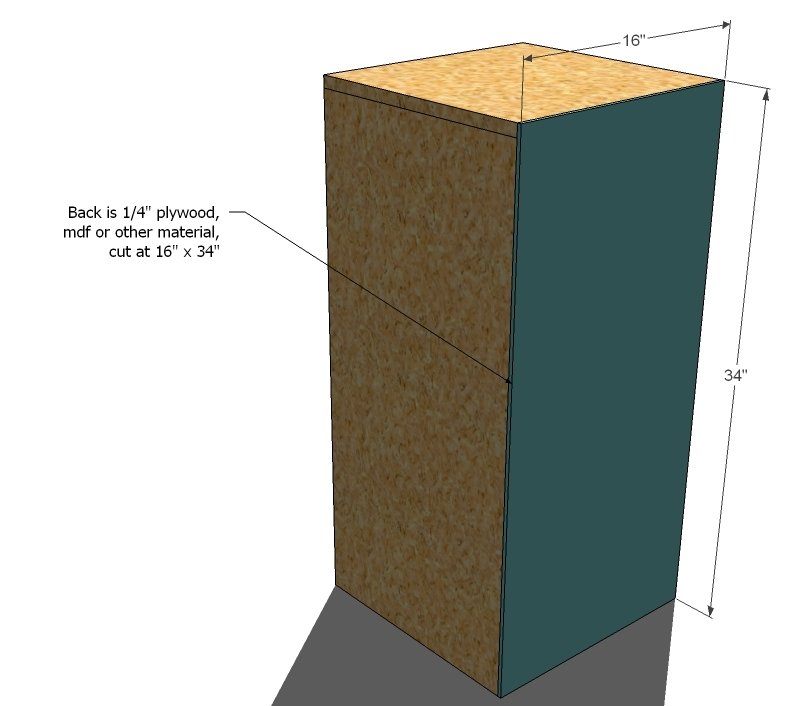
Back. Square your project up. Then using glue, fasten the back to the cabinet using 1 1/4″ nails. Make sure you fasten to the shelves too.
Step 4
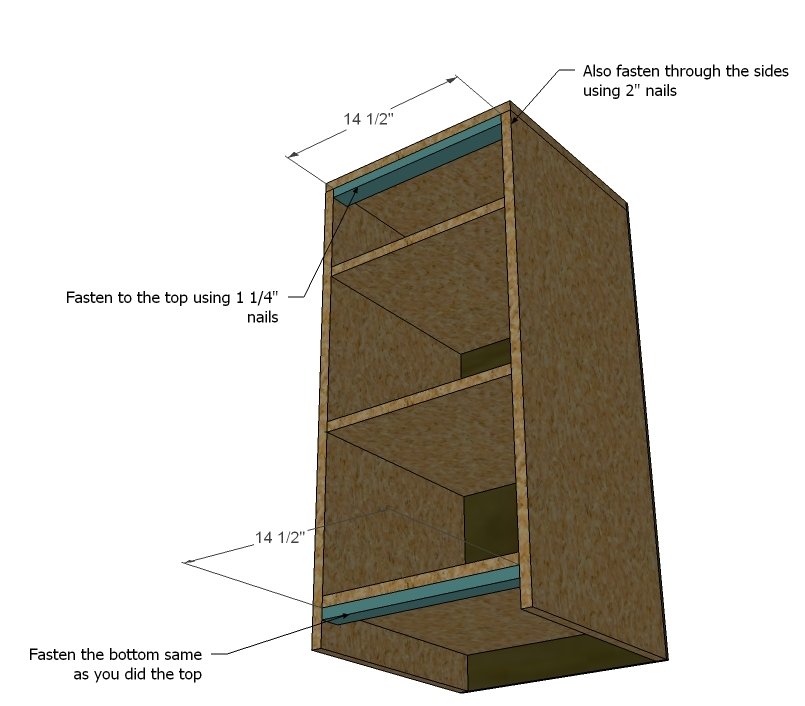
Inner Trim. Fasten the inside trim pieces as shown above. Check for square and fasten to both the shelves and sides to reinforce your joints. Use glue.
Step 5
Step 6
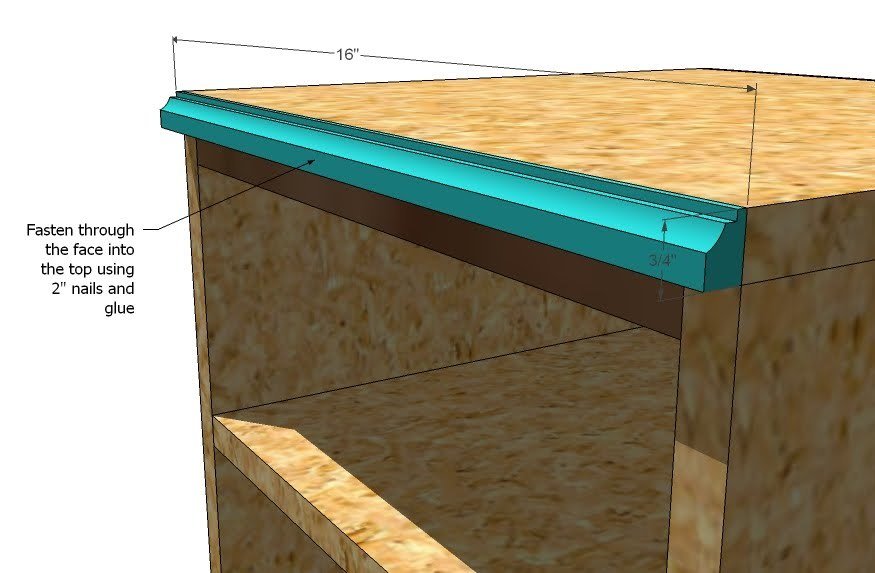
Top Edge Trim. With glue and nails, fasten the top edge trim as shown above. Keep outside and top edges flush. You could aslo use trim up to 1 1/4″ wide here.
Step 7
Drawer Construction. First cut your drawer bottom from the 1×16, length of 12 3/4″. Then cut the width side down to 13 3/4″ (completed dimensions should be 12 3/4″ x 13 3/4″). You must cut the drawer bottom perfectly square. Then fasten the drawer back to the bottom. Then the sides to the back and bottom. Use 2″ nails and glue. You may wish to inset the bottom up 1/4″. The easiest way to do this is use a scrap piece of plywood 1/4″ and rest the bottom on the scrap. Then fasten the sides. Make sure you build a square drawer.
Step 8
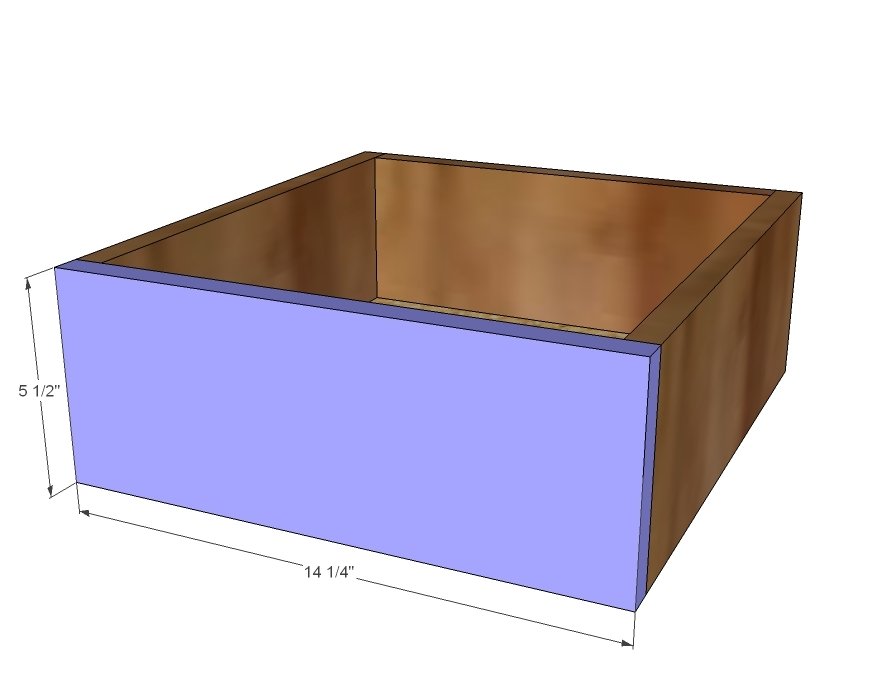
Drawer Face. Insert the drawer into the drawer housing in the cabinet (without the face attached). Then center the face on the drawer and attach the face to the drawer, leaving a 1/8″ even gap around all edges, including the bottom edge. Use glue and 2″ nails
Step 9
Finishing. Fill nail holes with wood filler and sand and finish as desired. Add the front knob.
Finishing
Sand all surfaces, starting with a medium grit and finishing with fine. Wipe off the dust, fill any holes or gaps with wood filler, and sand smooth once dry. Apply primer if you're painting, then finish with your choice of paint or stain and seal with a durable clear topcoat. For outdoor projects, use exterior-rated primer, paint or stain, and sealer so the piece stands up to the weather.
Source (temporary): https://www.ana-white.com/woodworking-projects/build-beautiful-nursery-wall-side-bases