Build the Bitty Bench
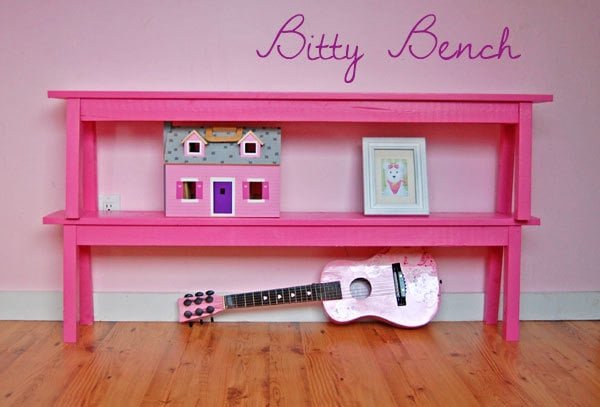
A little itty bitty bench for itty bitty guests. Features a tip resistant leg design, yet still narrow and space saving.
Specifications
| Project type | Kids Tables and Chairs |
|---|---|
| Room | Bathroom |
| Style | Children's and Kid's Room Furniture and Toy Plans |
| Difficulty | Starter Projects |
| Estimated cost | Under $20 |
Dimensions
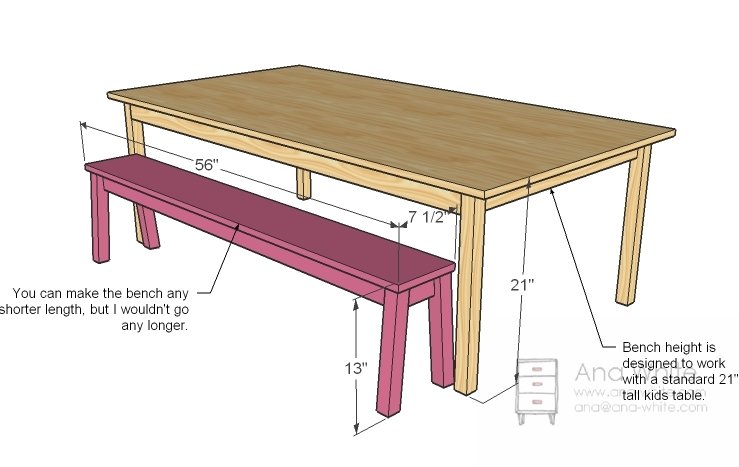
Use the size-specific shopping and cut lists below.
Shopping List
1 – 4 foot long 1×8 (my bench) but you can also use a 1×10 or 1×12 for a wider seat
1 – 2×2, 6 feet long
2 – 1×3, 8 feet long
2″ screws
wood glue, wood filler and finishing supplies
Cut List
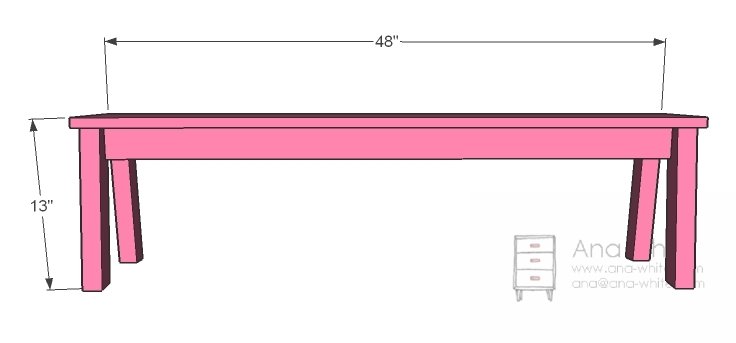
1 – 1×8 @ 48″ (you can use the 1×10 or 1×12 here)
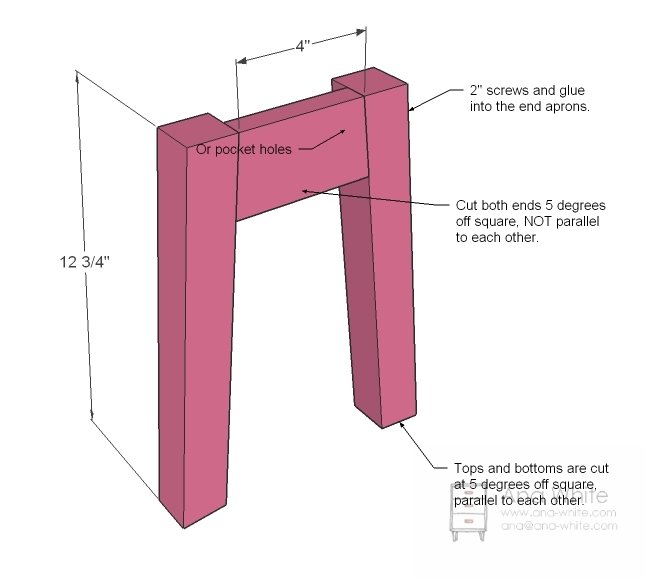
4 – 2×2 @ 13 3/4″ long, both ends cut at 5 degrees off square, parallel to each other
2 – 1×3 @ 4″ with both ends cut at 5 degrees off square, NOT parallel to each other (cut 2″ longer for a 1×10, 4″ longer for a 1×12)
2 – 1×3 @ 44″ (side aprons)
Tools
- measuring tape
- square
- pencil
- hammer
- safety glasses
- hearing protection
- kreg-jig
- drill
- circular saw
- nailer
- sander
- countersink drill bit
Step-by-step Instructions
Step 1
The bench shown in the photos is actually 56″ long, but I choose to make the plans only 48″ long to save everyone from buying a longer board. But you can easily modify the plans to a longer bench.
Ends
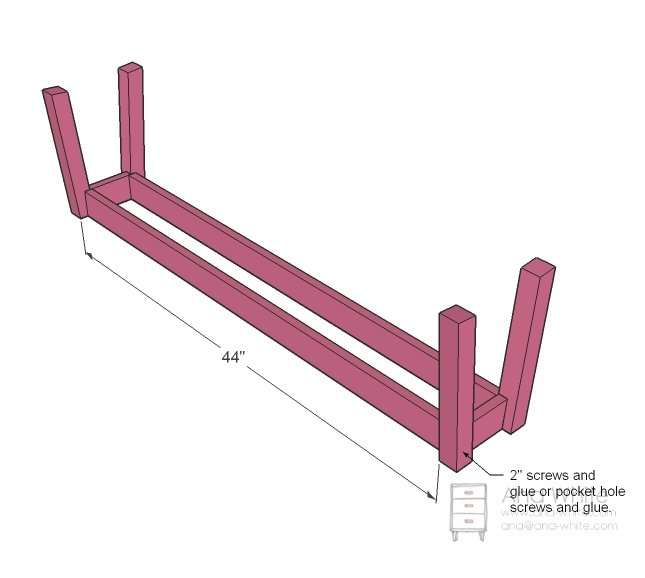
Build the ends as shown above. Use glue and screws. You can use pocket hole screws or 2″ screws predrilled with a countersink bit from the outsides of the legs. Use 2 screws per leg per end apron.
Front/Back Aprons
Now carefully add the front and back aprons to the ends with screws and glue. Keep the aprons square with the work surface, NOT inline with the legs. If you do, you won’t be able to put the top on straight.
Top
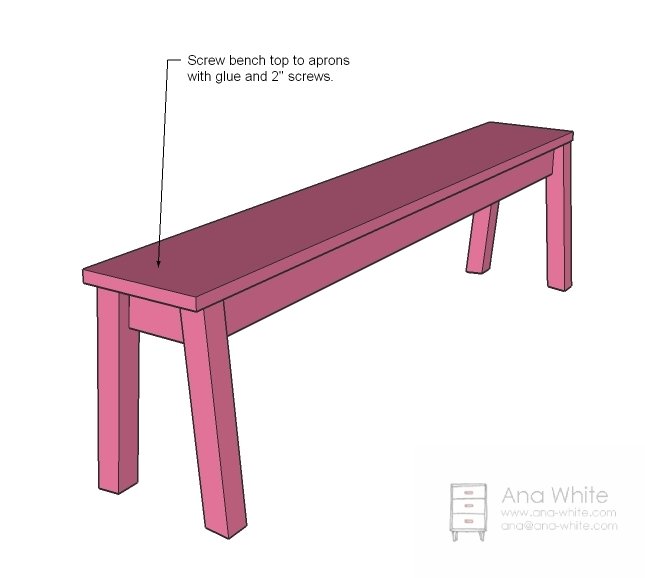
Now simply lay the bench top, pretty side up, and line the aprons up on the underside. Trace the aprons onto the bench top. Measure and take note of the exact placement of the aprons. Then place the bench frame right side up and lay the bench top on top of the frame, pretty side up. Line up and then predrill holes through the traced lines and screw down. Somewhere in there, you need to apply glue to the tops of the aprons.
Finishing
Sand all surfaces, starting with a medium grit and finishing with fine. Wipe off the dust, fill any holes or gaps with wood filler, and sand smooth once dry. Apply primer if you're painting, then finish with your choice of paint or stain and seal with a durable clear topcoat. For outdoor projects, use exterior-rated primer, paint or stain, and sealer so the piece stands up to the weather.
Source (temporary): https://www.ana-white.com/woodworking-projects/build-bitty-bench