Build a Simple Nightstand
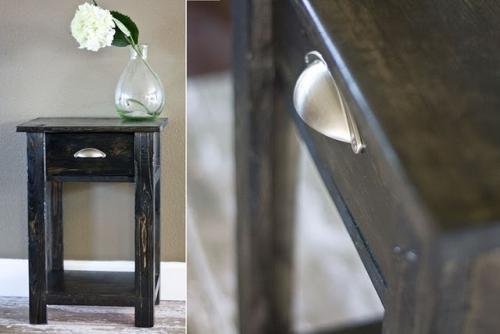
Simple nightstands that can be made from scraps. Uses a simple wood drawer and easy false legs. From Crissie at a nightstand made from these plans!
Specifications
| Project type | Nightstands |
|---|---|
| Room | Bedroom |
| Difficulty | Intermediate |
| Estimated cost | $20 - $50 |
Dimensions
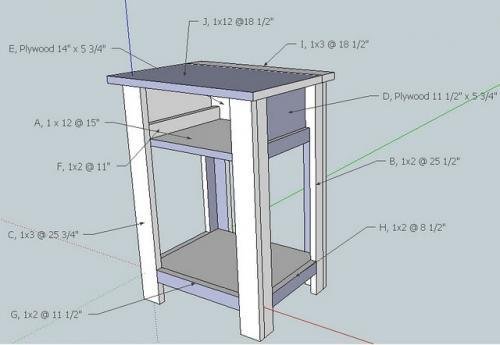
Use the size-specific shopping and cut lists below.
Tools
- measuring tape
- square
- safety glasses
- hearing protection
- drill
- circular saw
- nailer
Step-by-step Instructions
Step 1
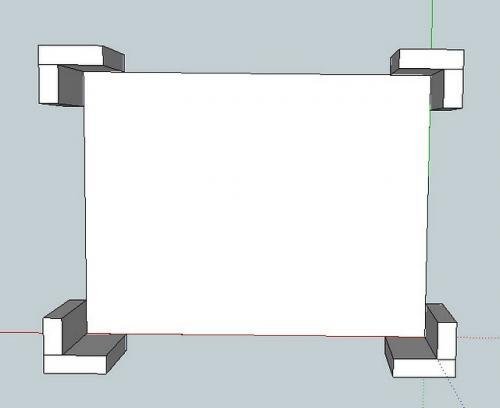
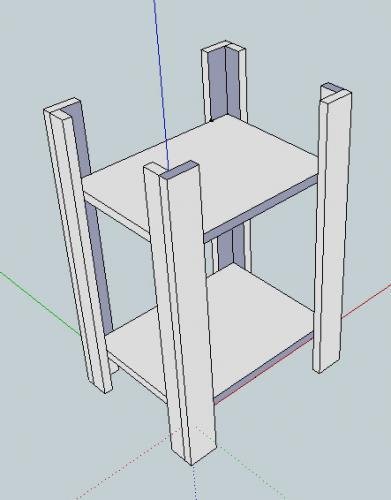
1. Legs. Start by attatching the legs together by taking a 1x2x25 1/2" and attatching it to the 1x3x25 1/2" on the long edge, so that the two piece make a leg, as shown below. Do this to make all four legs. Mark each leg 3 1/2" from the bottom. Take care to place the 1x3 part of the leg on the front and back, and the 1x2 part of the legs on the sides, as shown in the below photo. This is very important to make sure your drawer fits properly. Legs to Shelves. Now attatch the legs to one of the shelf pieces, so the bottom of the shelf is flush with the marks made in step 1. This will give a 3 1/2" clearance under the nightstand. Your nightstand should look as follows. Remember, the 1x3 side of the legs goes on the front and back, and the 1x2 side goes on the sides, as pictured.
Step 2
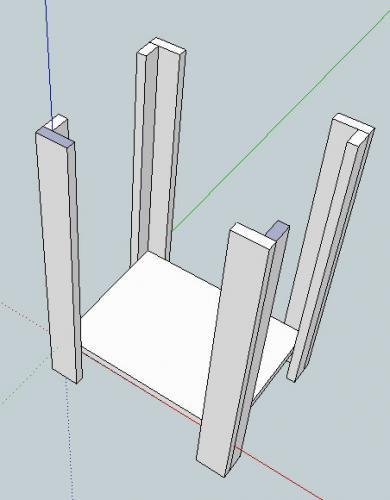
Legs, Top Shelf. Now mark the legs 5 3/4" from the top edge on the insides. Attatch the top shelf, leaving a clearnace of 5 3/4" from the top edge of the shelf to the top of the piece.
Step 3
Legs, Top Shelf. Now mark the legs 5 3/4" from the top edge on the insides. Attatch the top shelf, leaving a clearnace of 5 3/4" from the top edge of the shelf to the top of the piece.
Step 4
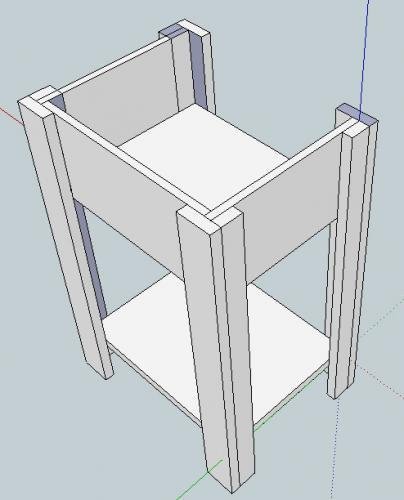
Sides, Drawer Box. Your nighstand should appear as above. If everything was done properly, you can now add the side pieces of plywood. If you choose to use 1x12s for the side pieces of the drawer box, make sure you make the back piece of plywood (E) 1/2" shorter, or specifically 13 1/2 x 5 3/4"
Step 5
Step 6
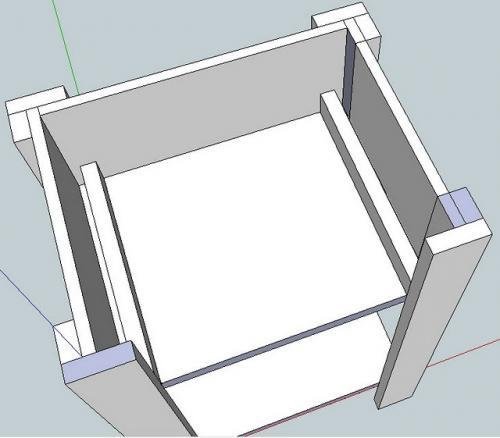
Front Trim. As shown above, now add the front trim piece onthe bottom edge. Keep the top edge of the trim and the shelf flush.
Step 7
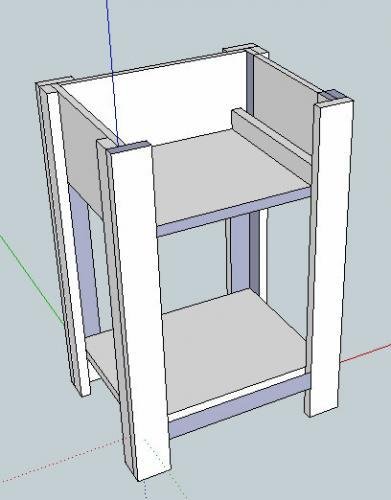
Shelf Trim. As shown above, add the side trim pieces (H) to the bottom shelf, and the bottom of the sides of the drawer box.
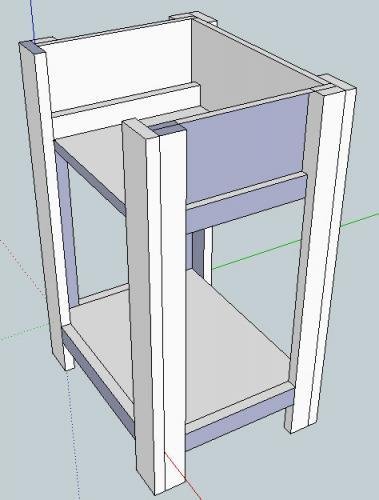
Step 8
Top, Back. Now add the back top countertop piece (I) as shown above, leaving a 1" overhand on either side. I would take a moment to measure the inside of the drawer box and confirm that it is exactly 11" wide and 11" deep. (The depth measurement will actually be 10 1/4 to the bottom shelf, and 11" to the side of the legs). Top, Front. Add the front countertop piece as shown. Leave a 1" overhand on the sides and front.
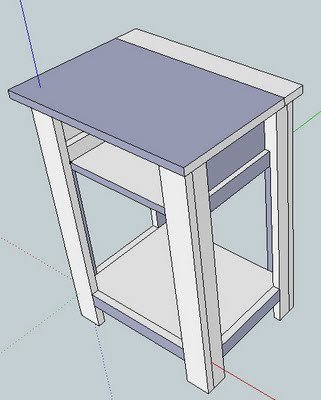
Step 9
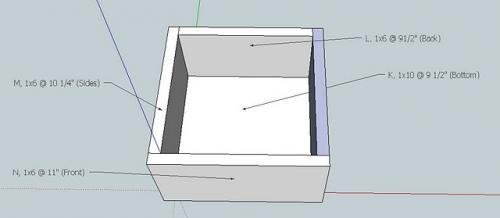
Drawer. The drawer box is much more simple. Start with the bottom piece and attatch the back piece as shown. You will nail through the back piece into the bottom piece. Then attatch the side piece, nailing through the side piece into the bottom and back pieces. Drawer. Do the same on the other side. Your drawer should appear as above. Finally, nail the front piece to the drawer. Your drawer should look as follows:
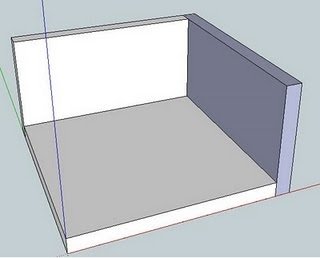
Step 10
Drawer. If you have done everything correctly and exactly, the drawer should be a perfect fit. 14. Finishing. Fill any holes with wood filler and sand and finish as desired. Special thanks to one of our readers, Charissa, for creating this PDF to help you.
Finishing
Sand all surfaces, starting with a medium grit and finishing with fine. Wipe off the dust, fill any holes or gaps with wood filler, and sand smooth once dry. Apply primer if you're painting, then finish with your choice of paint or stain and seal with a durable clear topcoat. For outdoor projects, use exterior-rated primer, paint or stain, and sealer so the piece stands up to the weather.
Source (temporary): https://www.ana-white.com/woodworking-projects/build-simple-nightstand