Build Your Own Table Menu Stands
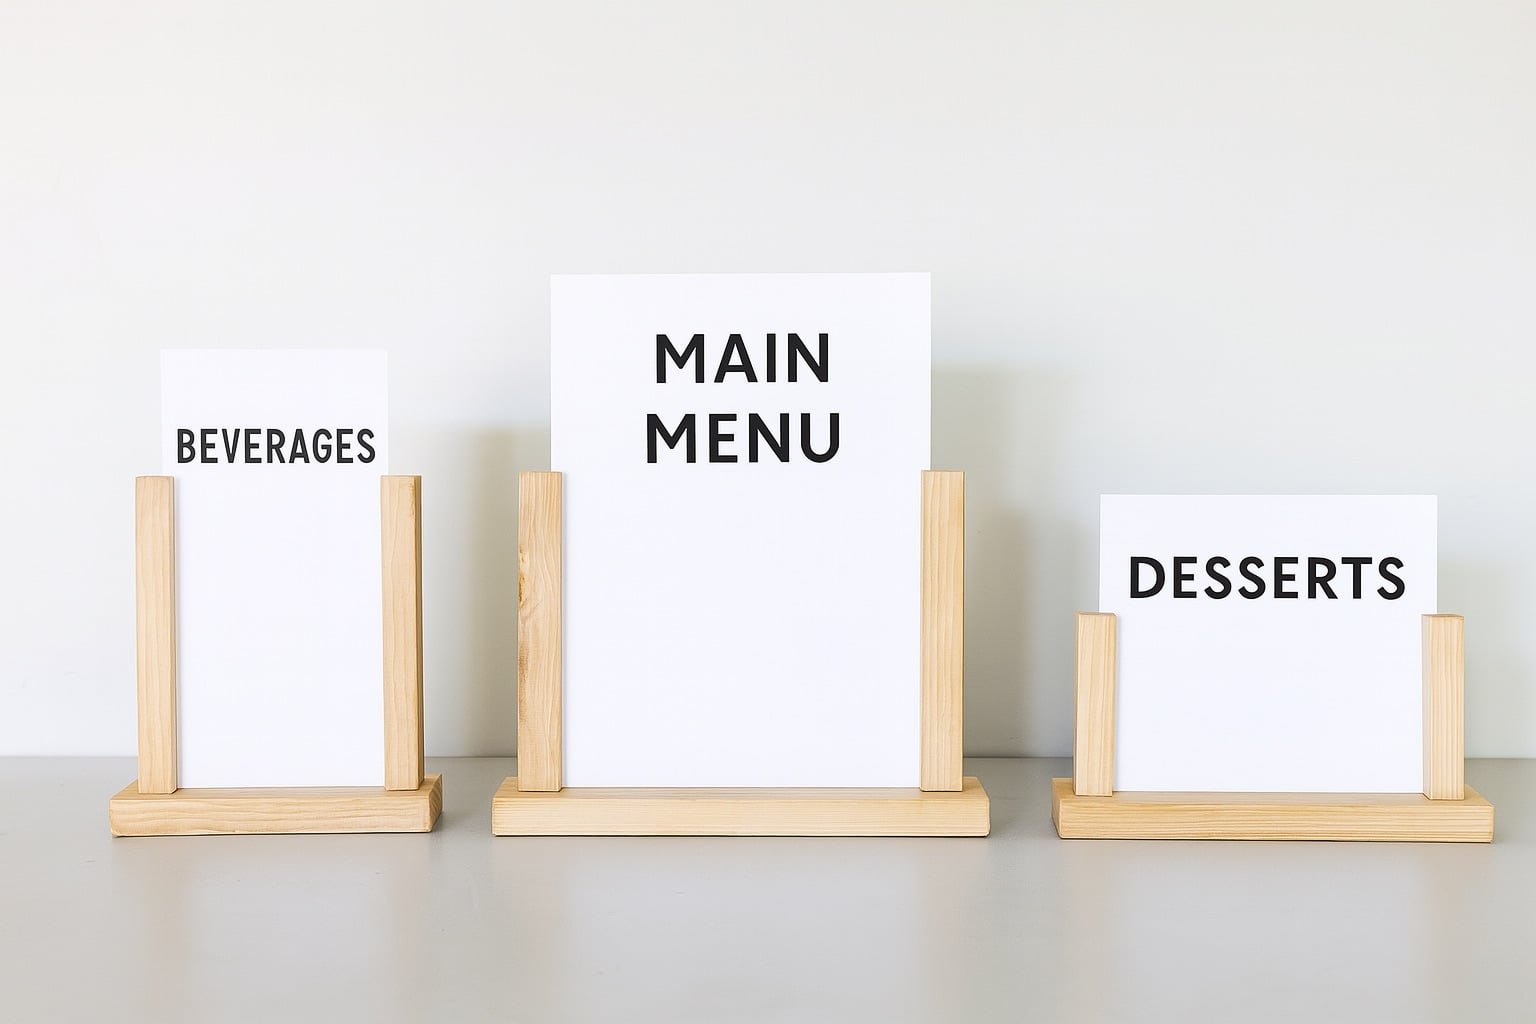
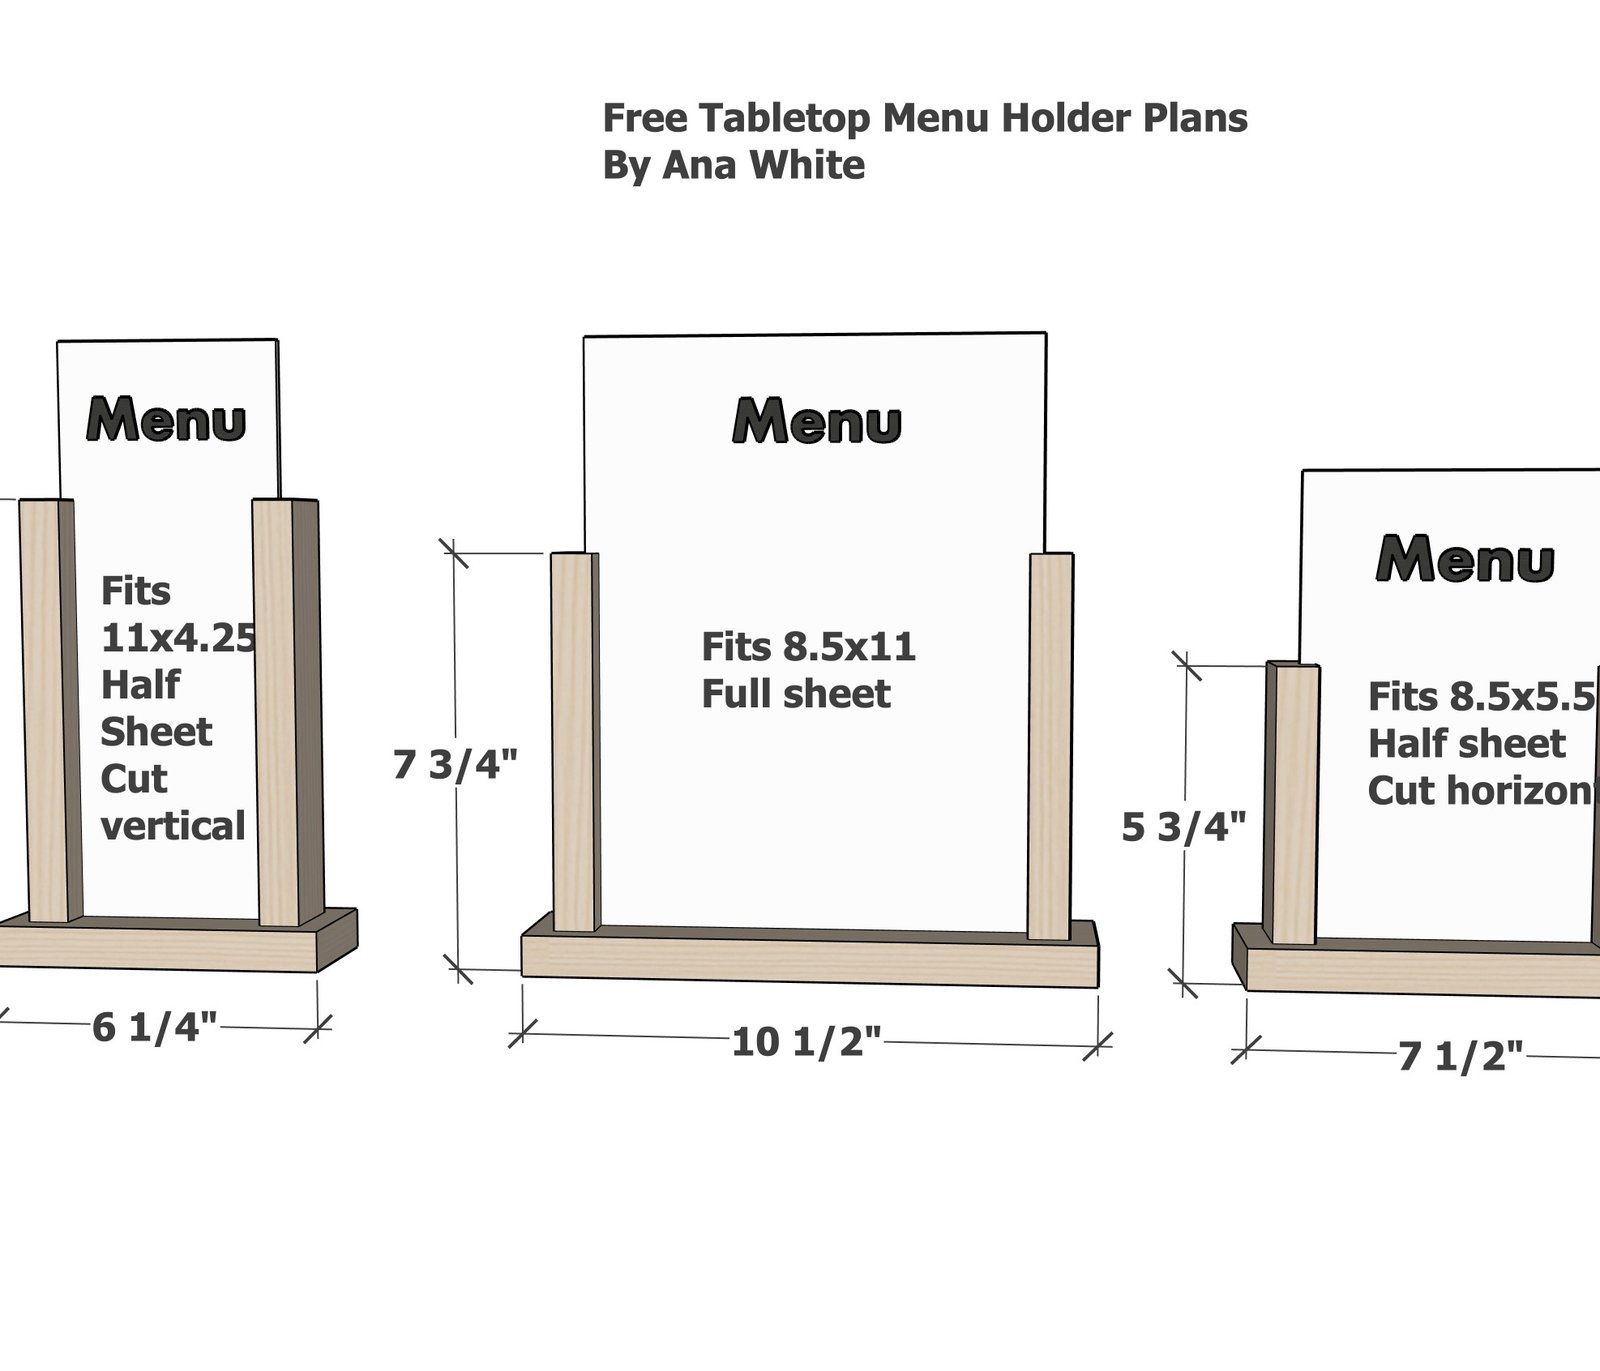
Make your own tabletop menu holders with these easy, beginner-friendly plans. These wood frames hold menus upright to display, made from affordable 1x2 and 1x3 pine boards, so you can stain or paint them any color to match your space. Menus simply slide in from the top, making it super easy to swap out cards as needed—perfect for heavy cardstock or laminated menus. The wood base adds rustic charm! The plan includes three size options, all based off 8.5" x 11" standard paper sizes for printed paper menus. • Full size (8.5x11”) for standard menus • Half wide - full sheet cut in half horizontal (8.5x5.5”) • Half tall - full sheet cut in half vertical (4.25x11”) That way, you can print menus right at home on standard 8.5" x 11" cardstock either use the full sheet, or cut in half, and always have a perfect fit, and they fit right in the wooden stand. Every menu holder is easy to build with step-by-step diagrams, a full shopping list, and a cut list. Each one costs under $1 in materials! The weighted wooden base keeps the holder stable on any table. These menu displays look high-end, frame your menu, can you used for special offers, promotions, daily specials, and are a great way to display your logo, on easy to print paper menus! Guest will love them! Add a rustic, handmade touch to your bar counters, restaurant table, cafe countertop, or event tables—without breaking the bank! Ideas for using these menu displays that can be built in various sizes to get visibility to your customers - special offers, advertisement, drinks list, menu card holders, help promote the restaurant's theme and increase brand identity.
Specifications
| Project type | Food Serving and Display |
|---|---|
| Room | dining room |
| Difficulty | Intermediate |
Dimensions
Use the size-specific shopping and cut lists below.
Shopping List
- 1x2s for the sides
- 1x3s for the bases
- 1-1/4" brad nails
- medium grit sanding block
- wood glue
- 1/2" spacer block
- wood stain
Figuring boards needed per menu size:
Total Board Length Needed for One Full Size Menu (fits 8.5" x 11" menu)
- 1x3 @ 10-1/2"
- 1x2 @ 14"
Total Board Length Needed for One Short Half Size Menu (fits 5.5" x 8.5" Menu)
- 1x3 @ 7-1/2"
- 1x2 @ 10"
Total Board Length Needed for One Tall Half Size Menu (fits 11" x 4.25" Menu)
- 1x3 @ 6-1/4"
- 1x2 @ 14"
Cut List
Full Size Menu (fits 8.5" x 11" menu)
- 1 - 1x3 @ 10-1/2"
- 2 - 1x2 @ 7"
Short Half Size Menu (fits 5.5" x 8.5" Menu)
- 1 - 1x3 @ 7-1/2"
- 2 - 1x2 @ 5"
Tall Half Size Menu (fits 11" x 4.25" Menu)
- 1 - 1x3 @ 6-1/4"
- 2 - 1x2 @ 7"
Tools
- measuring tape
- square
- pencil
- safety glasses
- compound miter saw
- table saw
- nailer
Step-by-step Instructions
Step 1
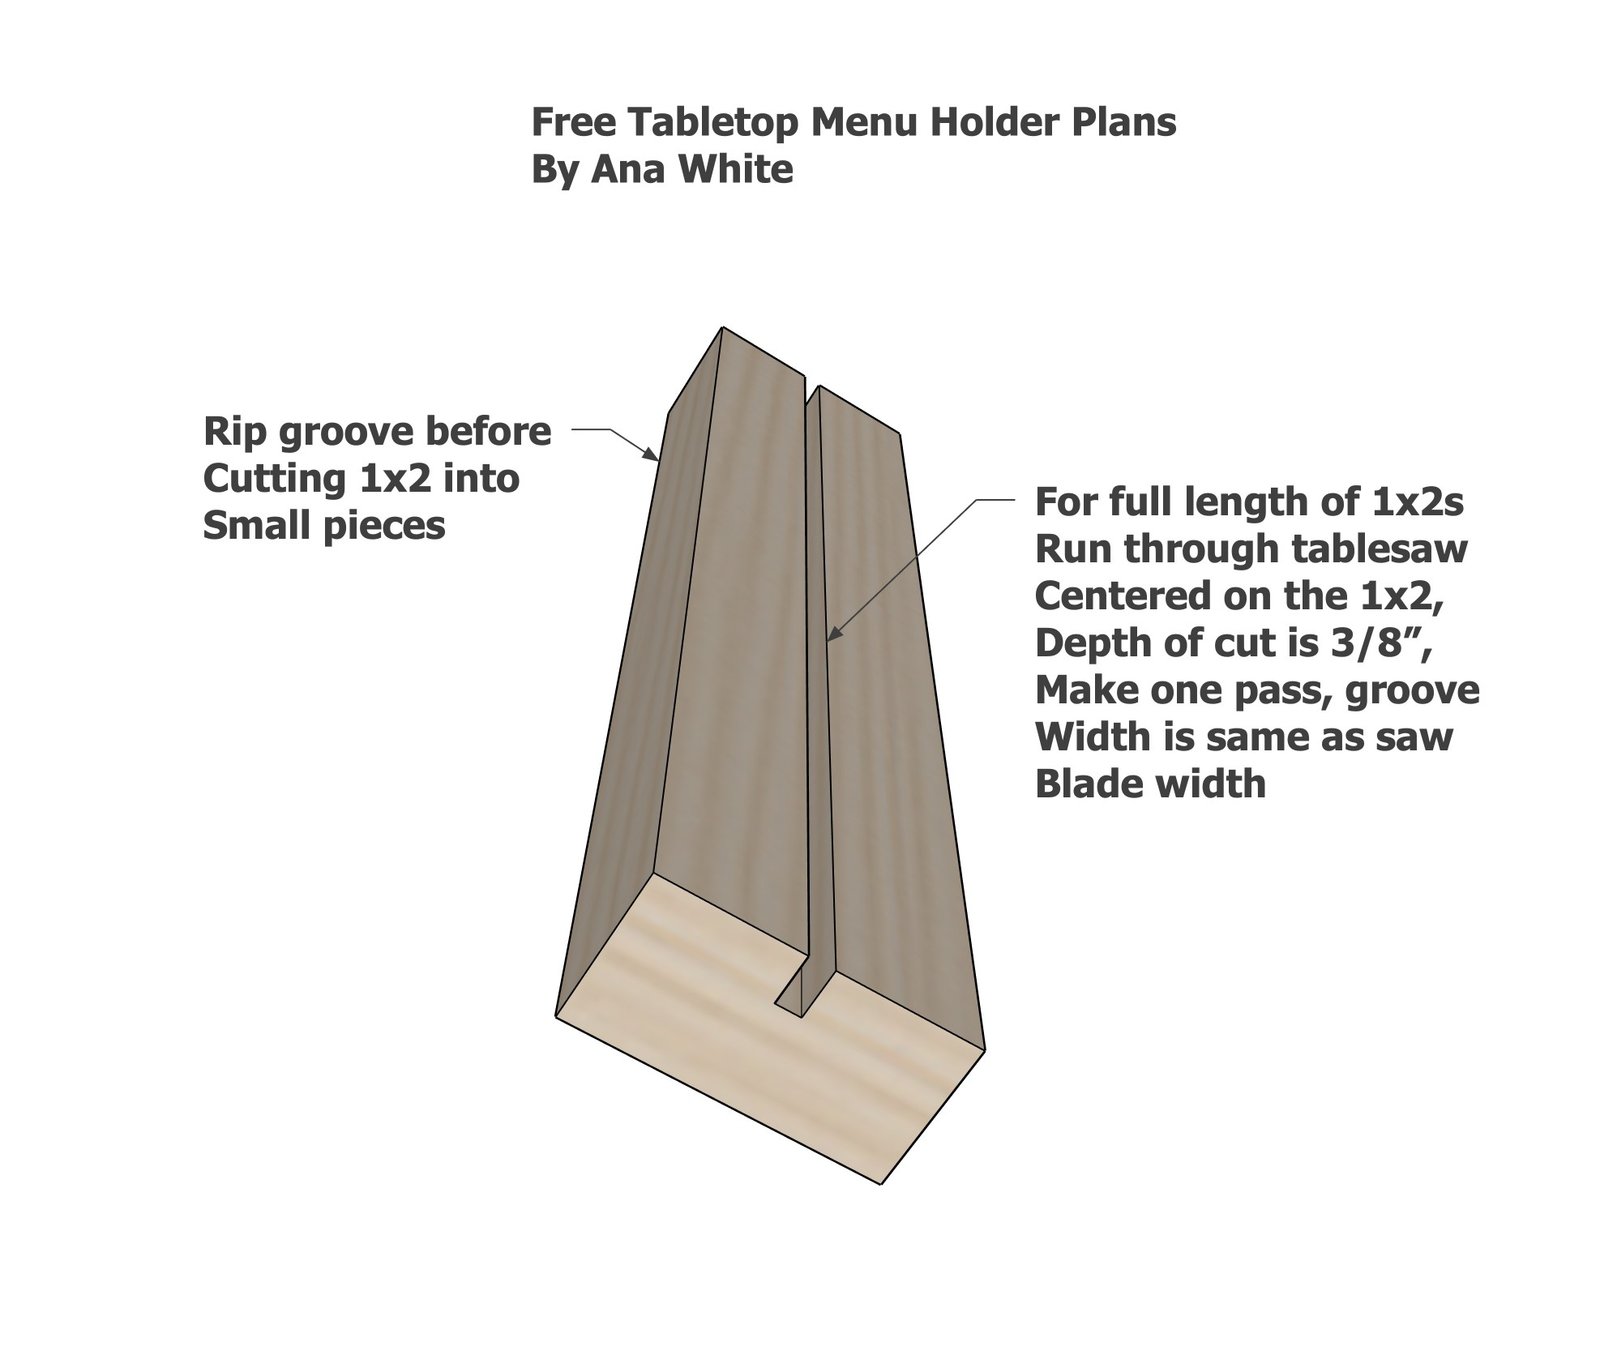
Set your tablesaw so it can cut a groove in the 1x2s 3/8" deep, with the groove centered on the 1x2. You may need to remove your saw guard to do this, read your table saw guide and follow instructions. It is safer to run long pieces through a tablesaw, so you don't have to get your hands anywhere near the blade. So run the 1x2 in full length through before making any cross cuts. Cut the pieces according to the cut list. Sand all the pieces now with a medium grit sanding block.
Step 2
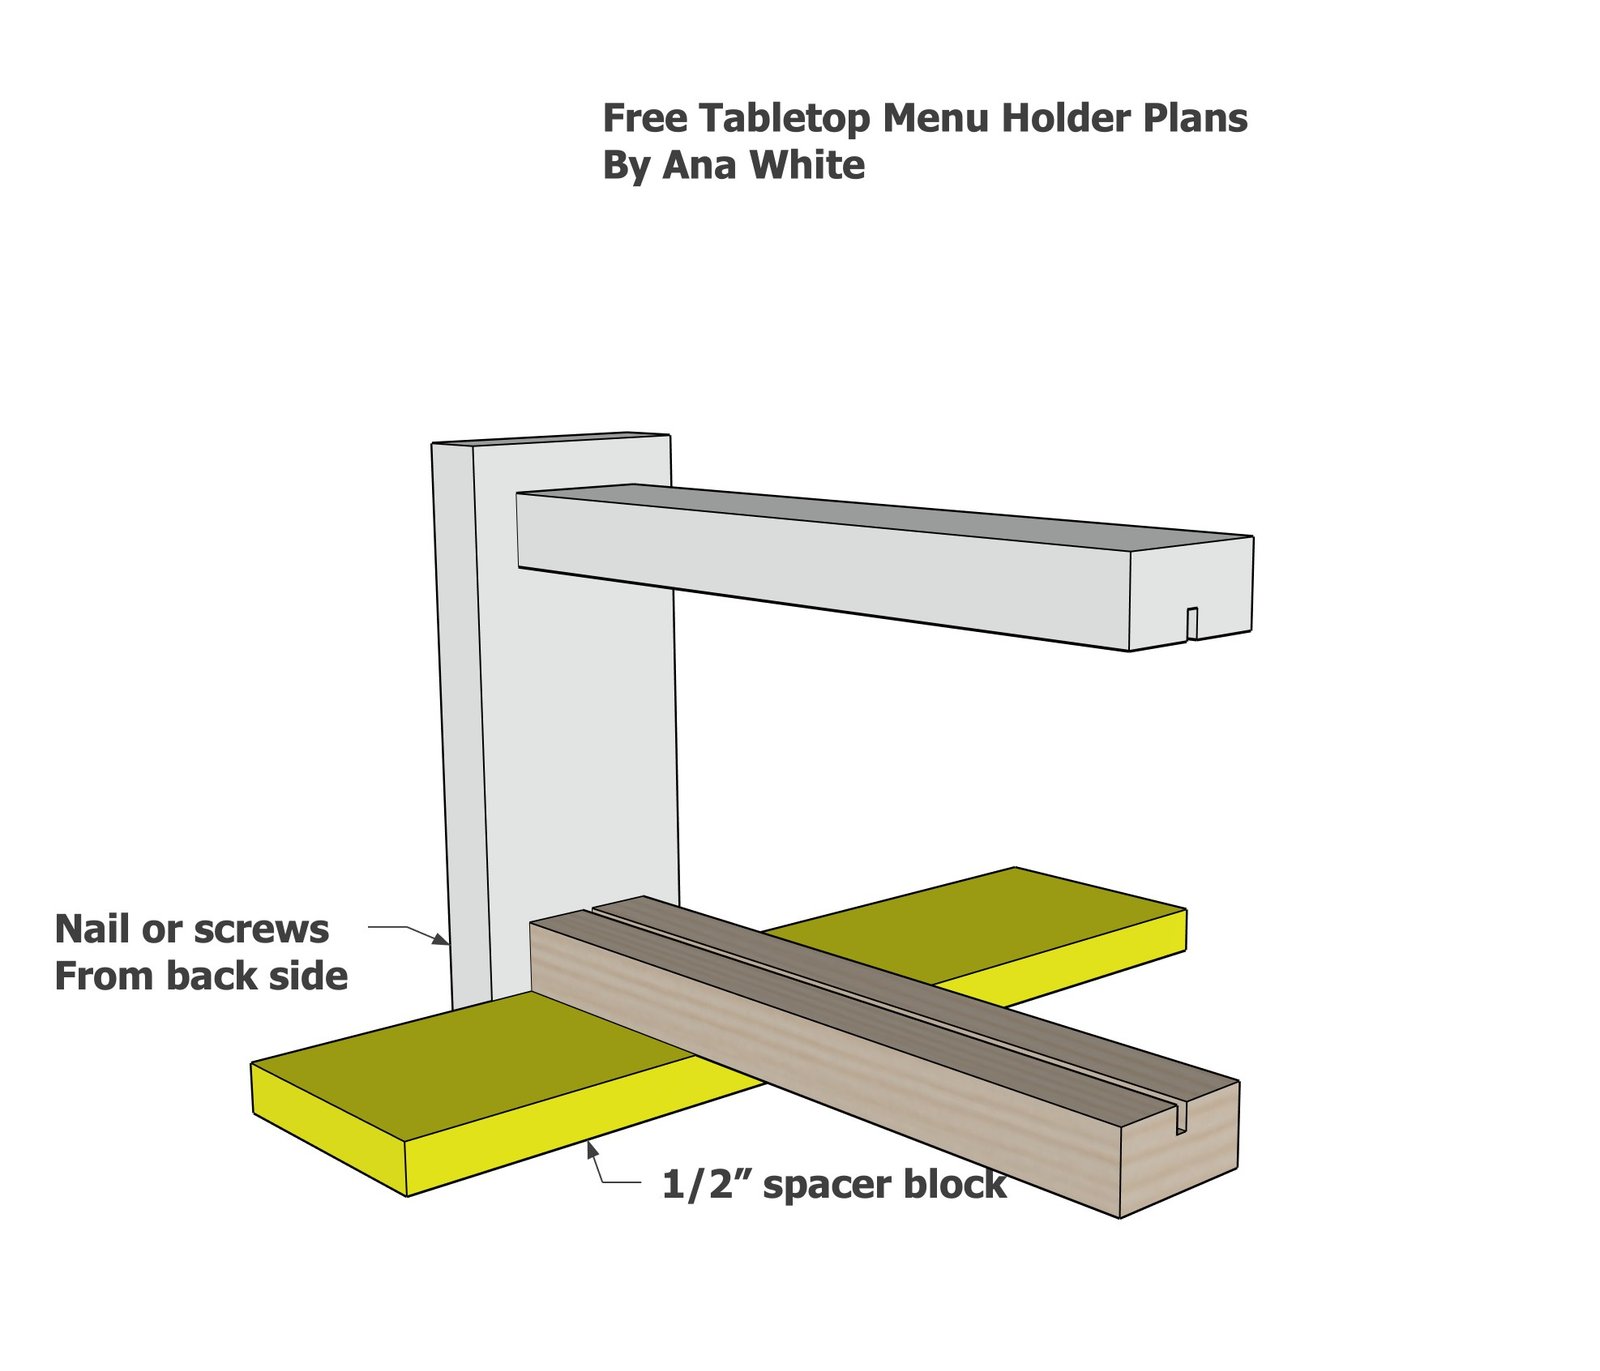
layout on a table a 1/2" pieces of scrap wood (I used 1/2" plywood scrap). Clamp the cut to length 1x2 with grove facing upward to the table, with the 1/2" spacer under it. Apply glue to the end and attach the base 1x3. Make sure fasteners are not in the groove area.
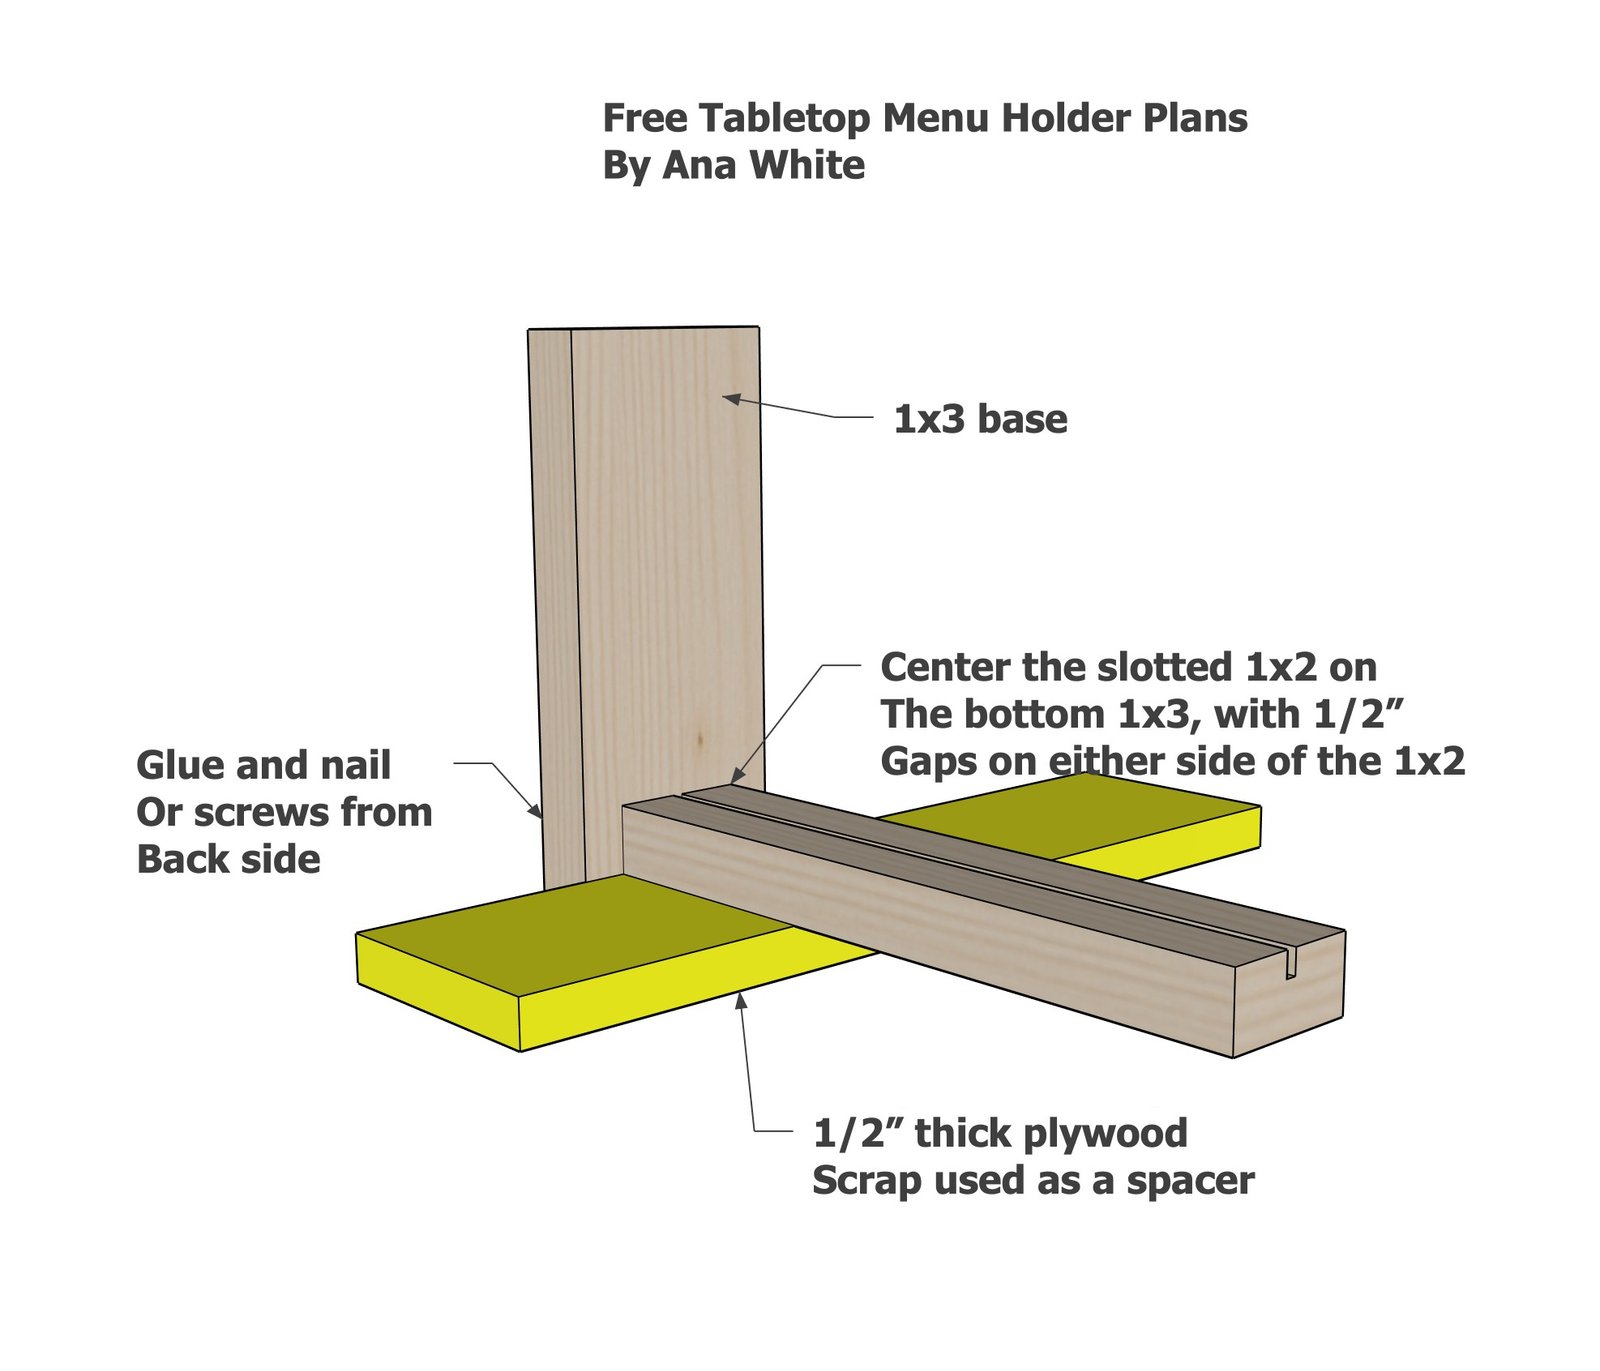
Repeat for second side.
Make sure the 1x2s are aligned straight and allow the glue to fully dry.
Finishing
Sand all surfaces, starting with a medium grit and finishing with fine. Wipe off the dust, fill any holes or gaps with wood filler, and sand smooth once dry. Apply primer if you're painting, then finish with your choice of paint or stain and seal with a durable clear topcoat. For outdoor projects, use exterior-rated primer, paint or stain, and sealer so the piece stands up to the weather.
Source (temporary): https://www.ana-white.com/woodworking-projects/build-your-own-table-menu-stands-free-diy-plans