Build Your Own Wood Gallery Frames
Looking for an easy way to display your favorite art or photos? These DIY wood gallery frames are simple to build and make your walls look polished and custom – without the high price tag. Why You'll Love This Project: • Beginner-friendly – No fancy tools required • Custom sizing – Make frames to perfectly fit your artwork • Budget build – Use inexpensive wood and skip store-bought frames • Timeless style – Clean lines and natural wood look great in any room
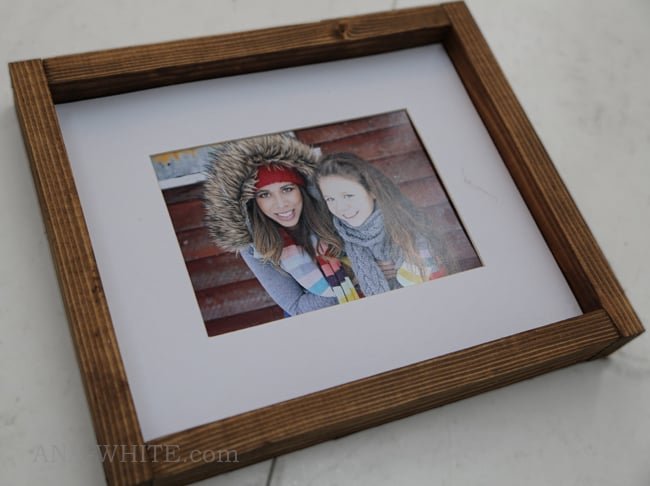
Specifications
| Project type | Home Decor |
|---|---|
| Room | Teens |
| Style | Tradditional Style Furniture Plans |
| Difficulty | Starter Projects |
| Estimated cost | Under $20 |
Dimensions
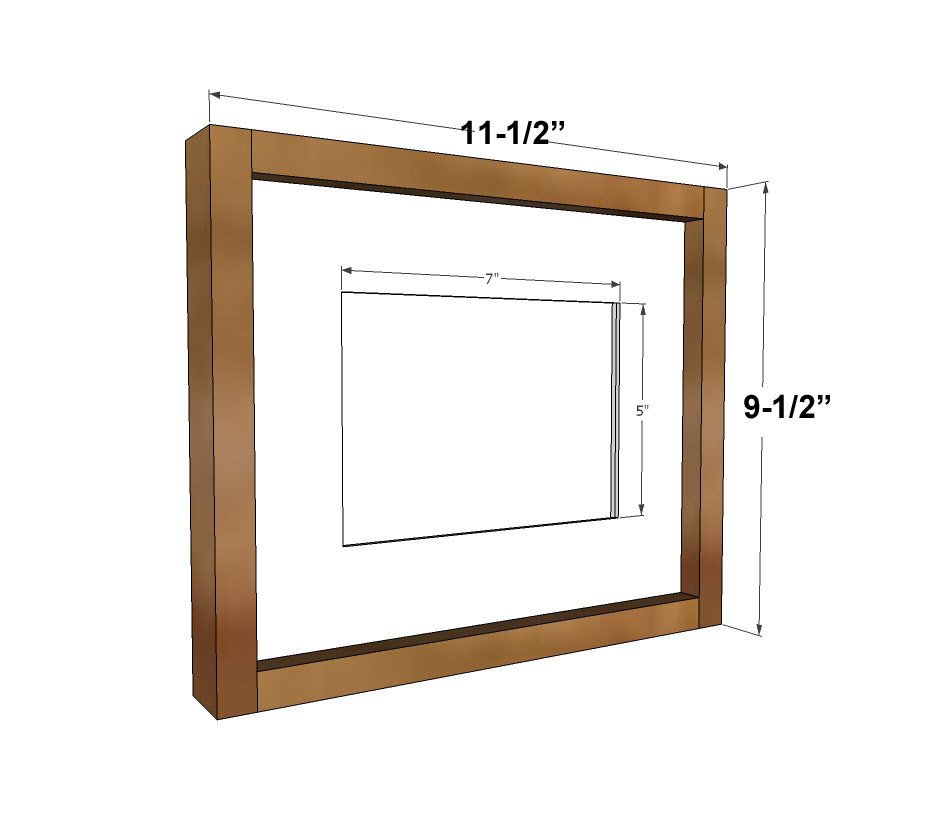
Use the size-specific shopping and cut lists below.
Shopping List
- 1 - 1x2 @ 5 feet long
- 1-1/4" brad nails
- wood stain
- picture hanging cleats
- 8x10 picture frame mats with 5x7 opening
Cut List
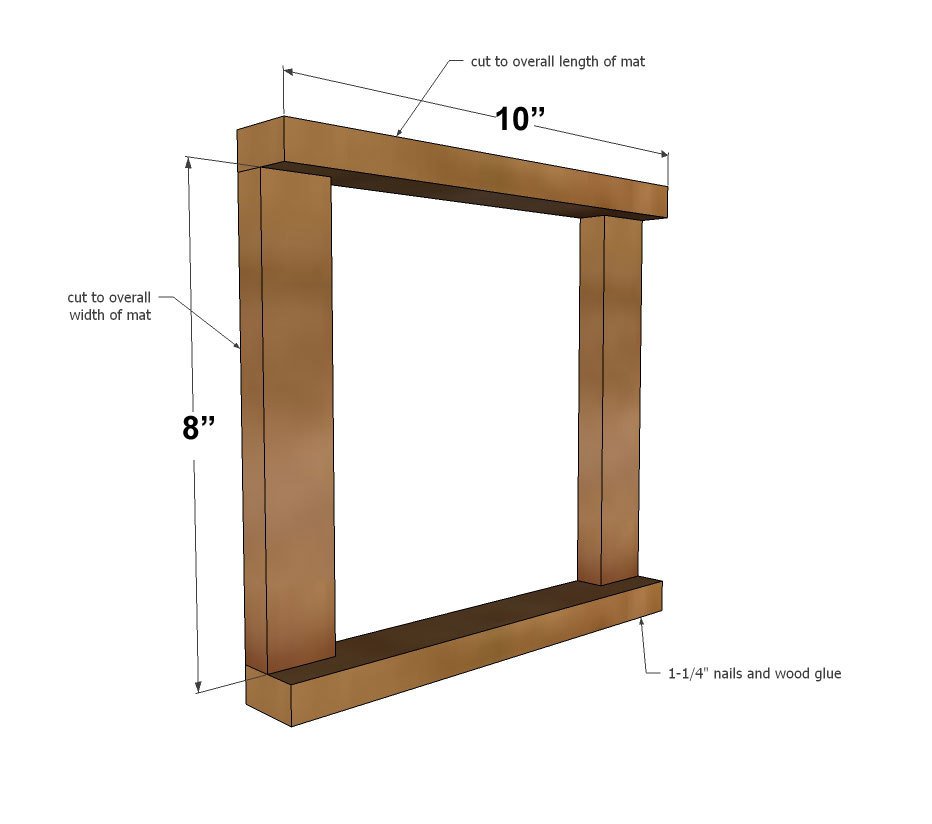
- 2 - 1x2 @ 8" (cut to width of mat)
- 2 - 1x2 @ 10" (cut to length of mat)
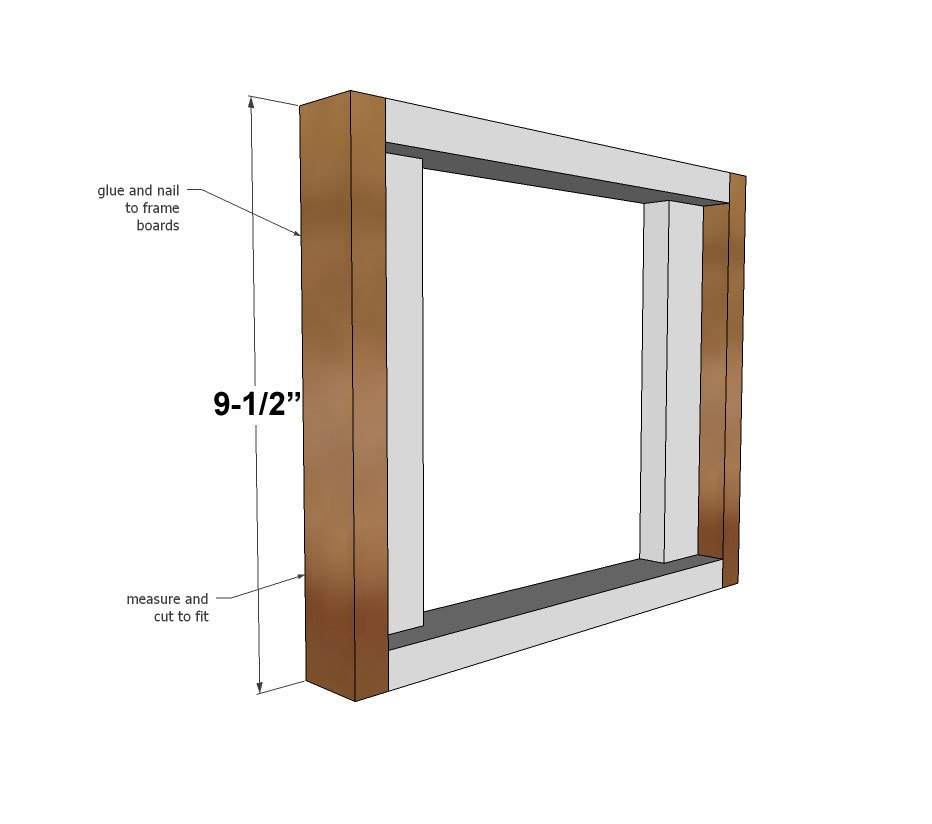
- 2 - 1x2 @ 9-1/2" (cut to width of mat PLUS 1-1/2" - measure and cut to fit is recommended)
Tools
- measuring tape
- square
- pencil
- safety glasses
- compound miter saw
- nailer
Step-by-step Instructions
Step 1
Clamp the shorter 1x2 board to a tabletop and then nails with 1-1/4" nails and wood glue the 10" 1x2 to the 8" 1x2.
Step 2
Measure the outside of the frame and cut two additional 1x2 boards to fit. Glue and nail to frame.
Stain or paint the frame.
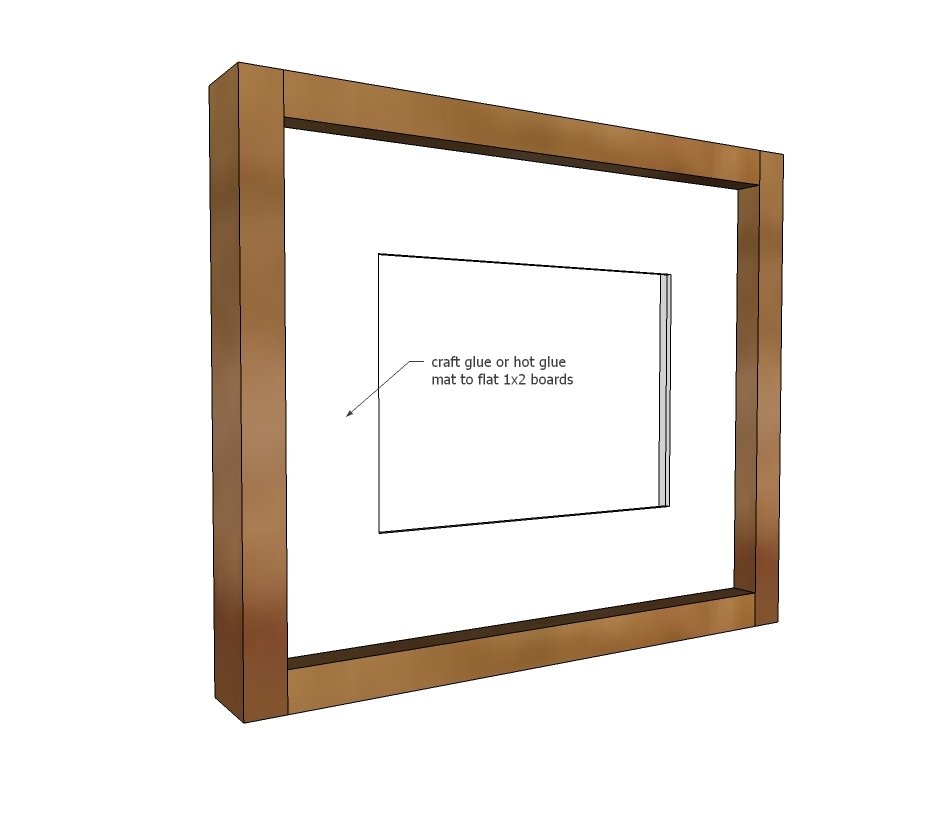
Glue mat to frame. You can use craft glue or hot glue.
Finishing
Sand all surfaces, starting with a medium grit and finishing with fine. Wipe off the dust, fill any holes or gaps with wood filler, and sand smooth once dry. Apply primer if you're painting, then finish with your choice of paint or stain and seal with a durable clear topcoat. For outdoor projects, use exterior-rated primer, paint or stain, and sealer so the piece stands up to the weather.
Source (temporary): https://www.ana-white.com/woodworking-projects/build-your-own-wood-gallery-frames-easy-diy-plans