Build Your Own Wooden Push Toys
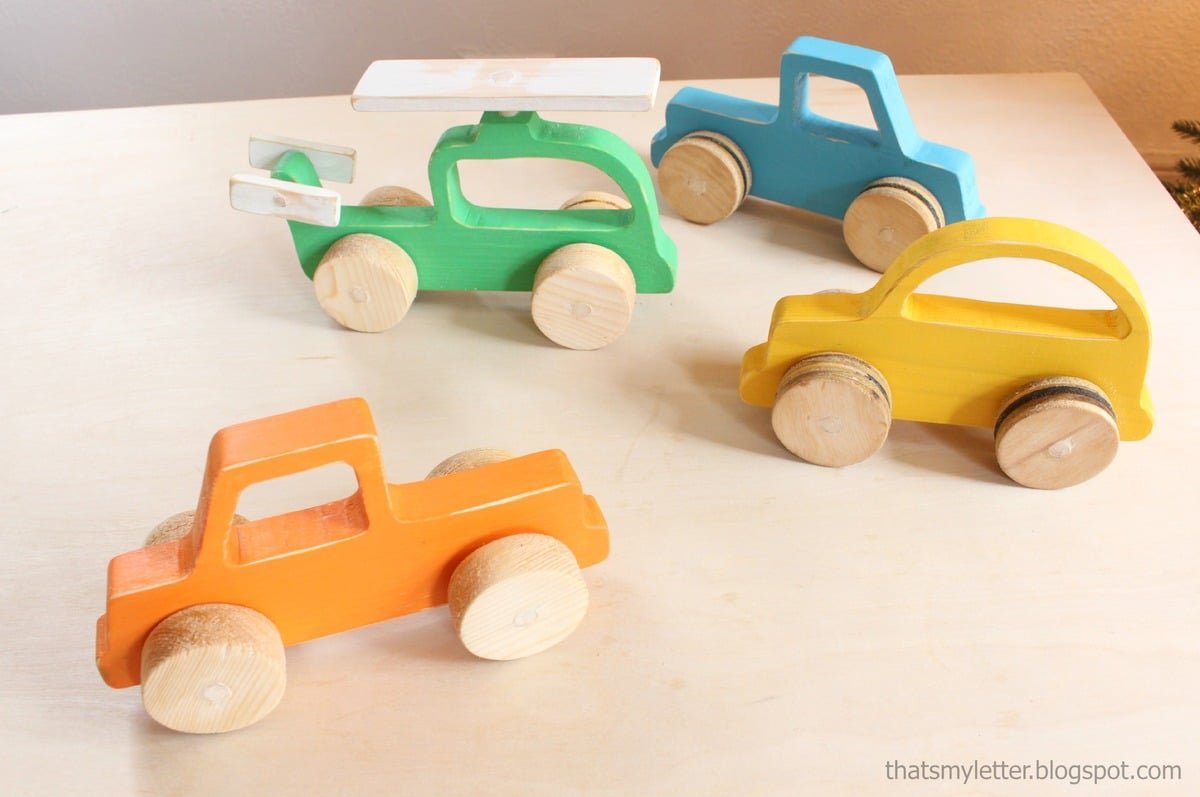
Looking for a fun and simple woodworking project? These wooden push toys are easy to build, kid-approved, and make great handmade gifts. and minimal tools needed, you’ll be rolling out smiles in no time!
Specifications
| Project type | Toys |
|---|---|
| Room | Kids and Toys |
| Style | Children's and Kid's Room Furniture and Toy Plans |
| Difficulty | Beginner Projects |
| Estimated cost | scraps |
Shopping List
- 1x4 scrap wood
- small wood dowel matching hole saw bit or store bought wheel axel hole (about 6" per toy)
- store bought wheels (1-1/2" diameter) or cut your own wheels with a hole saw (see step 4)
Cut List
- Cut 1x4 to length of the template
- Cut two dowels 2-1/2" long per toy
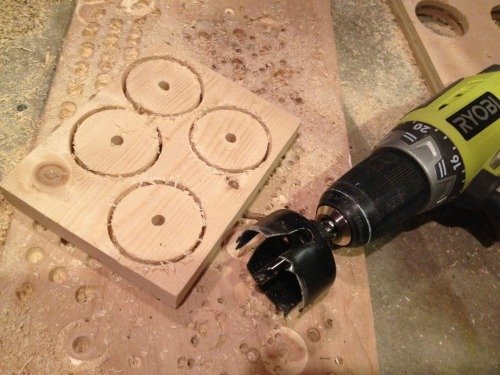
- If you are making your own wheels, use a 1-1/2" hole saw to drill out wheels, and sand smooth
Tools
- pencil
- safety glasses
- hearing protection
- drill
- jigsaw
- sander
Step-by-step Instructions
Step 1
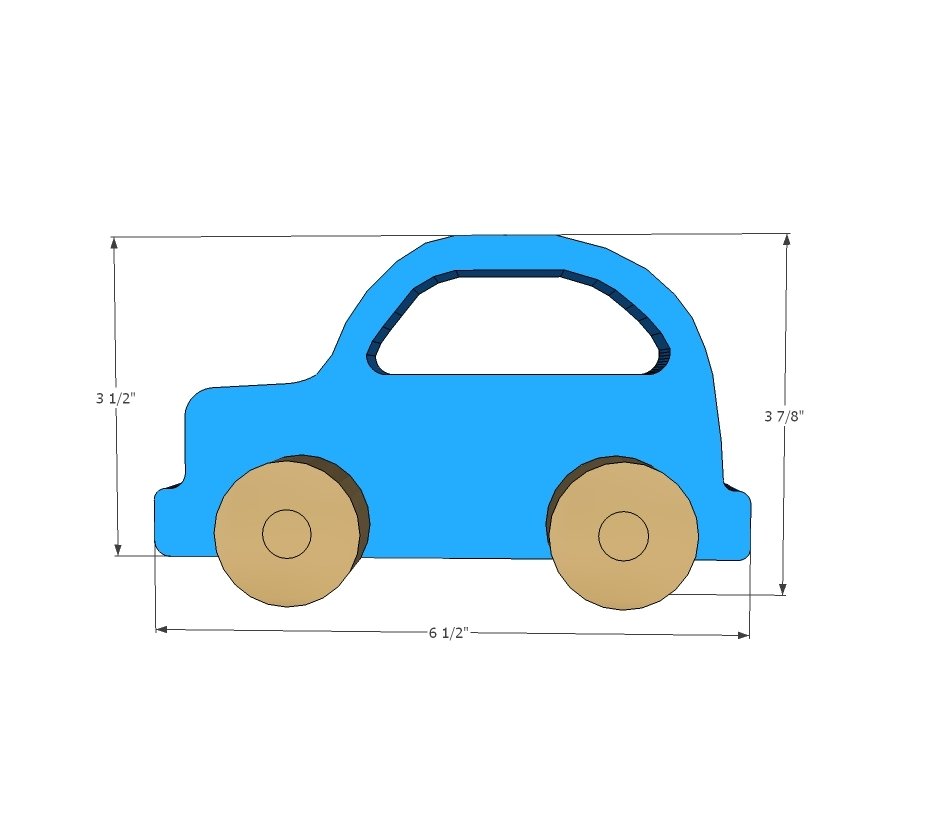
Car - Cut car template out and trace on to 1x4 board. To cut window area out, drill a center hole in the window area bigger than the jigsaw bit and cut out with a jigsaw. Drill holes matching hole saw bit (you could even use the same hole saw bit) in the template and thread dowel through. Glue the wheels to the dowels. Make sure you don't glue the dowels to the car to allow the dowel to spin.
Step 2
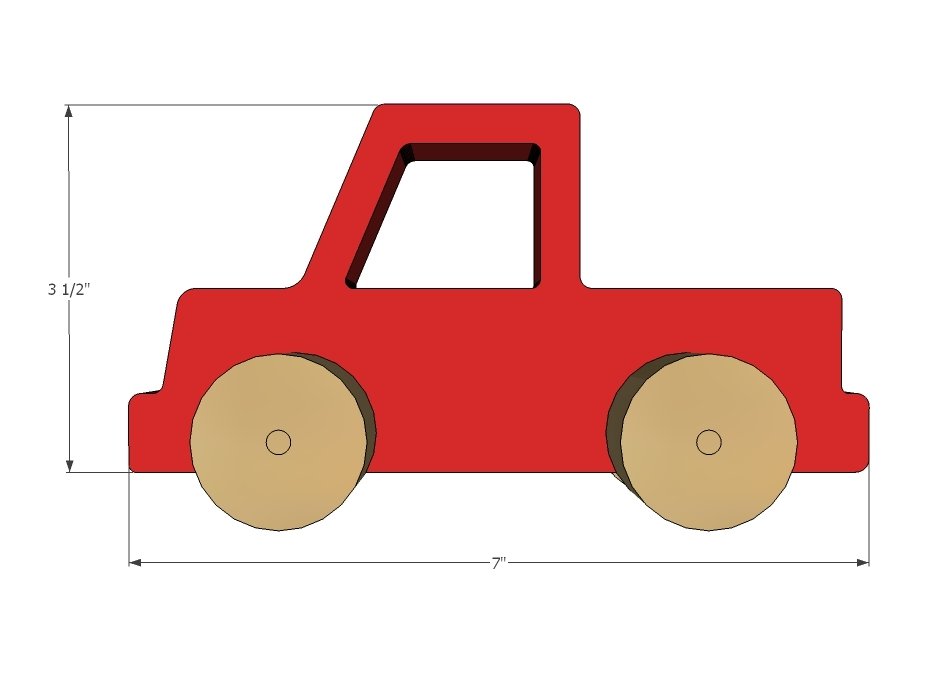
Truck - Cut truck template out and trace on to 1x4 board. To cut window area out, drill a center hole in the window area bigger than the jigsaw bit and cut out with a jigsaw. Drill holes matching hole saw bit (you could even use the same hole saw bit) in the template and thread dowel through. Glue the wheels to the dowels. Make sure you don't glue the dowels to the car to allow the dowel to spin.
Step 3
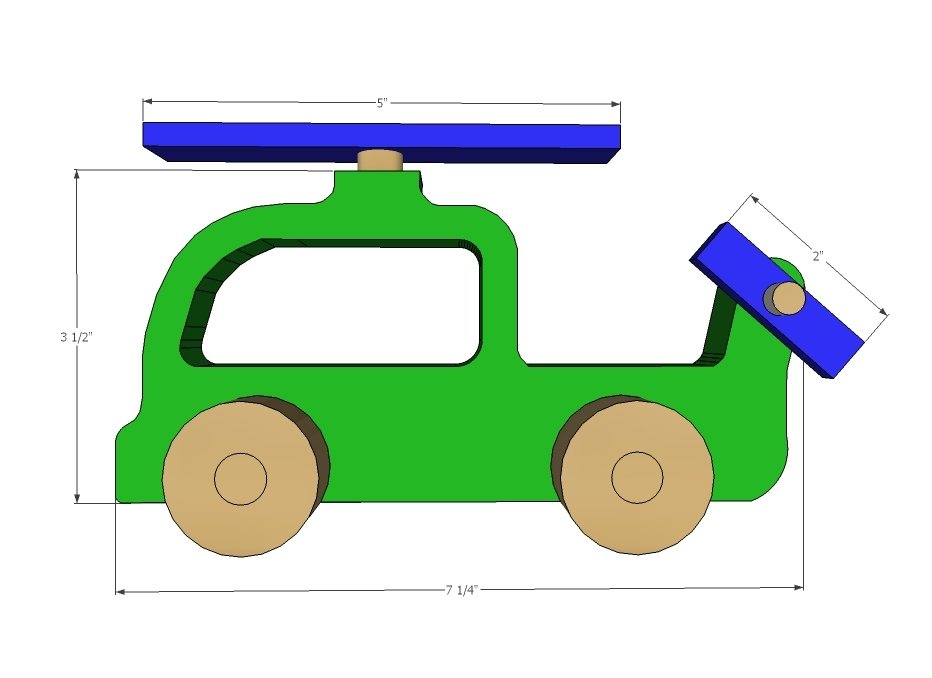
Helicopter - Cut helicopter template out and trace on to 1x4 board. To cut window area out, drill a center hole in the window area bigger than the jigsaw bit and cut out with a jigsaw. Drill holes matching hole saw bit (you could even use the same hole saw bit) in the template and thread dowel through. Glue the wheels to the dowels. Make sure you don't glue the dowels to the car to allow the dowel to spin. The blades on the helicopter are just scrap pieces of wood. Attach back piece the same as the wood wheels. The top blade can also be attached with a small wood lag screw and washer between blade and top of helicopter. Predrill holes (IMPORTANT) to prevent wood from splitting.
Step 4
Jaime cut her own wheels using a hole saw bit. You can find more details on her blog here.
Finishing
Sand all surfaces, starting with a medium grit and finishing with fine. Wipe off the dust, fill any holes or gaps with wood filler, and sand smooth once dry. Apply primer if you're painting, then finish with your choice of paint or stain and seal with a durable clear topcoat. For outdoor projects, use exterior-rated primer, paint or stain, and sealer so the piece stands up to the weather.
Source (temporary): https://www.ana-white.com/woodworking-projects/build-your-own-wooden-push-toys-car-truck-helicopter