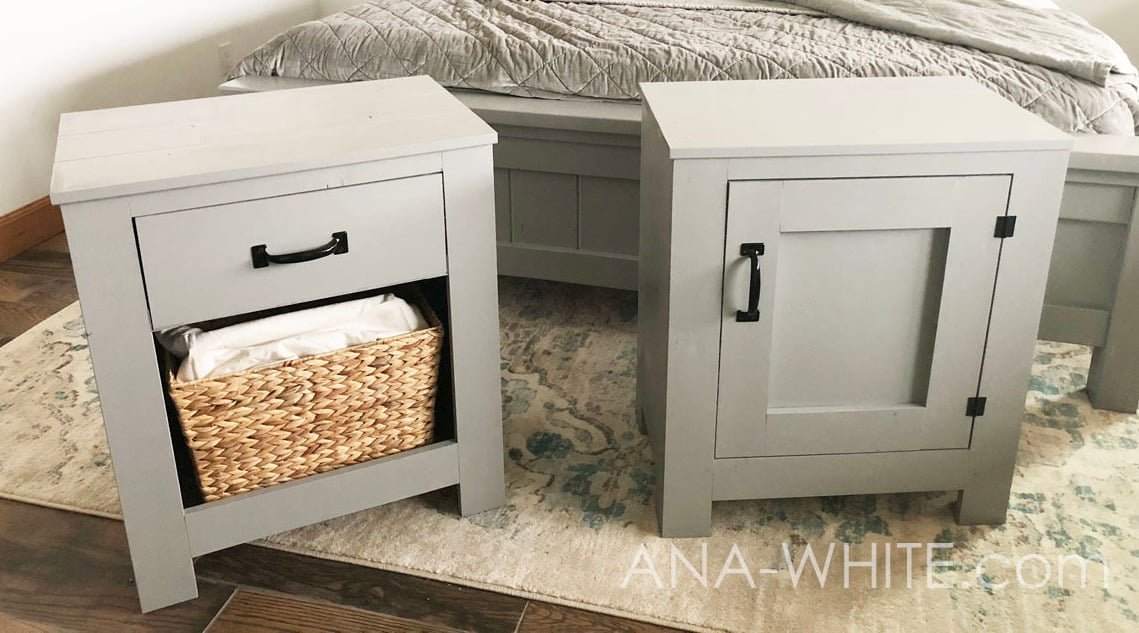
Cabinet Style Farmhouse Nightstand with Drawer
Easy to build farmhouse style nightstand - with detailed diagrams and shopping list and cut list by
Specifications
| Project type | Nightstands |
|---|---|
| Room | Storage Solutions |
| Style | Cottage Style Furniture Plans |
| Difficulty | Intermediate |
| Estimated cost | $20 - $50 |
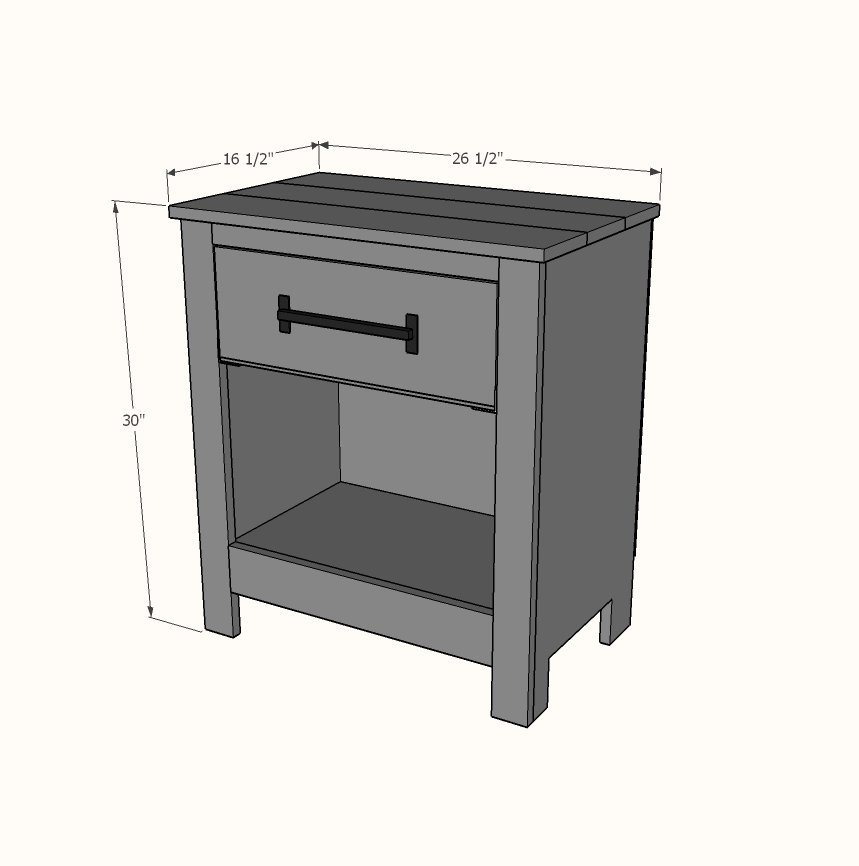
Dimensions
Use the size-specific shopping and cut lists below.
Shopping List
48" x 48" piece of 3/4" thick plywood - I used paint grade birch
- 24" x 48" piece of 1/4" thick plywood
- 1 - 1x4 @ 8 feet long
- 1 - 1x2 @ 6 feet long
- 2 - 1x6 @ 6 feet long
- 1 - 1" alumninum metal angle @ 6 feet long (no thicker than 1/8") like this
- 4 - 1/2" long flat head screws like shown below -
Cut List
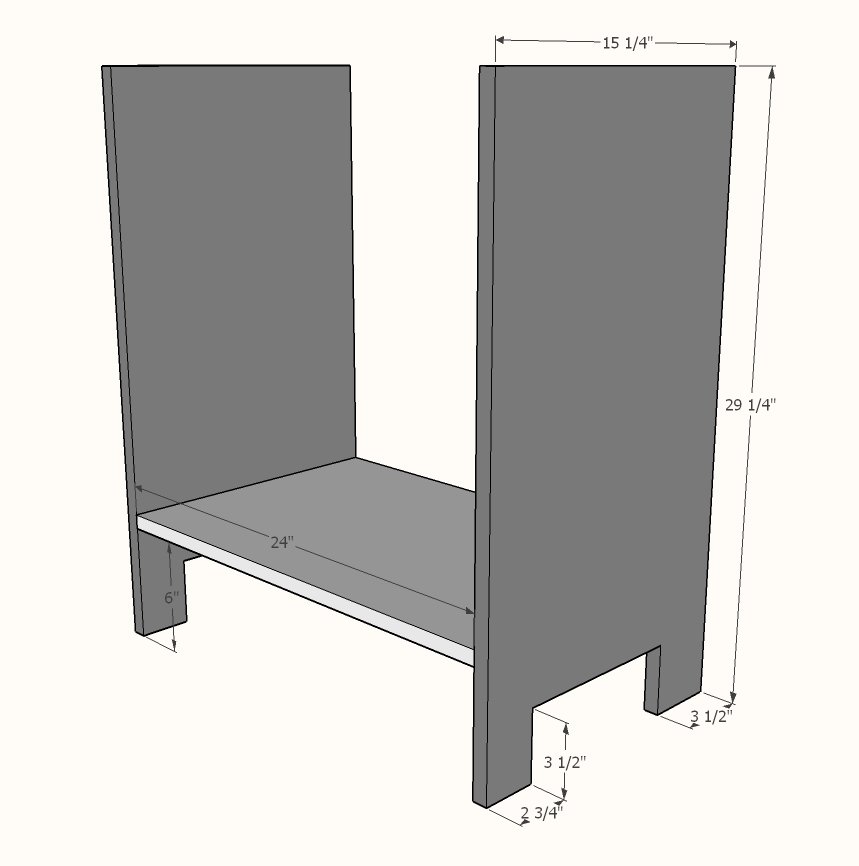
- 2 - 3/4" plywood @ 15-1/4" x 29-1/4" - Sides
- 1 - 3/4" plywood @ 15-1/4" x 24" - Bottom
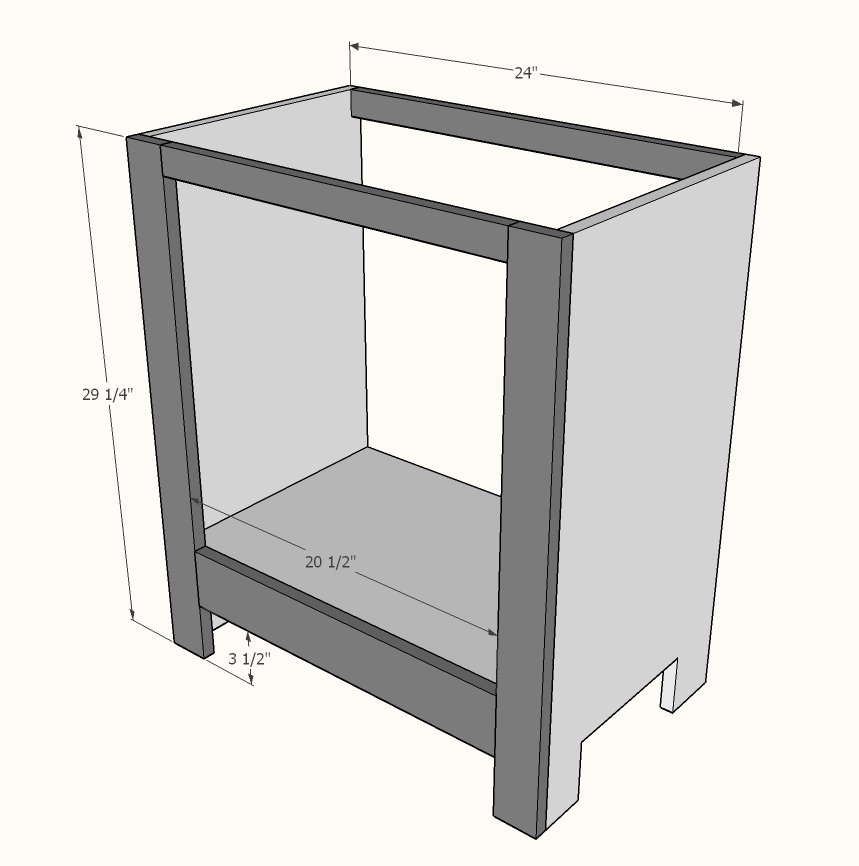
- 2 - 1x4 @ 29-1/4" - Face Frame Legs
- 1 - 1x4 @ 18-1/2" - Face Frame Bottom
- 1 - 1x2 @ 18-1/2" - Face Frame Top
- 2 - 1x2 @ 24" - Back Supports
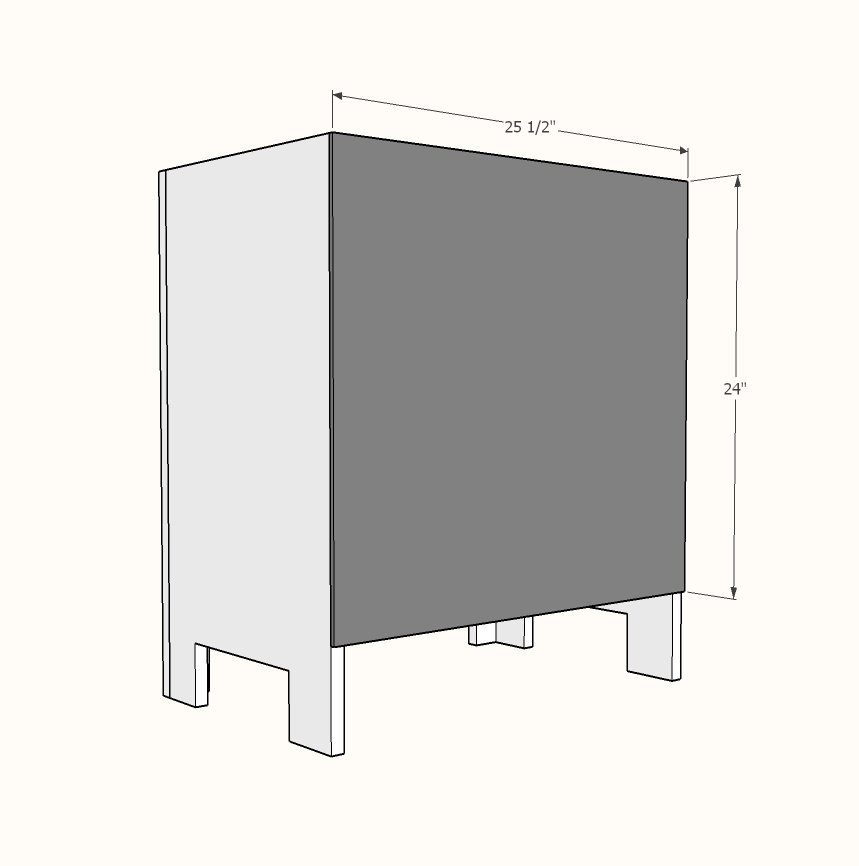
- 1 - 1/4" plywood @ 25-1/2" x 24" - Back
- 2 - 1" Metal Angle @ 16" - Drawer Slides
- 1 - 1x8 @ ~18-1/4" OR 1 - 3/4" plywood 7-1/4" x ~18-1/4" - Drawer Face
- 2 - 1x6 @ 14-1/4" - Drawer Sides
- 1 - 1x6 @ ~18-1/4" - Drawer Back
- 1 - 1/4" plywood @ ~18-1/4" x 15-3/4" - Drawer Bottom
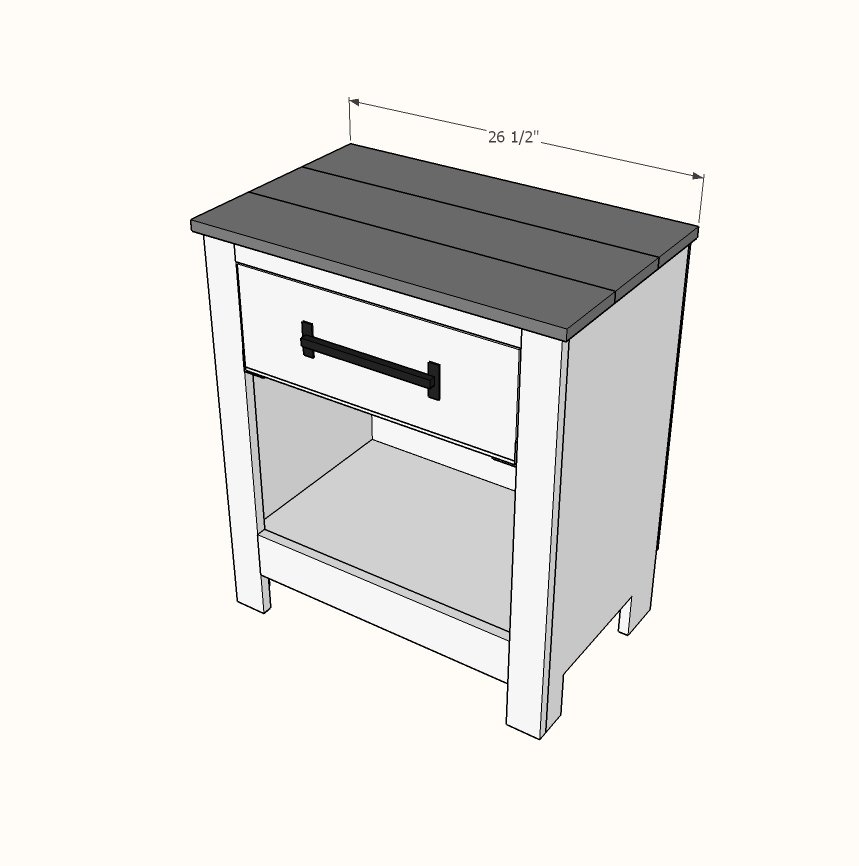
- 3 - 1x6 @ 26-1/2" - Top
Tools
- measuring tape
- square
- pencil
- safety glasses
- hearing protection
- kreg-jig
- drill
- circular saw
- jigsaw
- compound miter saw
- nailer
- sander
- countersink drill bit
Step-by-step Instructions
Step 1
Cut bottom and sides from 3/4" plywood. If using a full sheet of plywood, simply rip one strip 15-1/4" wide - then cross cut from that strip the side and bottom pieces. Mark out bottoms of sides as shown in diagram and cut out with a jigsaw. Drill three 3/4" pocket holes on both ends of bottom piece. Attach to sides with 1-1/4" pocket hole screws and glue.
NOTE: Face Frame top and bottom are 18-1/2" long, not 20-1/2"
Cut 1x pieces on miter saw. Drill 3/4" pocket holes on ends of 1x2s and the 1x4 bottom trim piece. Build the front face frame first, attaching 1x2 and 1x4 pieces 20-1/2" long to the legs with 1-1/4" pocket hole screws. Attach face frame to the carcass with glue and 1-1/4" brad nails. Attach back support piece to carcass back with 1-1/4" pocket hole screws and glue.
Step 3
Cut back plywood piece with either table saw or circular saw. Attach with glue and 3/4" brad nails.
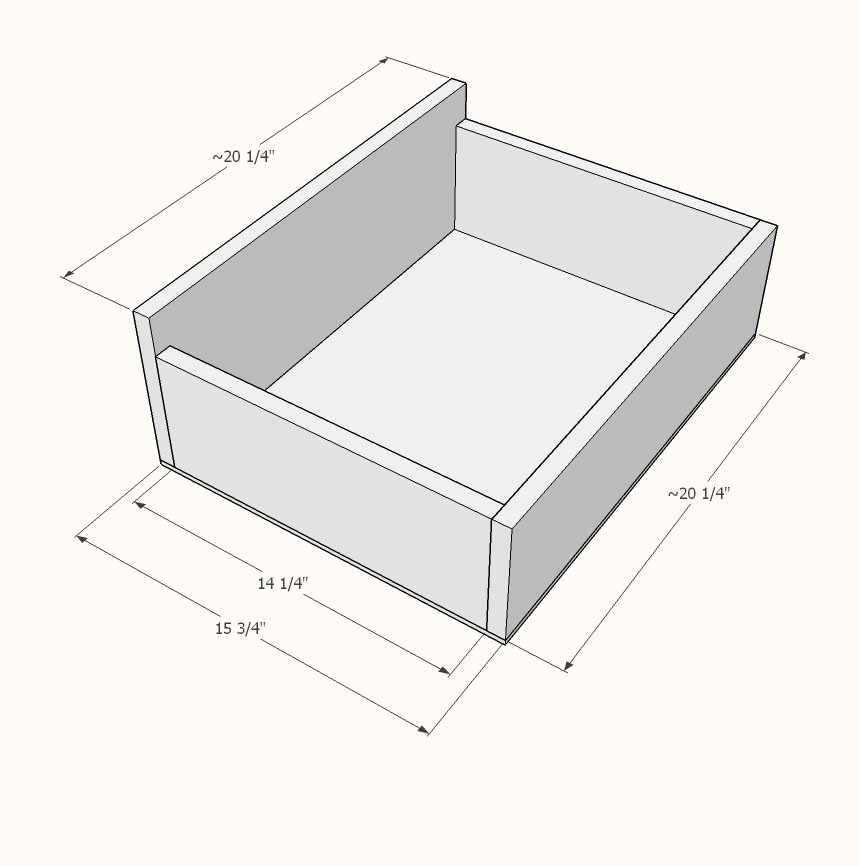
NOTE: Drawer width should be approximately 18-1/4" - not 20-1/4"
Measure opening on cabinet and confirm it is 18-1/2" wide. Drawer width should be 1/4" less than opening. Cut drawer pieces with miter saw. Drill two 3/4" pocket holes on each end of the drawer sides. Attach to drawer face and back with 1-1/4" pocket hole screws. Cut drawer bottom with circular saw. Attach to bottom of drawer with 3/4" brad nails and glue, making sure drawer box is square.
Step 5
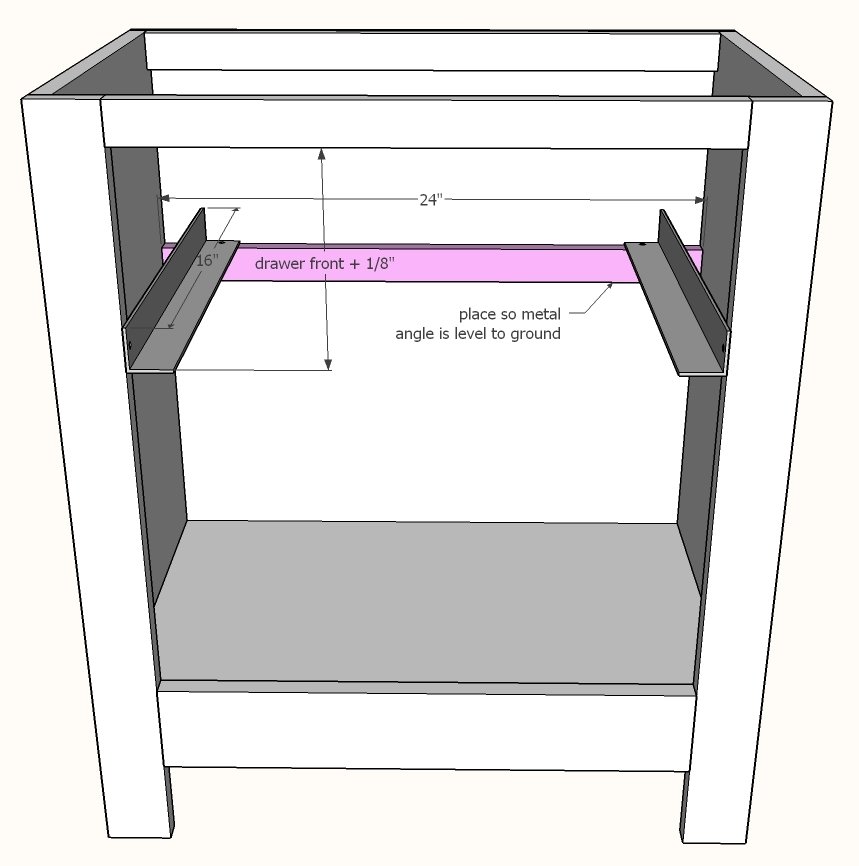
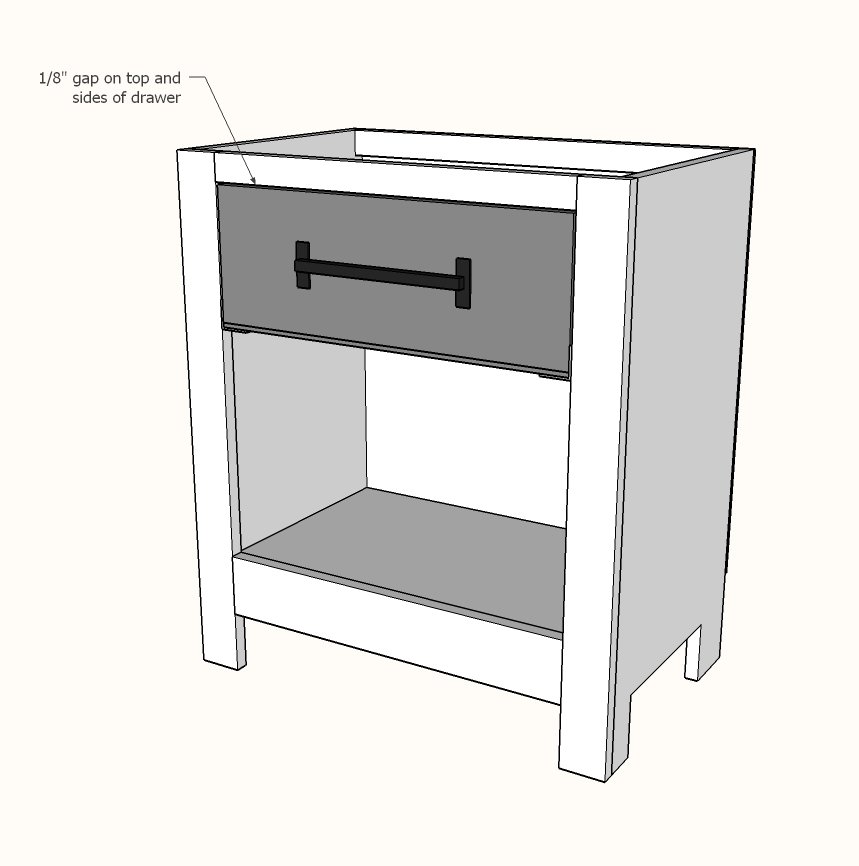
The finished drawer should have an 1/8" gap on top and sides.
Candle wax applied to the bottom of the drawer box will help the drawer slide easier.
Build the top with 3/4" pocket holes and 1-1/4" pocket hole screws and glue.
Attach to top with glue and 1-1/4" brad nails.
Finishing
Sand all surfaces, starting with a medium grit and finishing with fine. Wipe off the dust, fill any holes or gaps with wood filler, and sand smooth once dry. Apply primer if you're painting, then finish with your choice of paint or stain and seal with a durable clear topcoat. For outdoor projects, use exterior-rated primer, paint or stain, and sealer so the piece stands up to the weather.
Source (temporary): https://www.ana-white.com/woodworking-projects/cabinet-style-farmhouse-nightstand-drawer