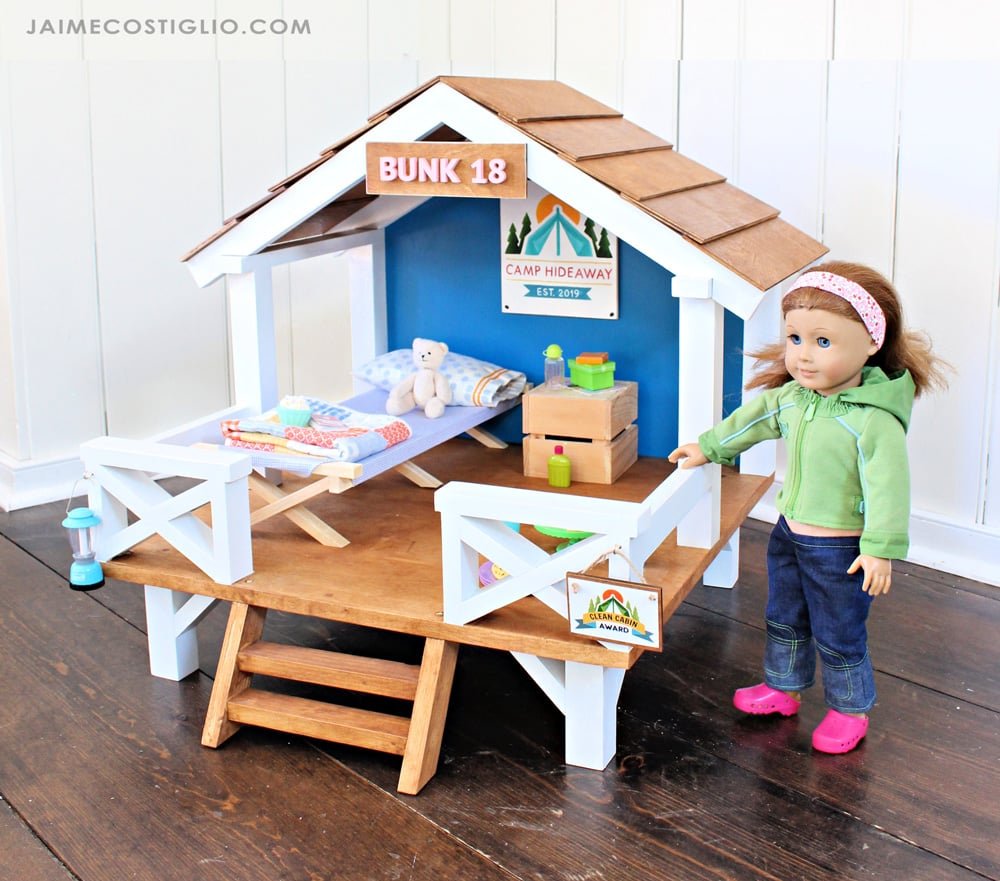
Camp Hangout for 18" or American Girl Dolls
to build your own camp hangout for 18" or American Girl dolls. Uses standard off the wood lumber and just a drill and brad nailer or stapler for assembly. Step by step plans with full diagrams, cut list and shopping list. More photos and build post at
Specifications
| Project type | Toys |
|---|---|
| Room | Kids and Toys |
| Style | Children's and Kid's Room Furniture and Toy Plans |
| Difficulty | Intermediate |
| Estimated cost | $20 - $50 |
Dimensions
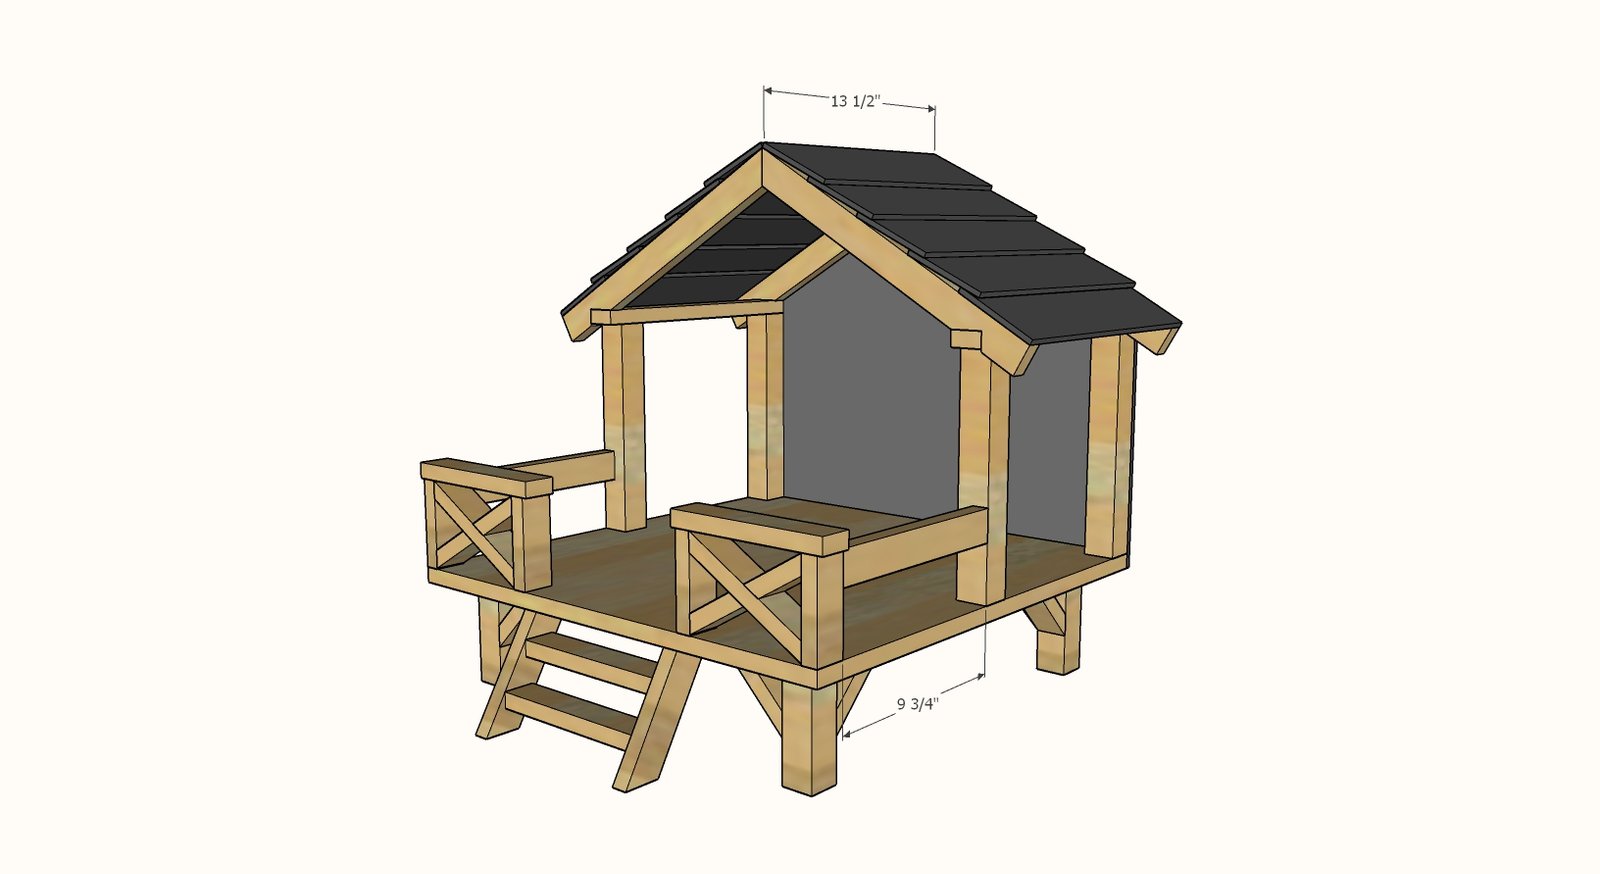
Use the size-specific shopping and cut lists below.
Shopping List
1 - 3/4" plywood @ 24" x 24"
1 - 1/4" plywood, 24" x 48"
1 - 2x2 @ 6 feet long
3 - 1x2 @ 8 feet long
1-1/4" and 3/4" brad nails
2" self tapping wood screws (Spax or similar, #7 preferred but #8 is ok - can be slightly longer or shorter depending on what is available at your hardware store)
Cut List
Base
- 1 - 3/4" plywood @ 24" x 24"
- 4 - 2x2 @ 5"
- 8 - 1x2 @ 4-1/4" - long point to long point, both ends cut at 45 degree bevels, ends NOT parallel
House
- 2 - 1x2 @ 13-1/2" (shown in plans as 17")
- 4 - 2x2 @ 11"
- 4 - 1x2 @ 16-1/2" - one end cut at 30 degrees off square, longest point measurement
- Back plywood is 24" x 20-1/4" - cut angles for roof off
- 8 - 1/4" plywood pieces @ 4" x 13-1/2" - first cut the scrap from the back plywood into strips 4" wide x ~27-1/2" long, then cut into the 13-1/2" lengths
Railing
- 4 - 1x2 @ 4-1/4"
- 2 - 1x2 @ 7-3/4"
- 2 - 1x2 @ 6-5/8" - both ends cut at 30 degrees bevel, ends ARE parallel, long point to short point measurement
- 4 - 1x2 @ 3-3/8" - both ends cut at 30 degree bevel, ends are NOT parallel, long point to short point measurement
- 2 - 1x2 @ about 9-3/4" - railing sides, should be cut to fit the width of the opening
Stairs
- 2 - 1x2 @ 5-3/4" long - both ends cut at 30 degrees off square, long point to short point measurement
- 2 - 1x2 @ 8" long
Tools
- measuring tape
- square
- pencil
- safety glasses
- hearing protection
- drill
- circular saw
- jigsaw
- compound miter saw
- nailer
- sander
Step-by-step Instructions
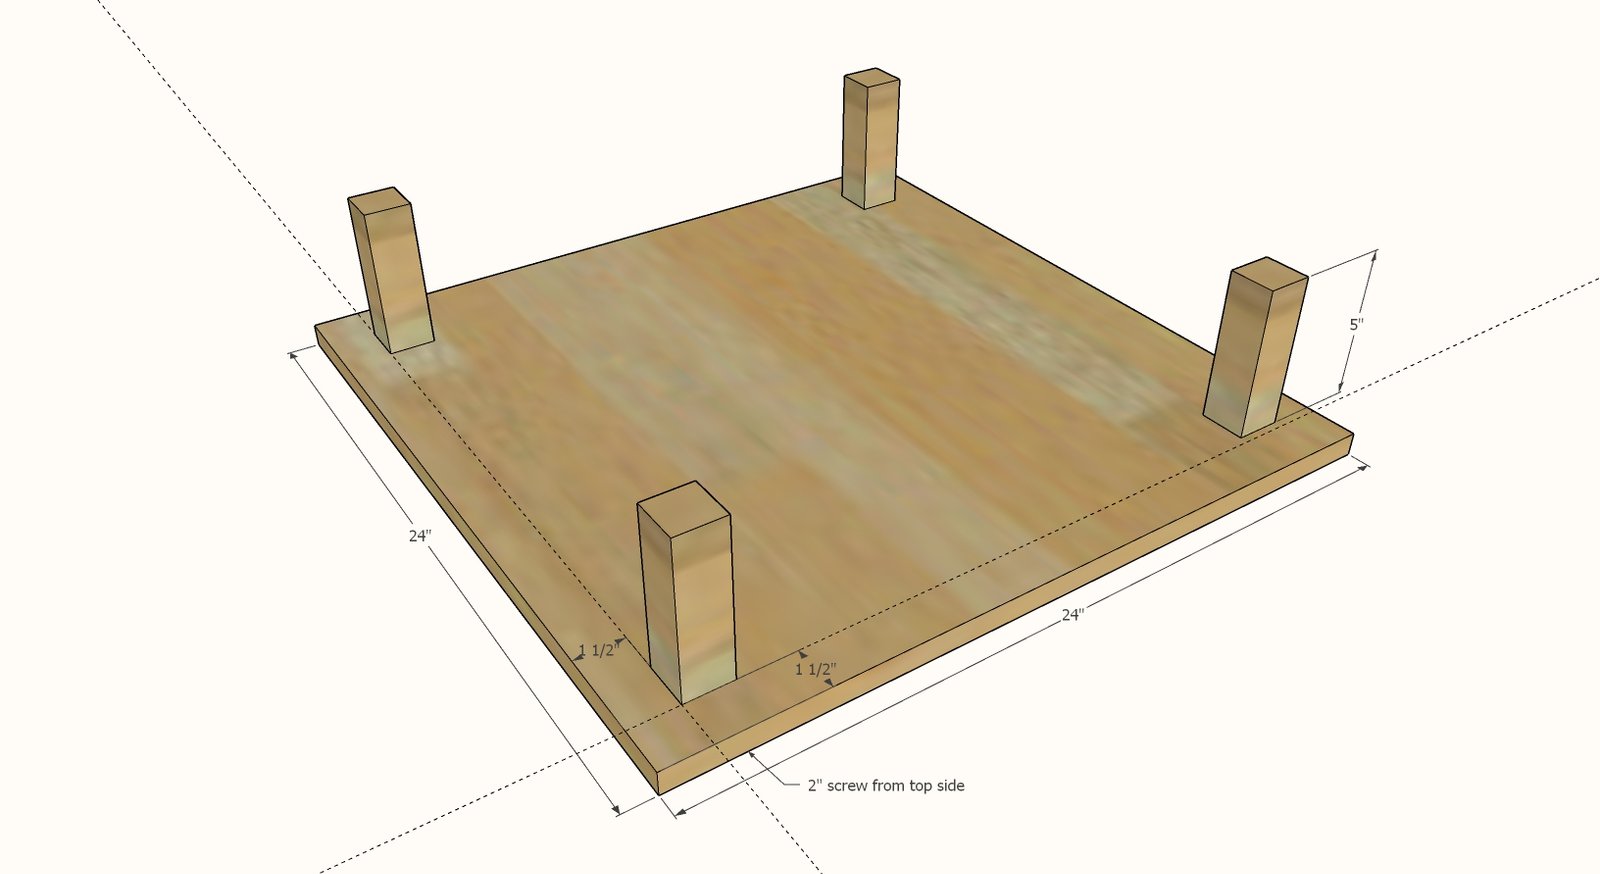
Attach legs to the 3/4" plywood base using the 2" screws.
Set in as shown in diagram.
Step 2
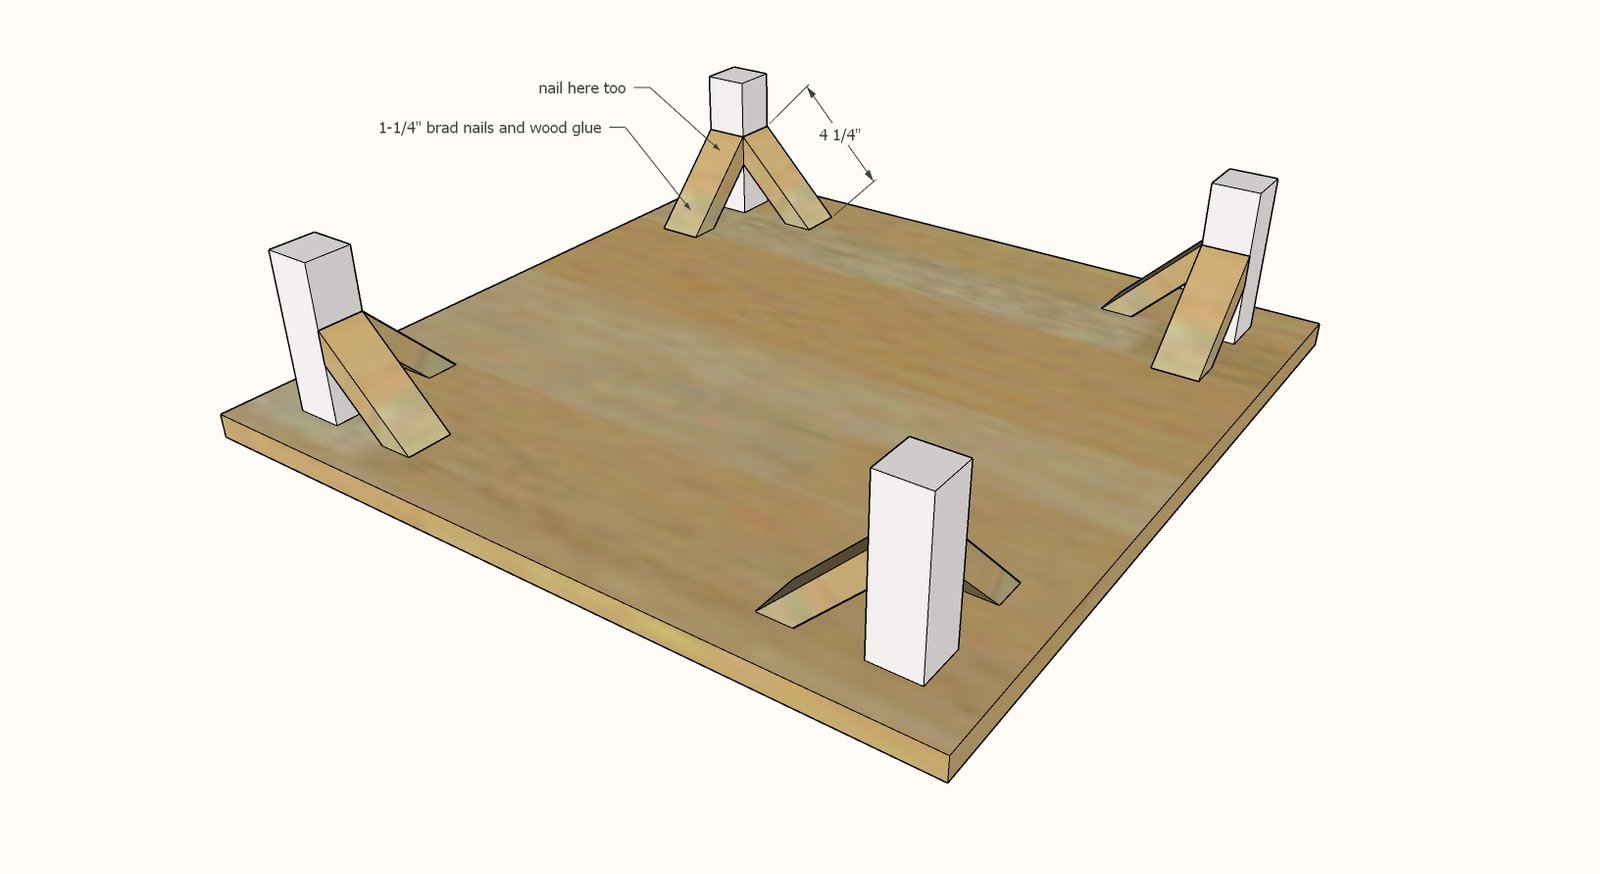
Attach cross bracing to legs with 1-1/4" brad nails and wood glue.
Step 3
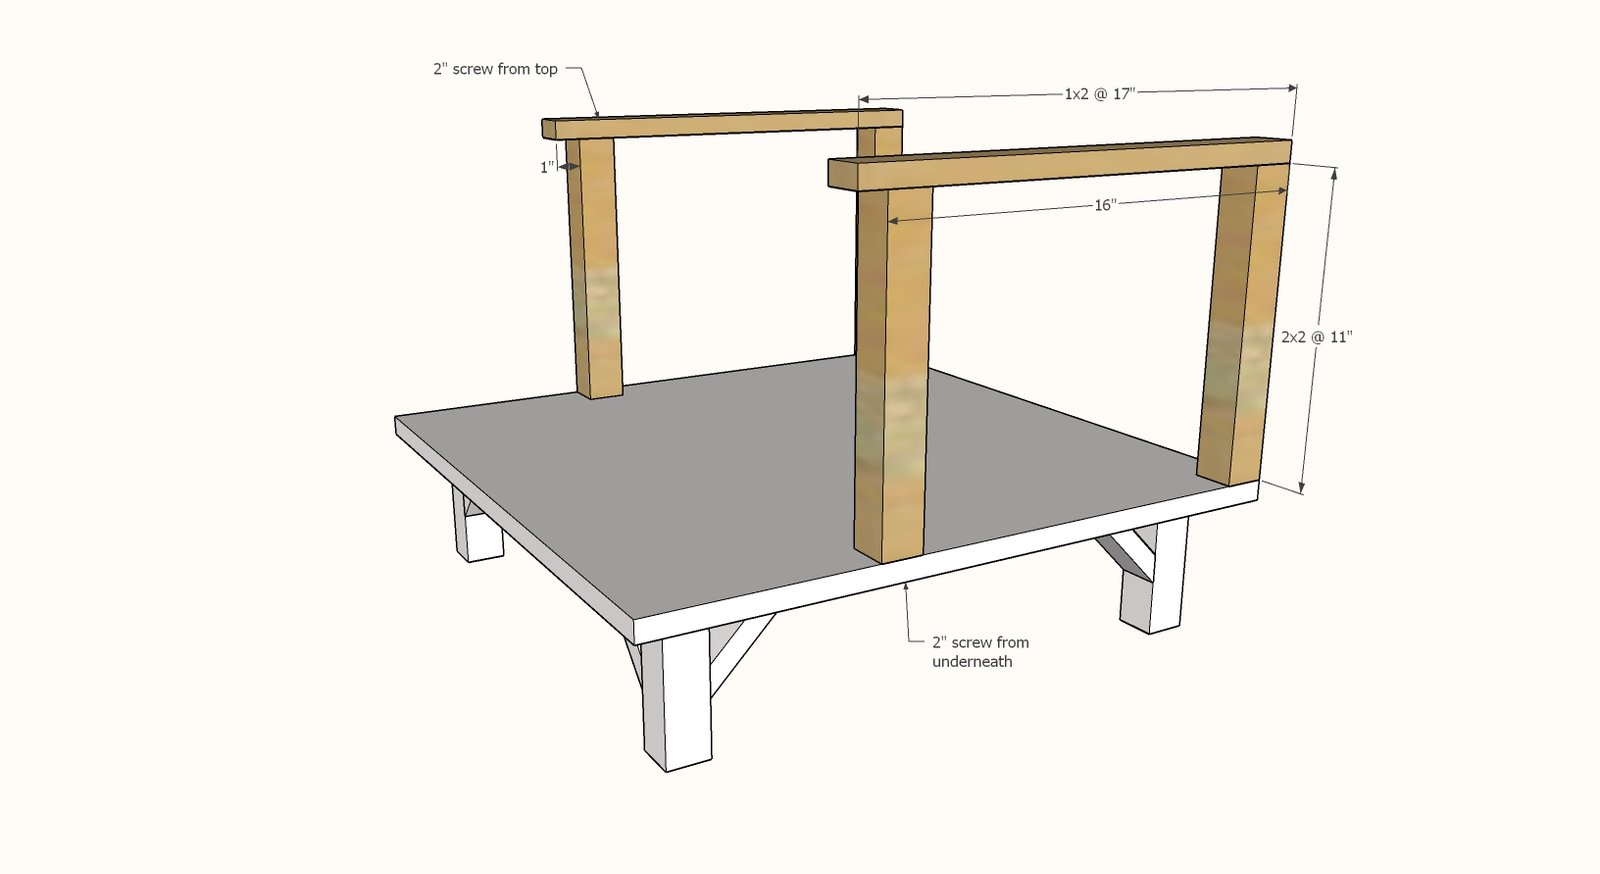
Attach 1x2 to top of 2x2. You can overhang the front slightly to create more detail in the finished product. Attach walls to base from underneath. PLAN NOTE: As shown in photos, we shortened the top 1x2s to 13-1/2" long to allow for easier access inside the "cabin" and to make the plywood roof pieces fit from the scraps from the back.
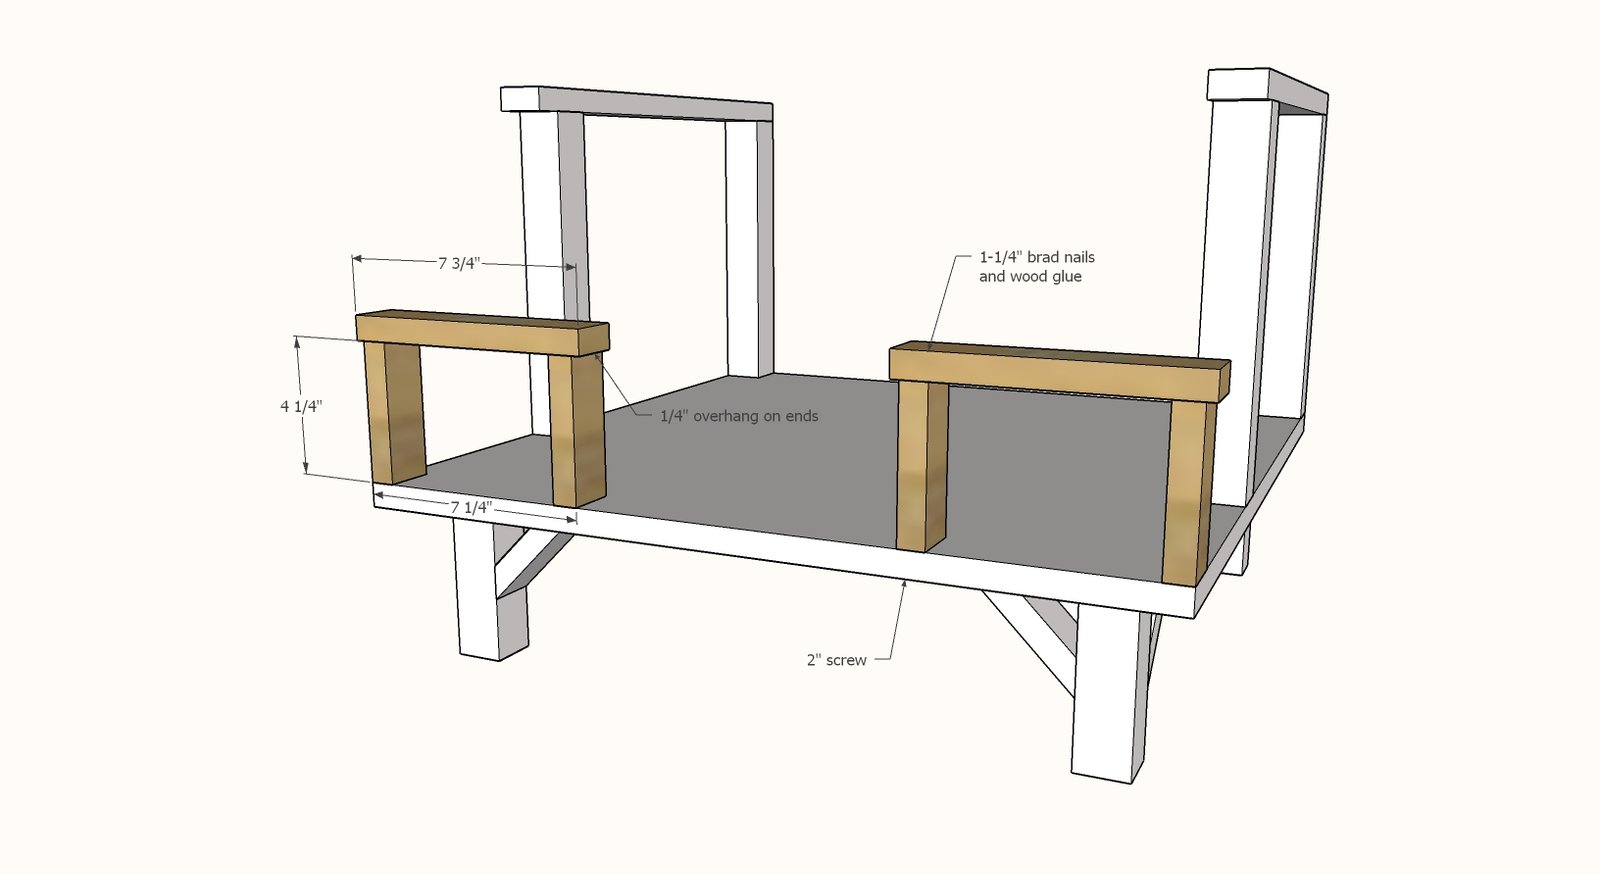
Build railing by nailing pieces together with glue. Clamp the pieces to a workbench when attaching.
Note overhangs. TIP: Wait until after you add the X detailing (next step) to attach to the 3/4" plywood floor.
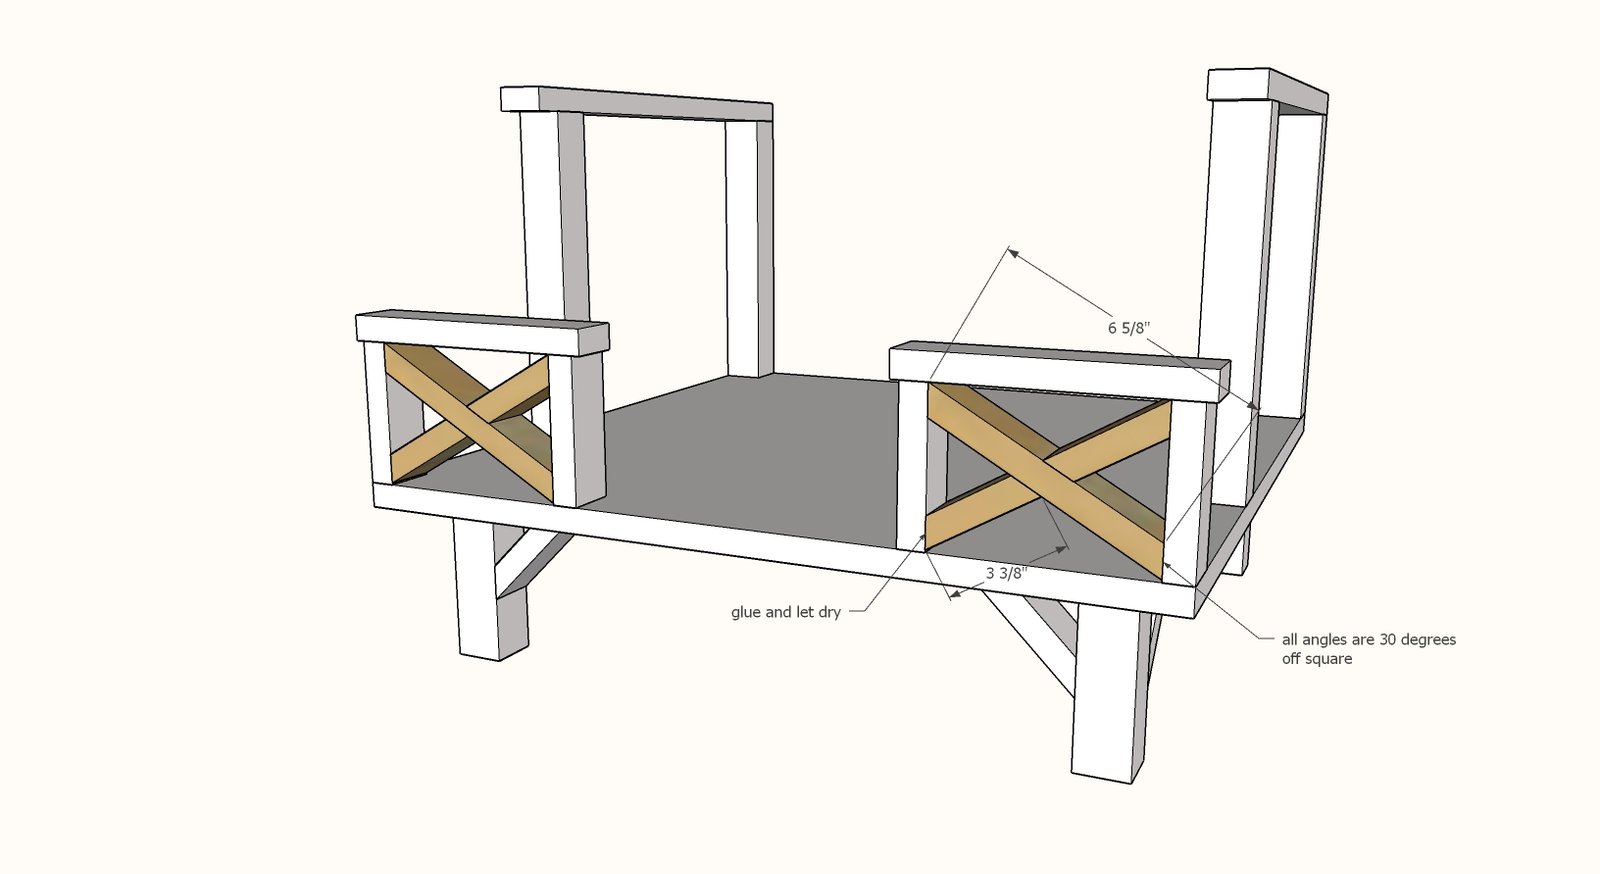
Cut railing detailing inside the railing frames. Make sure they fit.
Glue and nail pieces together inside the frames. Attach railings to the 3/4" plywood floor.
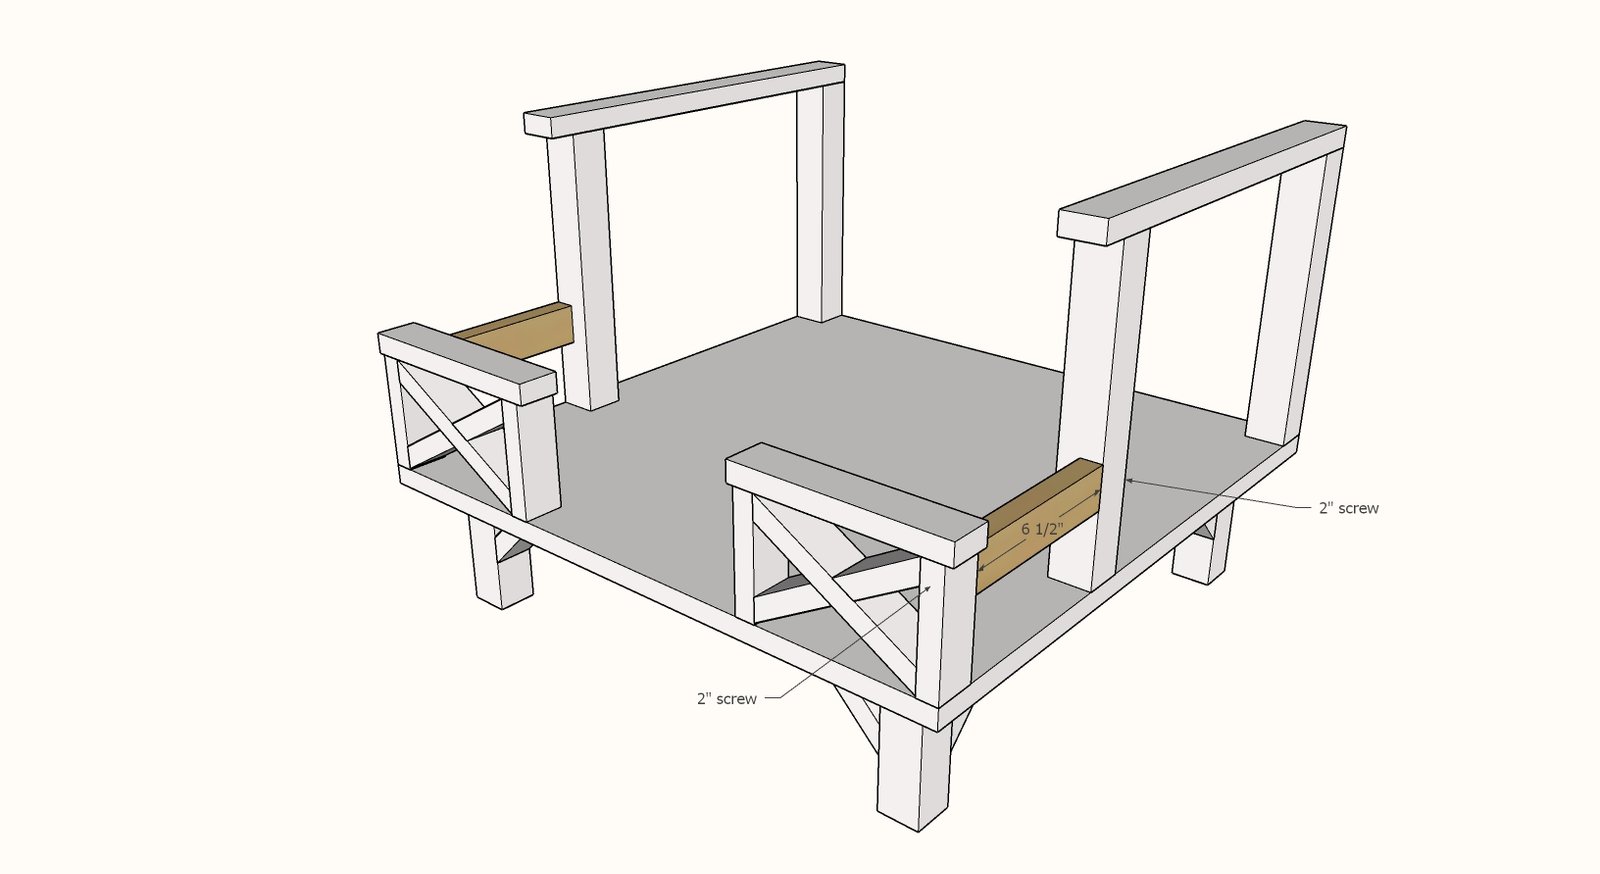
Measure the distance from the railing to the 2x2 "wall" piece. Cut two 1x2s to this measurement.
Attach with glue and predrilled holes and 2" screws. You can also use 2" brad nails and glue or hot glue.
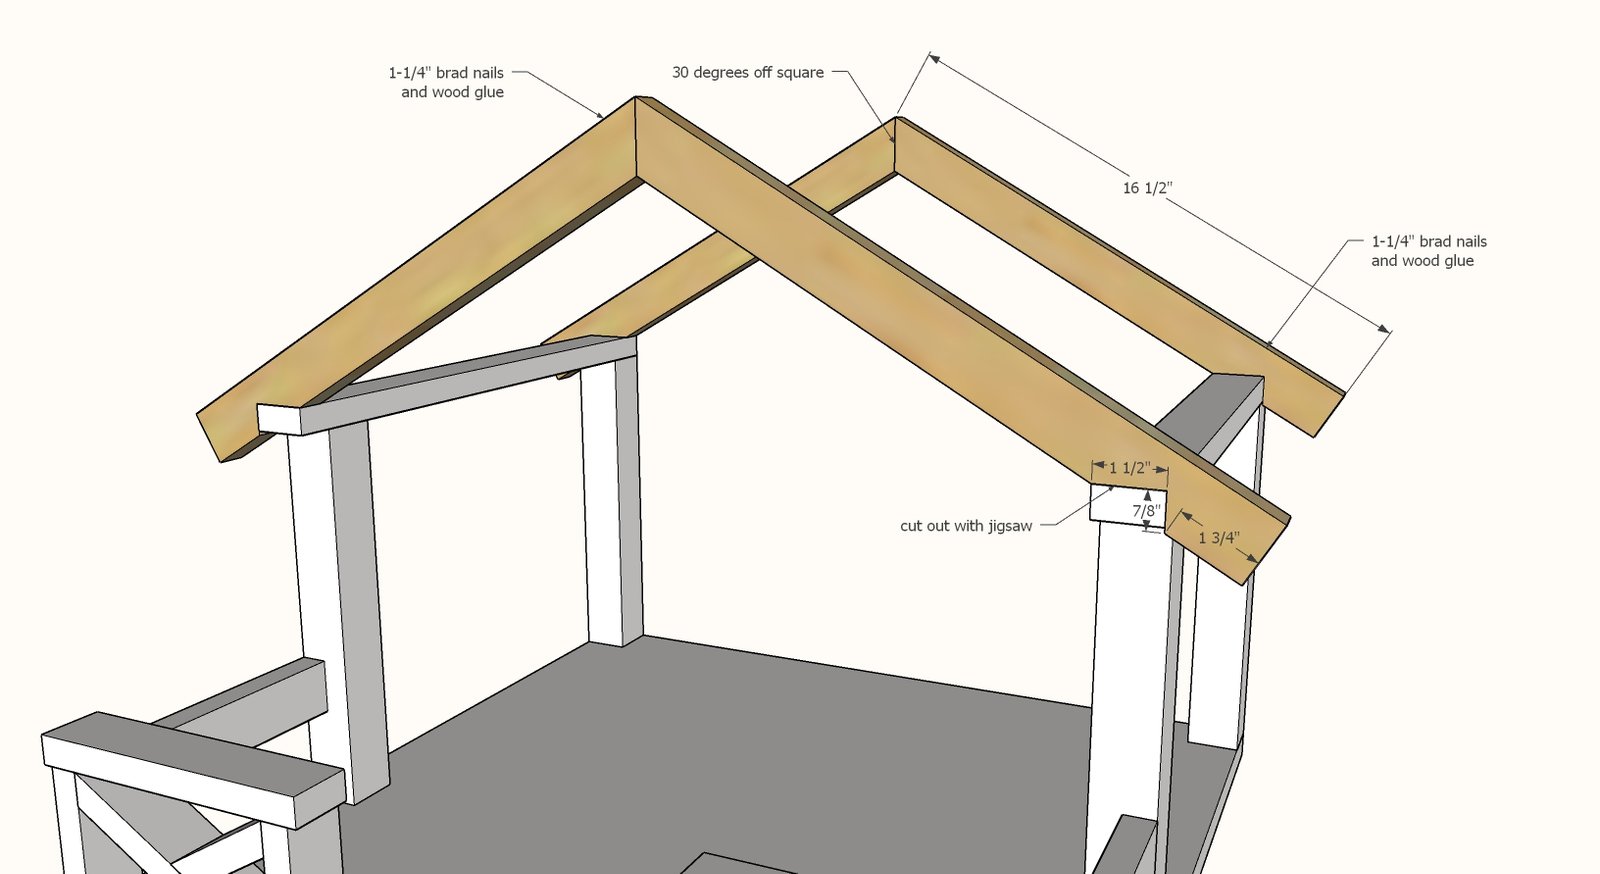
Use a jigsaw to cut out the birdsmouth in the rafter tails.
Attach two rafters together at the top. Then attach rafters to the roof. You can set back from the front of the 1x2 to add some detailing.
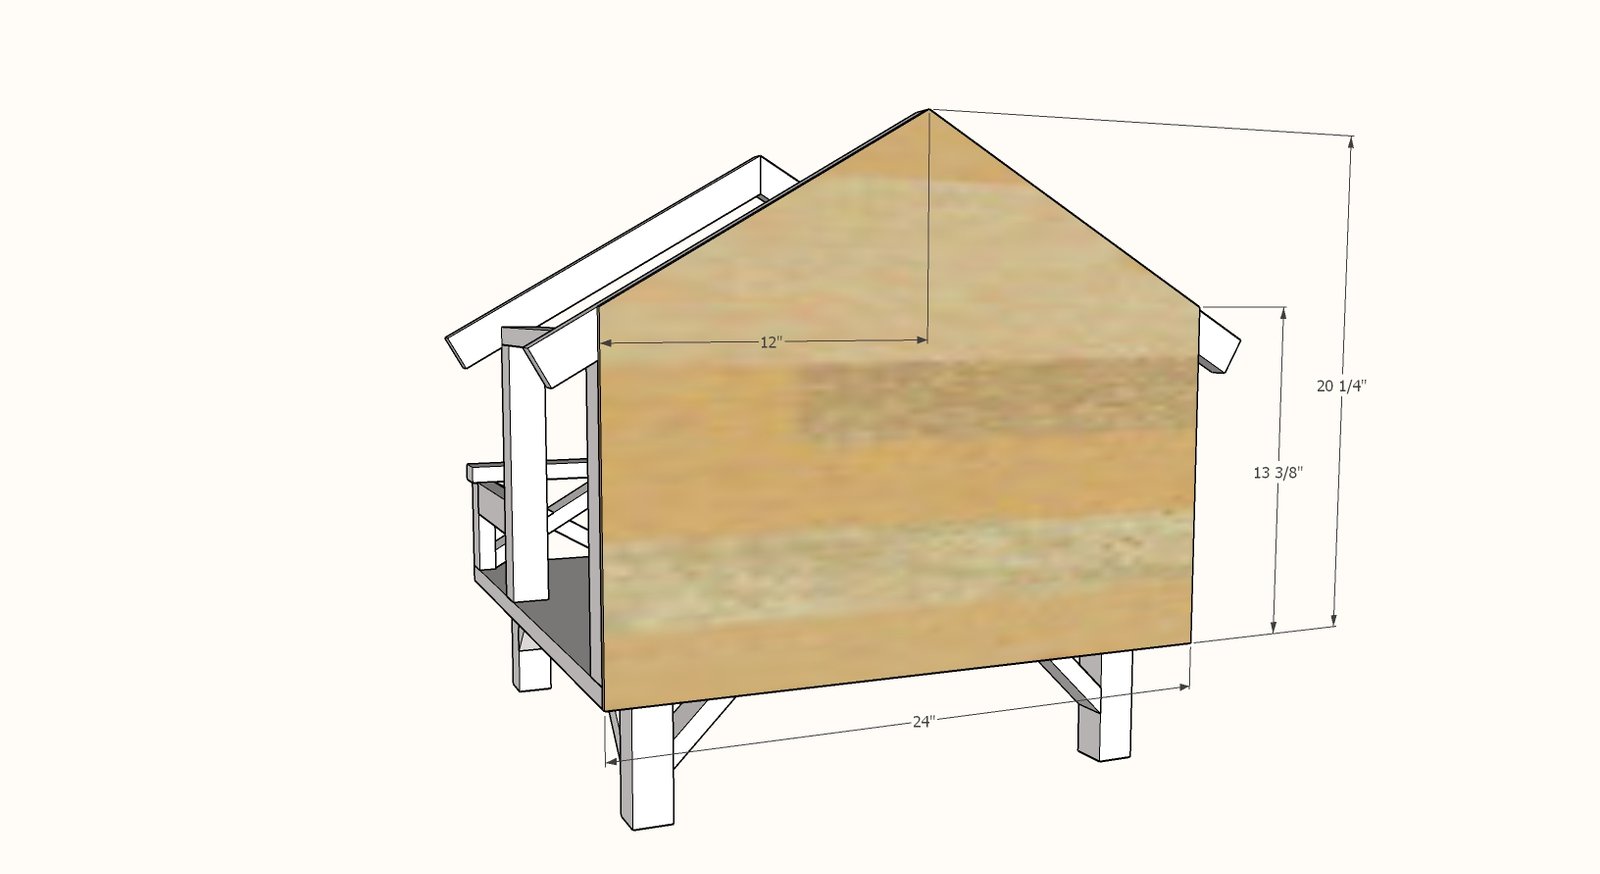
Cut 1/4" plywood 24" wide x 20-1/4" tall.
Place on back of cabin and trace outline of the rafters. Cut on traced lines with either a jigsaw or circular saw. Attach with 3/4" brad nails and wood glue.
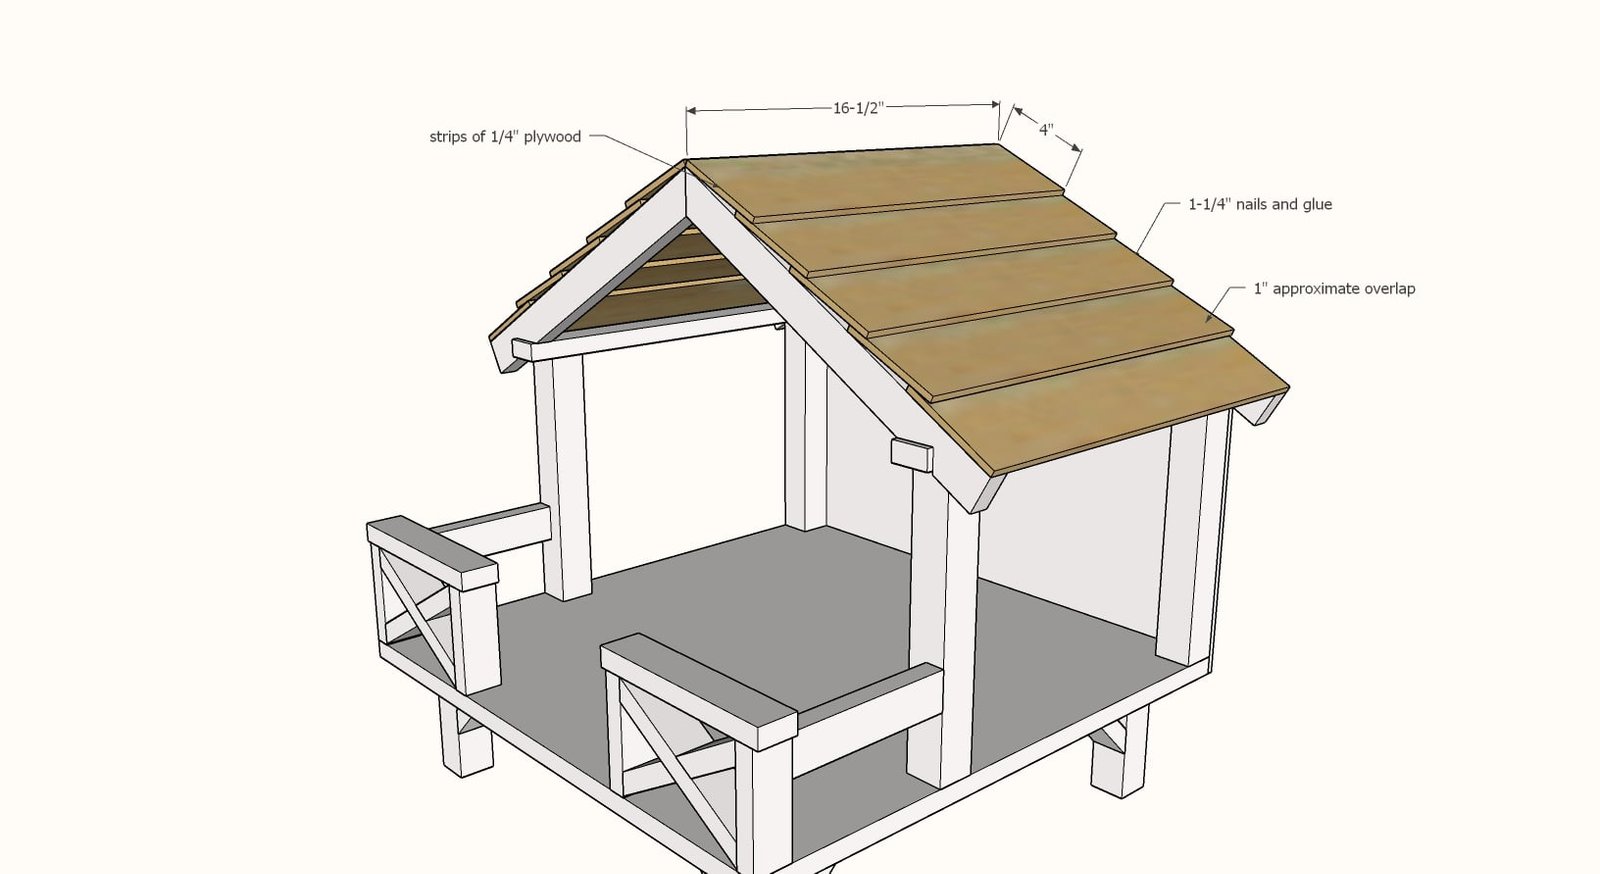
From remaining 1/4" plywood, cut into strips 4" long by about 27-3/4" long.
Then cut those strips to 13-1/2" long. Attach working from the bottom up to the rafters, with about a 1" overlap.
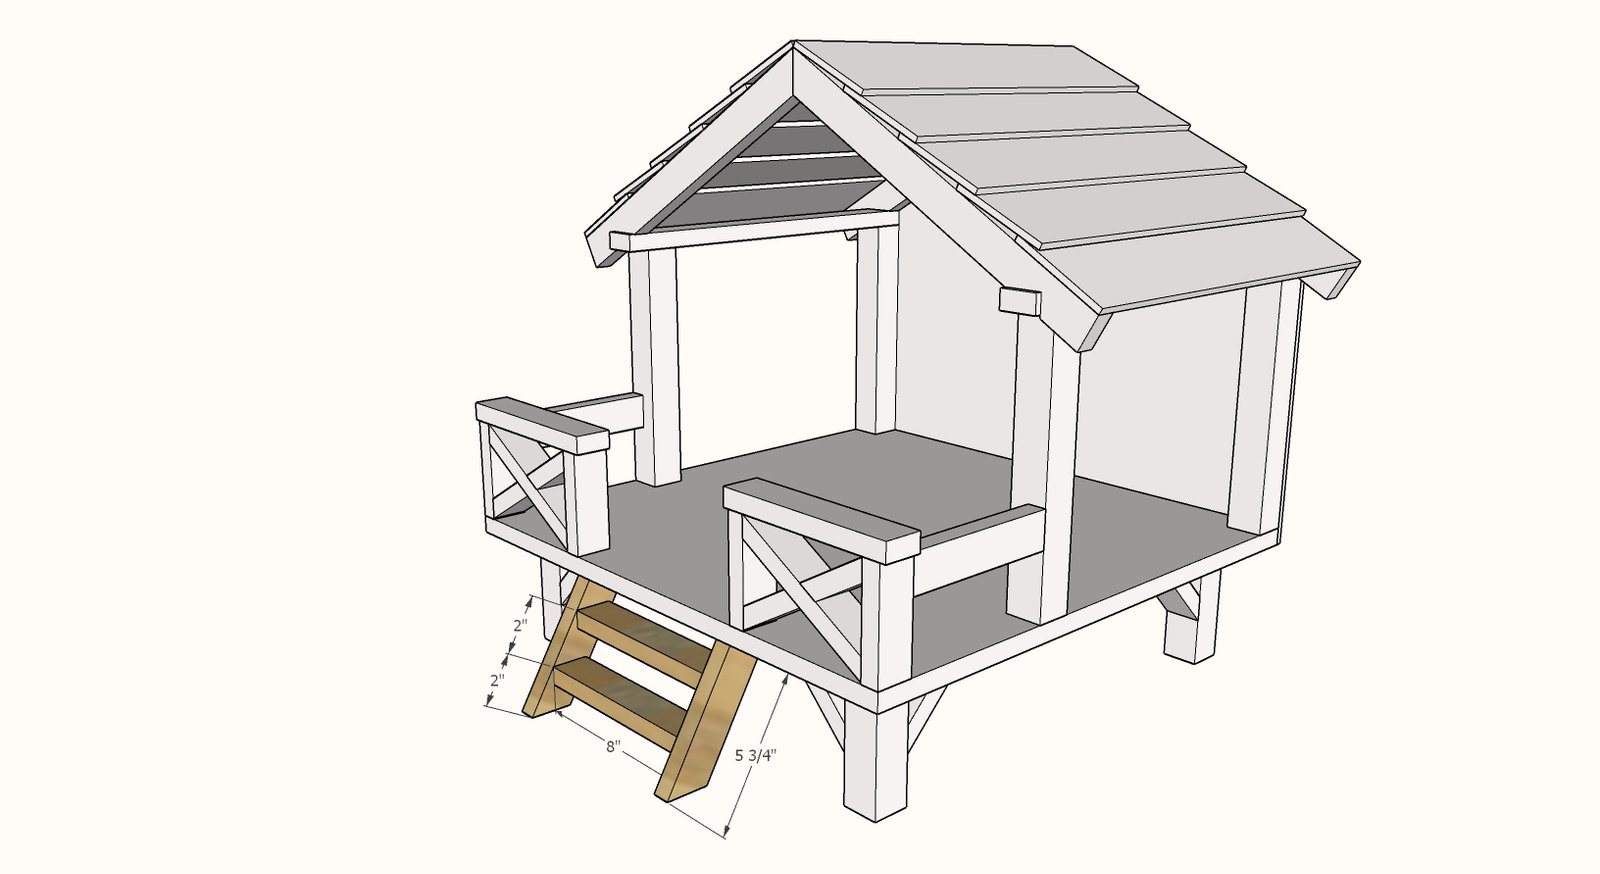
Attach the stair treads to the stringers with 1-1/4" brad nails and glue.
Then attach to the plywood floor with 2" screws and glue.
Finishing
Sand all surfaces, starting with a medium grit and finishing with fine. Wipe off the dust, fill any holes or gaps with wood filler, and sand smooth once dry. Apply primer if you're painting, then finish with your choice of paint or stain and seal with a durable clear topcoat. For outdoor projects, use exterior-rated primer, paint or stain, and sealer so the piece stands up to the weather.
Source (temporary): https://www.ana-white.com/woodworking-projects/camp-hangout-18-or-american-girl-dolls