Camp Loft Bed with Stair, Junior Height
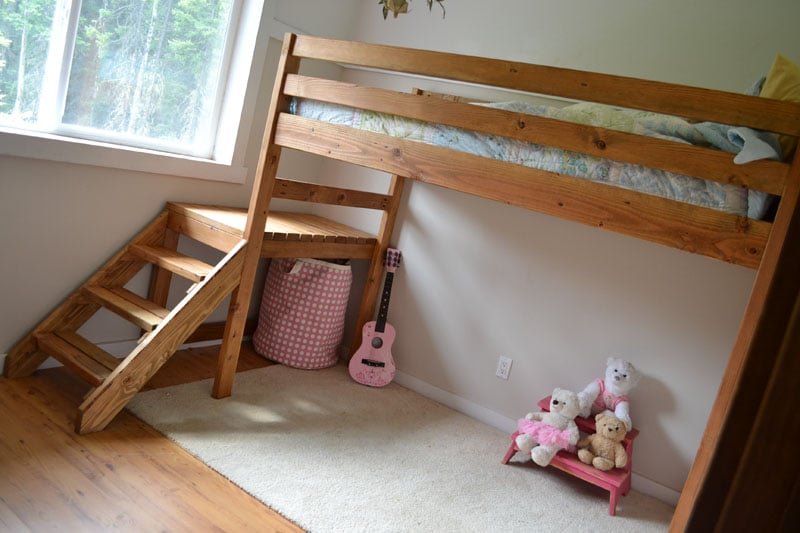
Build your own loft bed plans with stairs all from 2x4 and 2x6 lumber! This super sturdy and beautiful design features a platform for easy access, junior height loft bed plans free from
Specifications
| Project type | Beds and Bed Frames |
|---|---|
| Room | Bedroom |
| Style | Children's and Kid's Room Furniture and Toy Plans |
| Difficulty | Beginner Projects |
Dimensions
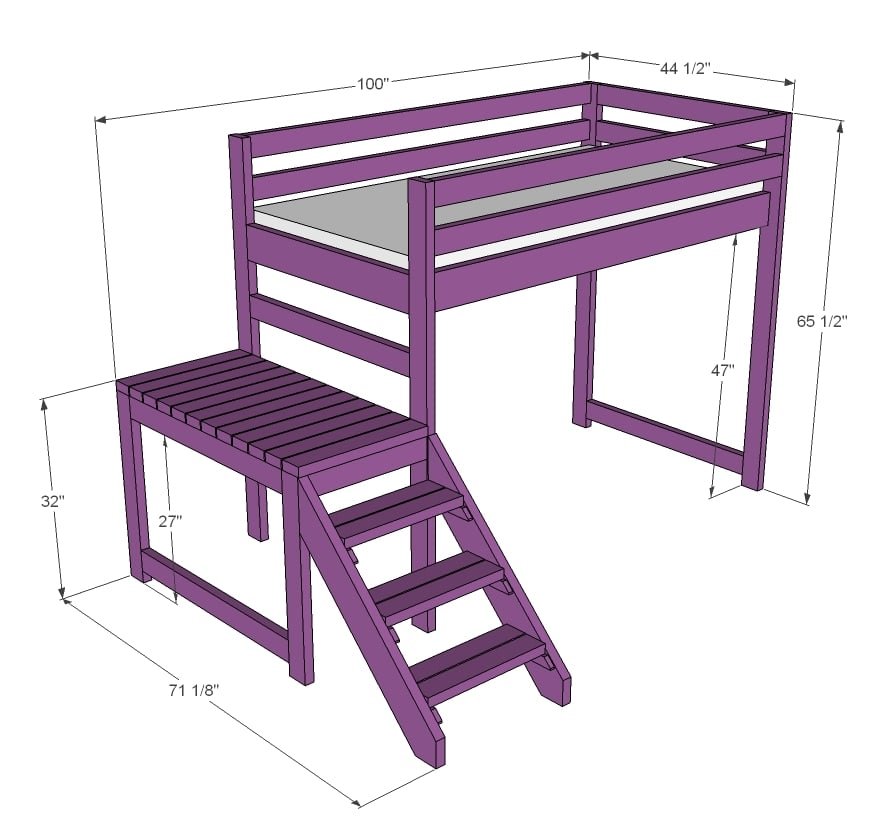
Use the size-specific shopping and cut lists below.
Shopping List
- 15 – 2x4 @ 8 feet long
- 4 – 2x6 @ 8 feet long
- 2 – 2x2 @ 8 feet long
- 1 – 1x2 @ 8 feet long
- 2 ½” pocket hole screws
Cut List
- 4 – 2x4 @ 65 ½” - legs
- 2 – 2x6 @ 37 ½” -bed siderails on ends
- 5 – 2x4 @ 37 ½” - guardrails on ends
- 5 – 2x4 @ 75” - guardrails and base support
- 2 – 2x6 @ 75” - bed siderails
- 2 – 2x2 @ 75” - cleats
- 2 – 2x4 @ 30 ½” - platform
- 2 – 2x4 @ 37 ½” - platform
- 1 – 2x4 @ 41 ½” - platform
- 2 – 2x4 @ 20 ½” - platform
- 12 – 2x4 @ 22” - decking
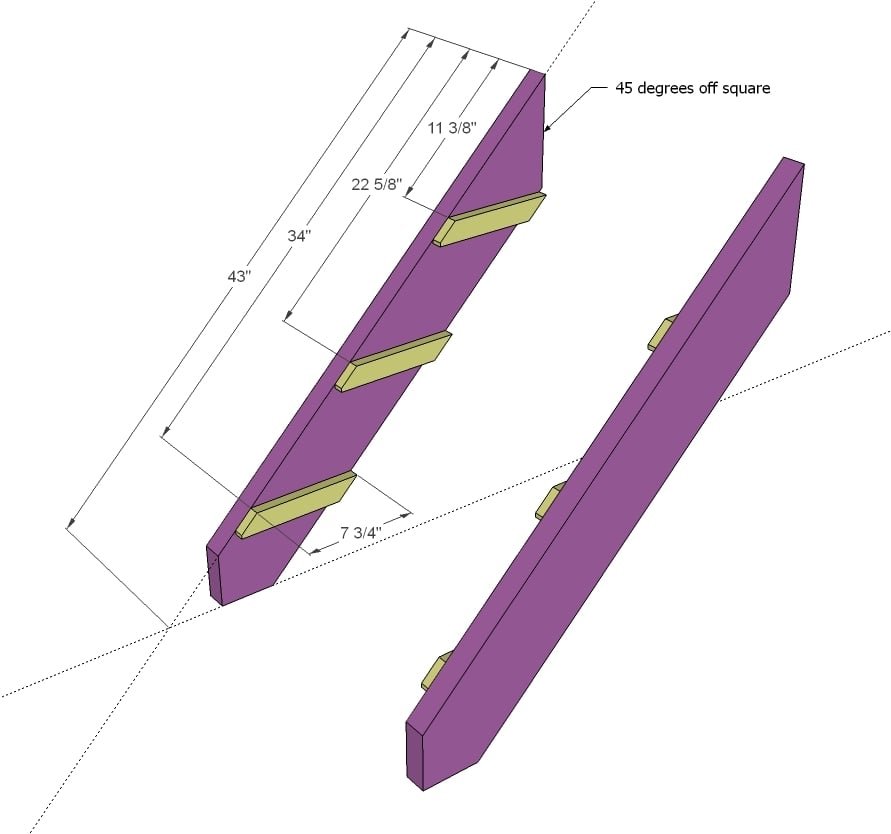
- 2 – 2x6 @ 43” (both ends cut 45 degrees off square, ends NOT parallel) – to be trimmed down in later steps
- 6 – 1x2 @ 7 ¾” (both ends cut at 45 degrees off square)
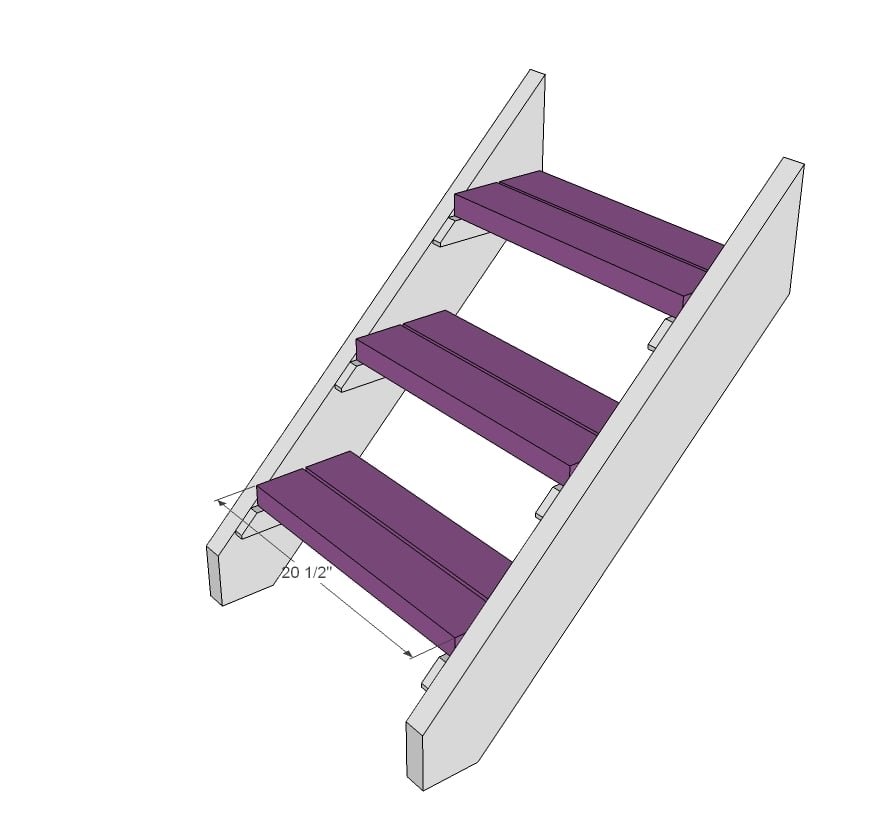
- 6 – 2x4 @ 20 ½” - stair treads
This bed requires a slat system (1x3s, 1x4s or 2x4s or similar) or a bunkie board mattress to complete
Tools
- measuring tape
- square
- pencil
- safety glasses
- hearing protection
- kreg-jig
- drill
- circular saw
- sander
- countersink drill bit
Step-by-step Instructions
Step 1
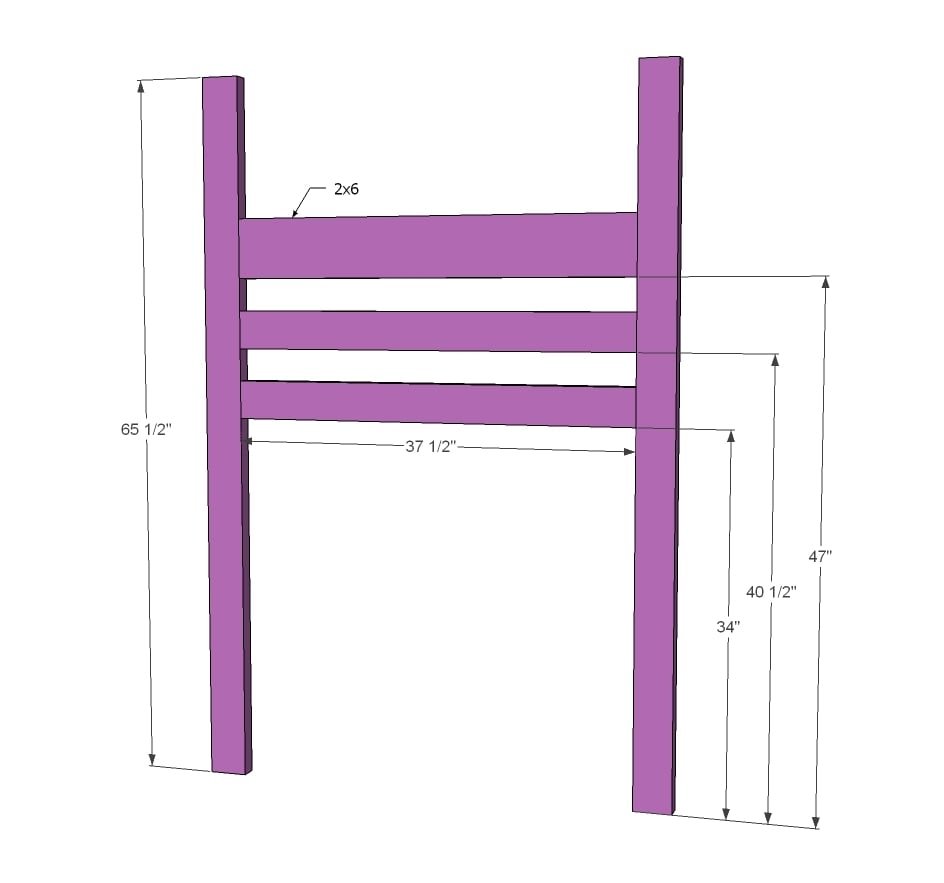
Build the ladder end as shown in diagram with 1 1/2" PHs and 2 1/2" PH screws. Use glue to fasten - these joints are permanent. If you are building this loft bed without the stair platform, add 2x4s all the way down to make a "ladder" for the kids to climb up.
Step 2
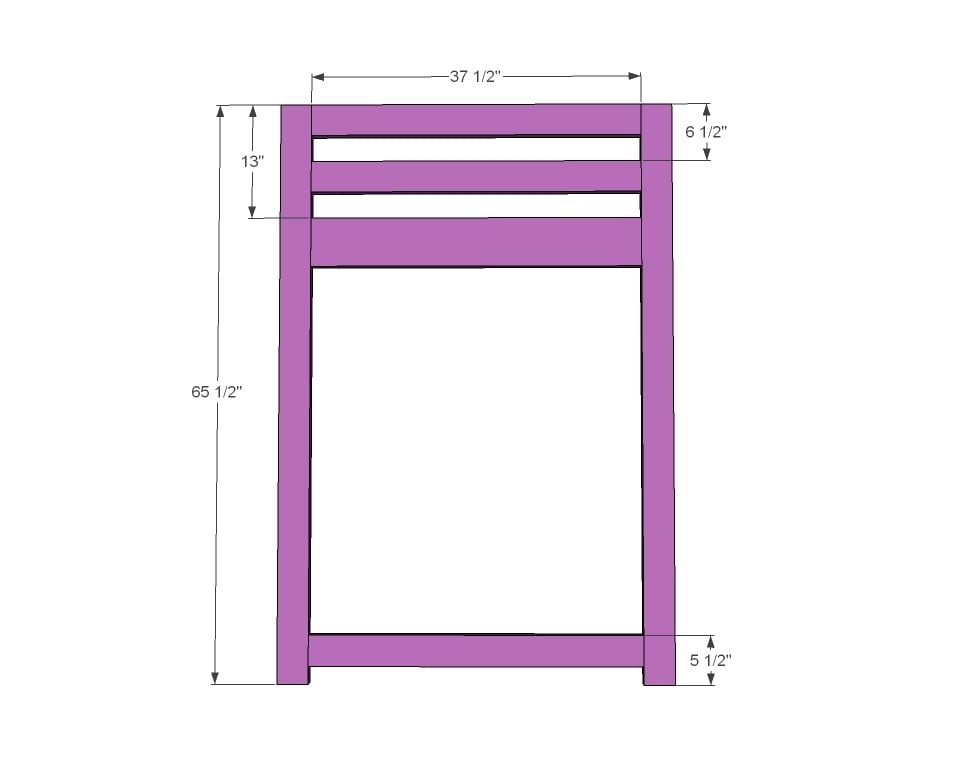
Build front end of loft bed same as ladder end.
Step 3
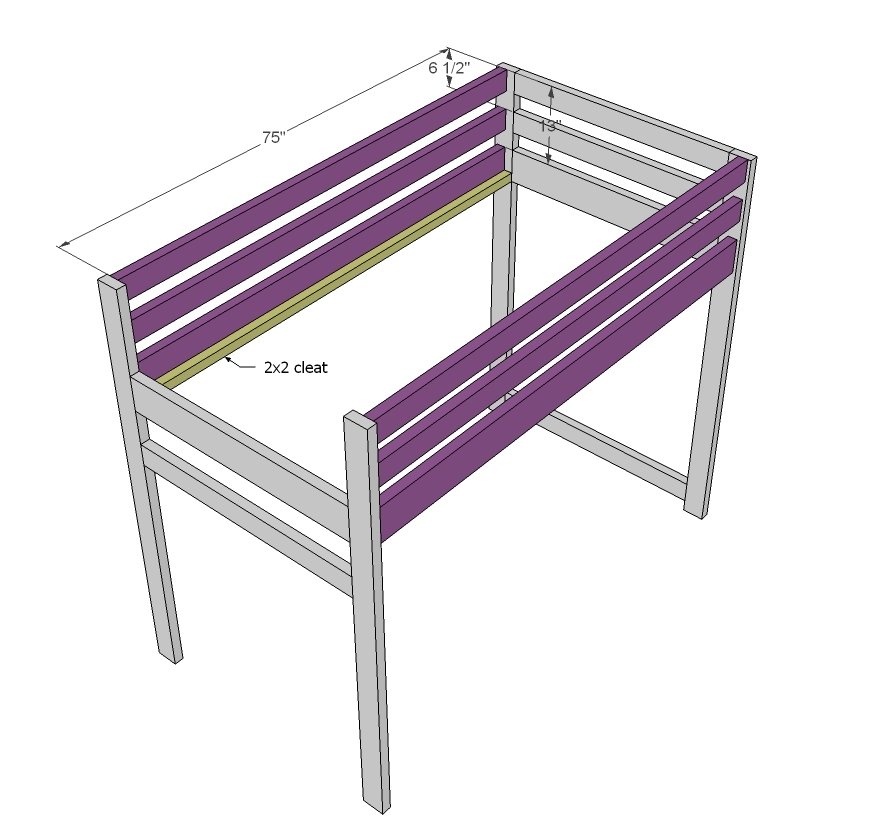
Now here's where we skip the glue. To make this loft bed easy to disassemble, I did not use glue here. The inside width for the mattress area should be 39", insetting the side rails 1 1/4" from outsides. I did this so your PH screws have lots of board to grab into. This bed has NOT been weight tested or guaranteed. If you feel you need extra support - add metal brackets under the 2x6s. An alternative method is to attach metal bed brackets directly to the ends if you have those. Notice the cleat is added in this step to. I used 2 1/2" screws and glue to attach, screws every 6-8" all the way down. This bed is designed to work with a bunkie board, but we just used 2x6s cut to length as the bed slats. NOT SHOWN: Add the fifth 2x4 @ 75" at the back base of the bed to support the legs at the bottom.
Step 4
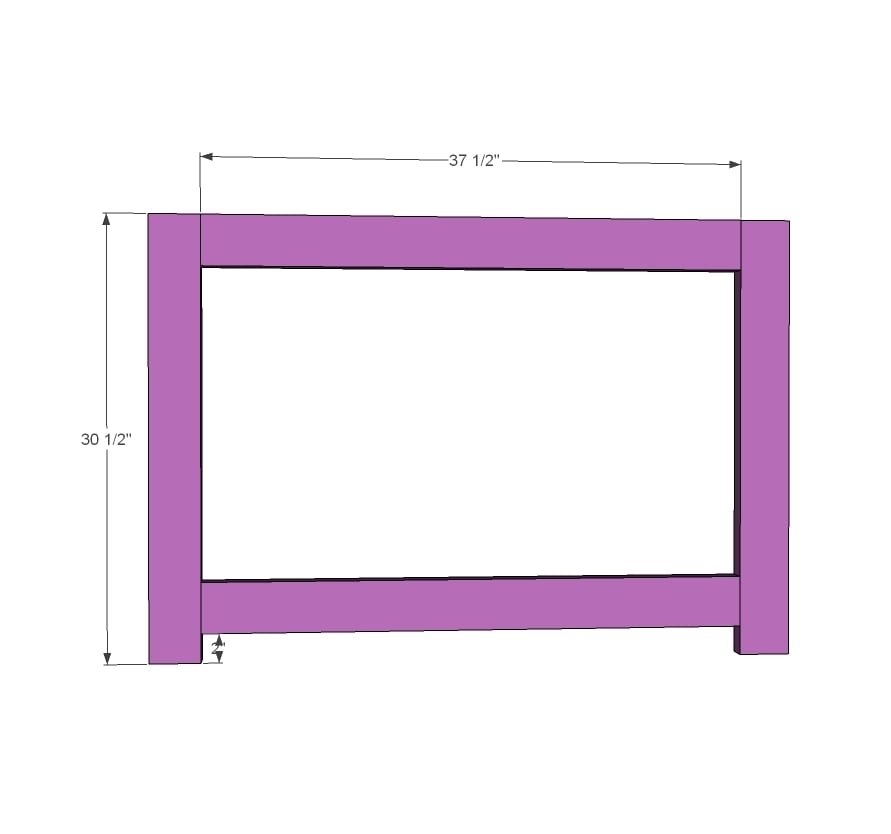
Now we'll start building the stair platform for the loft bed with stairs.
Step 5
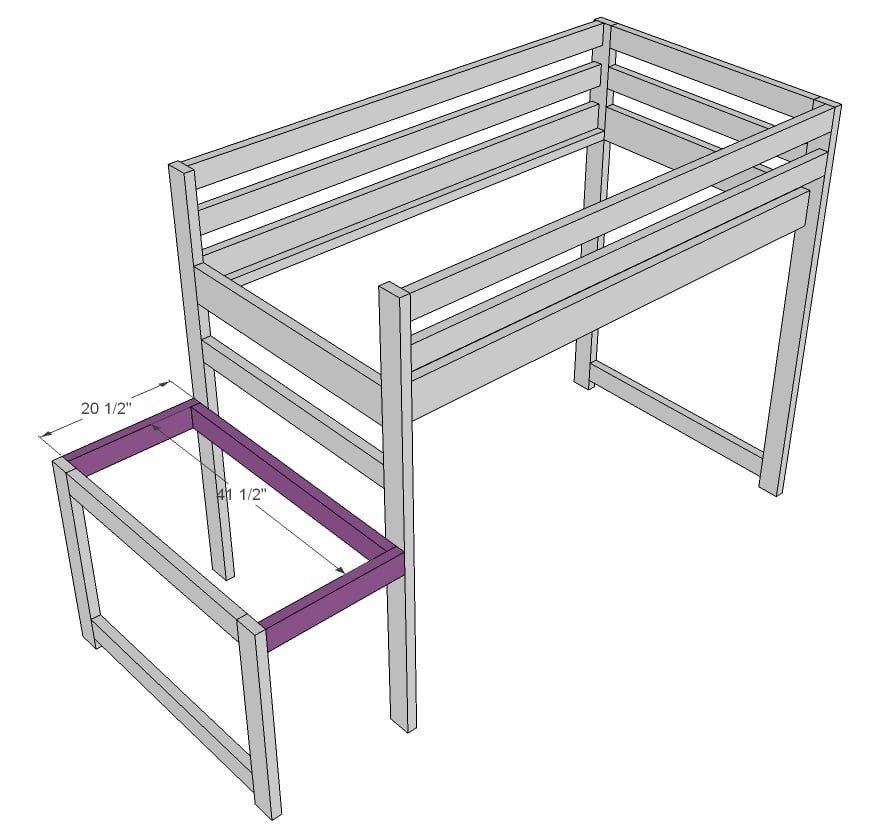
Attach stair framing to the loft bed legs.
Step 6
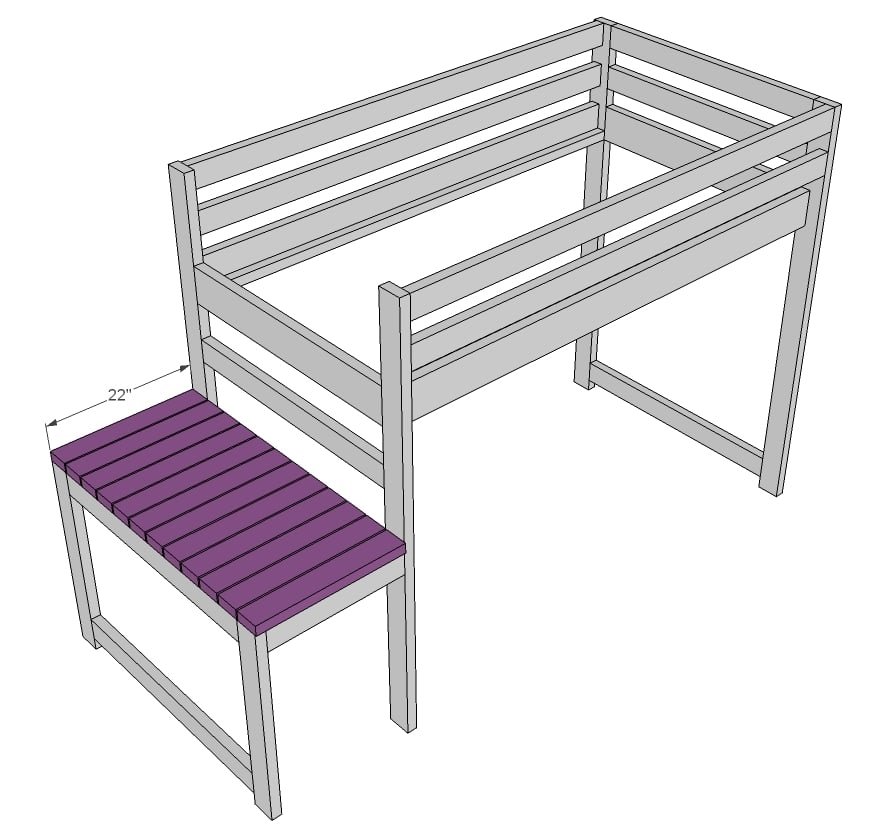
And then the decking is placed on top of the stair platform.
Step 7
The stairs are easy to build - just 45 degree angles! We went ahead and drilled 1 1/2" PHs along top edge of the stairs to connect the stairs to the bed later on.
Step 8
Then we added the stair treads. We also drilled 1 1/2" PHs along ends of the stair treads and attached with 2 1/2" PH screws just for extra strength. Everything gets glued.
Step 9
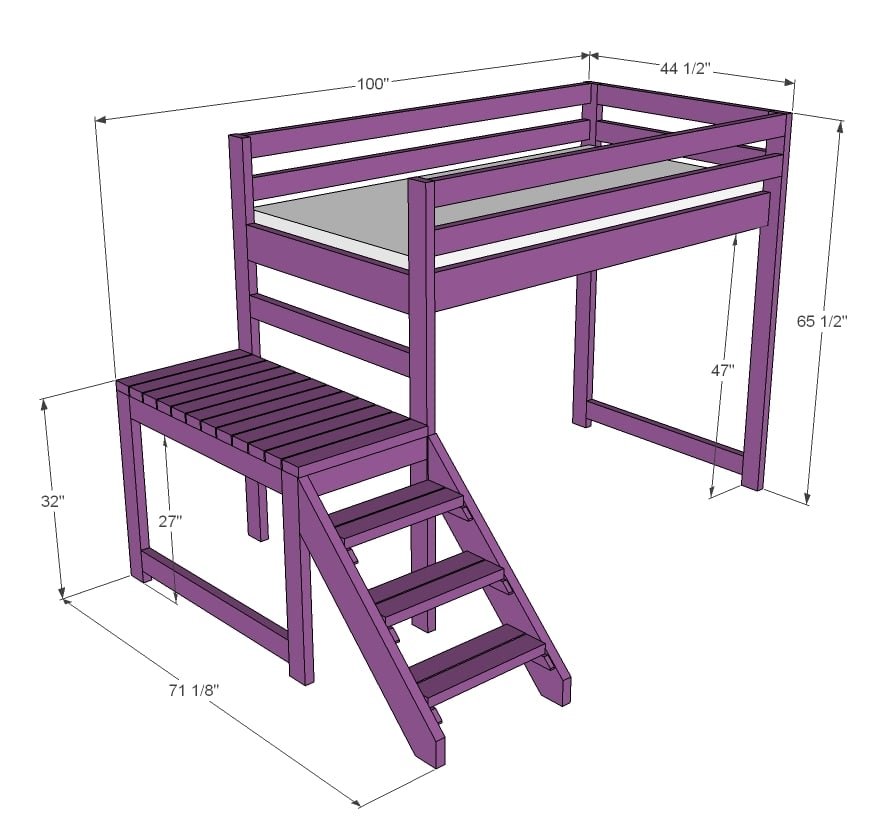
The bed was finished outside and then assembled in the room. TIP: We haven't found our bed needs it, but for extra support, you could add another 2x4 @ 75" (at $2 a 2x4, cheap insurance) to the base of the bed to further support the bottoms.
Finishing
Sand all surfaces, starting with a medium grit and finishing with fine. Wipe off the dust, fill any holes or gaps with wood filler, and sand smooth once dry. Apply primer if you're painting, then finish with your choice of paint or stain and seal with a durable clear topcoat. For outdoor projects, use exterior-rated primer, paint or stain, and sealer so the piece stands up to the weather.
Source (temporary): https://www.ana-white.com/woodworking-projects/camp-loft-bed-stair-junior-height