Canopy Doll Bed for American Girls 18" Dolls
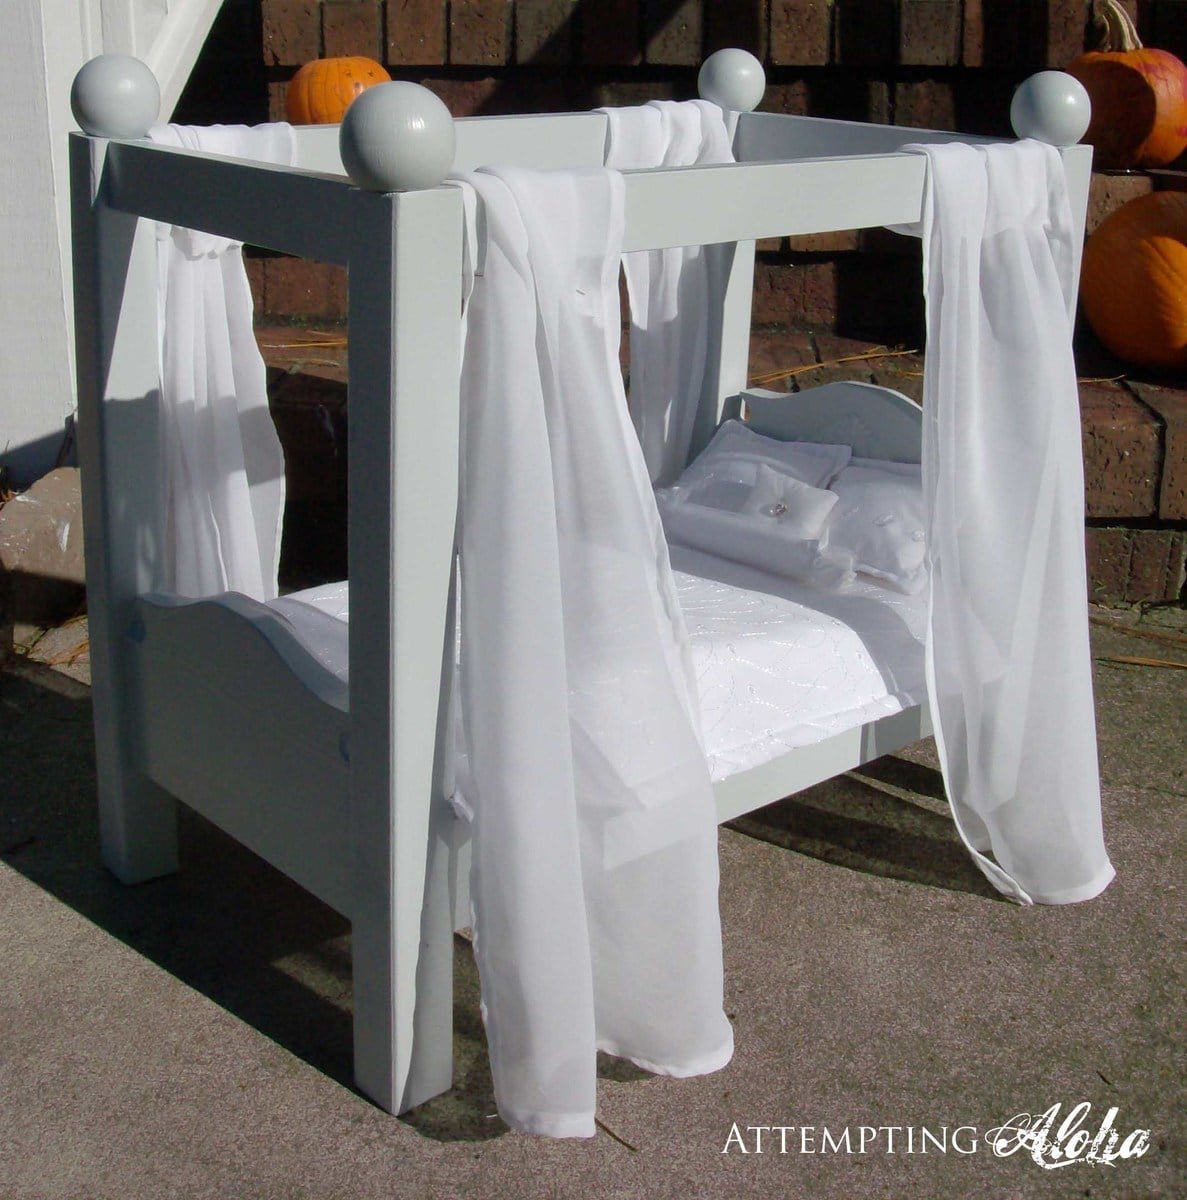
I used the base of Ana's Farmhouse doll bed as a jumping-off point for my canopy doll bed. A free PDF pattern of the headboard/footboard is available on my blog here: This was my first time using Sketch Up, and I just got a crash course this afternoon, so you might have to overlook the slightly messy-looking headboard in the design plan pics!:) My daughter loves her doll bed (it's used for her Build-A-Bear), and I hope you find this helpful.
Specifications
| Project type | Doll Furniture |
|---|---|
| Room | Kids and Toys |
| Style | Children's and Kid's Room Furniture and Toy Plans |
| Difficulty | Beginner Projects |
| Estimated cost | Under $20 |
Dimensions
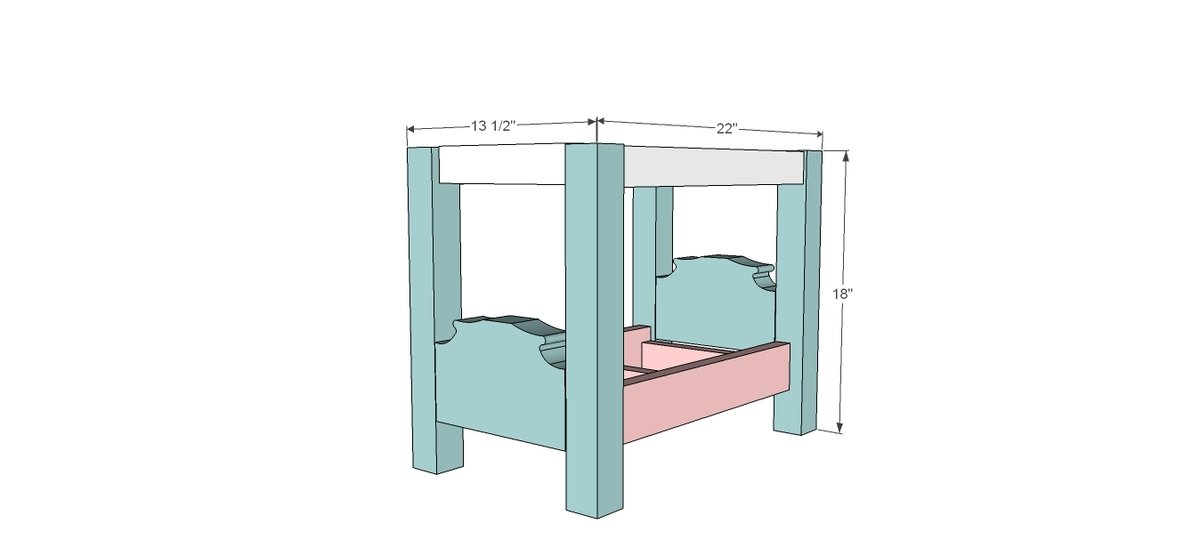
Use the size-specific shopping and cut lists below.
Shopping List
1x6 (19" total)
2x2 furring strip (72" total)
1x3 furring strip (36" total)
1x2 furring strip (85" total)
Cut List
2x2 - cut 4 pieces @ 18" each
1x6 - cut 2 pieces @ 9.5" each
1x3 - cut 2 pieces @ 18" each
1x2 - cut 2 pieces @ 9.5" each
2 pieces at 18" each,
and 2 or 3 (depending on how many slats you want on the bottom of the bed--I recommend 3) at 10" each
Tools
- measuring tape
- square
- pencil
- safety glasses
- drill
- jigsaw
Step-by-step Instructions
Step 1
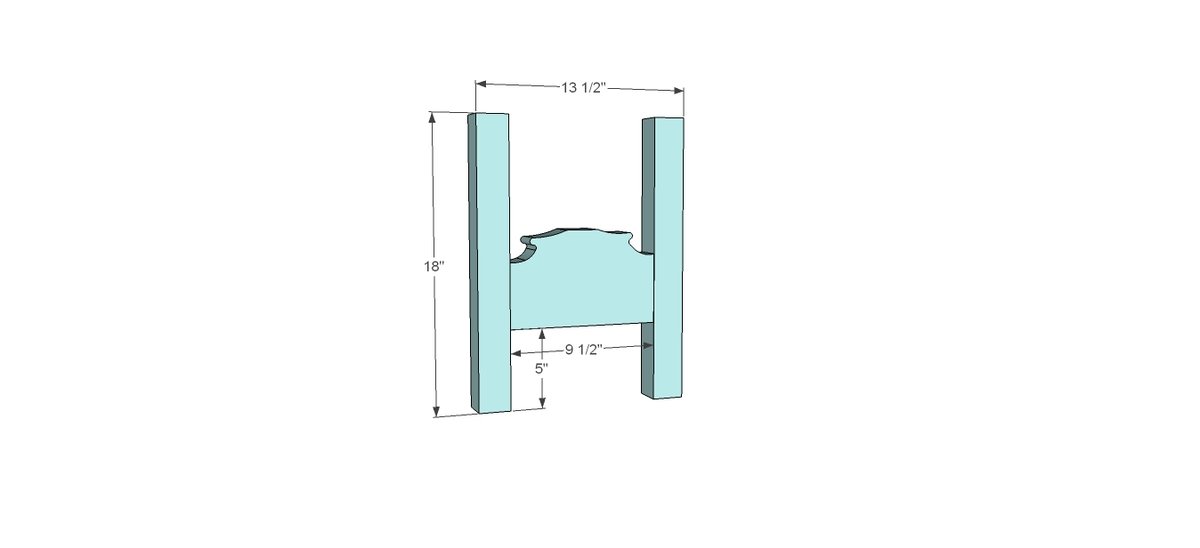
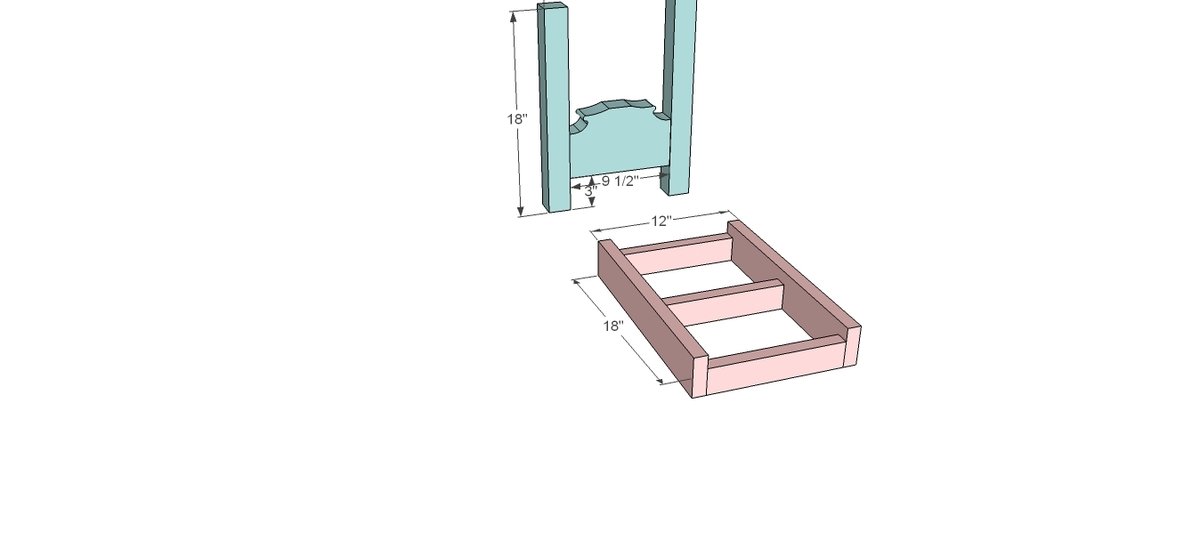
Cut out the headboard with your jig saw and the template from my site. Then use wood glue and your 2" wood screws to attach the headboard to two of your 18" 2x2's. Place the bottom of the headboard 5" up from the bottom of the posts (2x2's).
Step 2
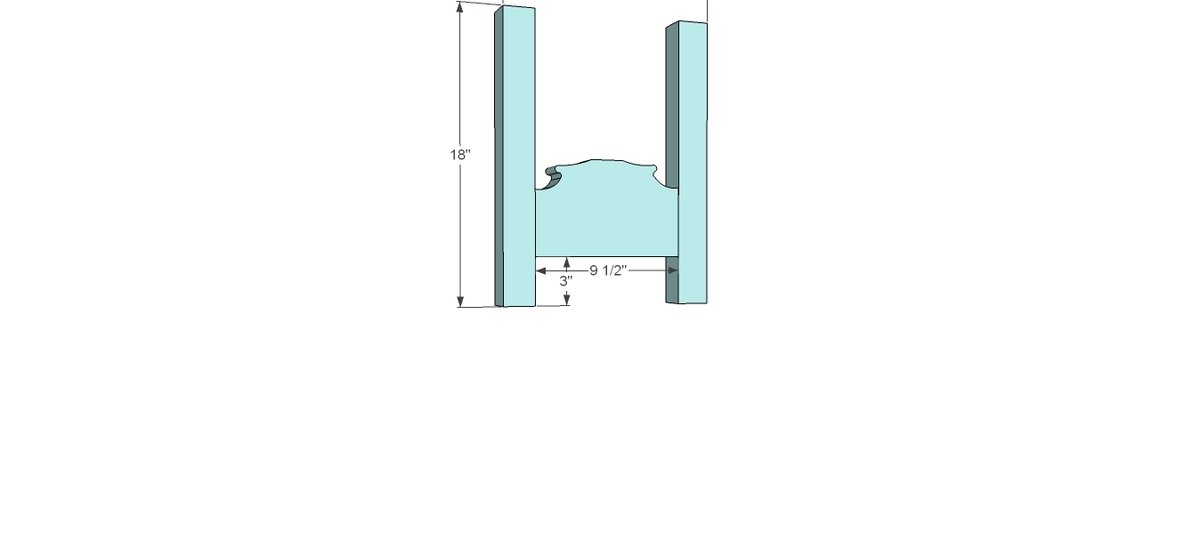
Repeat step 1 with your other 1x6 and two remaining 18" 2x2's, but this time place it up 3" from the bottom instead of 5". This will give the illusion of the headboard being larger without having to pay for a separate piece of wood.
Now follow Ana's Farmhouse Doll Bed plans Step 10:
But your 1x3's will be 18", and your 1x2's will be 10". I chose to add the center bar, and the cut list accounts for that.
Step 4
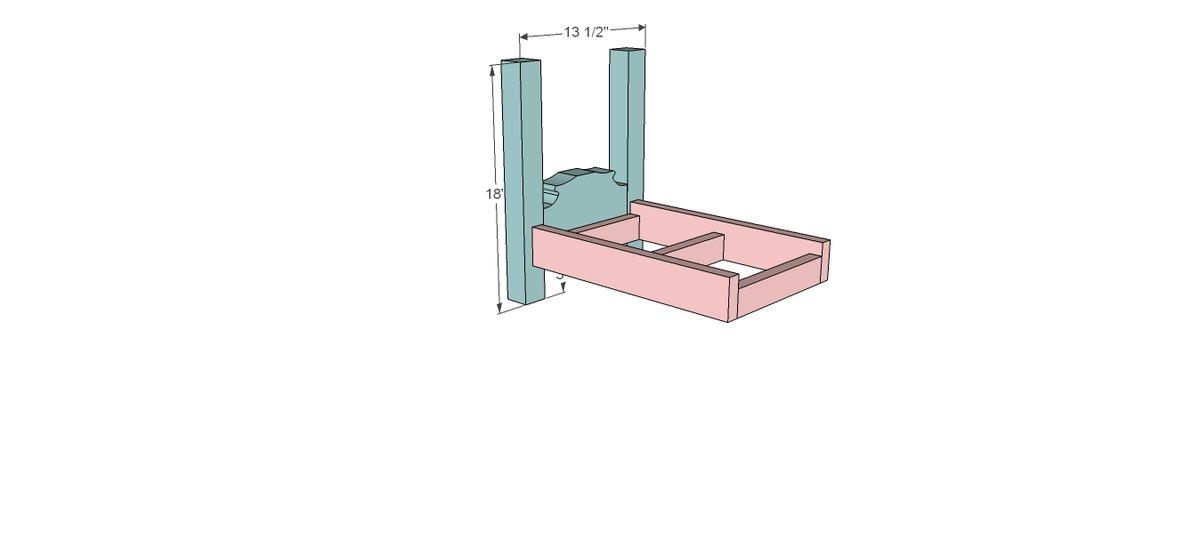
Now attach the footboard to the base you just built. I made mine flush with the bottom of the footboard, so up 3" from the floor.
Step 5
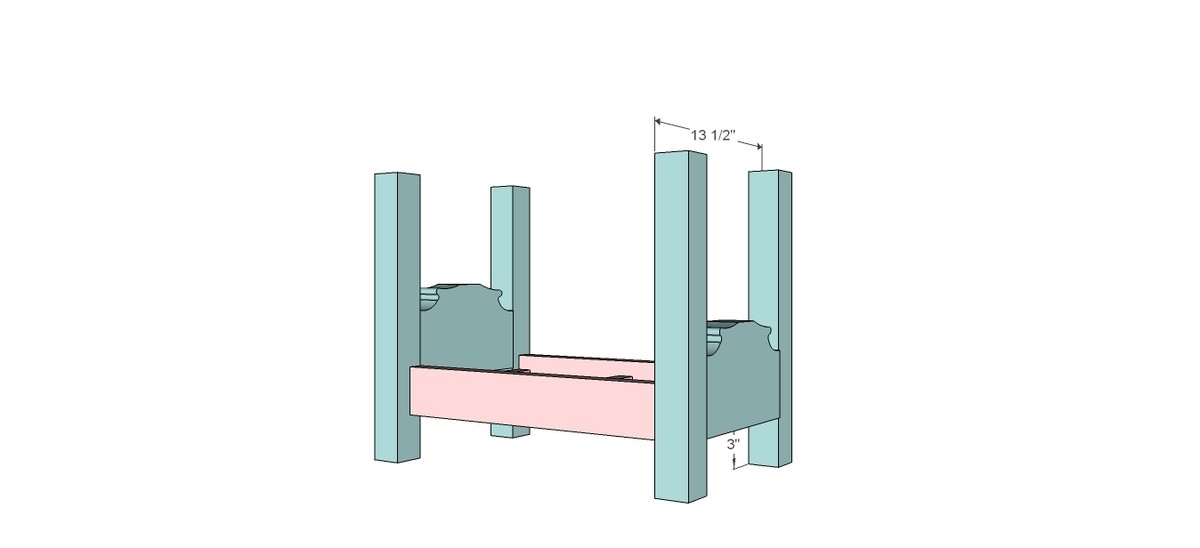
Step 6
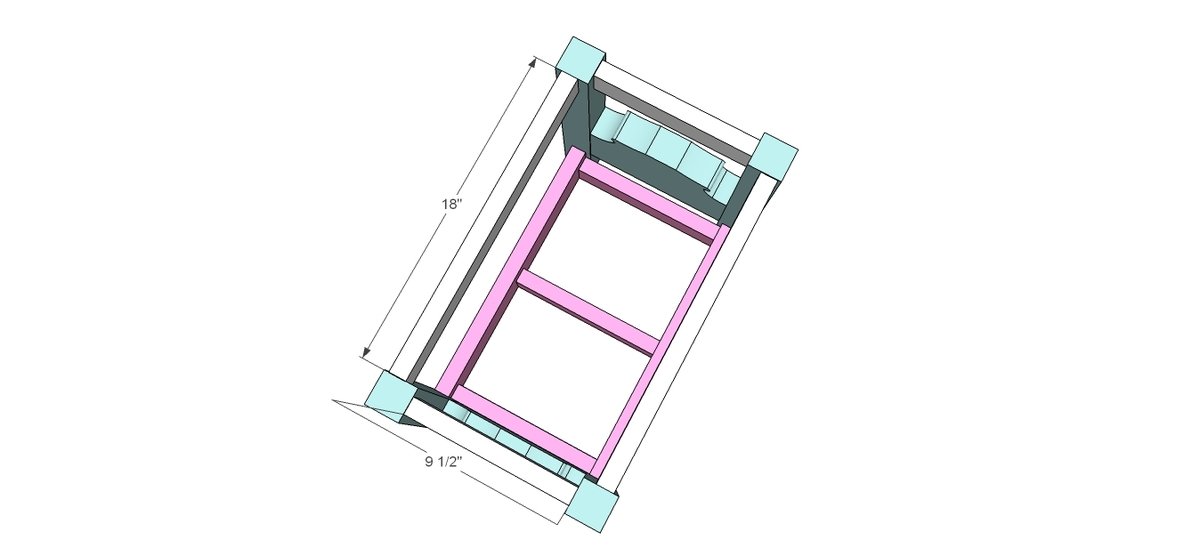
And finally, add your top railings. I chose to center mine on each post. You could bring them in flush with the inside or to the outside if you wanted as well. It won't affect the functionality of it at all.
Step 7
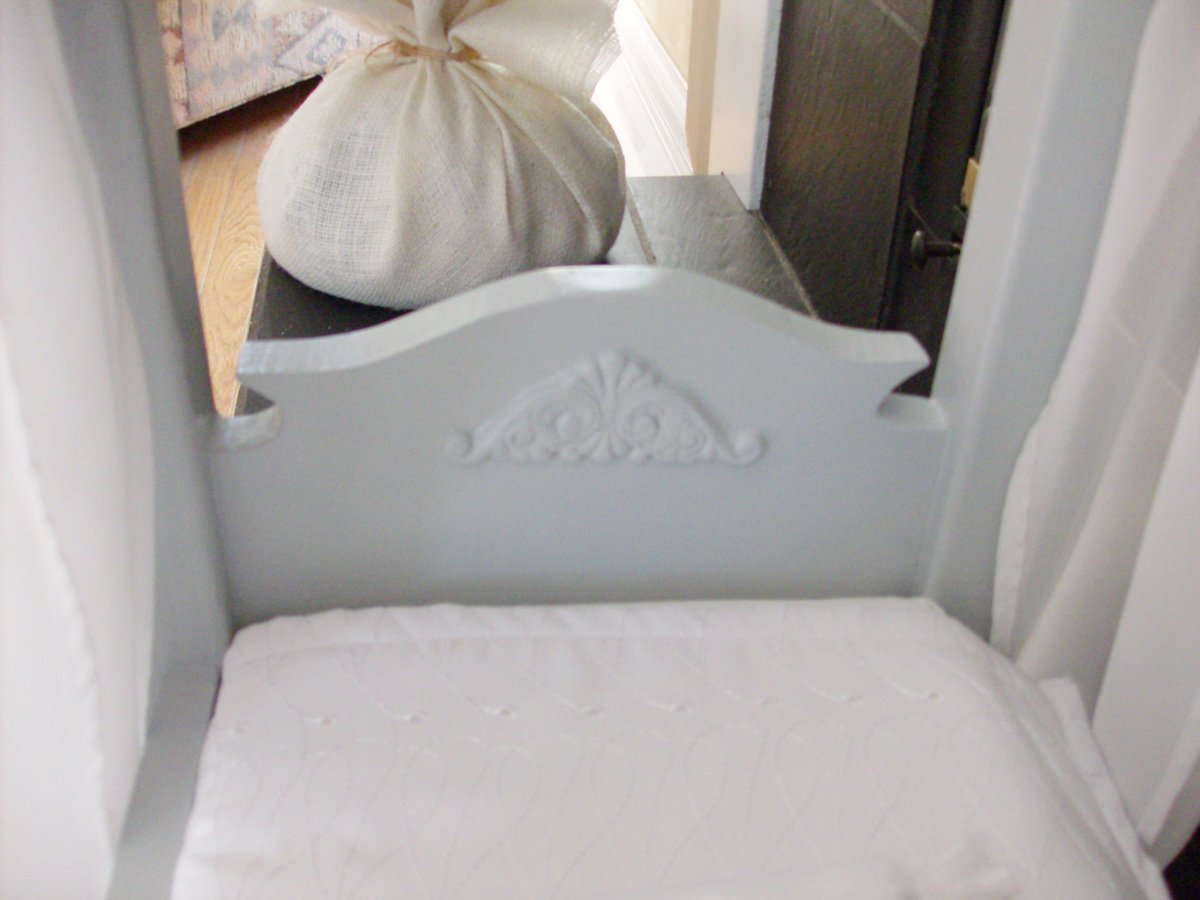
And the last step is to add the finials and decorative touches! I simply used Gorilla Glue to keep them on, and we haven't had any mishaps yet!
Finishing
Sand all surfaces, starting with a medium grit and finishing with fine. Wipe off the dust, fill any holes or gaps with wood filler, and sand smooth once dry. Apply primer if you're painting, then finish with your choice of paint or stain and seal with a durable clear topcoat. For outdoor projects, use exterior-rated primer, paint or stain, and sealer so the piece stands up to the weather.
Source (temporary): https://www.ana-white.com/woodworking-projects/canopy-doll-bed-american-girls-18-dolls