Cara Bookcase
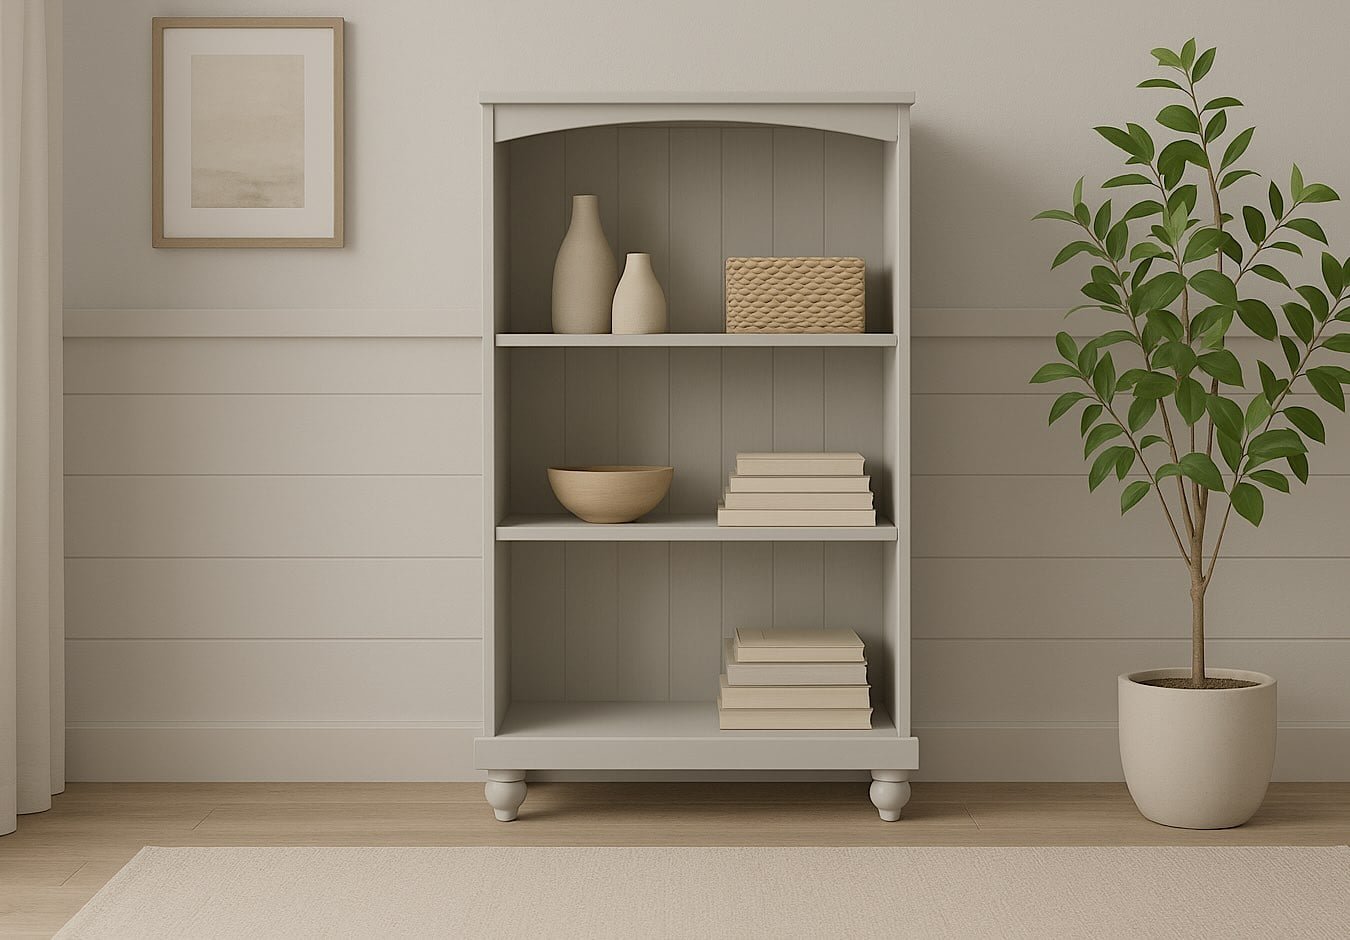
to build a vintage style bookshelf with detailed feet and arched top. from feature detailed diagrams, shopping and cut list and more!
Specifications
| Project type | Media and Entertainment Centers |
|---|---|
| Room | Storage Solutions |
| Style | Children's and Kid's Room Furniture and Toy Plans |
| Difficulty | Intermediate |
| Estimated cost | $50 - $100 |
Dimensions
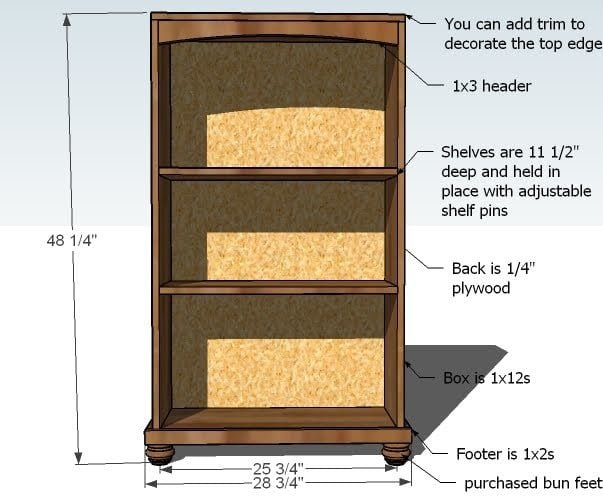
Use the size-specific shopping and cut lists below.
Shopping List
- 1 – 8′ 1×12 Boards
- 1 – 10′ 1×12 Board
- 1/4″ Plywood panel for back
- 1 – 1×2 - 8 feet long
- 1 – 1×3 - 8 feet long
Cut List
- 2 – 1×12 @ 45 1/2″ (Sides)
- 1 – 1×12 @ 27 1/4″ (Top)
- 3 – 1×12 @ 25 3/4″ (Shelves)
- 1 – 1×3 @ 25 3/4″ (Header)
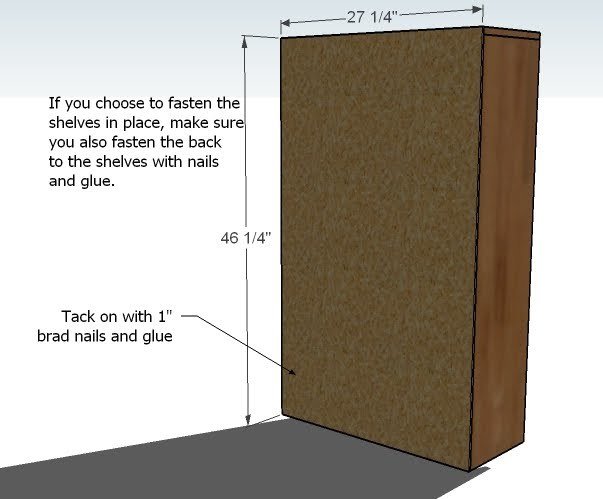
- 1 – 1/4″ Plywood @ 46 1/4″ x 27 1/4″ (Back)
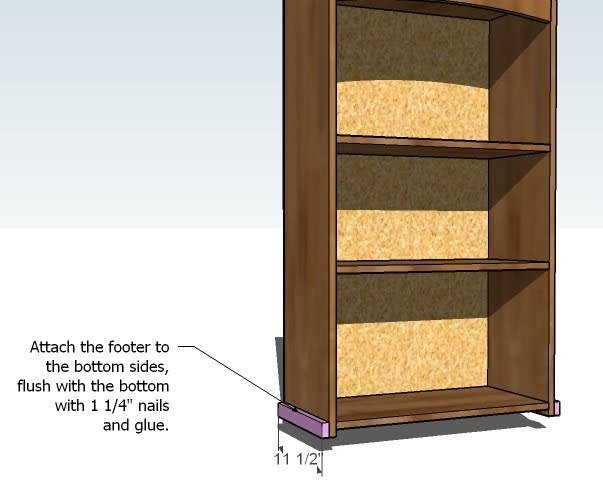
- 2 – 1×2 @ 11 1/2″ (Side Footer)
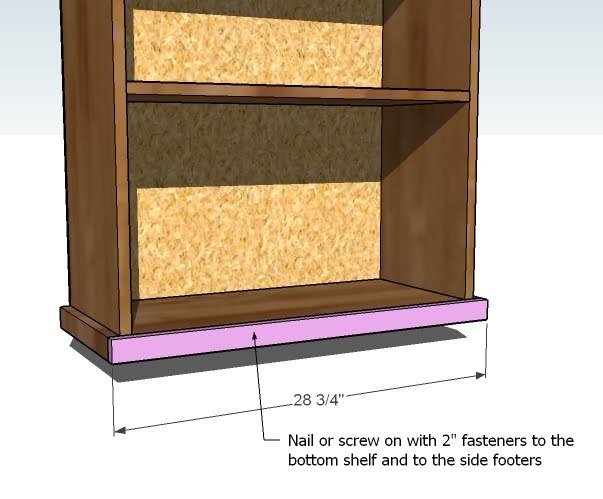
- 1 – 1×2 @ 28 3/4″ (Front Footer)
Tools
- measuring tape
- square
- pencil
- hammer
- safety glasses
- hearing protection
- drill
- circular saw
- jigsaw
- sander
Step-by-step Instructions
BUILD THE BOX
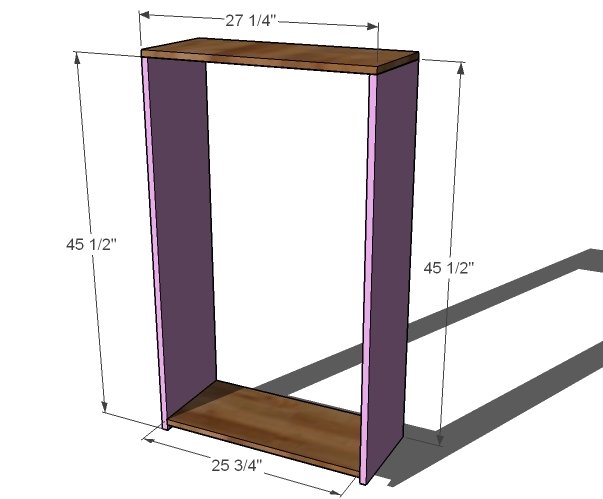
Screw the box together as shown here. Make sure there is a 3/4″ gap under the bottom shelf. Use 2″ screws and glue. Check for square.
SHELVES
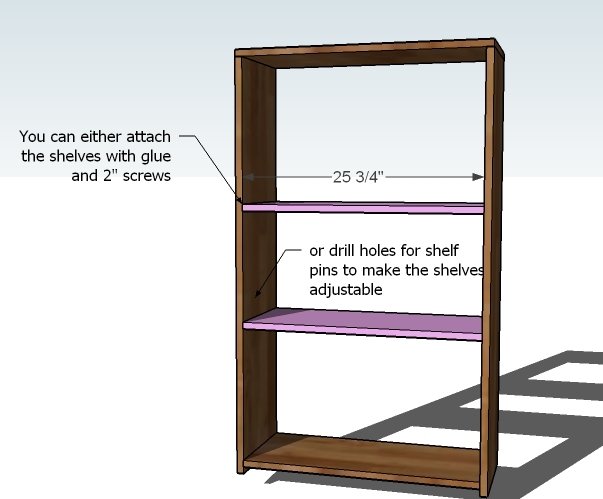
You can either drill holes as specified by your shelf pins to create removeable shelves, or you can fasten the shelves in place with 2″ screws and glue.
BACK
Attach the back to the bookshelf as shown here. If your shelves are screwed in, also fasten to the shelves. Use glue and check for square.
SIDE FOOTER
Attach the side footer to the bottoms of the bookcase as shown here. Use 1 1/4″ nails and glue.
Step 5
BUN FEET
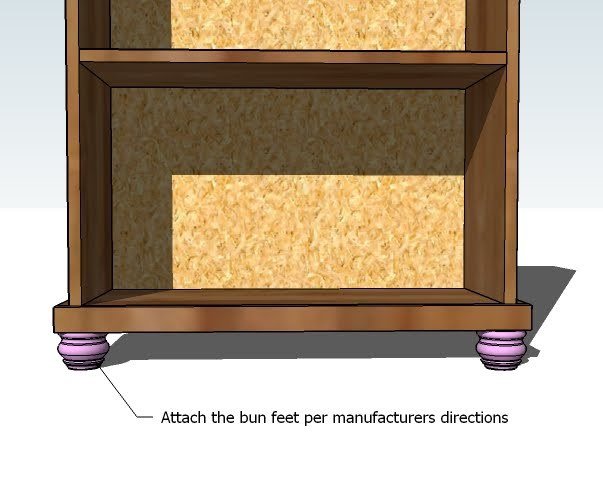
Attach the bun feet as directed by the manufacturer.
Finishing
Sand all surfaces, starting with a medium grit and finishing with fine. Wipe off the dust, fill any holes or gaps with wood filler, and sand smooth once dry. Apply primer if you're painting, then finish with your choice of paint or stain and seal with a durable clear topcoat. For outdoor projects, use exterior-rated primer, paint or stain, and sealer so the piece stands up to the weather.
Source (temporary): https://www.ana-white.com/woodworking-projects/cara-bookcase-free-plans