Cara Storage Console
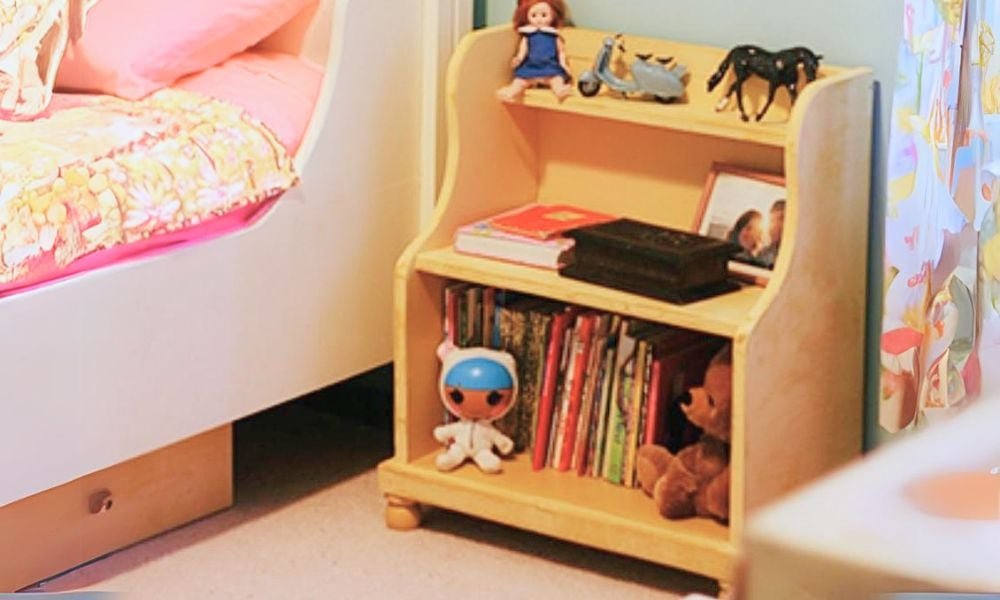
Free woodworking! Use as a nightstand, or a play center in a small space.
Specifications
| Project type | Bookshelf and Bookcase Plans |
|---|---|
| Room | Kids and Toys |
| Style | Children's and Kid's Room Furniture and Toy Plans |
| Difficulty | Beginner Projects |
| Estimated cost | $20 - $50 |
Dimensions
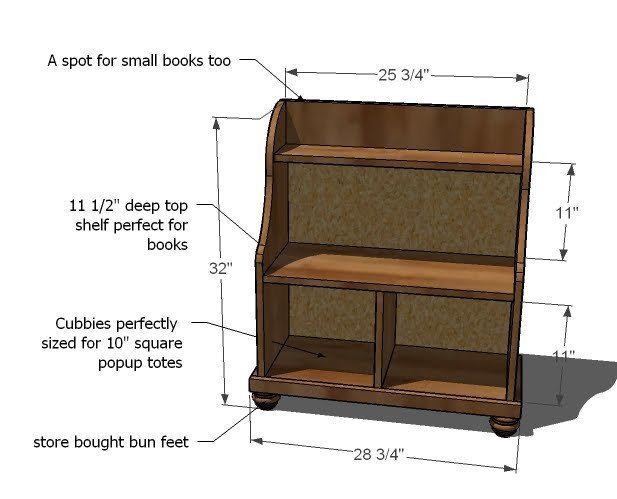
Use the size-specific shopping and cut lists below.
Shopping List
- 1 – 1×2 Furring Strip or Moulding 1 1/2″ wide
- 1 – 6′ 1×6 Board
- 1 – 10′ 1×12 Board
- 1/4″ Plywood for the Back
- 4 – Bun Feet
- 2″ self tapping star bit screws
- 1-1/4″ brad nails
- 1″ brad nails
- wood glue
- wood filler
- Finishing Supplies
Cut List
- 2 – 1×12 @ 29 3/4″ (Sides)
- 2 – 1×12 @ 25 3/4″ (Large Shelves)
- 1 – 1×12 @ 11″ (Cubby Divider)
- 2 – 1×6 @ 25 3/4″ (Top Shelf and Back)
- 1 – 1/4″ plywood @ 27 1/4″ x 29 3/4″ (Back)
- 2 – 1×2 @ 11 1/2″ (Side Footer)
- 1 – 1×2 @ 28 3/4″ (Front Footer)
Tools
- measuring tape
- square
- pencil
- safety glasses
- hearing protection
- drill
- jigsaw
- nailer
Step-by-step Instructions
SIDES
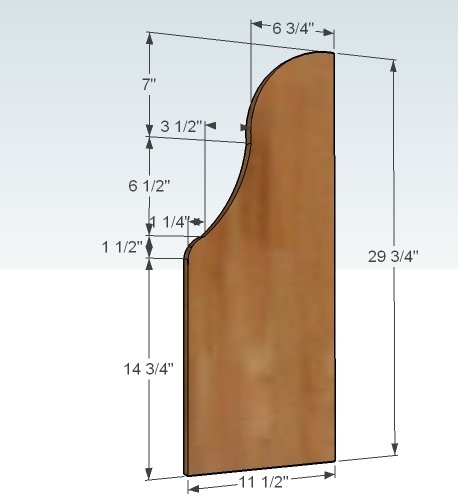
Cut the sides of the console as shown here. First draw out one side using the measurements shown here. Then cut out ONE side. Use that side as a pattern to cut out the other side. Place the two sides together and sand both cut edges at the same time until the edges match up. Set the sides aside.
LARGE SHELVES
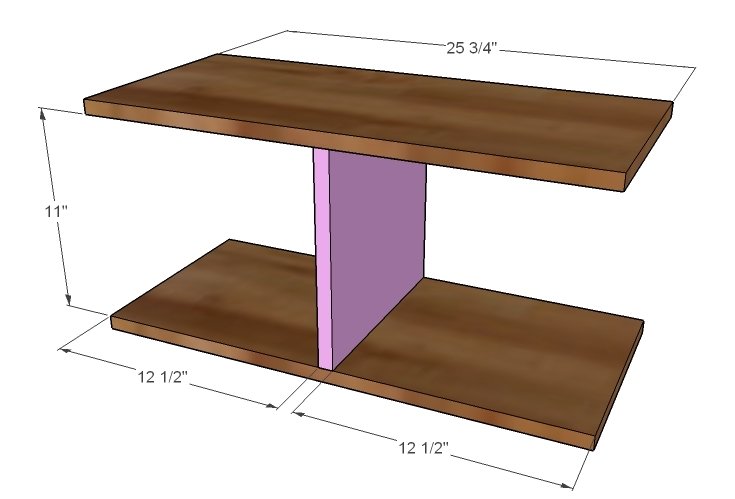
Attach the cubby divider to the large shelves as shown in the diagram, using the measurement to place your joint. You can use 2″ nails and glue or screws. Then attach the shelves to the sides, leaving a 3/4″ gap under the bottom shelf and the bottom of the sides. This is not shown in the diagram. Refer to the diagram in step 6.
TOP
Attach the top to the sides, using either 2″ nails and glue or screws. Keep top edges flush.
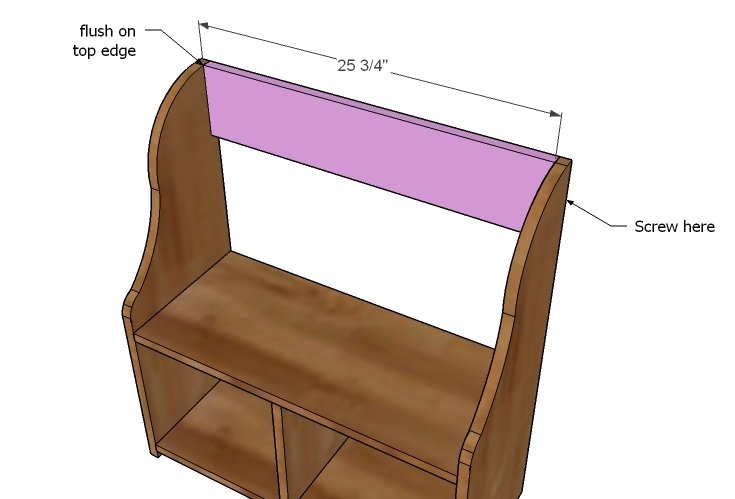
TOP SHELF
Attach the top shelf to both the sides and the top as shown in the diagram. Use 2″ nails and glue or screws. It’s a good idea to use a square to draw a square line at the bottom of the shelf so you know where to fasten the top shelf.
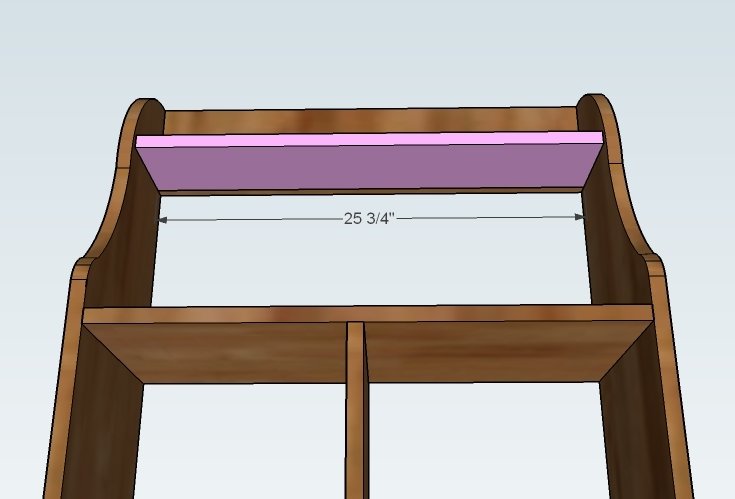
Step 5
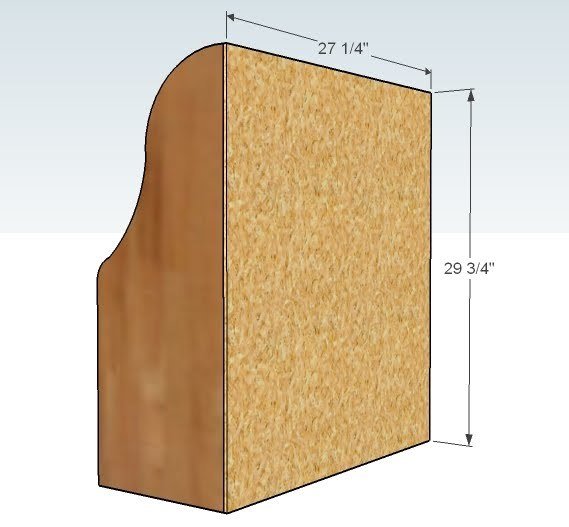
SIDE FOOTER
Use 1 1/4″ nails and glue to attach the side footer to the sides, keeping bottom and outside edges flush.
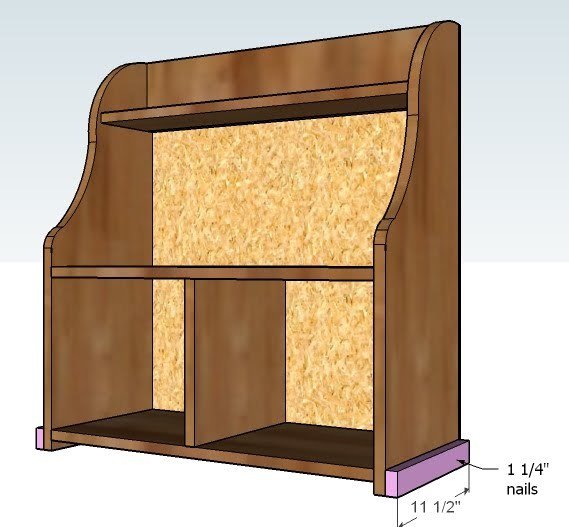
FRONT FOOTER
Attach the front footer to bottom shelf and the side footer as shown above. Use 2″ nails and glue.
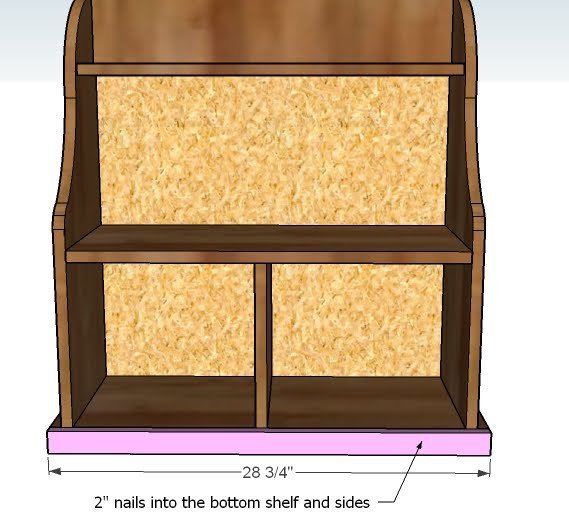
BUN FEET
Attach the bun feet as instructed by the manufacturer.
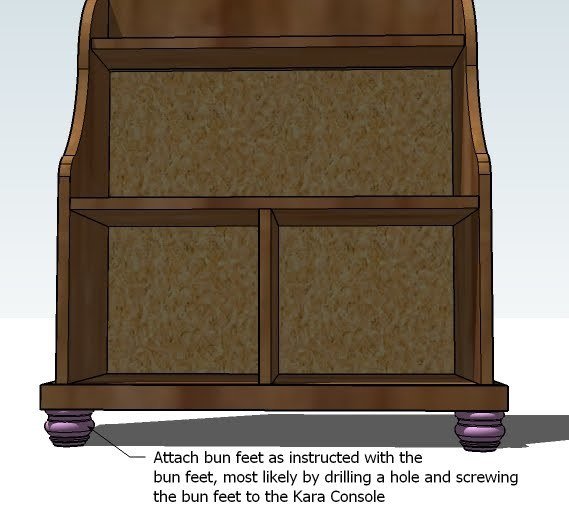
Finishing
Sand all surfaces, starting with a medium grit and finishing with fine. Wipe off the dust, fill any holes or gaps with wood filler, and sand smooth once dry. Apply primer if you're painting, then finish with your choice of paint or stain and seal with a durable clear topcoat. For outdoor projects, use exterior-rated primer, paint or stain, and sealer so the piece stands up to the weather.
Source (temporary): https://www.ana-white.com/woodworking-projects/cara-storage-console