Cassidy Bed
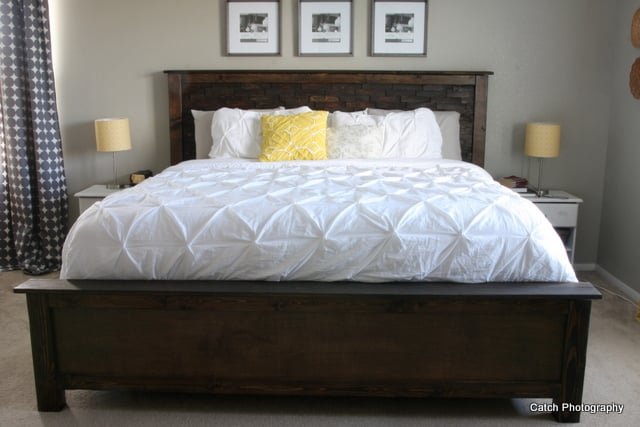
Wood shims fancy up this headboard! Free DIY bed plans (king) from
Specifications
| Project type | Beds and Bed Frames |
|---|---|
| Room | Bedroom |
| Style | Farmhouse Furniture |
| Difficulty | Intermediate |
| Estimated cost | $100-$150 |
Dimensions
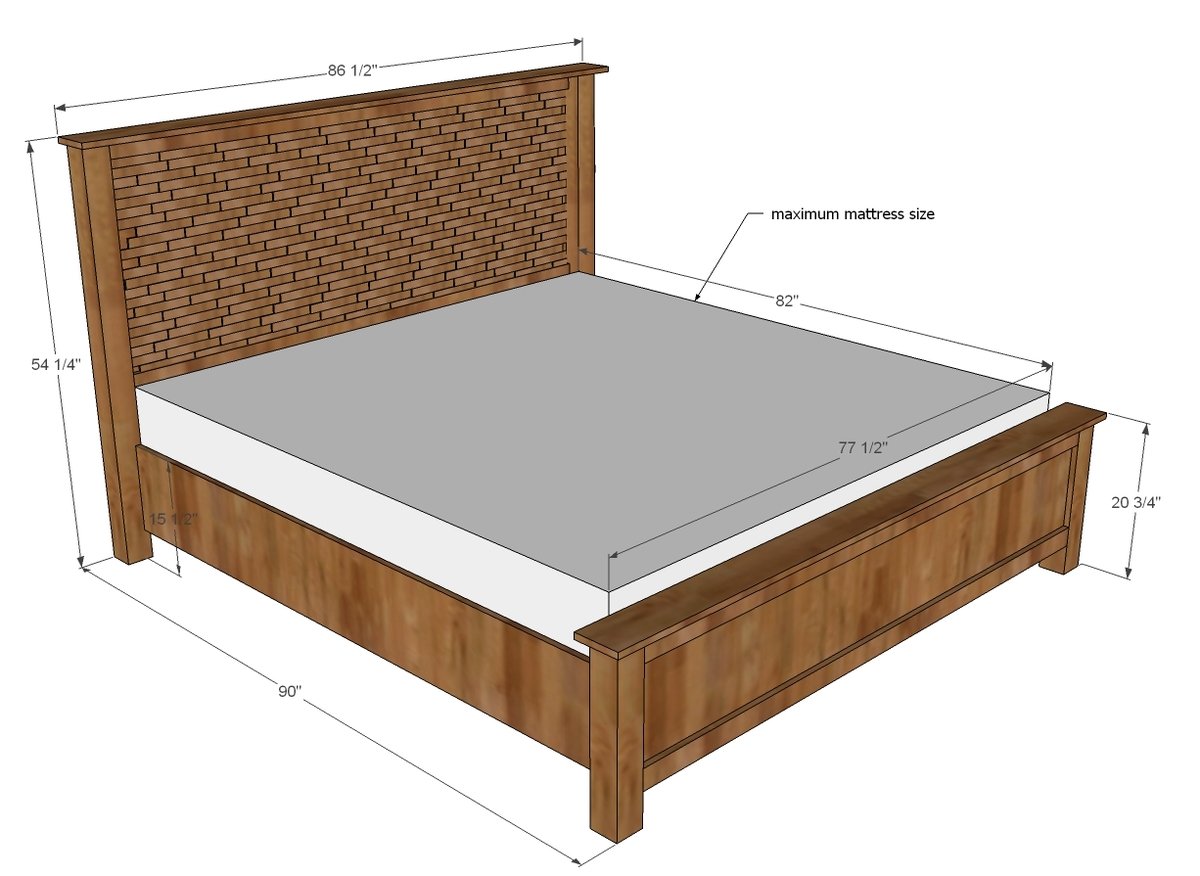
Use the size-specific shopping and cut lists below.
Shopping List
- 1 - sheet 3/4" plywood (full 4x8 sheet, hardwood preferred)
- 2 - 4x4 posts, 8 feet long each
- 4 - 1x3 @ 8 feet long
- 6 - 2x4 @ 8 feet long
- 2 - 1x12 @ 8 feet long
- 2 - 1x6 @ 8 feet long
- Approximately 13-15 packs wood shims (for headboard)
Cut List
- 4 - 1x3 @ 77 1/2" (panel trim boards)
- 1 - 3/4" plywood @ 77 1/2" x 32" (headboard panel)
- 1 - 3/4" plywood @ 77 1/2" x 16" (footboard panel)
- 2 - 4x4 @ 53 1/2" (headboard legs)
- 2 - 4x4 @ 20" (footboard legs)
- 2 - 2x4 @ 88 1/2" (inner siderails)
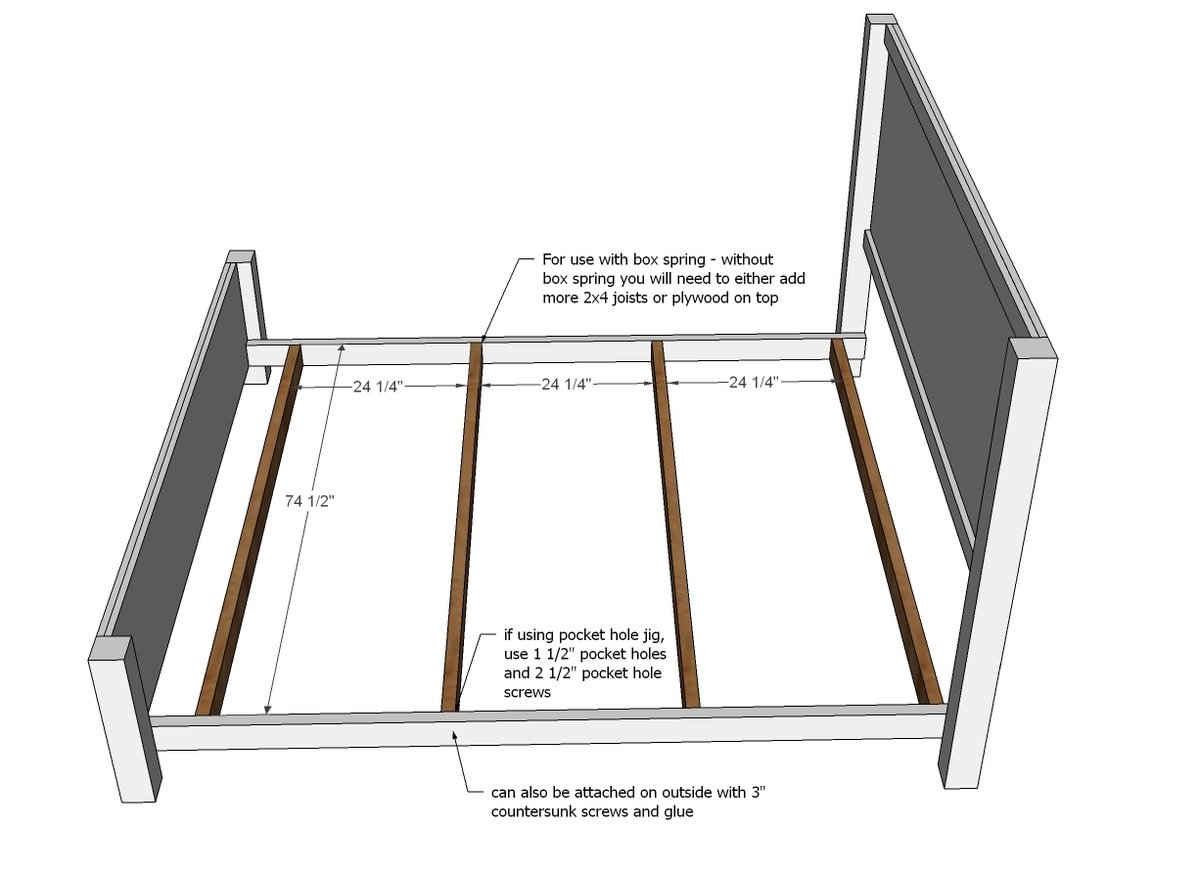
- 4 - 2x4 @ 74 1/2" (frame supports - for extra support, add addtional 2x4 supports)
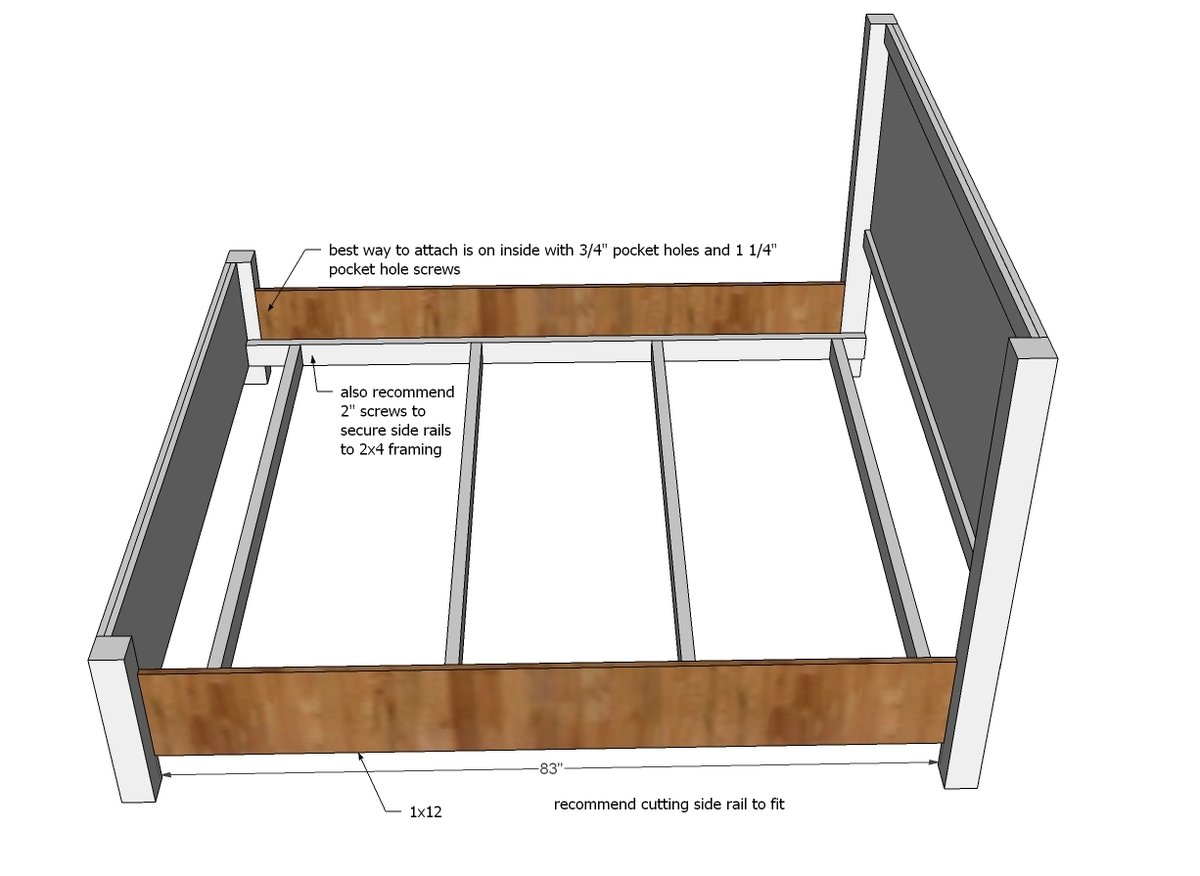
- 2 - 1x12 @ 83" long (siderails - can also use 2x12s for extra support)
- 2 - 1x6 @ 86 1/2" long (headers)
Step-by-step Instructions
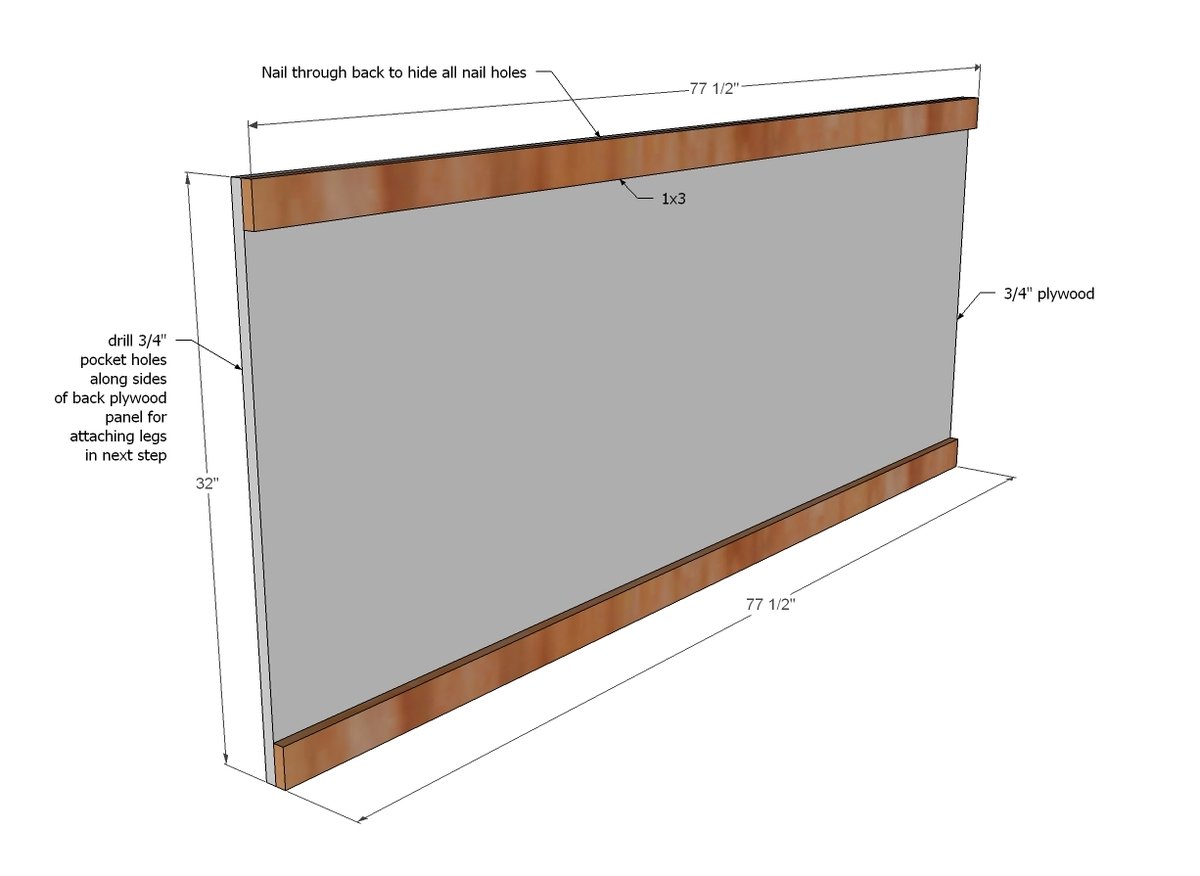
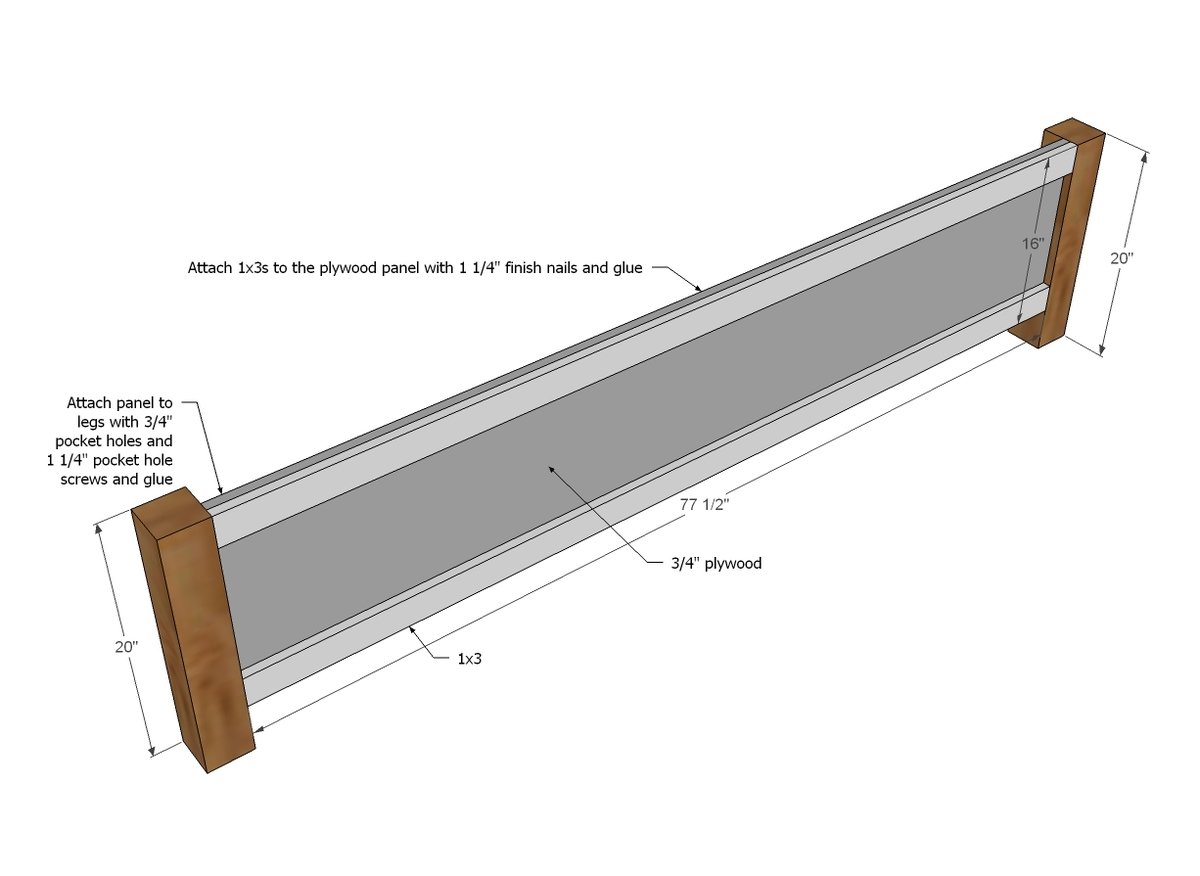
Attach 1x3s to the headboard panel. You can also do the same with the footboard panel.
If you are using pocket holes, drill 3/4" pocket holes along side and top edges every 6"-8" of plywood pieces for attaching legs and headers in later step prior to attaching the 1x3s. Rebecca also added the wood shims to the headboard at this step rather than waiting until the end - it's up to you. From Rebecca: "I attached my shims before the side 4x4's so I could sand the sides down and make sure they were even. I suppose you could even run a circular saw along he edge to make it easy. I did not run my 4x4's through the table saw first to make them more square and a flush to the front. So there is a little disconnect between my headboard and the legs. That is a personal decision though. My husband brought it up. "
Step 2
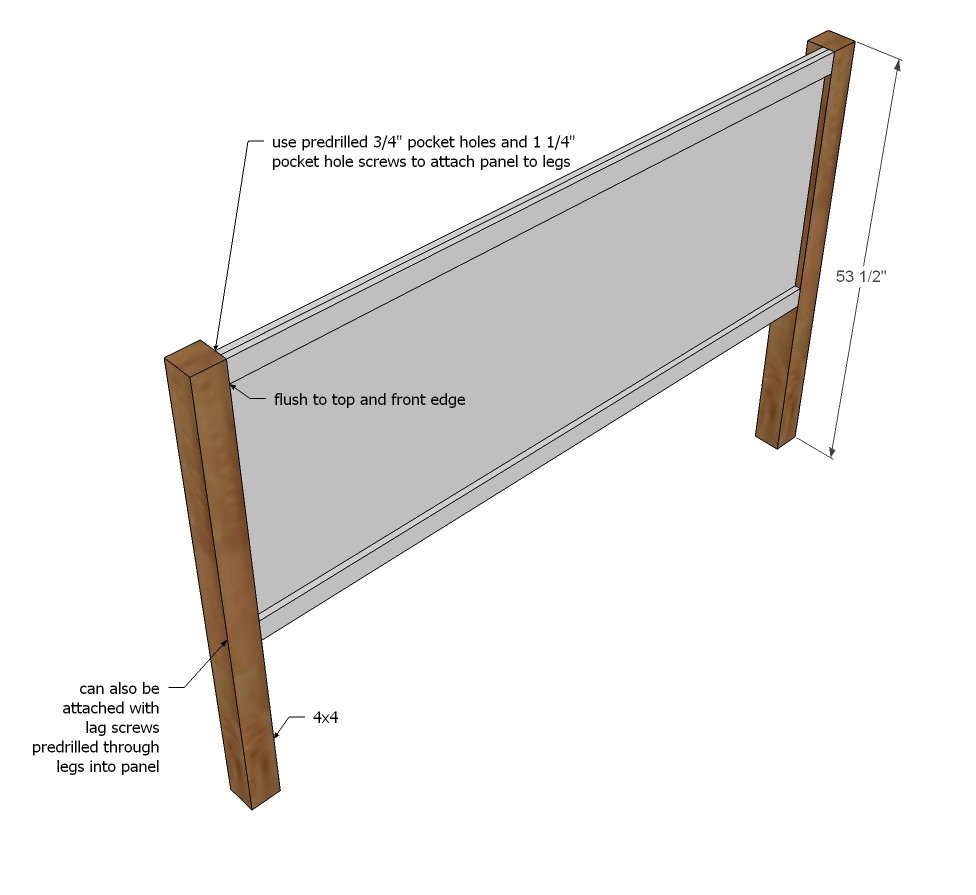
Attach legs to headboard. If you don't have a pocket hole jig, you can also attach the legs via long (depending on how deep you countersink) lag screws or hardware brackets on back side.
Step 3
Repeat the same steps for the footboard as you did the headboard.
Step 4
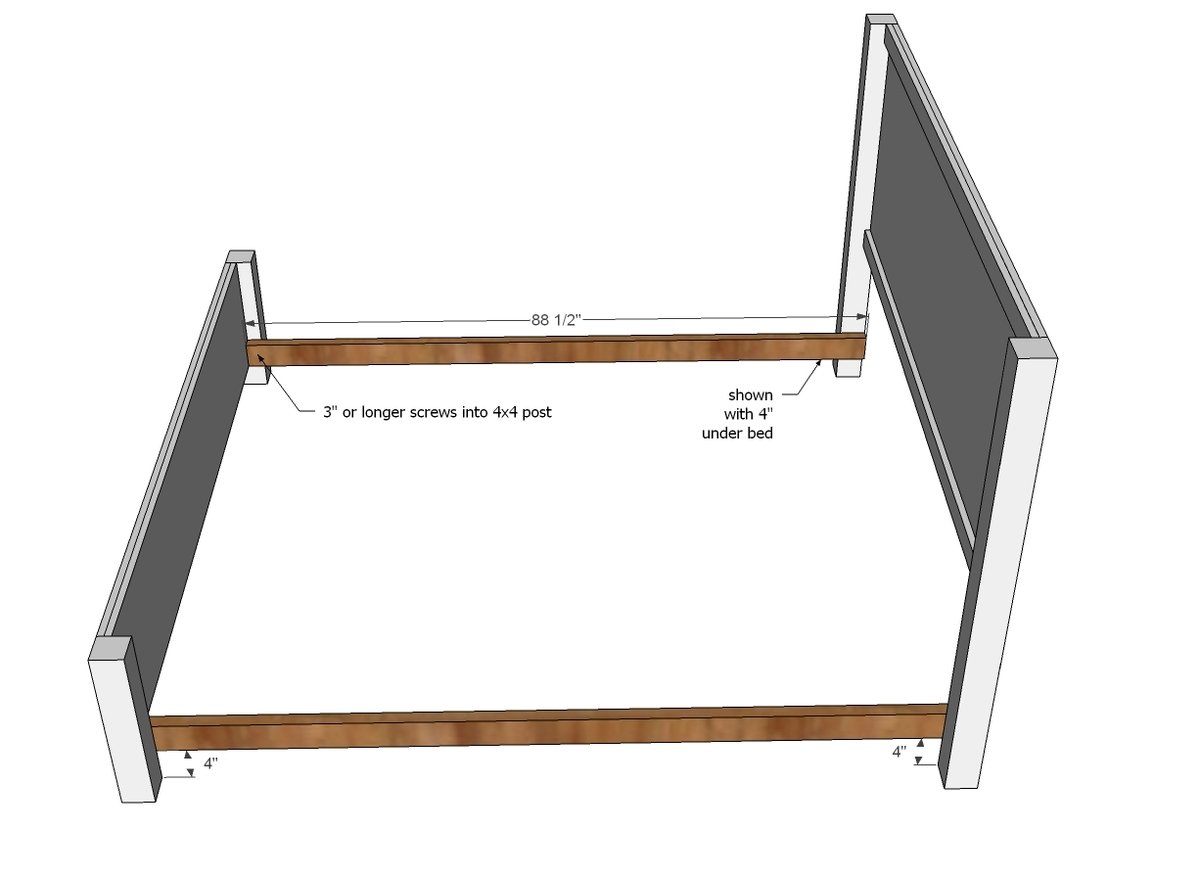
You'll want to make these guys somewhat removeable to get the bed in the room, so no glue here. Attach with screws at least 3" long into the legs.
Step 5
Step 6
Attach siderails to the sides of the bed. Again, these will need to be removeable.
Step 7
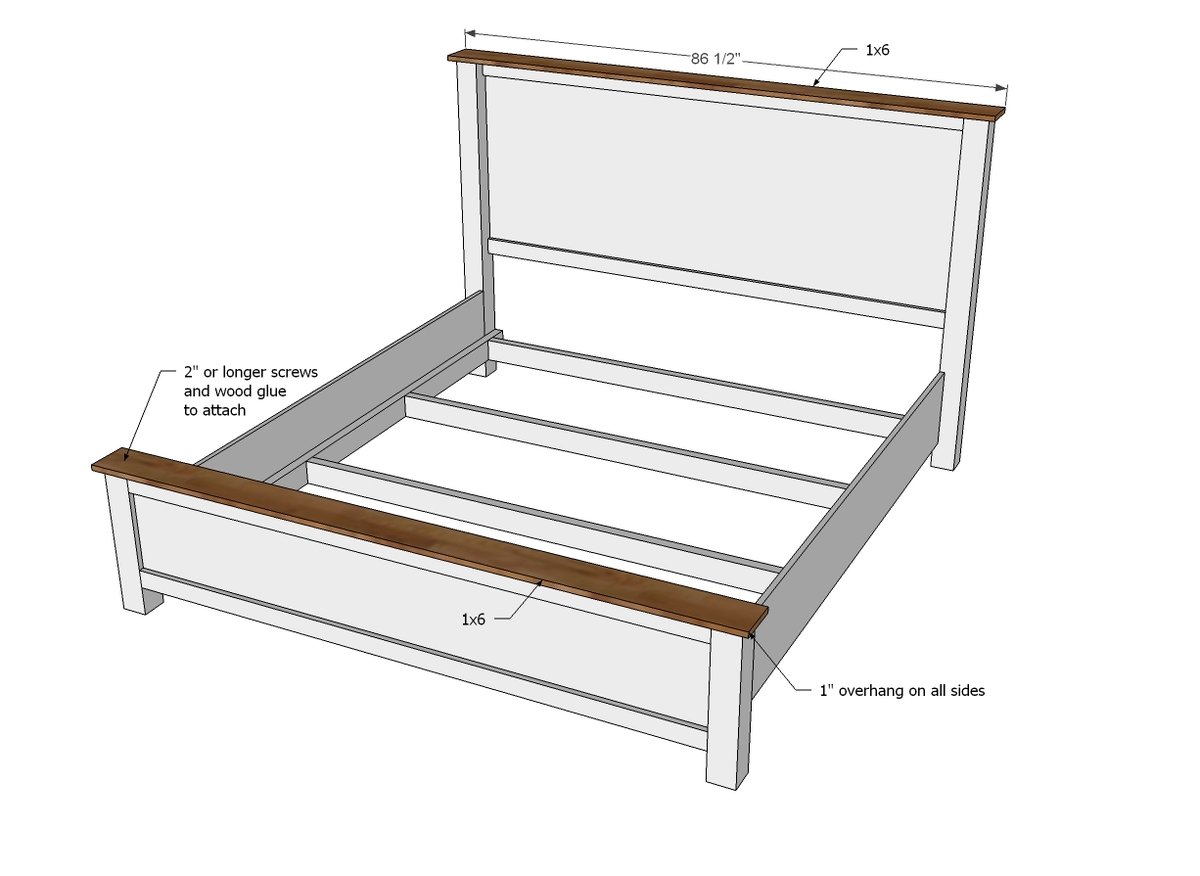
Attach headers to the footboard/headboard. If you drilled pocket holes facing upward in your panels, attach with 1 1/4" pocket hole screws. I recommend screws to attach headers just because they may try to come up over time. Try trim screws - they have a tiny screw head that will be much easier to hide.
Step 8
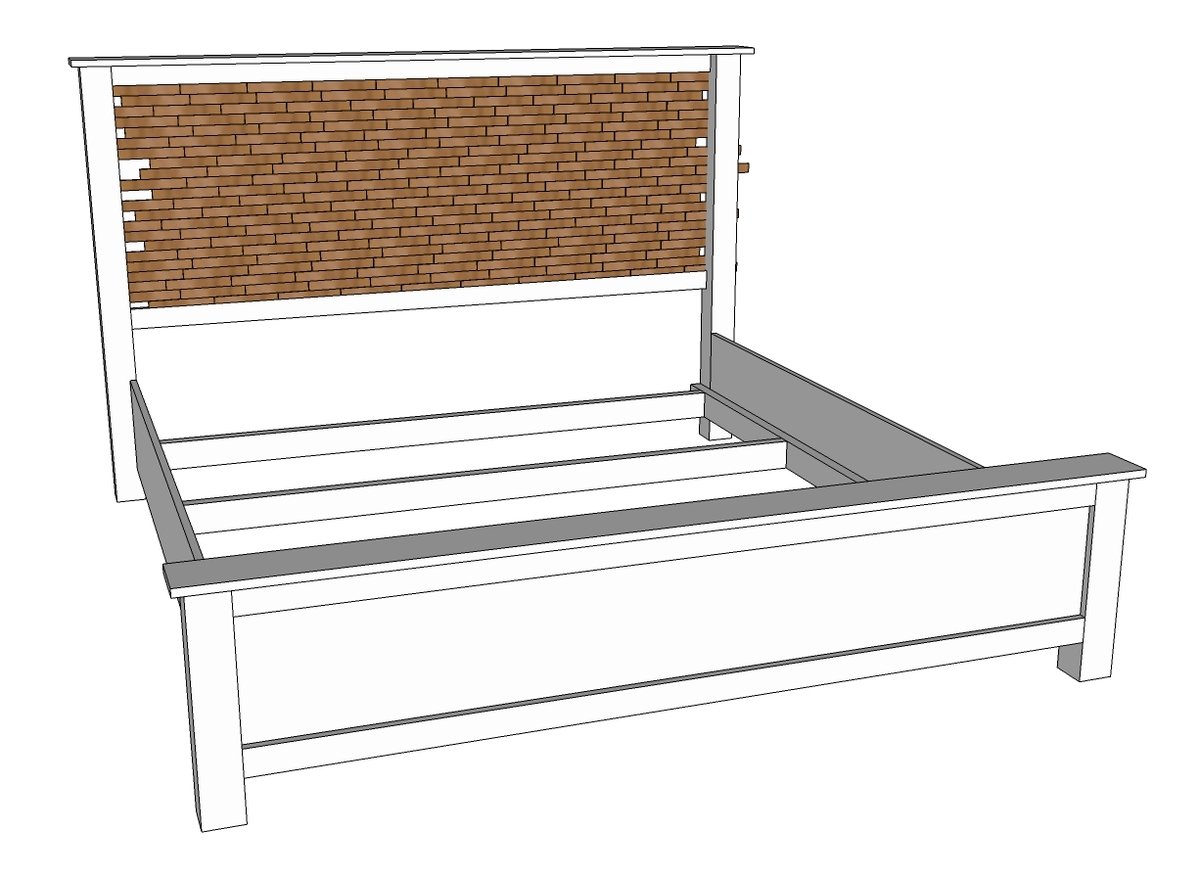
Fill headboard with wood shims with glue (hot glue would be awesome here) or small nails (I'd go with 3/4"). Done deal!
Finishing
Sand all surfaces, starting with a medium grit and finishing with fine. Wipe off the dust, fill any holes or gaps with wood filler, and sand smooth once dry. Apply primer if you're painting, then finish with your choice of paint or stain and seal with a durable clear topcoat. For outdoor projects, use exterior-rated primer, paint or stain, and sealer so the piece stands up to the weather.
Source (temporary): https://www.ana-white.com/woodworking-projects/cassidy-bed-king