Cedar Fence Picket Raised Garden Beds
Easy and inexpensive DIY cedar rasied garden beds with free. Beginner friendly. This plan is for a 6 foot long by 1-1/2 foot wide garden bed, suitable for a single row of plants. You can find the double width plans here.
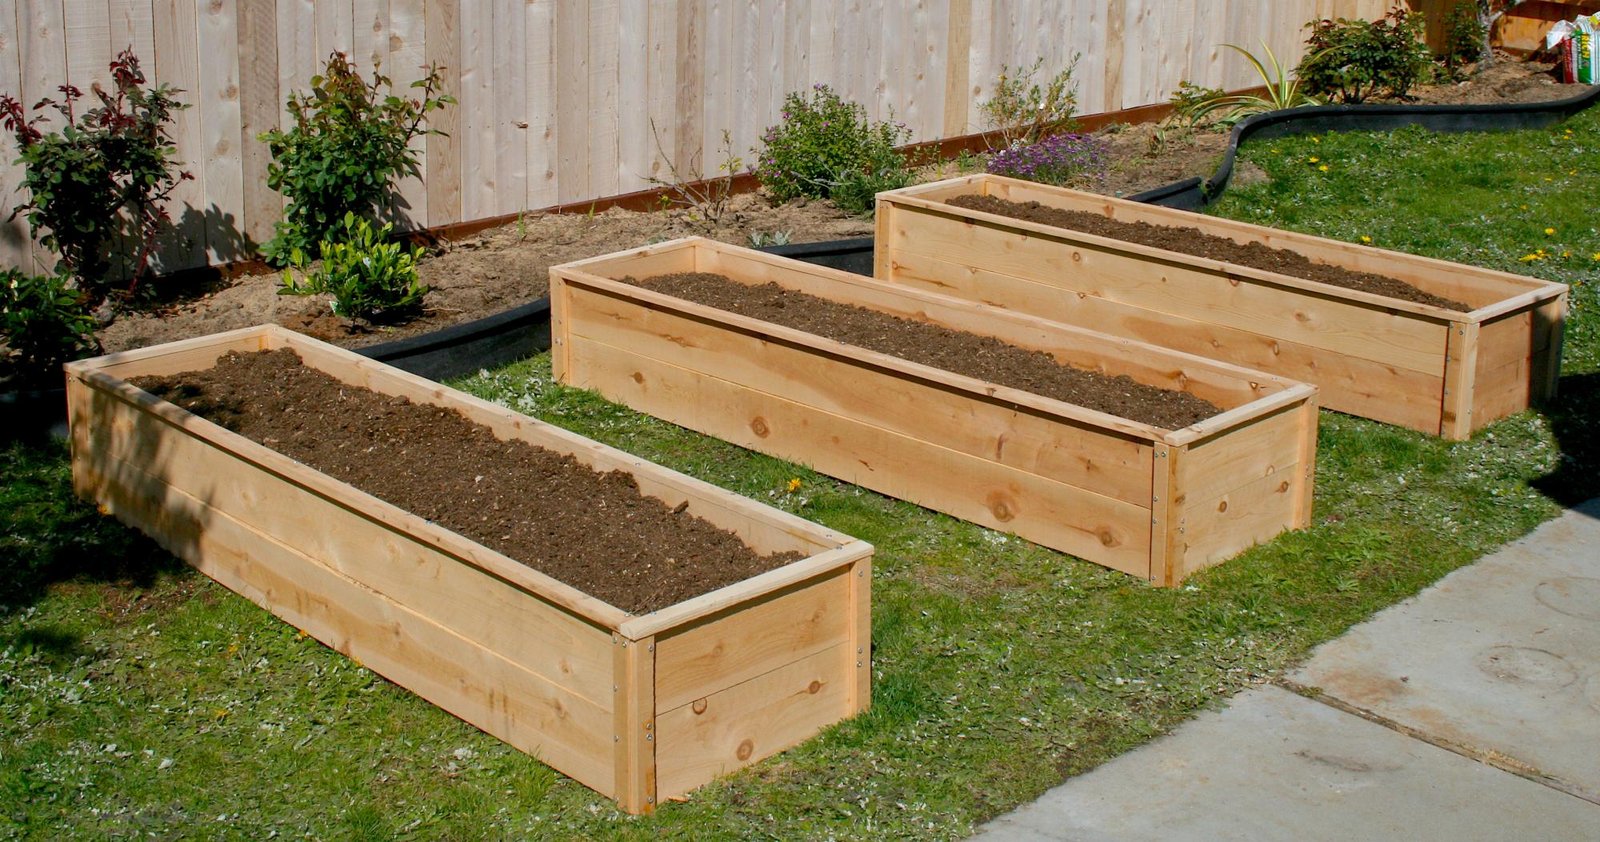
Specifications
| Project type | Planters, Garden Beds, and Greenhouses |
|---|---|
| Room | Outdoor |
| Style | Green or Eco-Friendly Style Furniture |
| Difficulty | Beginner Projects |
Dimensions
Use the size-specific shopping and cut lists below.
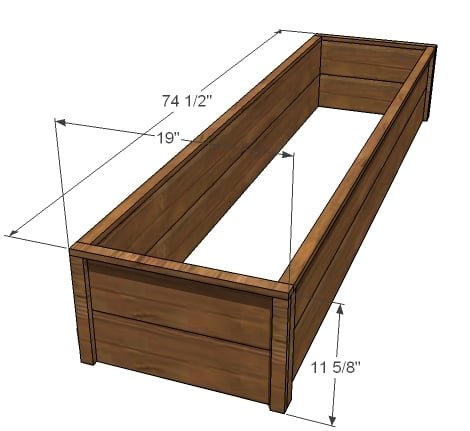
Shopping List
- 6 Cedar Fence Pickets
- 1x2 or 1x3 Cedar boards for corners (if you don't have a tablesaw)
- 1-1/4" self tapping exterior star bit screws
- Wood Glue
- Finishing Supplies
- Garden stakes or concrete stakes (we used a couple of stakes on each bed just to keep the bottoms in place)
Cut List
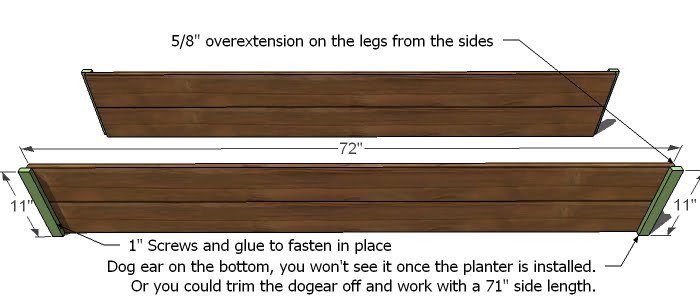
- 4 – 1×6 Fence Pickets @ 72″ (Side Panels, you can trim the dog ear off and work with a 71″ Fence post)
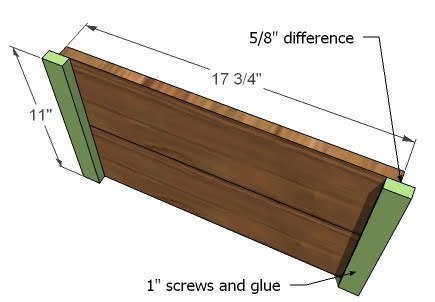
- 8 – 1×2 Fence Pickets @ 11″ (Corner Posts)
- 4 – 1×6 Fence Pickets @ 17 3/4″ (End Panels)
Optional Top Trim - CUT TO FIT
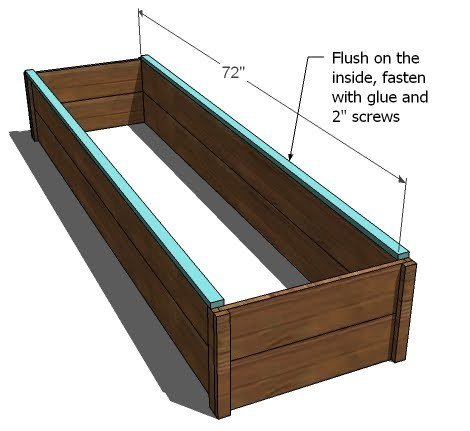
- 2 – 1×2 Fence Pickets @ 72″ (Top Trim, I used the non-dogeared ones from the center of the cuts)
- 2 – 1×2 Fence Pickets @ 19″ (Top Trim, Ends)
Tools
- measuring tape
- square
- pencil
- safety glasses
- hearing protection
- drill
- circular saw
- table saw
Step-by-step Instructions
Optional: Rip your Corner Posts
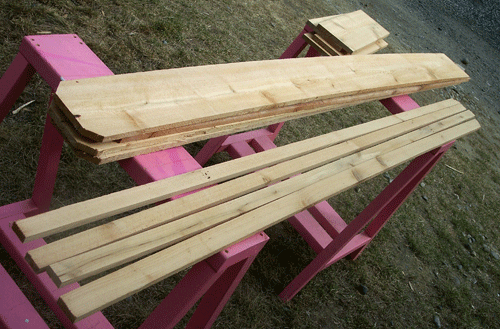
I’ve done the math, and by ripping one fence post into 4 – 1 1/4″ wide strips, you are saving quite a bit of money (well, that is, if you intend to build a garden full of planters). So set your tablesaw to 1 1/4″ and rip one of the fence posts to 1 1/4″ wide, as shown above. Or Use 1x2 Cedar Boards If you don’t have a table saw, you can use 1×2 cedar boards.
Side Panels
Use your 1″ screws and glue to put together your side panels as shown above. The post will overextend the sides by 5/8″ as shown above. I also used my Kreg Jig™ to join the boards together in the center (optional) or you can use a 1x2 in the center.
End Panels
Build your end panels exactly like your side panels.
Assembling the Panels
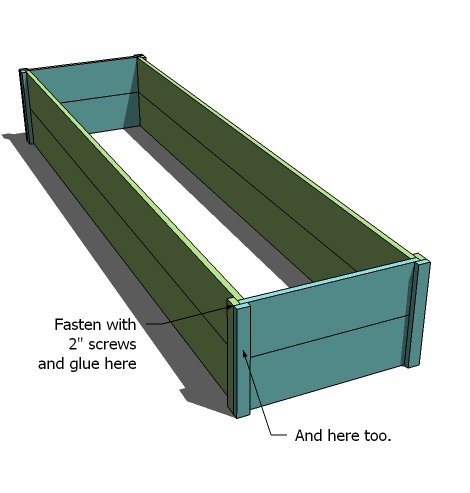
The panels should fit together like a puzzle. Fasten with 2″ screws and glue. Check for square.
Step 5
OPTIONAL: Measure and cut your top trim to fit. Attach to the top.
Finishing
Sand all surfaces, starting with a medium grit and finishing with fine. Wipe off the dust, fill any holes or gaps with wood filler, and sand smooth once dry. Apply primer if you're painting, then finish with your choice of paint or stain and seal with a durable clear topcoat. For outdoor projects, use exterior-rated primer, paint or stain, and sealer so the piece stands up to the weather.
Source (temporary): https://www.ana-white.com/woodworking-projects/cedar-fence-picket-raised-garden-beds-narrow-width