Cedar Fence Picket Raised Planter with Shelf
You'll just needs some 2x4s and cedar fence pickets to build this raised planter with bottom shelf. It's easy to care for plants with the raised height and the bottom shelf adds storage. This is a free project plan from with diagrams, shopping and cut list and lots of real, reader submitted photos. Build by Family_DIYnamic + Build Video
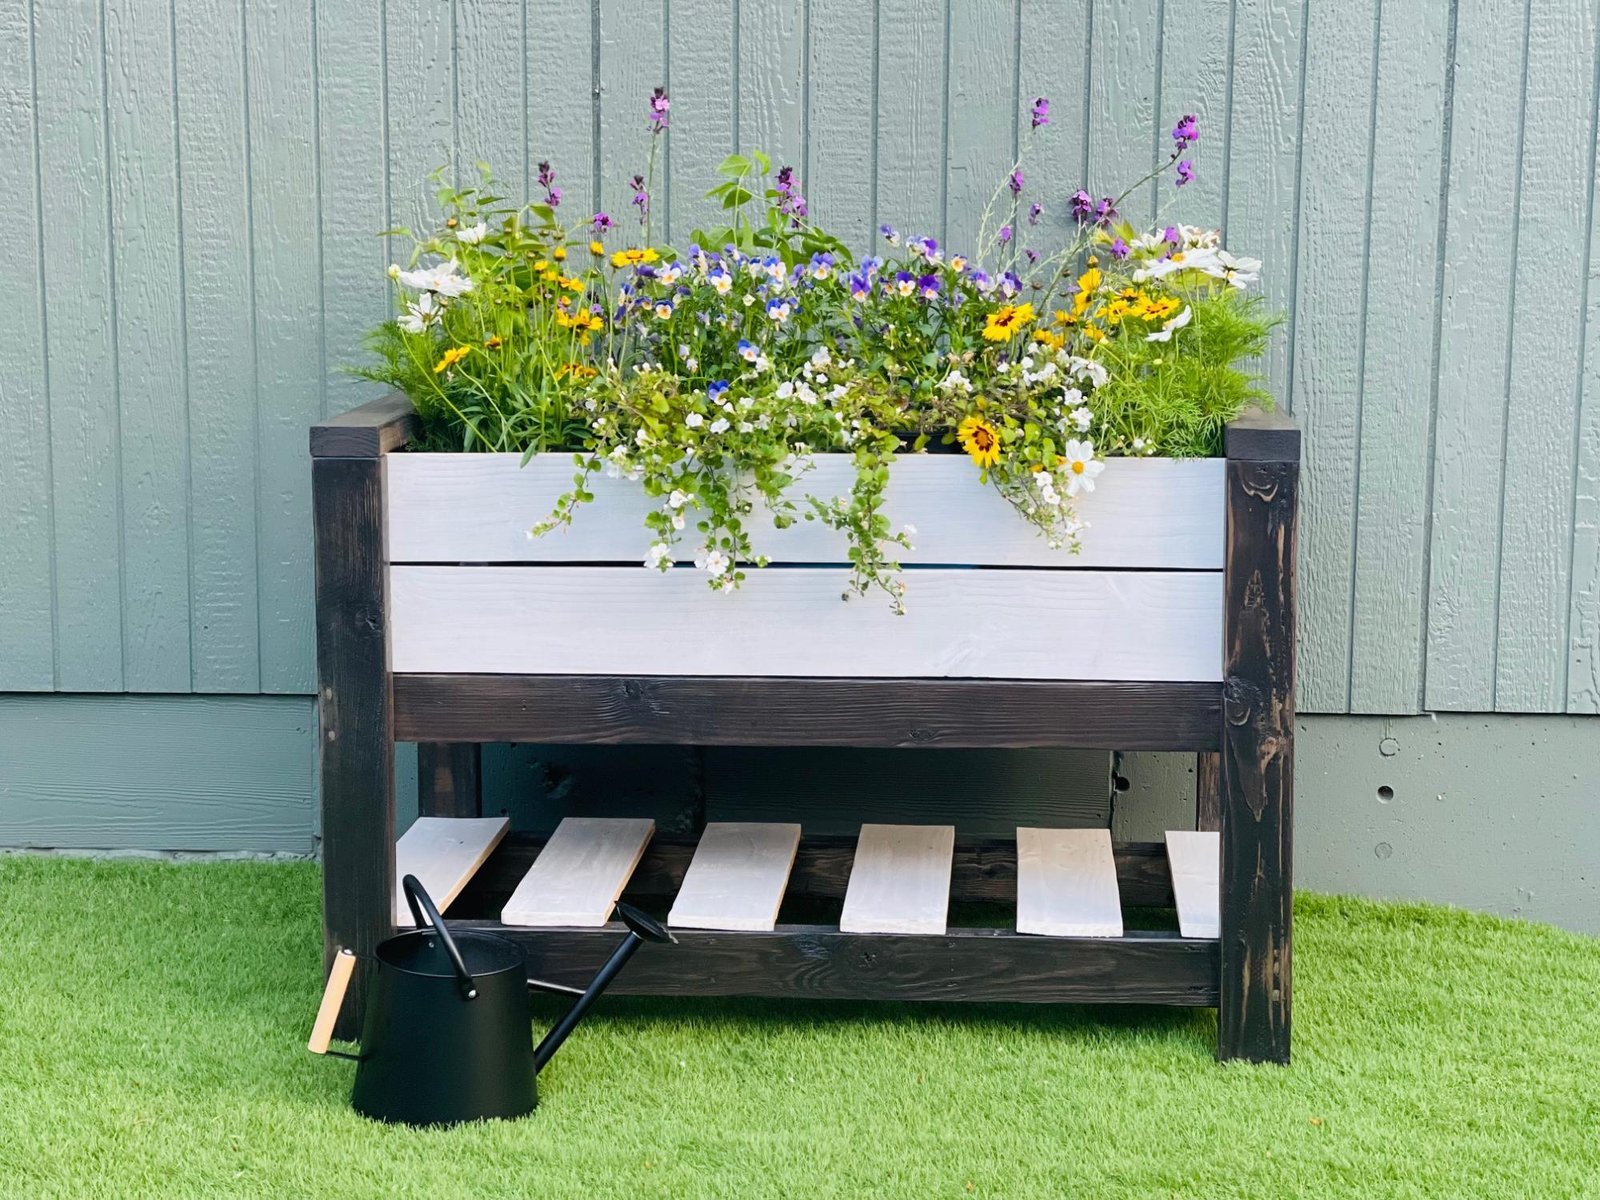
Specifications
| Project type | Planters, Garden Beds, and Greenhouses |
|---|---|
| Room | Outdoor |
| Difficulty | Beginner Projects |
| Estimated cost | $50 - $100 |
Dimensions
Use the size-specific shopping and cut lists below.
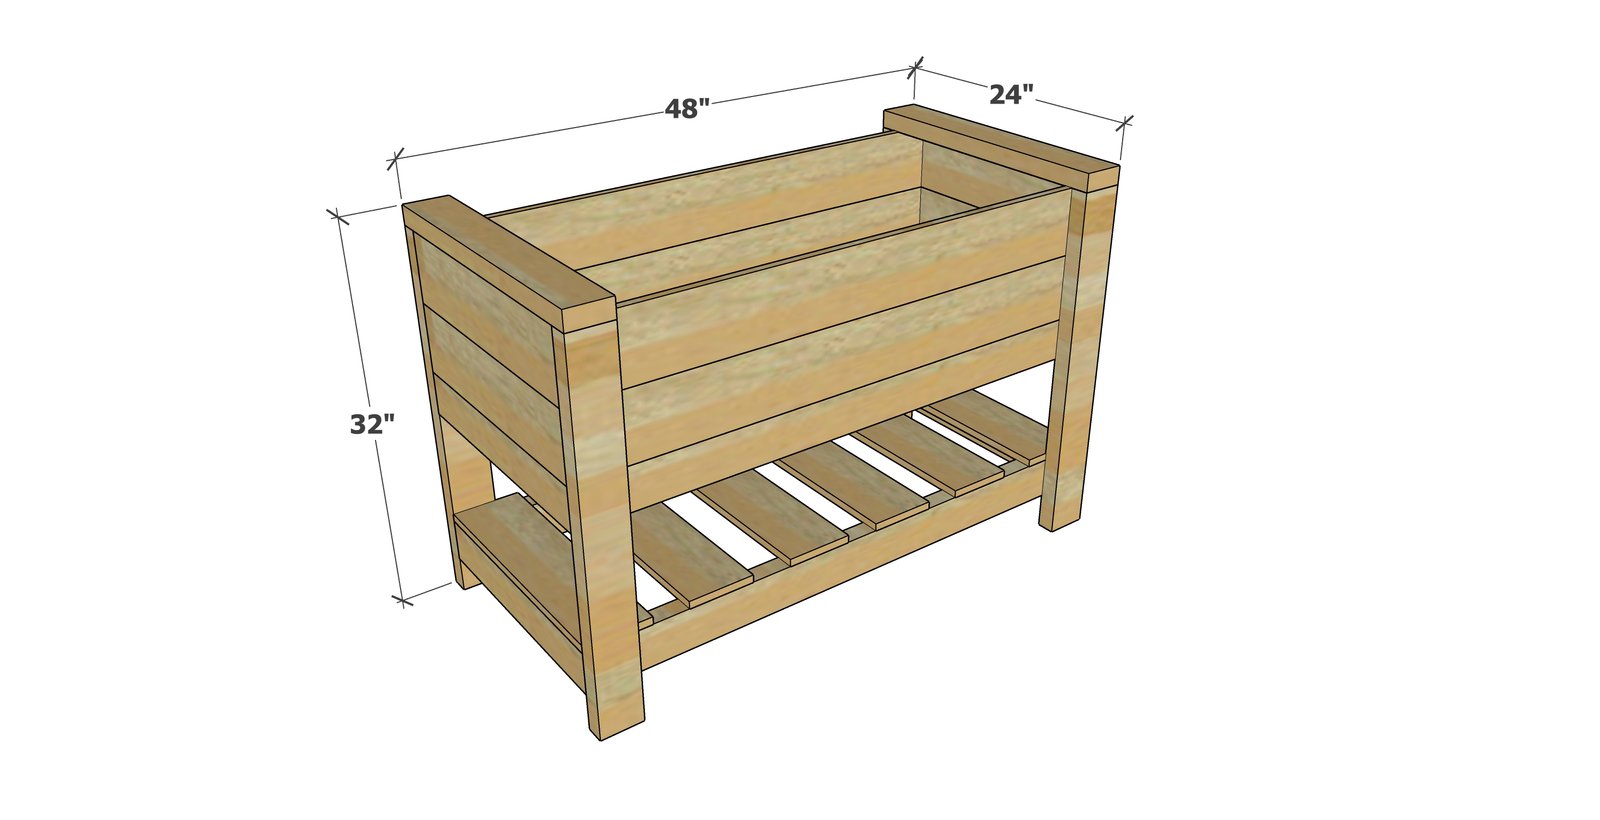
Shopping List
- 8 - 5-1/2" wide x 6 feet long cedar fence pickets (can be dogeared)
- 5 - 2x4 @ 8 feet long or stud length
- 2-1/2" exterior rated self tapping star bit wood screws (about 50)
- 1-5/8" exterior rated self tapping star bit wood screws (about 80)
- liner or landscaping fabric, may need staples to secure in place
Cut List
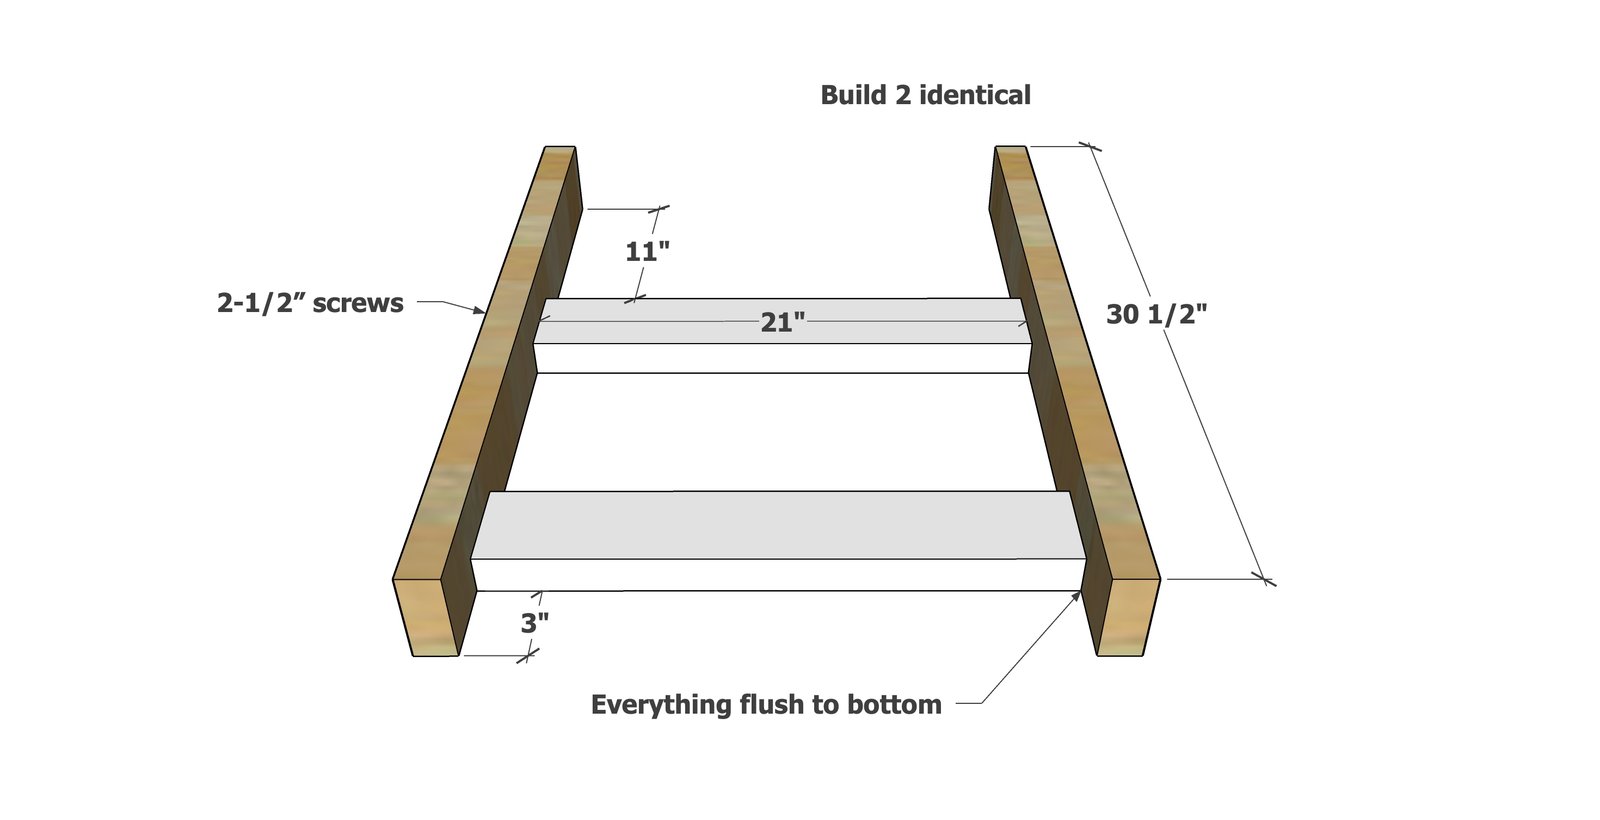
- 4 - 2x4 @ 30-1/2" - legs
- 4 - 2x4 @ 21" - end frame
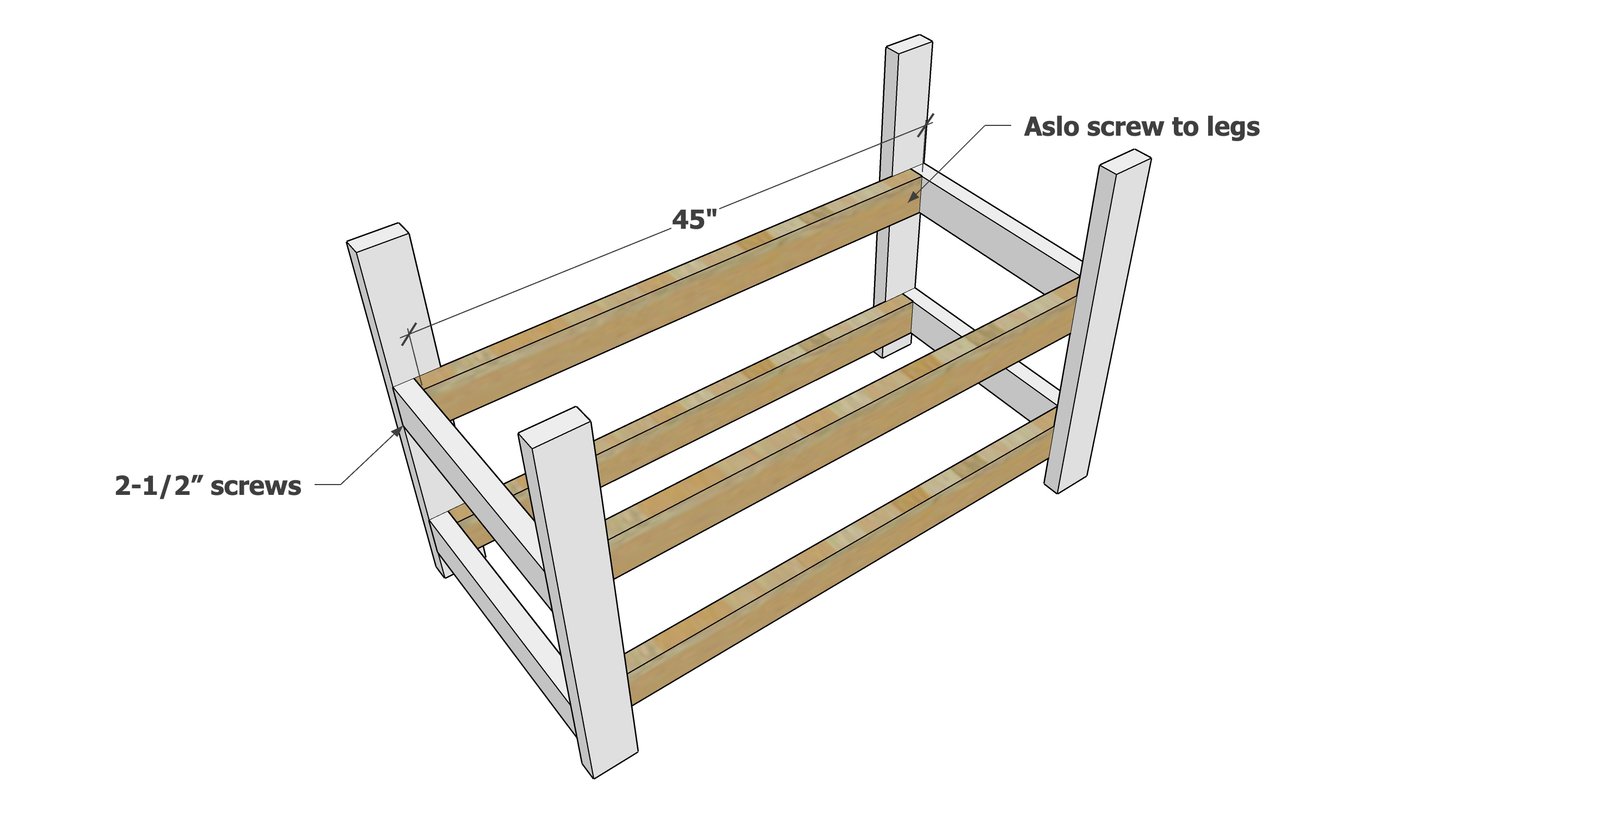
- 4 - 2x4 @ 45" - side frame
- 4 - cedar fence pickets @ 46-3/4" - sides
- 10 - cedar fence pickets @ 21" - ends and bottom shelf
- 6 - cedar fence pickets @ 20-3/8" - inside bottom
Tools
- measuring tape
- square
- pencil
- safety glasses
- drill
- compound miter saw
Step-by-step Instructions
Step 1
Build two of the leg frames, using the longer screws to attach, two screws per joint
Step 2
Attach the two leg sets together with the longer 2x4 boards.
Step 3
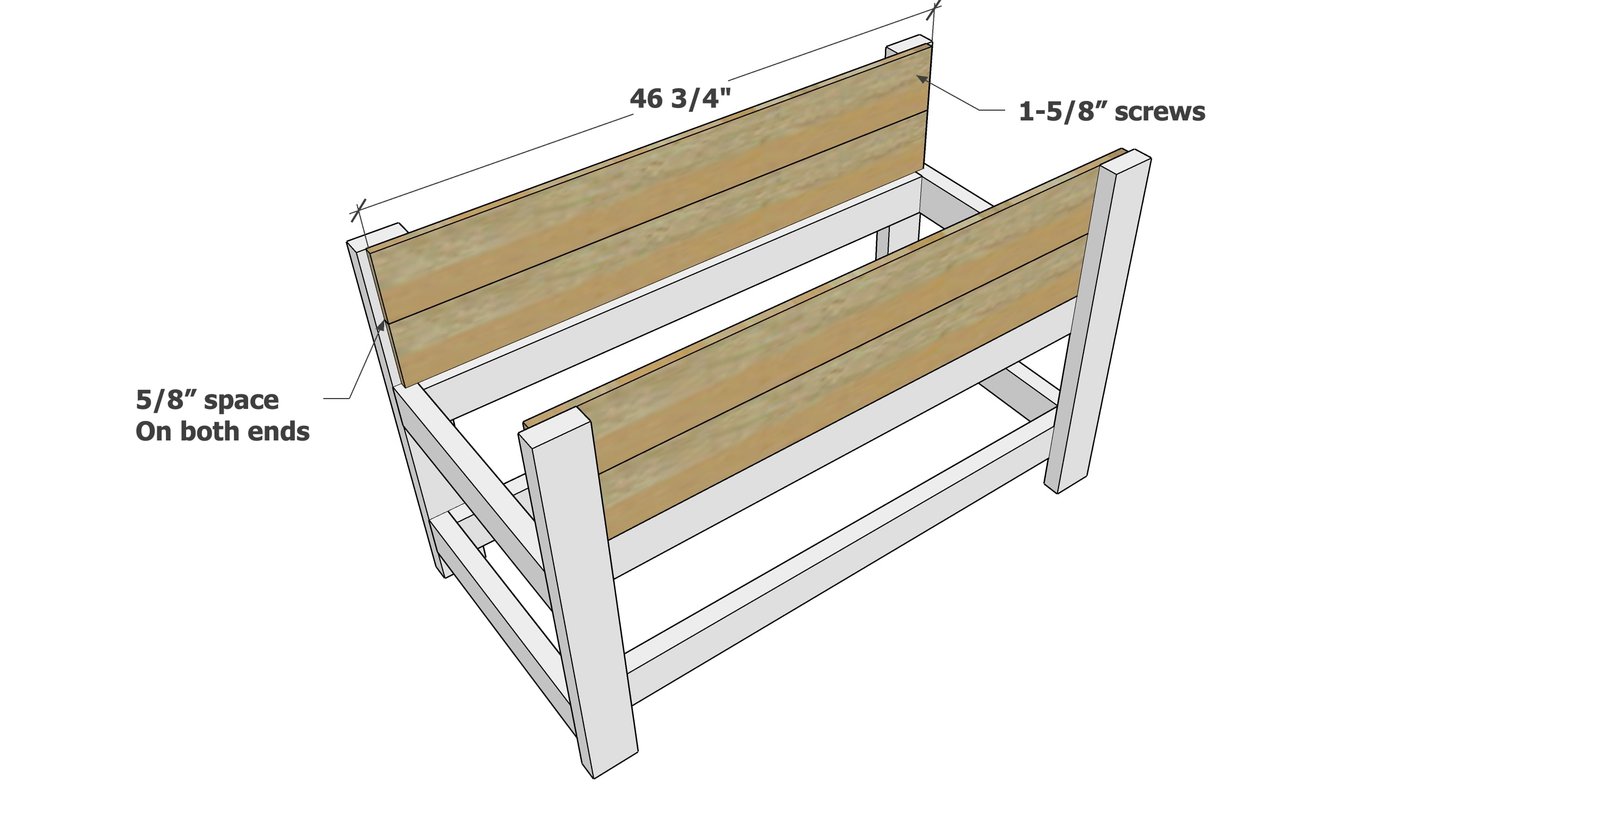
Use the shorter screws to attach the long cedar fence pickets to the legs. If there is extra space, leave in the center - the fence pickets may expand with moisture, so an expansion gap is good.
Step 4
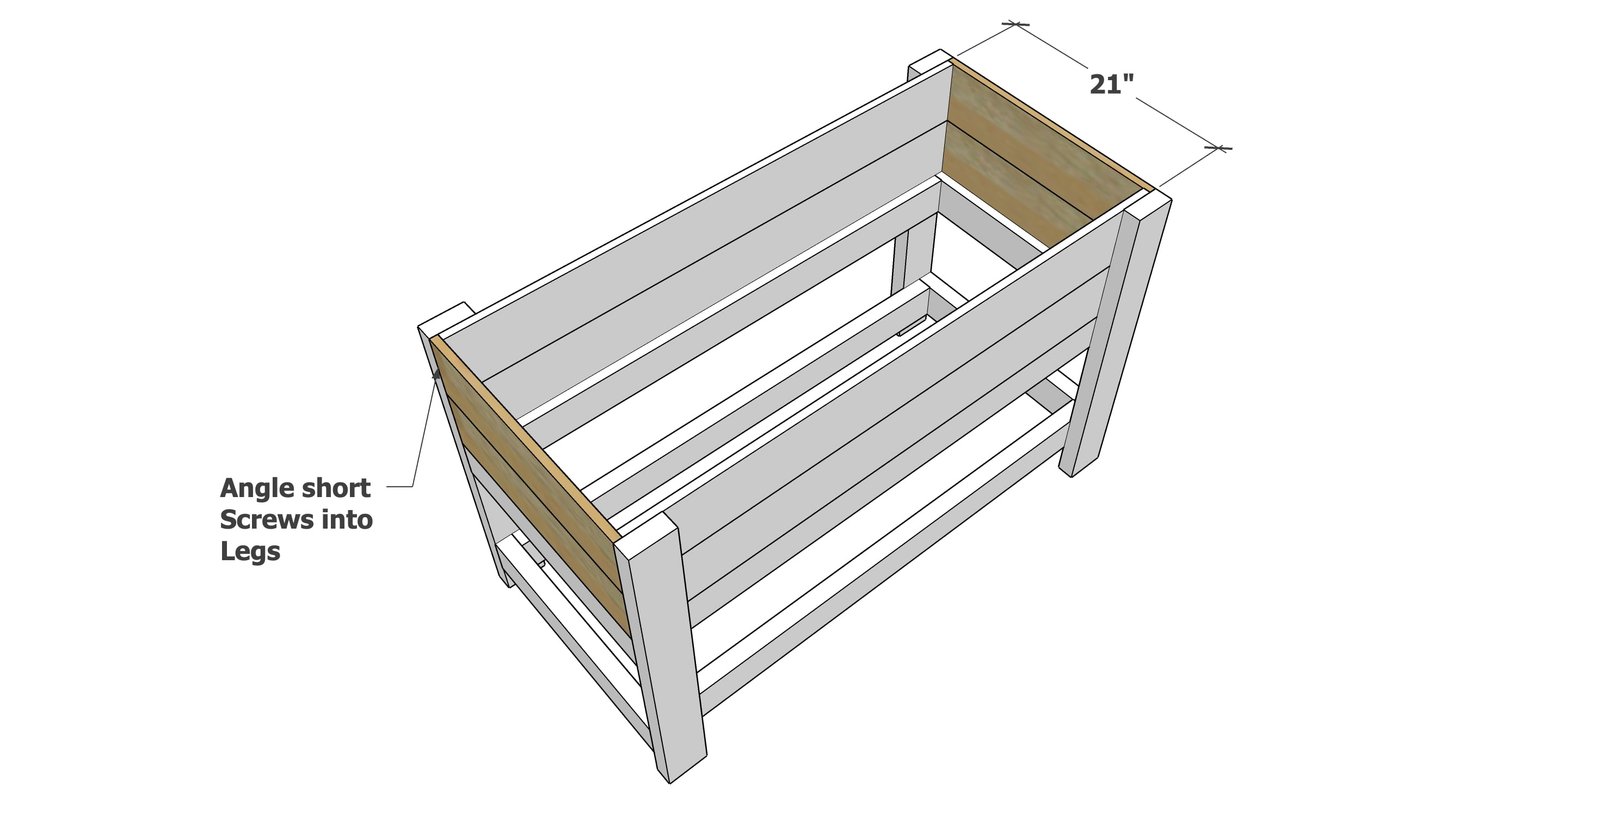
Add the end pieces, screw at a slight angle to go into the 2x4 legs.
Step 5
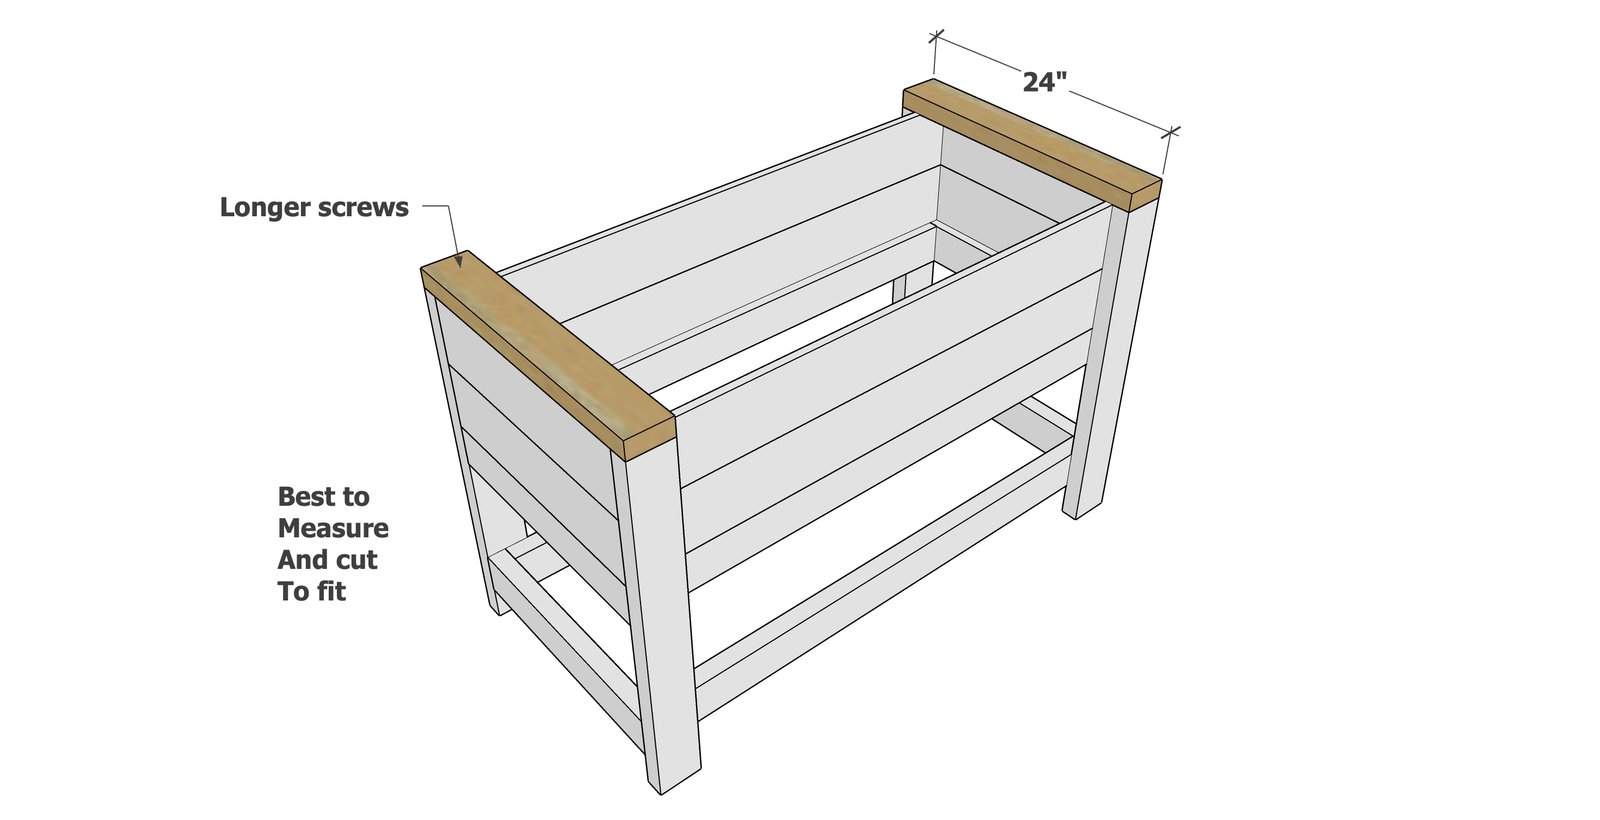
Attach the tops with the longer screws.
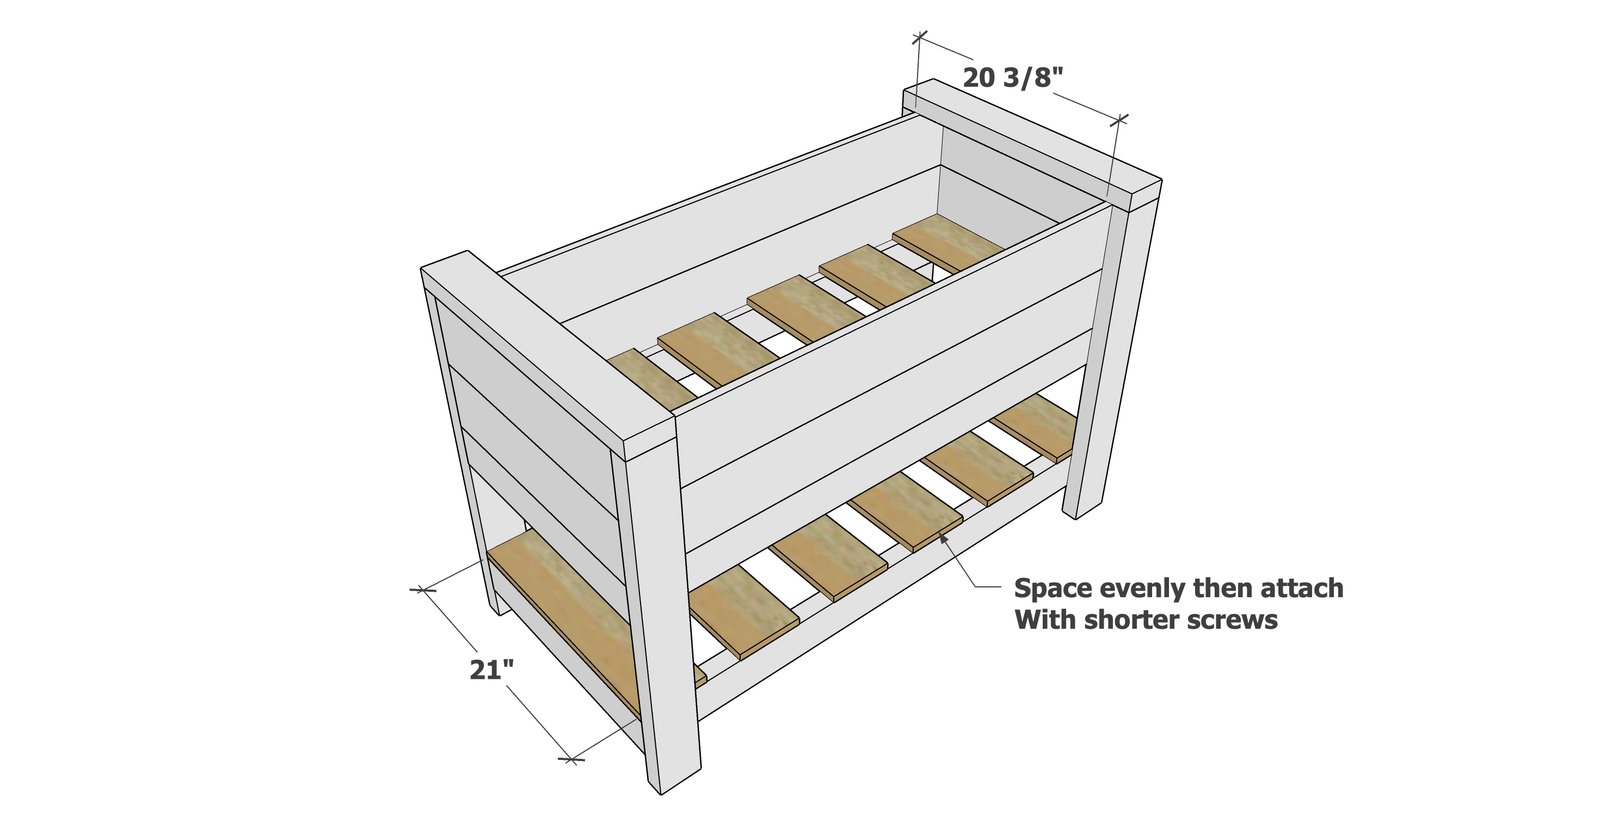
Add the shelf boards to the bottom shelf and attach with the shorter screws.
Repeat for the bottom of the planter. Cover the inside of the planter with a landscaping fabric to contain soil. If the fabric liner is water tight, cut a few holes to allow water drainage.
Finishing
Sand all surfaces, starting with a medium grit and finishing with fine. Wipe off the dust, fill any holes or gaps with wood filler, and sand smooth once dry. Apply primer if you're painting, then finish with your choice of paint or stain and seal with a durable clear topcoat. For outdoor projects, use exterior-rated primer, paint or stain, and sealer so the piece stands up to the weather.
Source (temporary): https://www.ana-white.com/woodworking-projects/cedar-fence-picket-raised-planter-shelf