Cedar Planters with 2x2 Legs
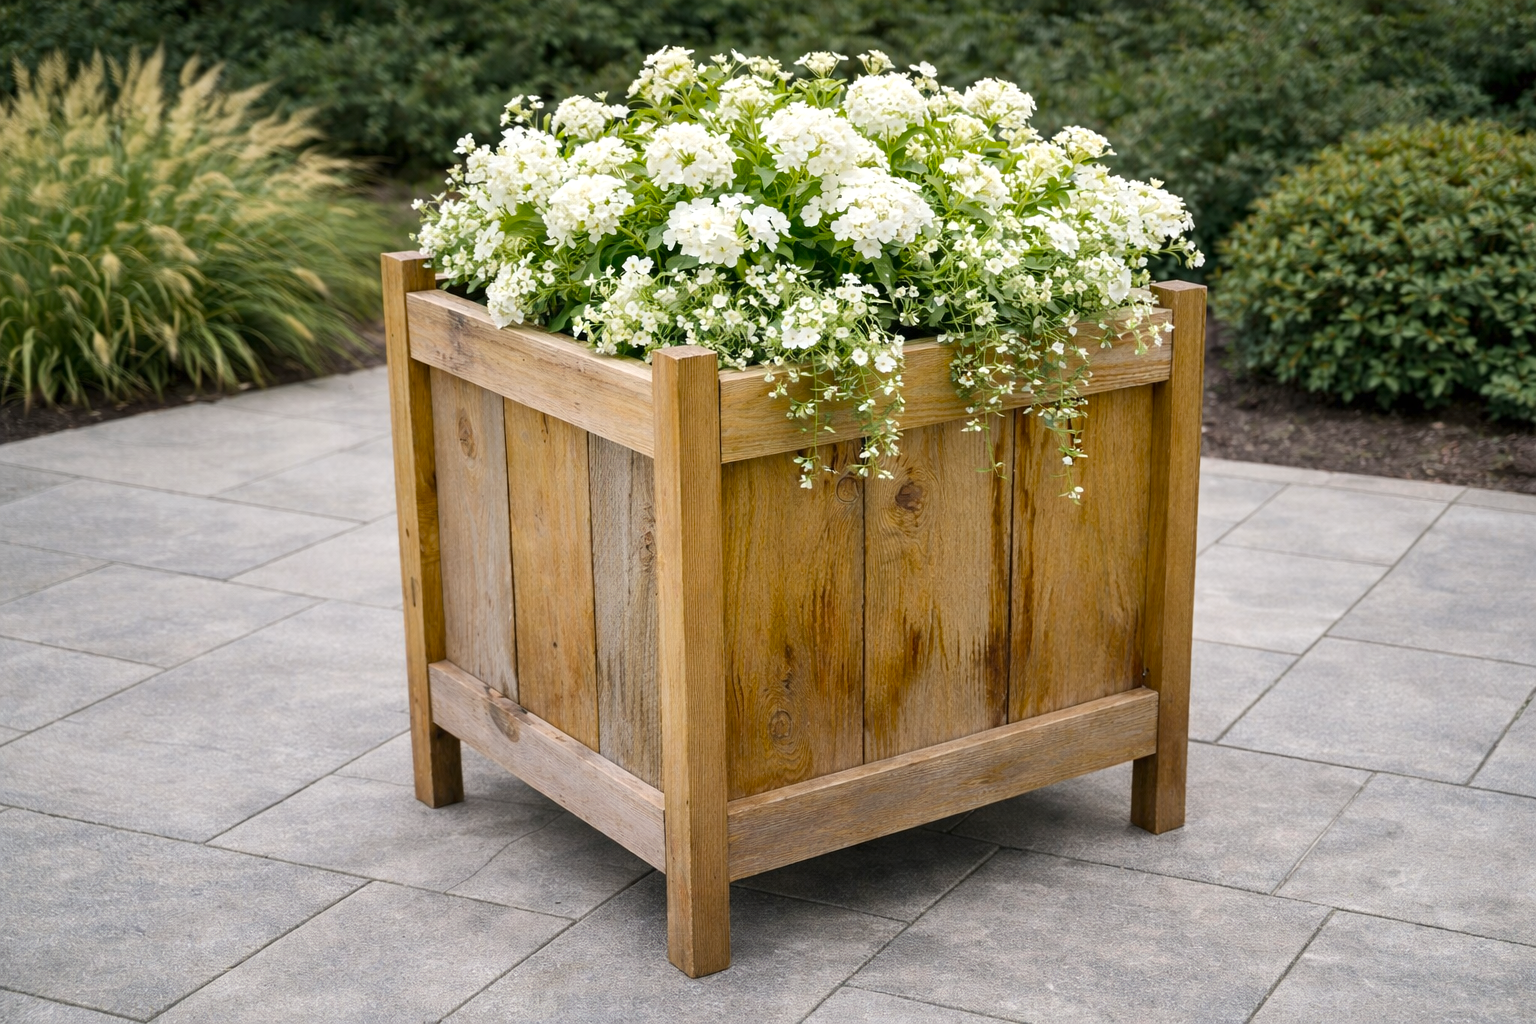
Using cedar fence pickets, you can make these beautiful planters for about $20 each! Our plans include step-by-step diagrams, shopping and cut lists, and dozens of reader submitted photos and success stories. We also have plans for a taller, more modern planter, a cedar ladder planter (also using cedar fence pickets!) and lots more planter projects here.
Specifications
| Project type | Planters, Garden Beds, and Greenhouses |
|---|---|
| Room | Outdoor |
| Style | Cottage Style Furniture Plans |
| Difficulty | Beginner Projects |
| Estimated cost | Under $20 |
Dimensions
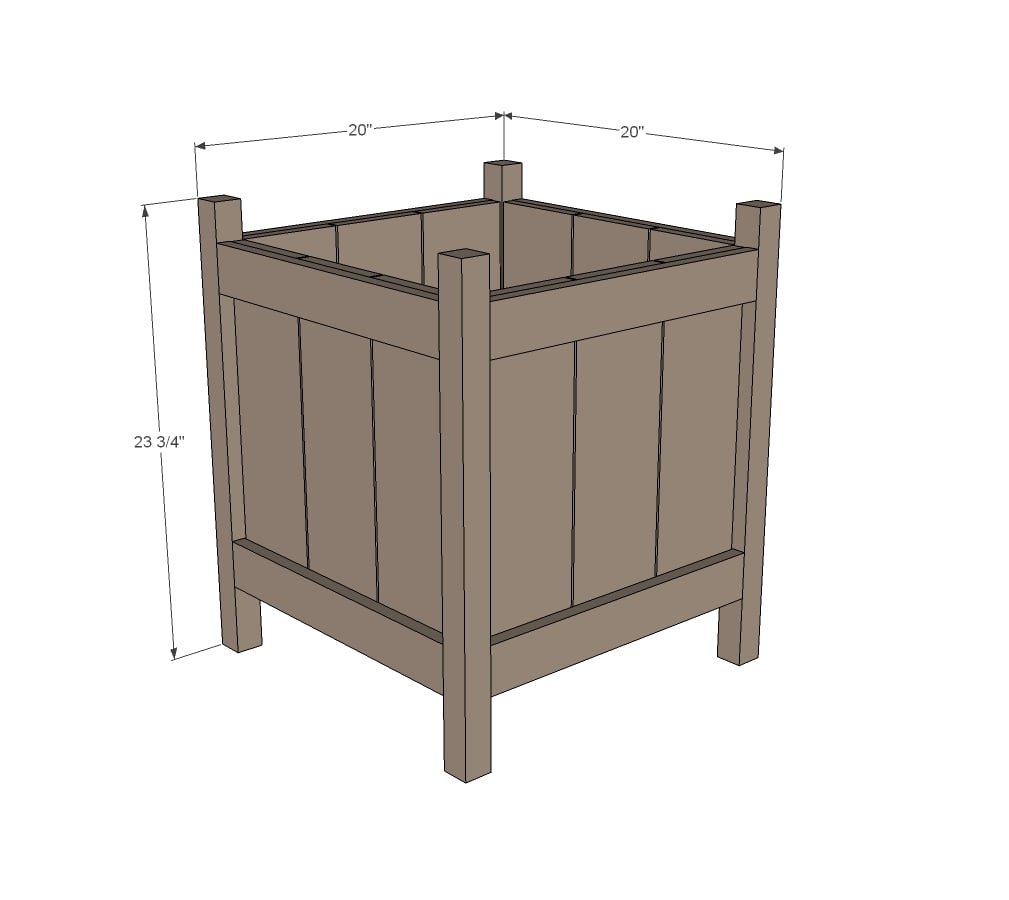
Use the size-specific shopping and cut lists below.
Shopping List
- 2 - 1x3 @ 8 feet long
- 1 - 1x2 @ 8 feet long
- 3 - 5 1/2" wide x 72" long cedar fence pickets
- 1 - 2x2 @ 8 feet long
- 2 1/2" exterior pocket hole screws
- 1 1/4" exterior screws or galvanized nails
- exterior wood glue
Cut List
- 10 - 1x3 @ 17"
- 5 - 1x2 @ 17"
- 4 - 2x2 @ 23 3/4"
- 12 - cedar fence pickets @ 17 3/4" long (shortened by 1/4" from diagrams to allow for saw blade width and dog eared end)
Tools
- measuring tape
- square
- pencil
- safety glasses
- hearing protection
- kreg-jig
- drill
- circular saw
- nailer
- sander
Step-by-step Instructions
Step 1
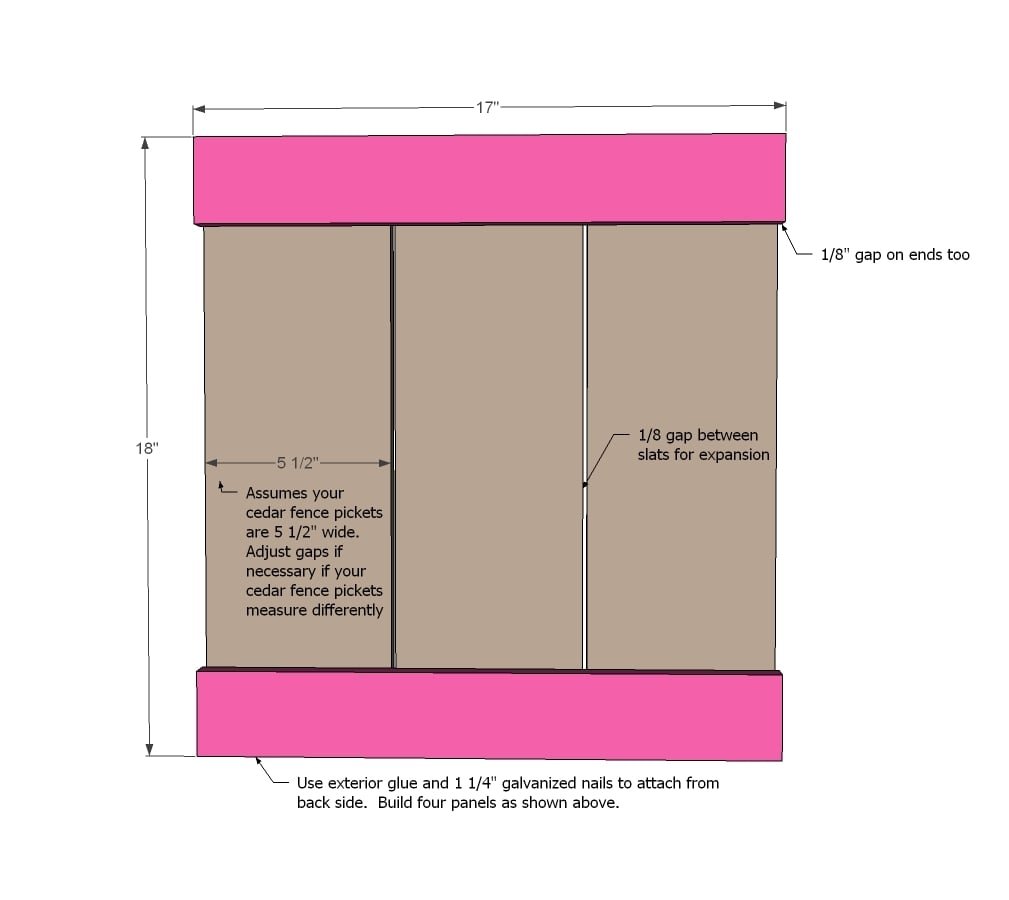
Start by first building your four panels. I sized this plan to allow for an 1/8" gap between the cedar pickets as they will shrink/expand with moisture and let's just face it - the cedar fence pickets are not going to be perfect! I used 1 1/4" galvanized nails and exterior glue from the insides.
Step 2
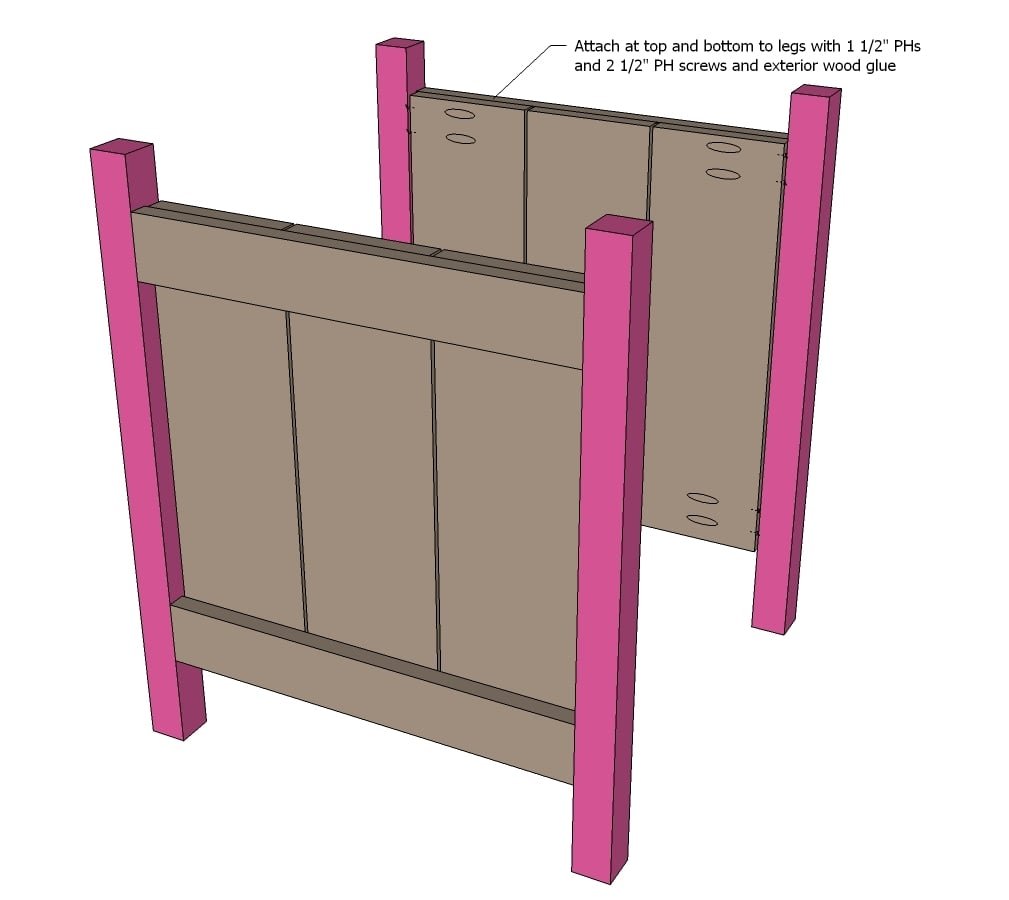
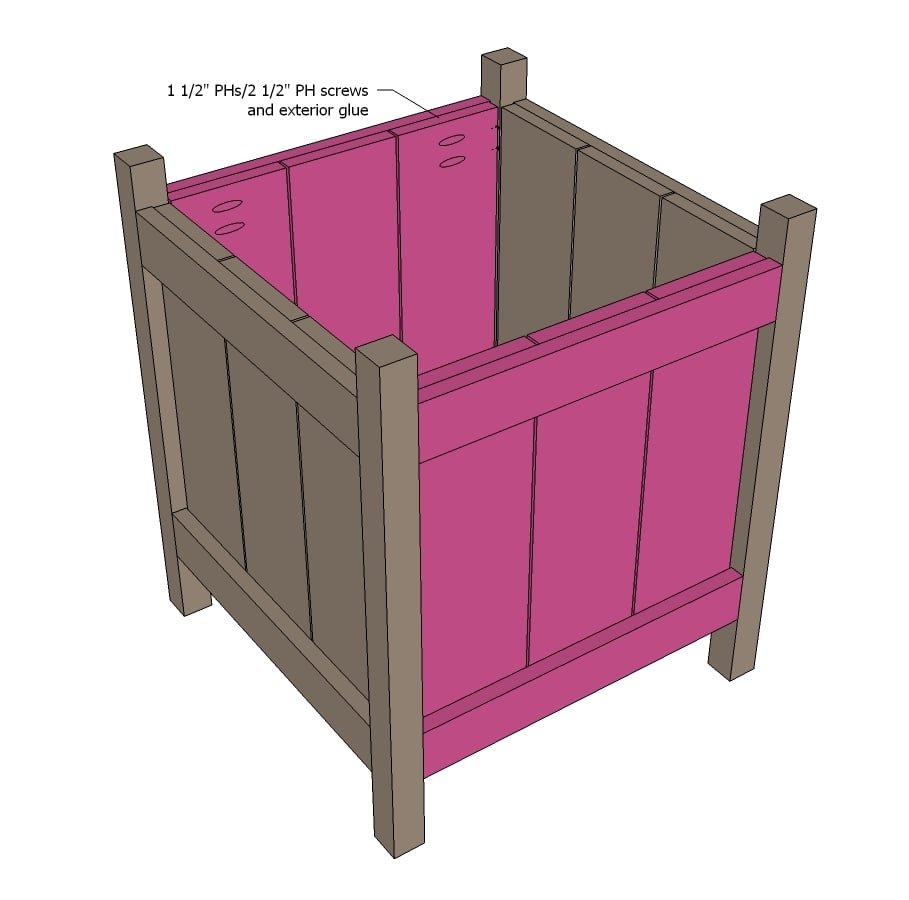
On all four of your panels, drill 2 - 1 1/2" pocket holes on the inside, behind each 1x3 on the ends. This will put screws through the fence pickets, 1x3s and then into your legs. Join two of the panels to the legs as shown in diagram.
Step 3
And then add the remaining two panels to create your planters. Adjust for square.
Step 4
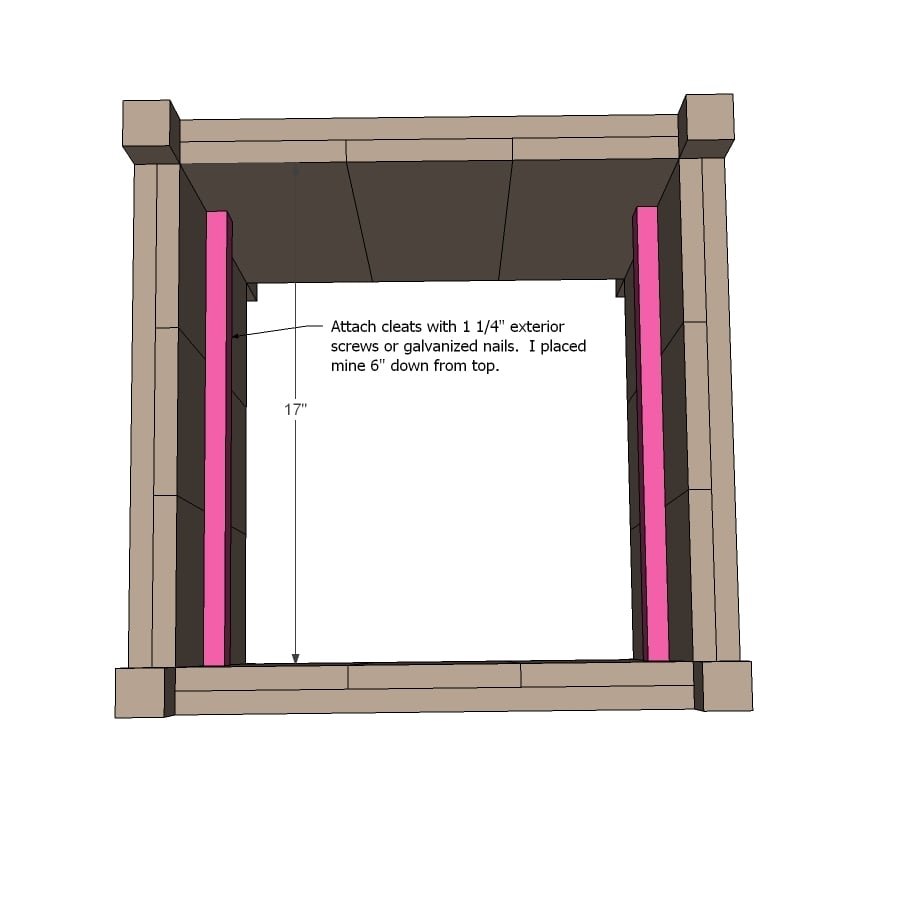
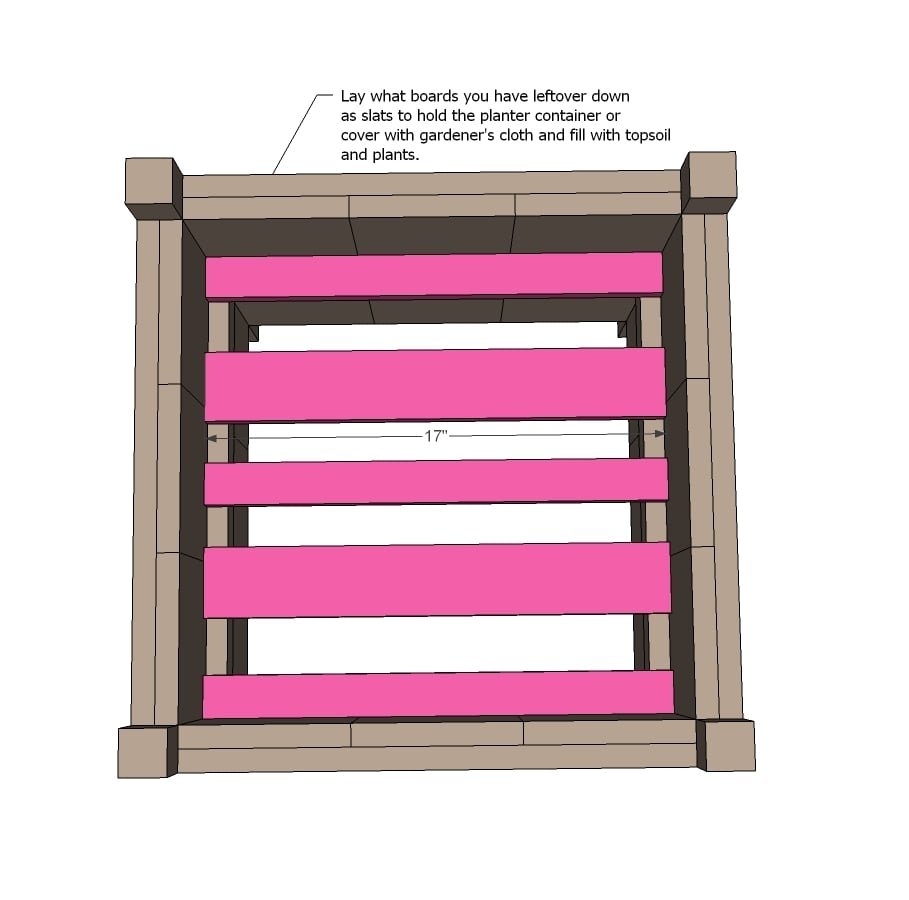
Now don't think that this whole planter needs to be filled with dirt!!! Unless you are planning on harvesting potatoes in there! I put my bottom 6" down from the top to keep the planter lighter and use less dirt. Start by attaching cleats to sides at desired height.
Step 5
Finishing
Sand all surfaces, starting with a medium grit and finishing with fine. Wipe off the dust, fill any holes or gaps with wood filler, and sand smooth once dry. Apply primer if you're painting, then finish with your choice of paint or stain and seal with a durable clear topcoat. For outdoor projects, use exterior-rated primer, paint or stain, and sealer so the piece stands up to the weather.
Source (temporary): https://www.ana-white.com/woodworking-projects/cedar-planters-2x2-legs