Chalkboard Cubby Shelf
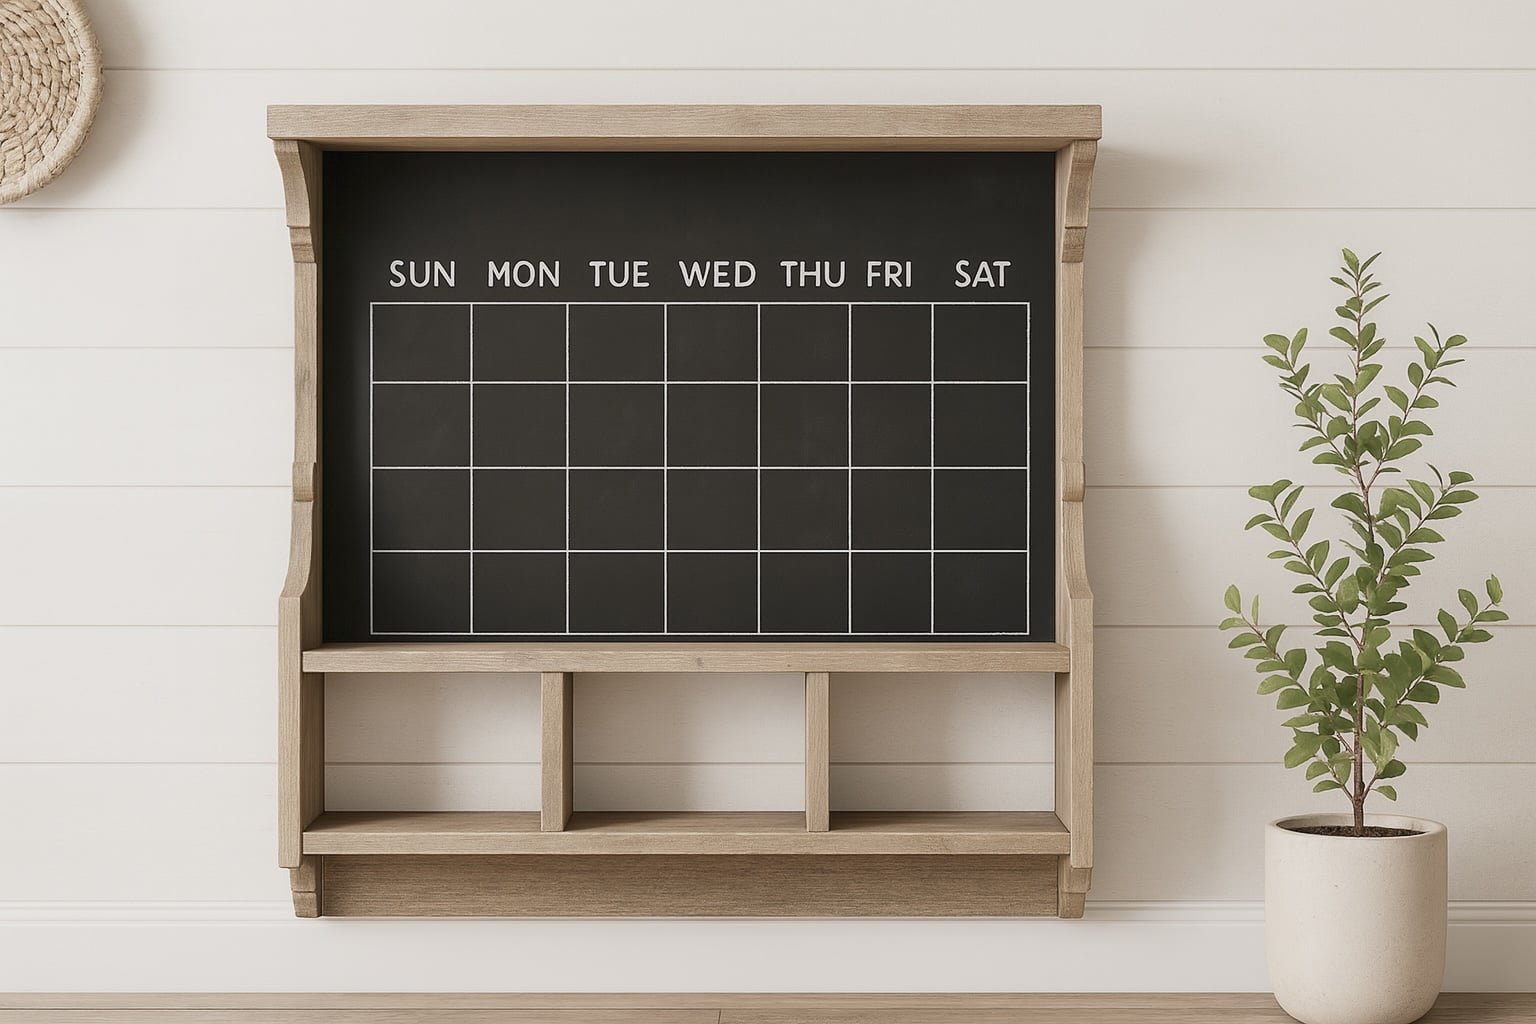
Organize your home in style with this DIY farmhouse family calendar shelf. Featuring a spacious chalkboard calendar, three open cubbies for mail or small items, and added key hooks for convenience, this multifunctional piece is perfect for entryways or kitchens. Download the and build your own wall-mounted organizer to keep your family on track—beautifully and efficiently.
Specifications
| Project type | shelves |
|---|---|
| Room | Craftroom |
| Difficulty | Intermediate |
Dimensions
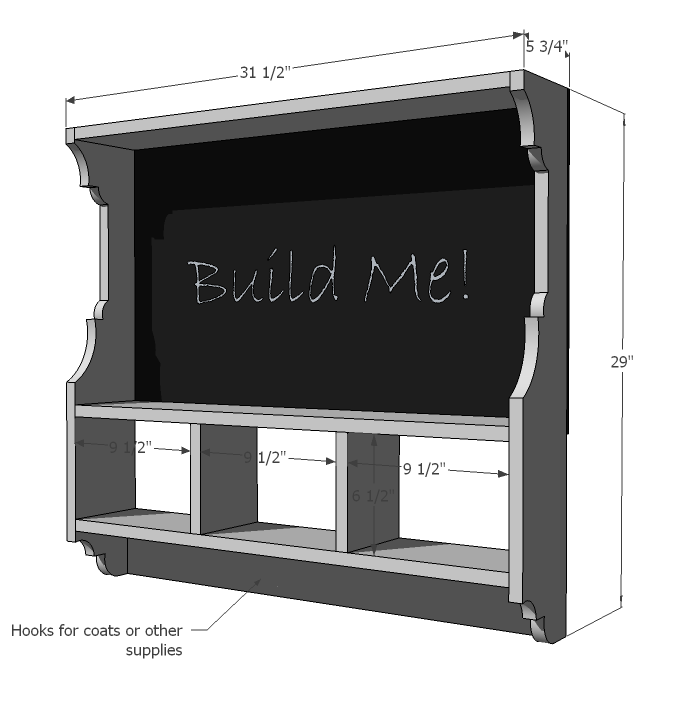
Use the size-specific shopping and cut lists below.
Shopping List
- 12 feet of 1x6 whitewood boards
- 30" of 1x4 whitewood boards
- 3 hooks
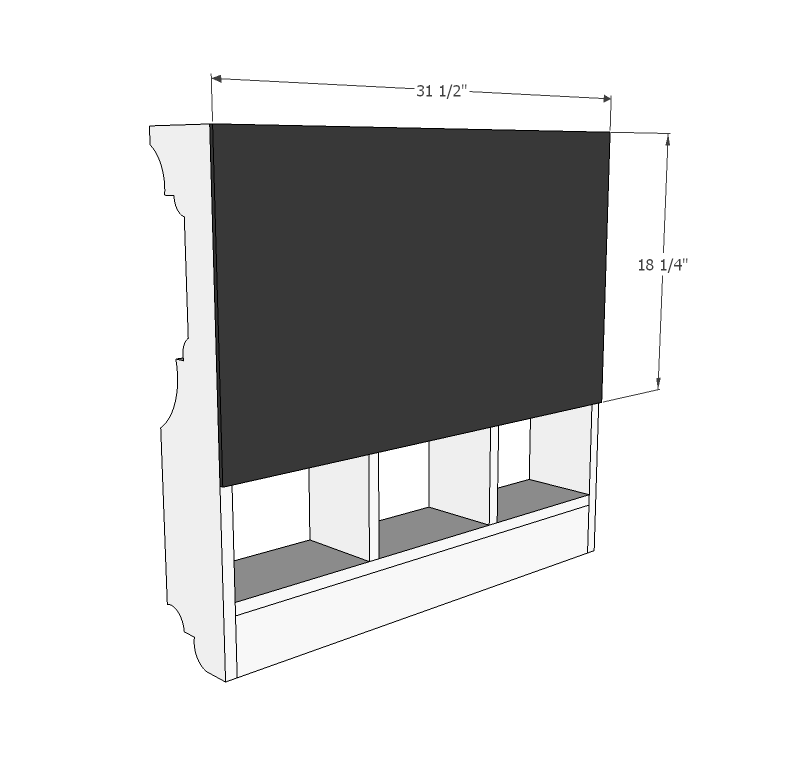
- 1 - chalkboard 31 1/2" x 18 1/4" (Make your own from hardboard and chalkboard paint)
- Heavy duty picture hanging kit
- Either pocket hole screws or 1-1/4" brad nails as noted below.
Cut List
- 2 - 1x6 @ 29" (Sides)
- 1 - 1x4 @ 30" (Bottom)
- 3 - 1x6 @ 30" (Shelves)
- 2 - 1x6 @ 6 1/2" (Cubby Dividers)
- 1 - chalkboard @ 31 1/2" x 18 1/4" (make your own with a piece of hardboard and chalkboard paint)
Tools
- measuring tape
- square
- pencil
- safety glasses
- hearing protection
- kreg-jig
- drill
- jigsaw
- nailer
- sander
- level
Step-by-step Instructions
Step 1
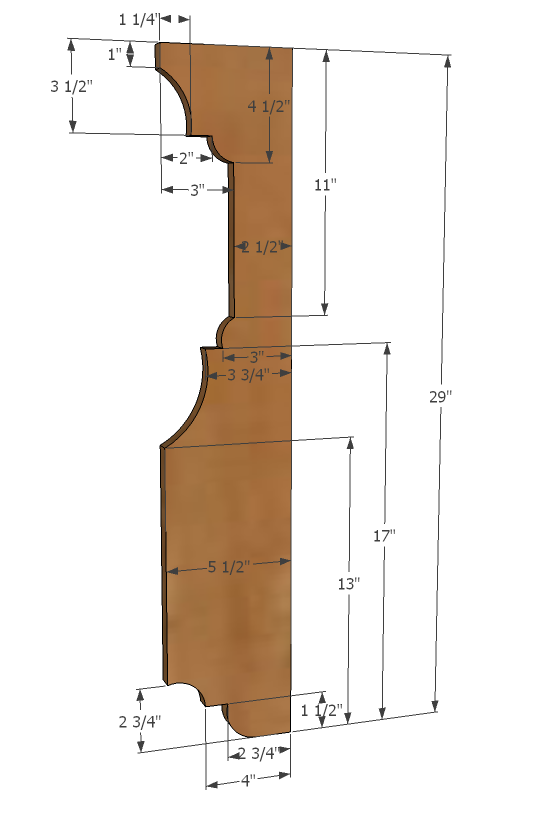
This is definitely the hardest step - getting the sides cut to match. Carefully measure and transfer the pattern to your 1x6 sides and cut out with a jigsaw. Sand edges until even and matching. TIP: Clamp two ends together and sand as one to remove all rough edges and differences between sides.
Step 2
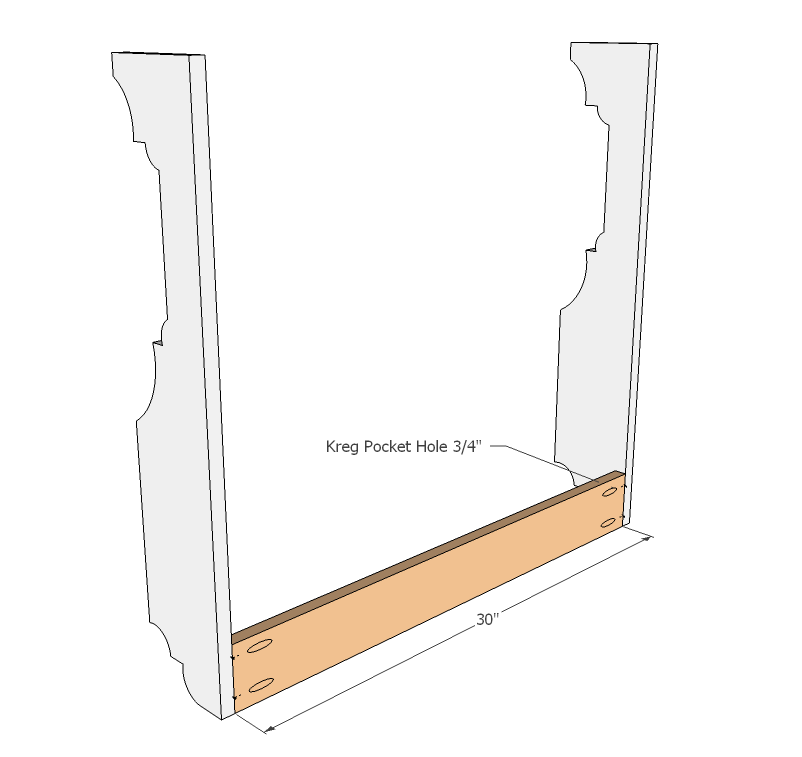
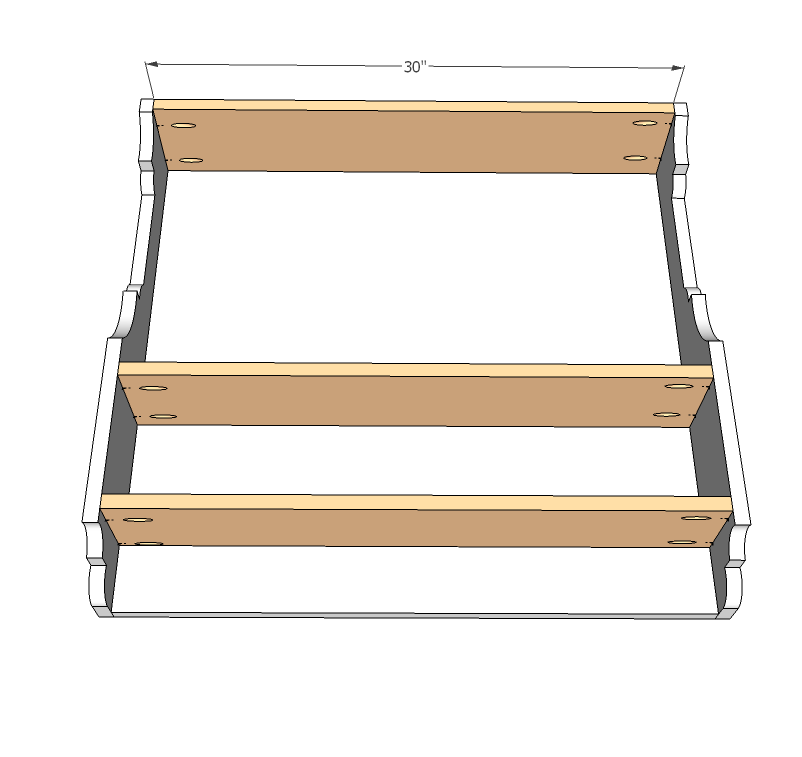
Attach two sides together with the bottom as shown above either with 1 1/4" pocket hole screws or 2" finish nails and wood glue from outsides.
Step 3
Now the shelves, same joinery technique. The middle shelf needs to sit 10 3/4" up from the bottom of the sides. Fit the cubby dividers in (next step) to guide you in placing middle shelf.
Step 4
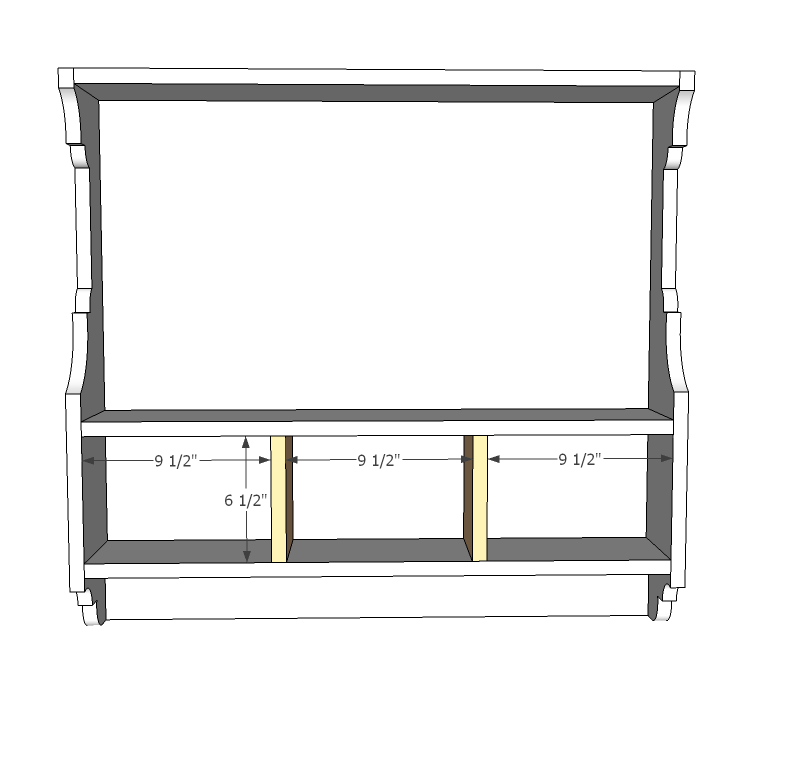
Add the cubby dividers with 2" finish nails and wood glue from top and bottom. You may wish to finish the wood frame at this step before adding the chalkboard.
Step 5
Finishing
Sand all surfaces, starting with a medium grit and finishing with fine. Wipe off the dust, fill any holes or gaps with wood filler, and sand smooth once dry. Apply primer if you're painting, then finish with your choice of paint or stain and seal with a durable clear topcoat. For outdoor projects, use exterior-rated primer, paint or stain, and sealer so the piece stands up to the weather.
Source (temporary): https://www.ana-white.com/woodworking-projects/chalkboard-cubby-shelf