Changing Table
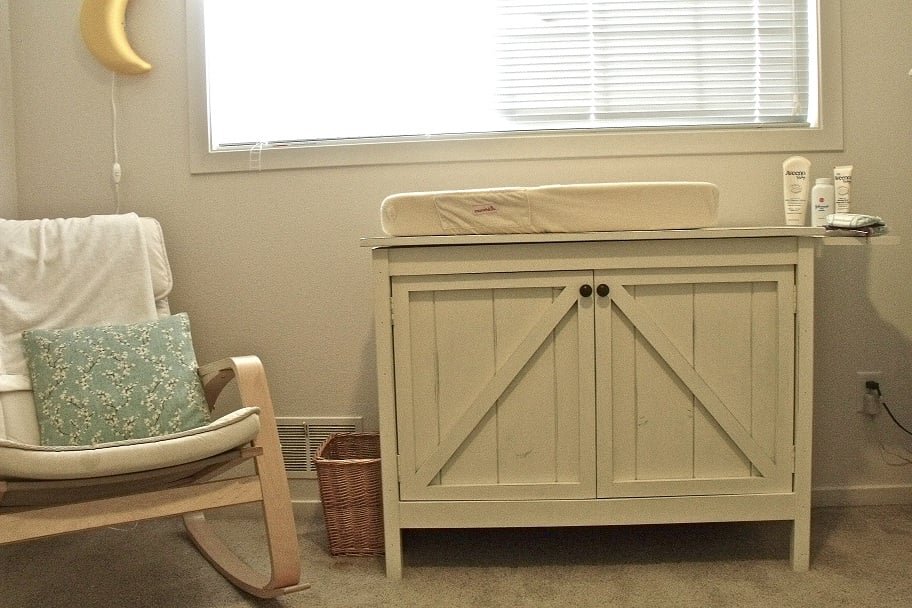
How to build a changing table from featuring rustic barn style doors and space saving pullout wings.
Specifications
| Project type | Cabinet Plans |
|---|---|
| Room | Kids and Toys |
| Style | Children's and Kid's Room Furniture and Toy Plans |
| Difficulty | Advanced |
Dimensions
Use the size-specific shopping and cut lists below.
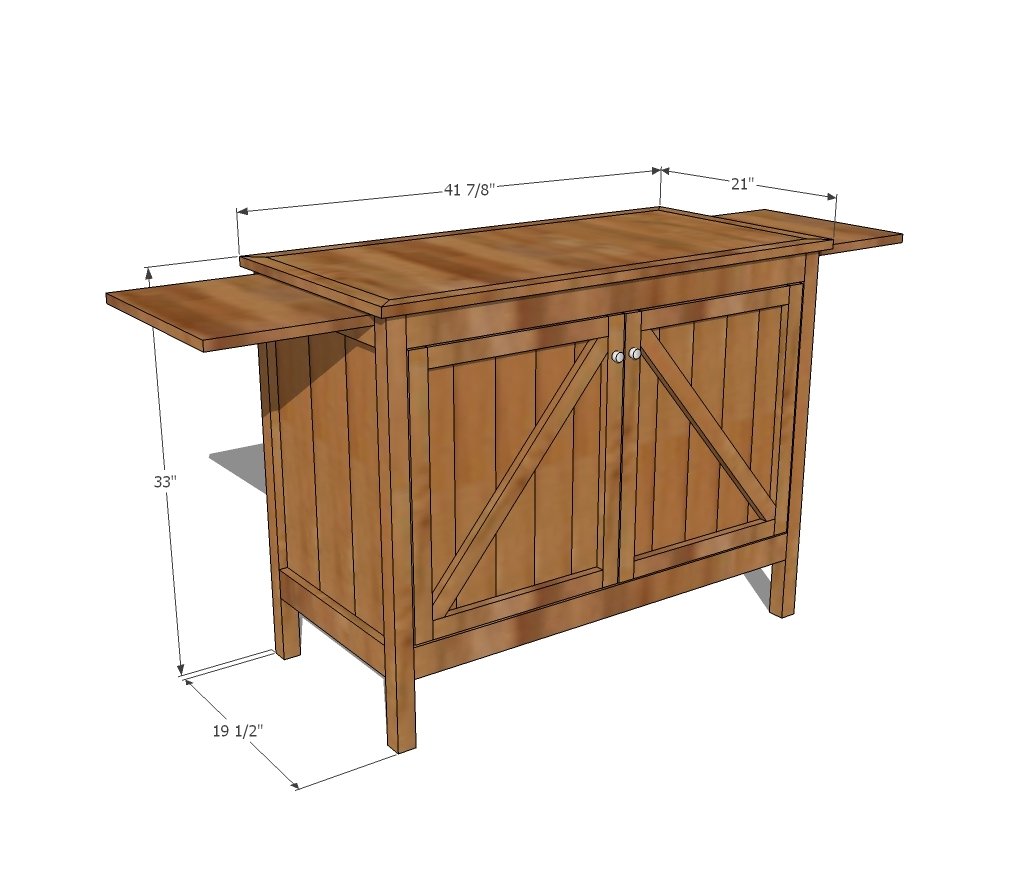
Shopping List
4 - 1x2 @ 8 feet long
3 - 1x3 @ 8 feet long
2 - 1x6 @ 8 feet long
3 - 2x2 @ 8 feet long
1/2 sheet 3/4” plywood
2 - 1/8” shims 18” long
200” of 1x4 tongue and groove for door backs
2 sets of hinges
Cut List
2 - 1x2 @ 16 1/2”
2 - 1x3 @ 16 1/2”
6 - 1x6 @ 25 3/4”
4 - 2x2 @ 32 1/4”
4 - 1x3 @ 37 3/8”
1 - 3/4” plywood 18” x 37 3/8”
2 - 2x2 @ 37 3/8”
2 - 3/4” plywood @ 16 1/2” x 12” (could use boards here too and could possibly be made larger as well)
2 - 1/8” thick shims or plywood pieces 18” x 1”
DOORS
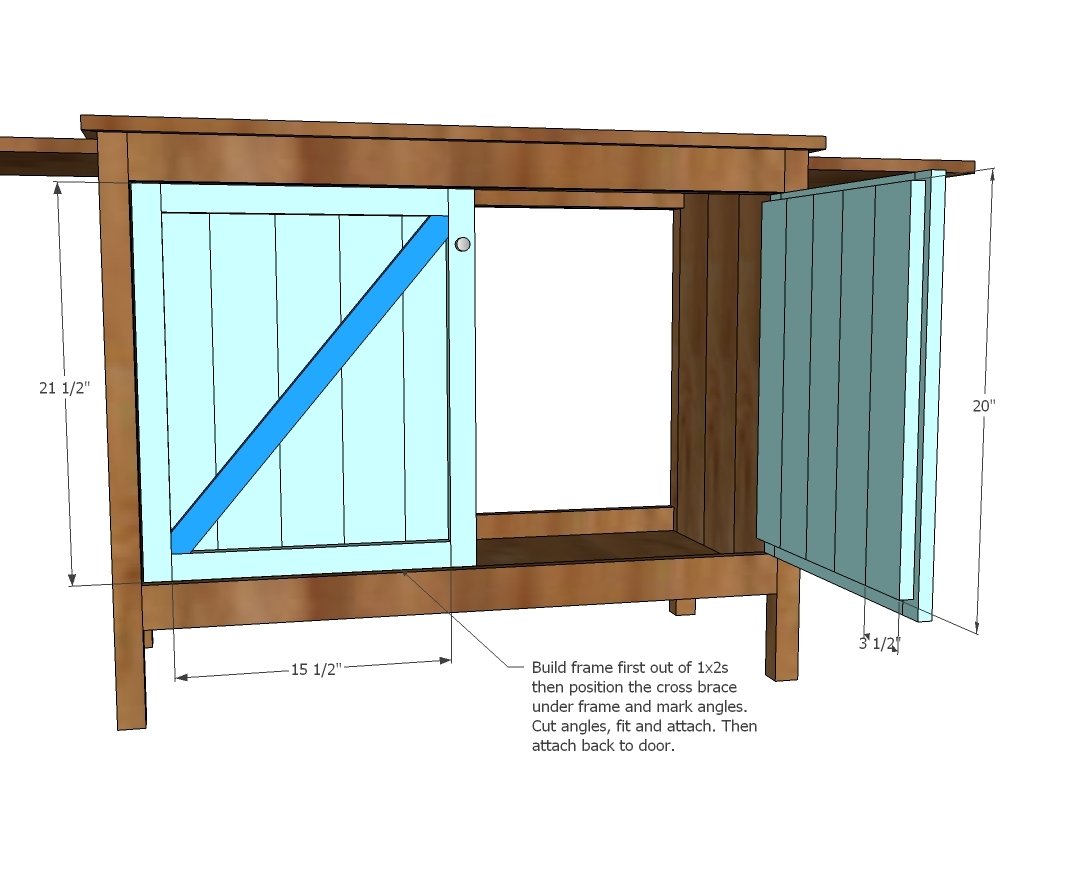
4 - 1x2 @ 21 1/2”
4 - 1x2 @ 15 1/2”
1 - 1x2 cross brace - overall length 24 1/2” approximately
10 pieces of 1x4 tongue and groove paneling for door backs 20” long
TOP
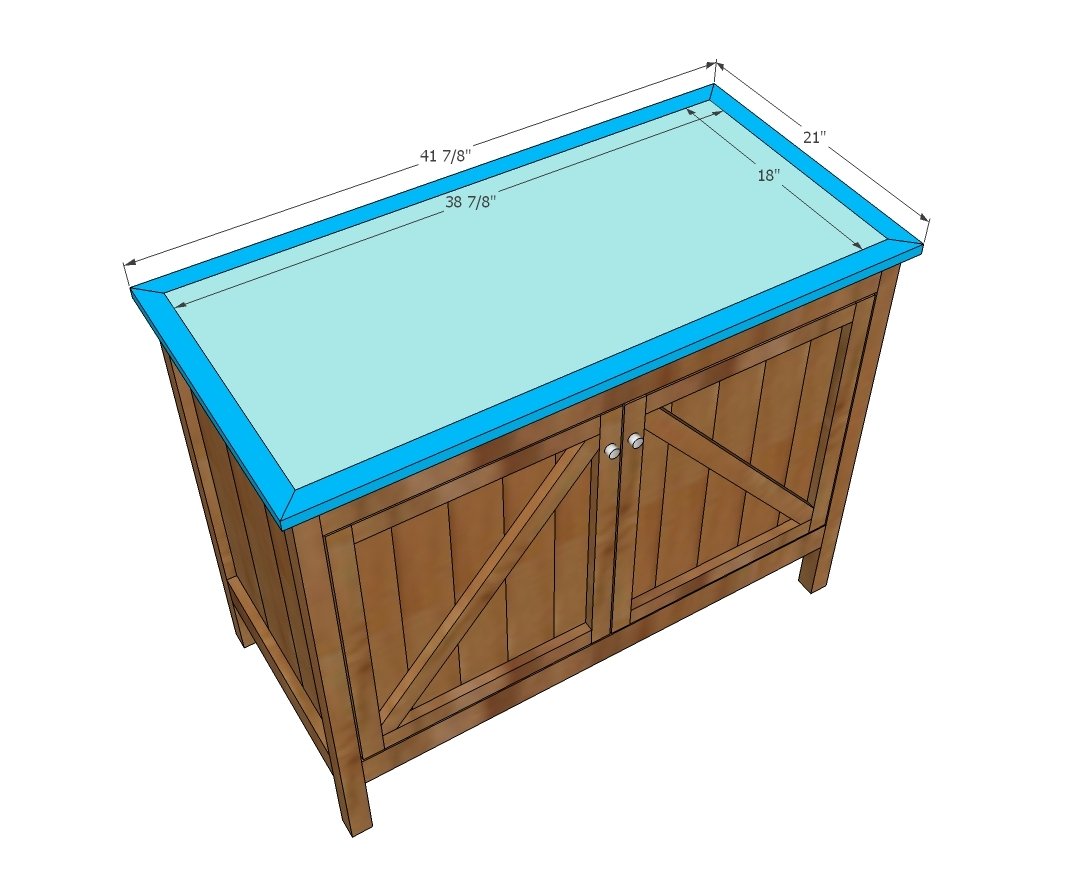
1 - 3/4” plywood @ 18” x 38 7/8”
2 - 1x2 @ 41 7/8” (Long point to long point, both ends mitered at 45 degrees)
2 - 1x2 @ 21” (Long point to long point, both ends mitered at 45 degrees)
Tools
- measuring tape
- square
- pencil
- safety glasses
- hearing protection
- kreg-jig
- drill
- compound miter saw
- nailer
- sander
- level
- countersink drill bit
Step-by-step Instructions
Step 1
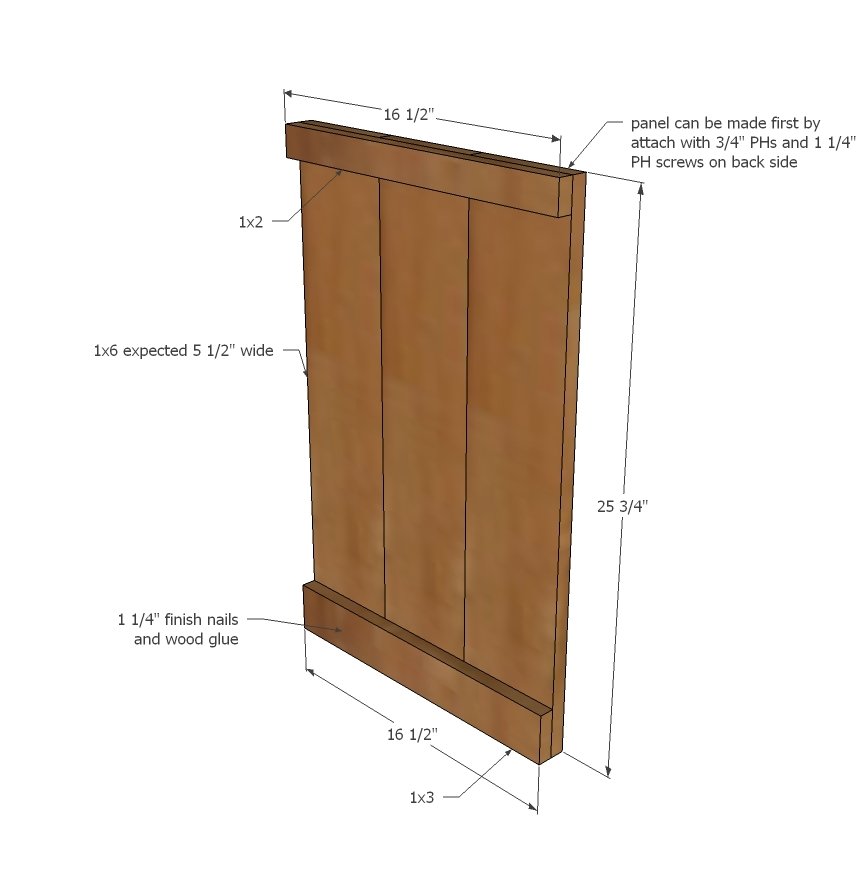
Start by building your sides. For the no pull out wings option, use a 1x3 at the top and extend the 1x6s 1" longer to meet the tops of the legs (see next step). You'll make two of these.
Step 2
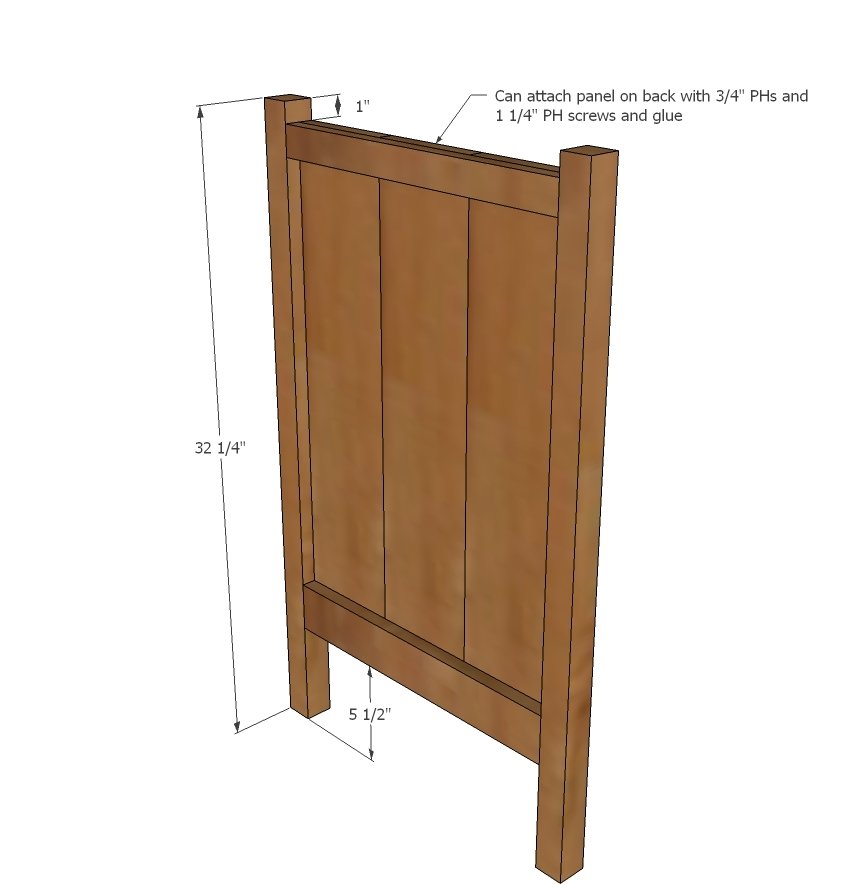
Then attach the legs to the panels to create the two ends.
Now we'll make this a box by adding the front and back trim.
NOTE: If you wish to attach top with PHs drill 3/4" PHs facing UPWARD on top aprons for later attaching top through.
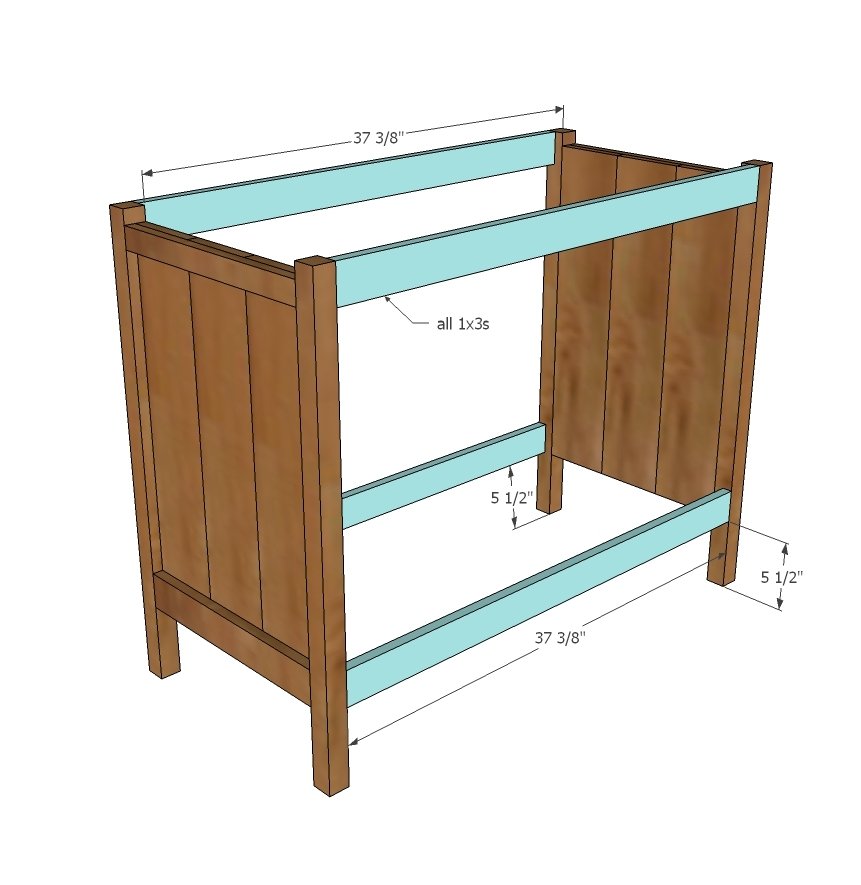
Step 4
Drill 3/4" pocket holes around all sides of bottom shelf and attach in place. For additional shelves, you can attach fixed with pocket holes or use shelf pins.
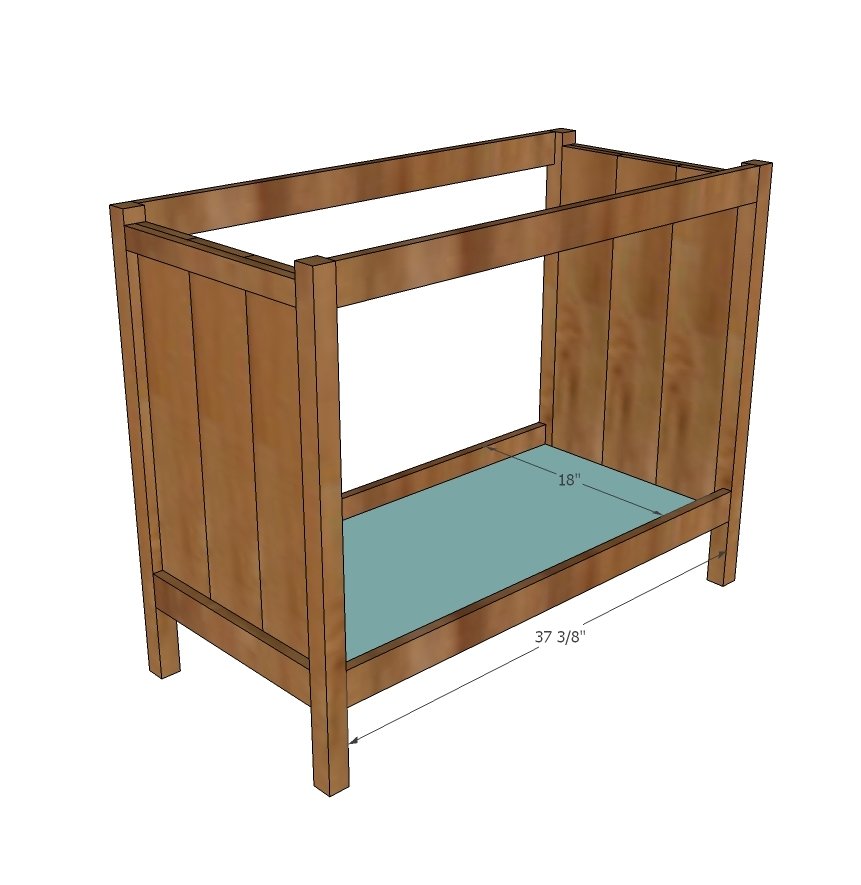
Step 5
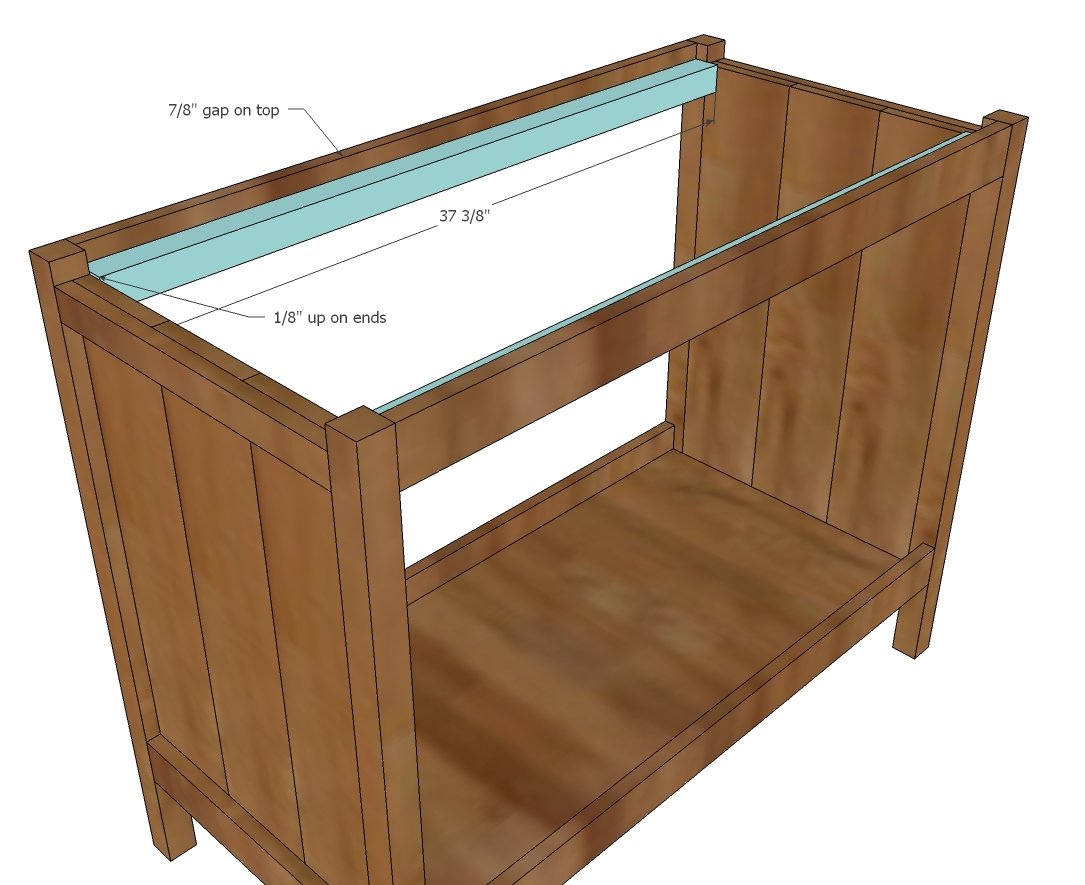
Step 6
Now attach the shims to the wings to keep from pulling all the way out and for a secure fit. Definitely do lots of testing here.
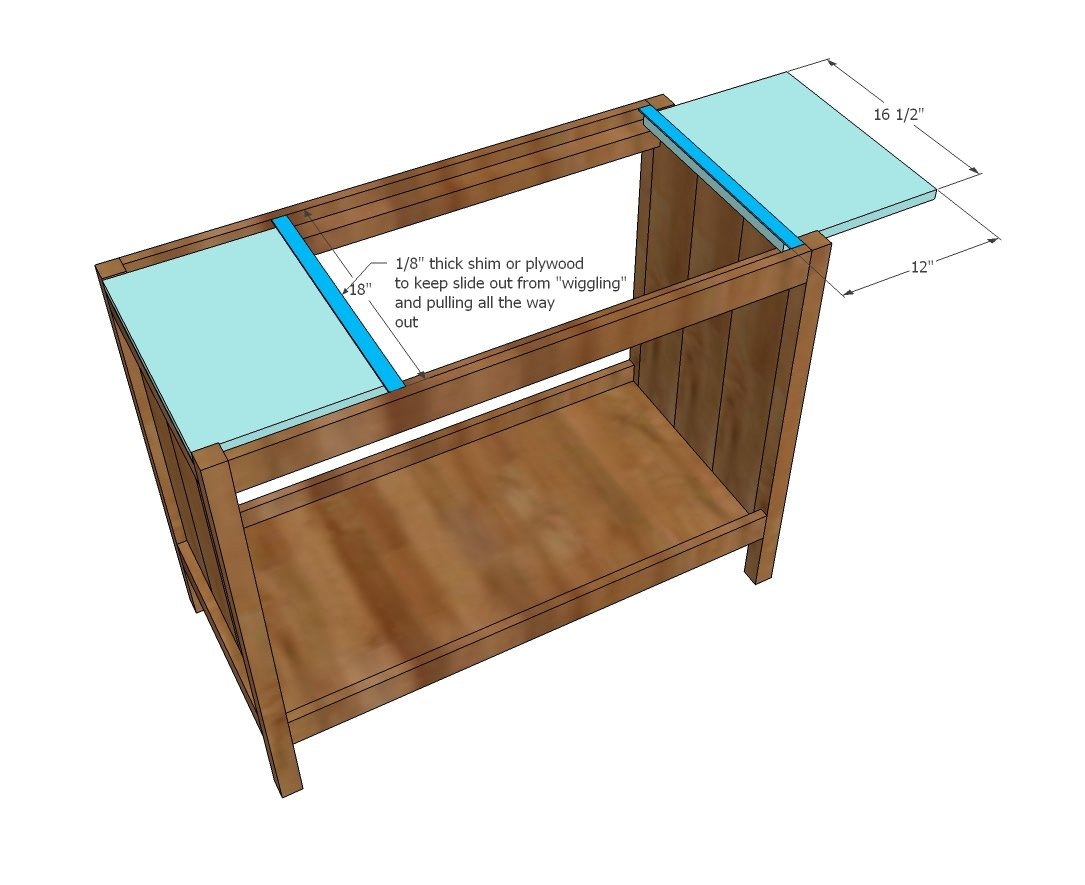
Step 7
When you are happy with the wings. let's get those doors installed. Build the main frame first, then mark your cross board and cut and attach. Then add the backing.
Step 8
Drill 3/4" PHs around all sides of the top and attach trim, mitering corners, with 1 1/4" PH screws. Attach to top.
Step 9
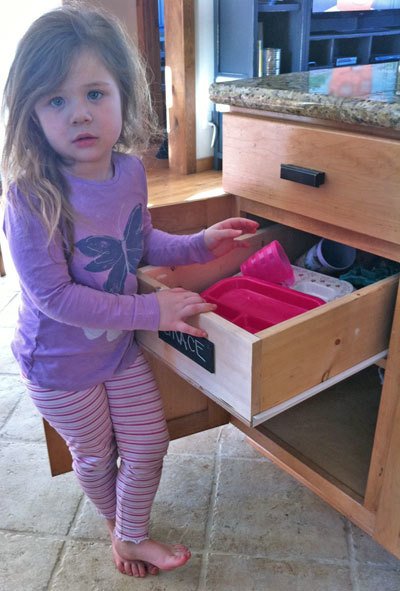
For the pullout drawers, make to fit your drawer slides. Here's a tutorial on pullout cabinet organizers. Now if I could just come up with a plan to get them to stop growing so much! Can you believe that my toddler is now a big girl????
Finishing
Sand all surfaces, starting with a medium grit and finishing with fine. Wipe off the dust, fill any holes or gaps with wood filler, and sand smooth once dry. Apply primer if you're painting, then finish with your choice of paint or stain and seal with a durable clear topcoat. For outdoor projects, use exterior-rated primer, paint or stain, and sealer so the piece stands up to the weather.
Source (temporary): https://www.ana-white.com/woodworking-projects/changing-table-brookstone