Channing Bookcase
This DIY furniture plan contains everything that you need to know to build your own rustic solid wood bookshelf! Step by step instructions include cut list, shopping list, and full diagrams. Also available in this collection: • Channing Desk • Channing Desk Hutch • Channing Snack Cabinet
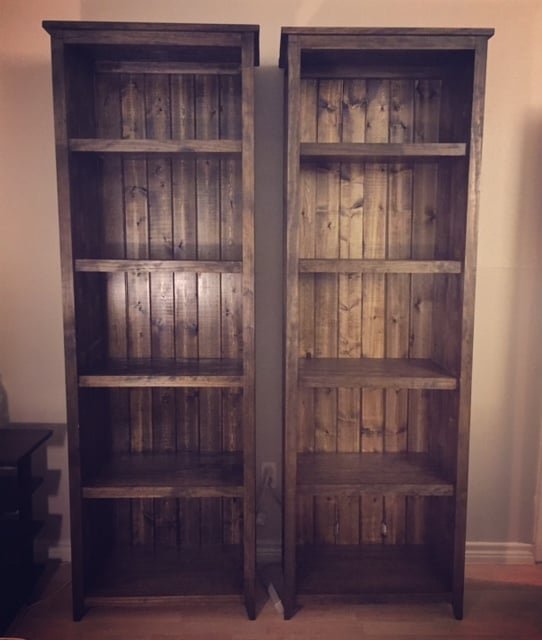
Specifications
| Project type | Bookshelf and Bookcase Plans |
|---|---|
| Room | Storage Solutions |
| Style | Cottage Style Furniture Plans |
| Difficulty | Intermediate |
| Estimated cost | $50 - $100 |
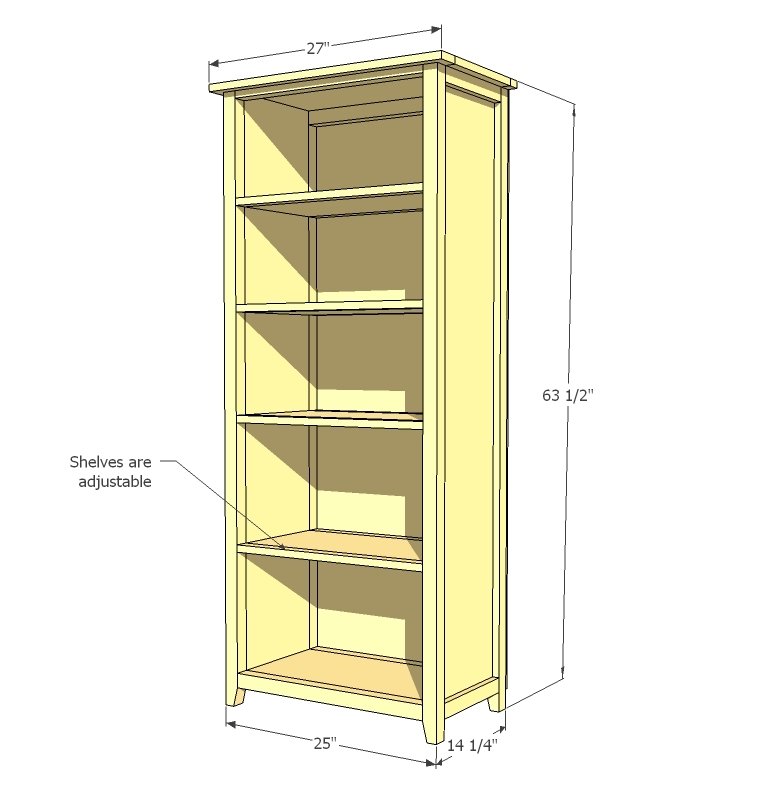
Dimensions
Use the size-specific shopping and cut lists below.
Shopping List
- 3 - 1x12 @ 8 feet long
- 4 - 2x2 @ 8 feet long
- 1 - 1/4" Plywood full sheet
- 1 - 1x3 @ 4 feet long
- 3 - 1x2 @ 8 feet long
Cut List
- 4 - 1x2 @ 11 1/4" (Trim for sides - cut to fit)
- 2 - 1x12 @ 60 3/4" (Sides)
- 4 - 2x2 @ 62 3/4" (Legs)
- 5 - 1x12 @ 22" (Shelves)
- 9 - 1x2 @ 22" (Shelf Trim)
- 3 - 2x2 @ 22" (Shelf Trim)
- 1 - 1/4" Plywood @ 25" x 60 3/4" (Back)
- 1 - 1x2 @ 27" (Top)
- 1 - 1x3 @ 27" (Top)
- 1 - 1x12 @ 27" (Top)
Tools
- measuring tape
- square
- pencil
- safety glasses
- hearing protection
- kreg-jig
- drill
- circular saw
- nailer
- sander
Step-by-step Instructions
Step 1
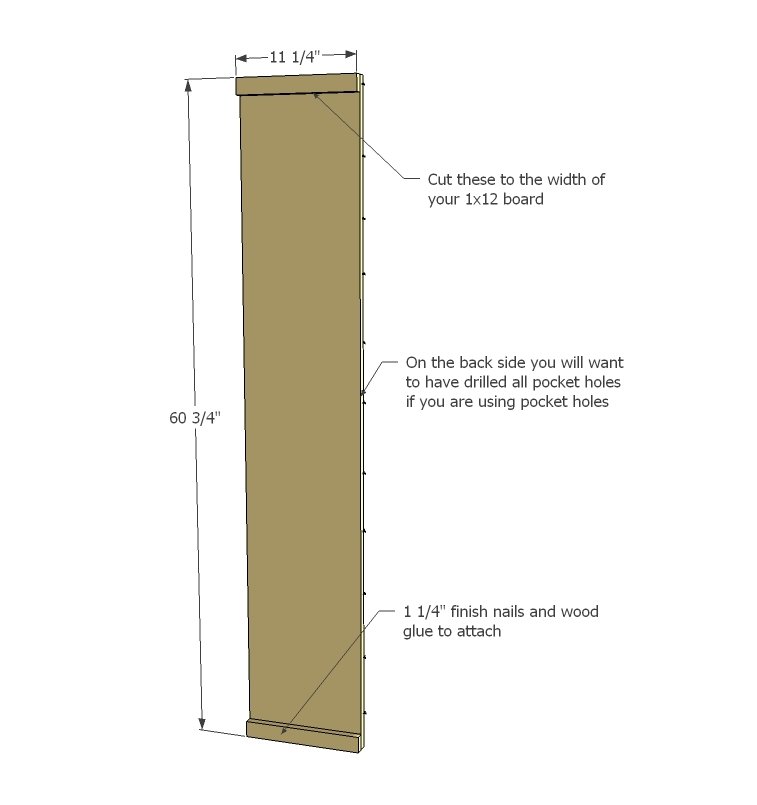
Start by simply nailing the top and bottom trim pieces to the 1x12s as shown above. If you are using pocket holes, make sure you have drilled the pocket holes first as noted in diagram.
Step 2
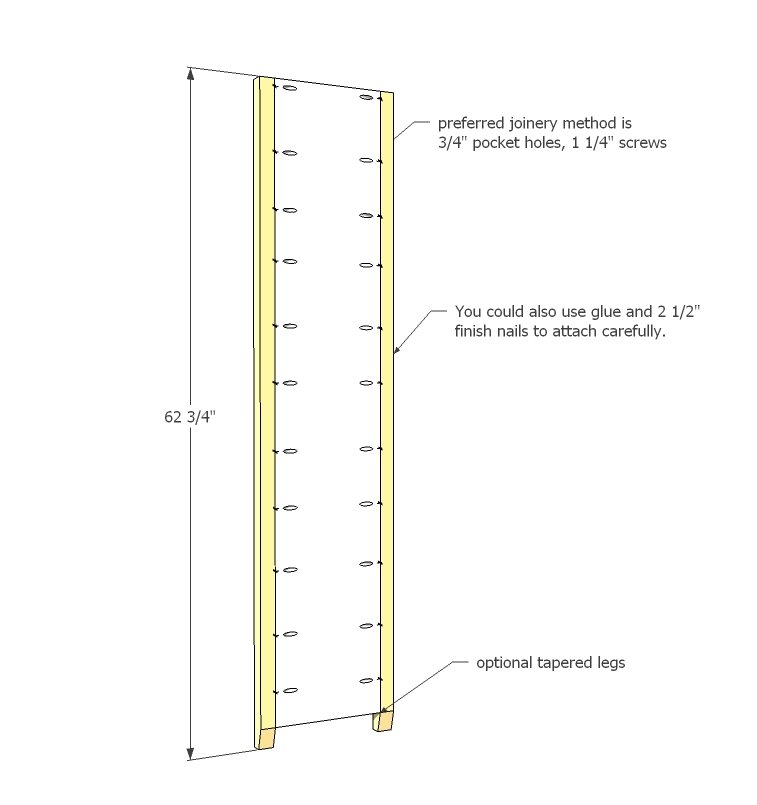
Attach legs to the sides as shown above. You can taper legs if desired.
Step 3
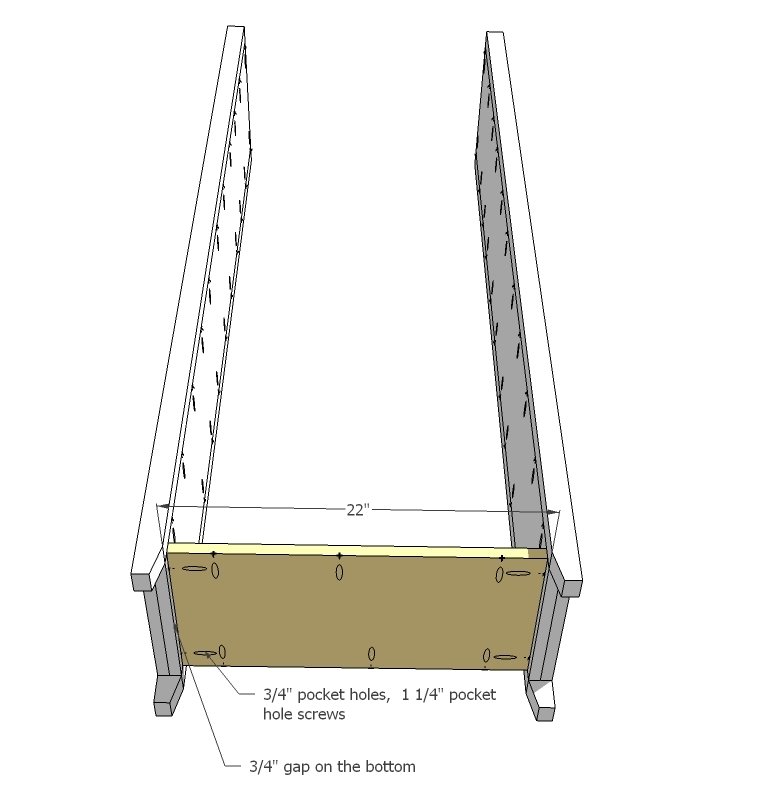
Attach bottom shelves as shown above. You can alternatively use 2" screws countersunk.
Step 4
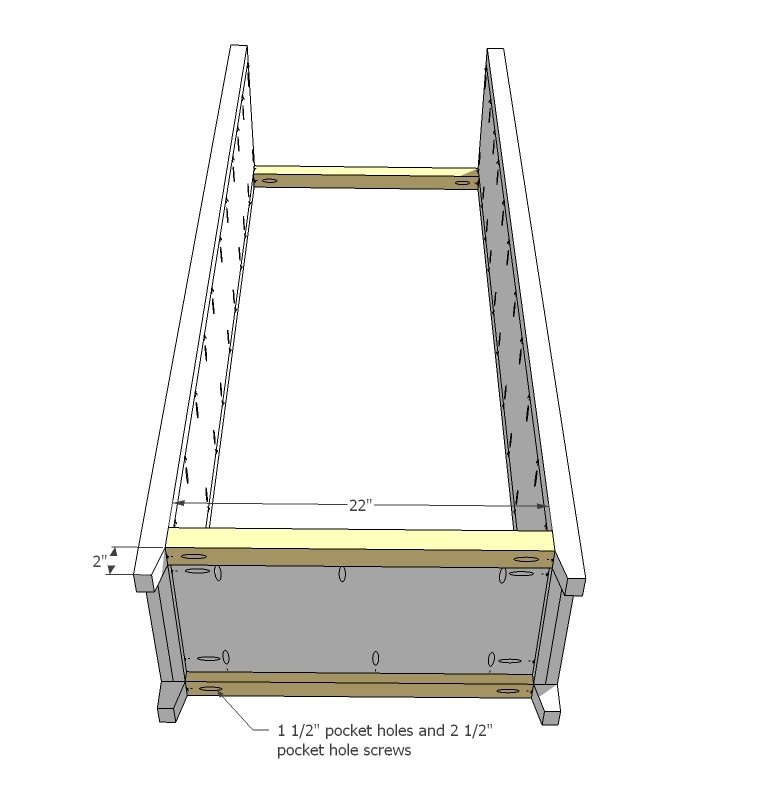
Now trim the shelves with 2x2 as shown above.
Step 5
Step 6
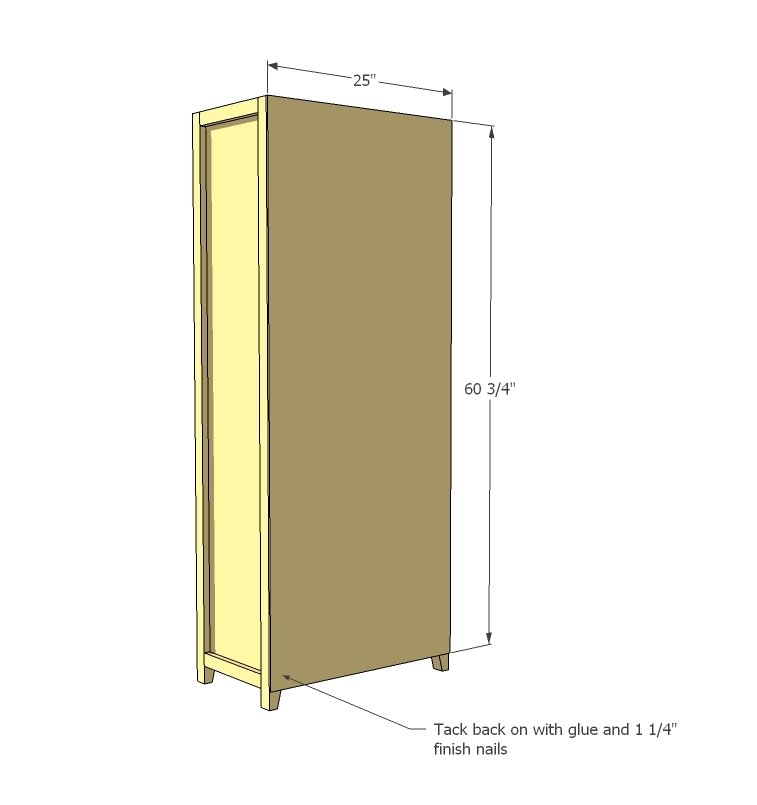
Now attach back with 1 1/4" finish nails and glue. Adjust your bookshelf for square.
Step 7
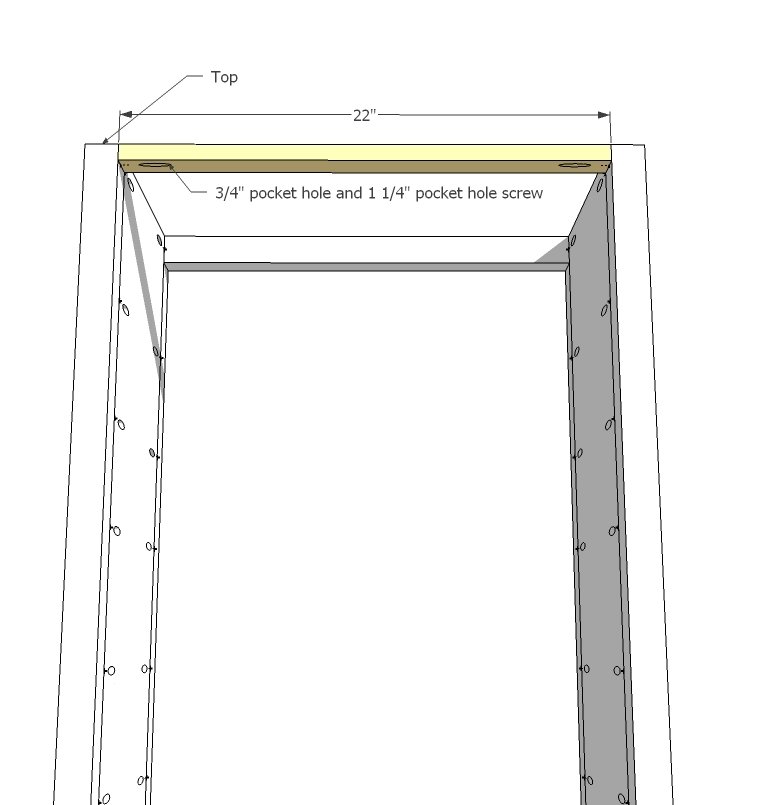
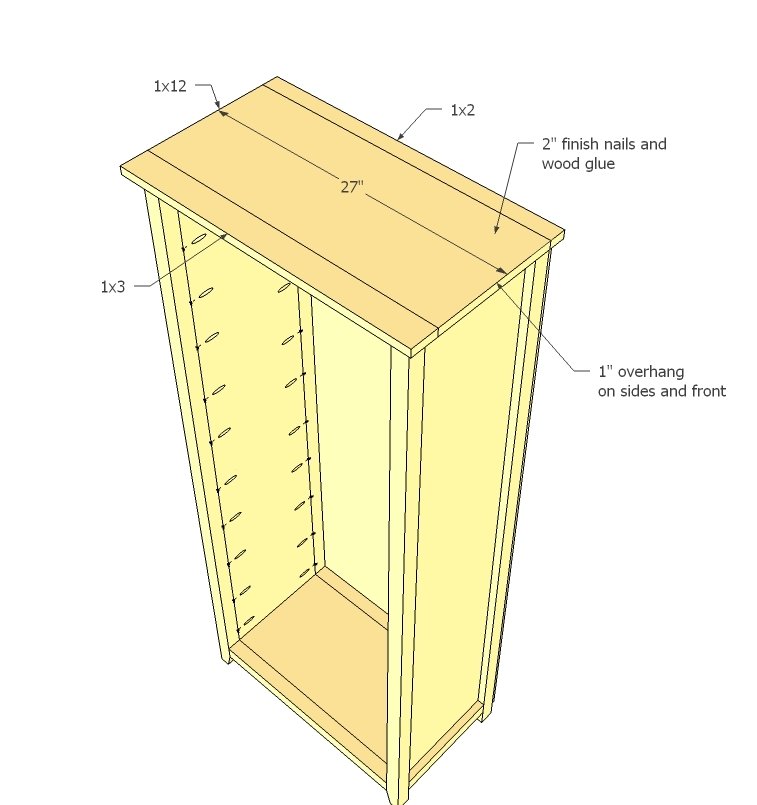
If you are using a pocket hole jig, build the top first, then attach to top as shown above.
Step 8
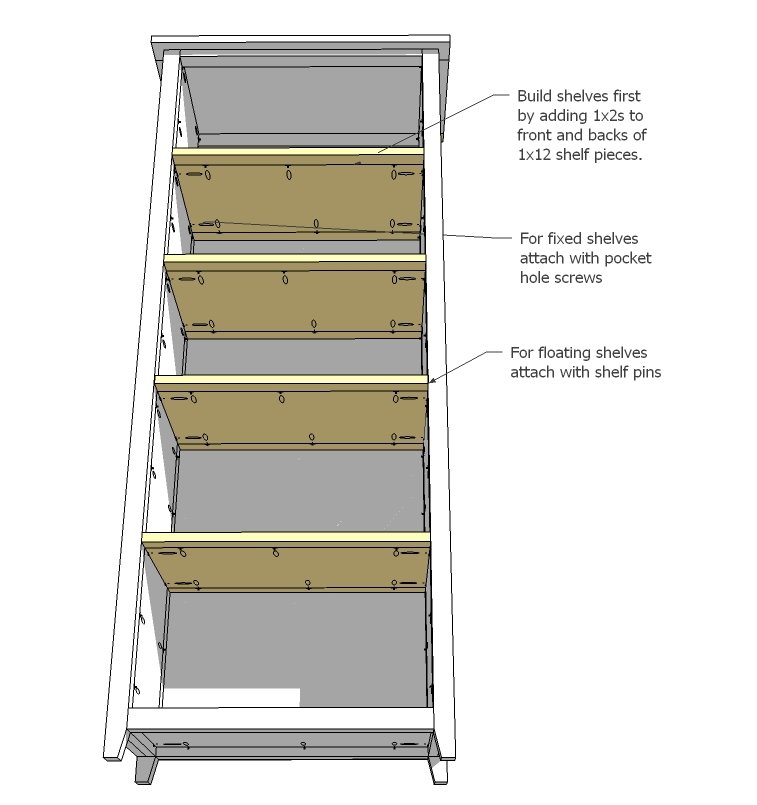
You can either use fixed shelves with the pocket holes or you can use shelf pins for adjustable shelves. Here's a video I found that could help explain how shelf pins are installed. I like to use a scrap piece of pegboard as my guide, or predrill a 1x2 with holes as a guide, and simply clamp on.
Finishing
Sand all surfaces, starting with a medium grit and finishing with fine. Wipe off the dust, fill any holes or gaps with wood filler, and sand smooth once dry. Apply primer if you're painting, then finish with your choice of paint or stain and seal with a durable clear topcoat. For outdoor projects, use exterior-rated primer, paint or stain, and sealer so the piece stands up to the weather.
Source (temporary): https://www.ana-white.com/woodworking-projects/channing-bookcase