Channing Desk Hutch
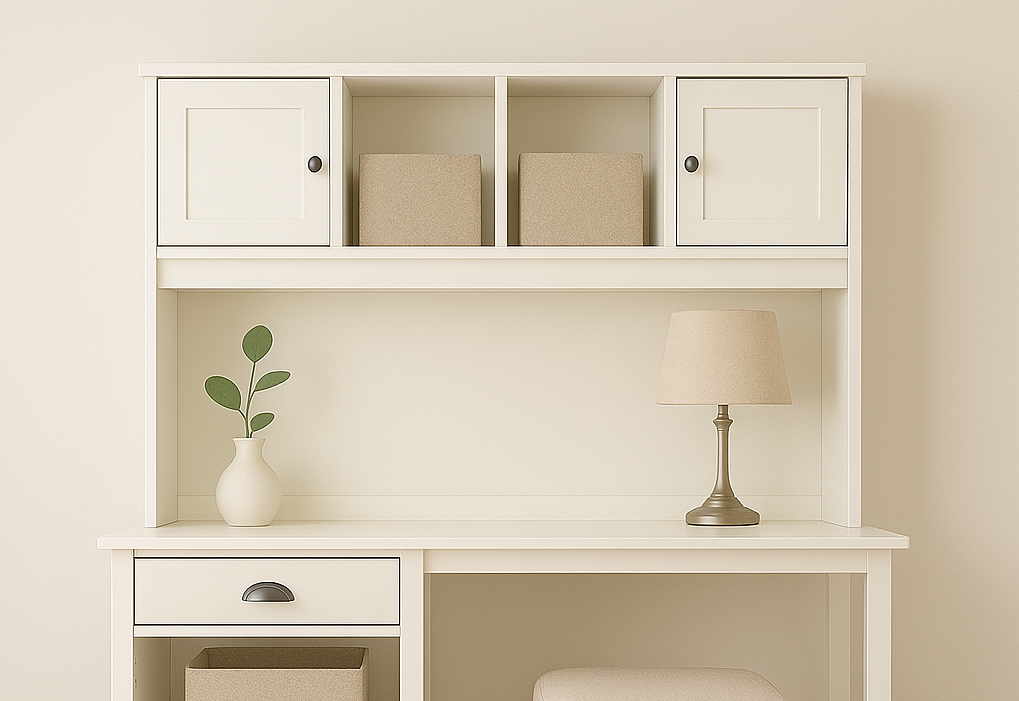
Build-Your-Own Desk Hutch (!) Turn any plain desk into an organizing superstar. This simple hutch matches our free desk plans perfectly, but it’s designed to sit on almost any desk you already have. Cubbies, shelves, and optional doors keep the homework hustle tidy and the craft chaos hidden—yay! Why you’ll love it • Free, step-by-step plans with cut list + diagrams • Beginner-friendly build—weekend project vibes • Fits most desks (easy to customize width & layout) • Loads of storage for bins, books, and treasures • Tons of real reader build photos for inspo and confidence Paint it to match your space, add bins, or swap in doors—make it yours. Grab the and build a hutch that works as hard as you do!
Specifications
| Project type | Desk, Desk Systems and Project Table Plans |
|---|---|
| Room | Teens |
| Style | Farmhouse Furniture |
| Difficulty | Beginner Projects |
| Estimated cost | $50 - $100 |
Dimensions
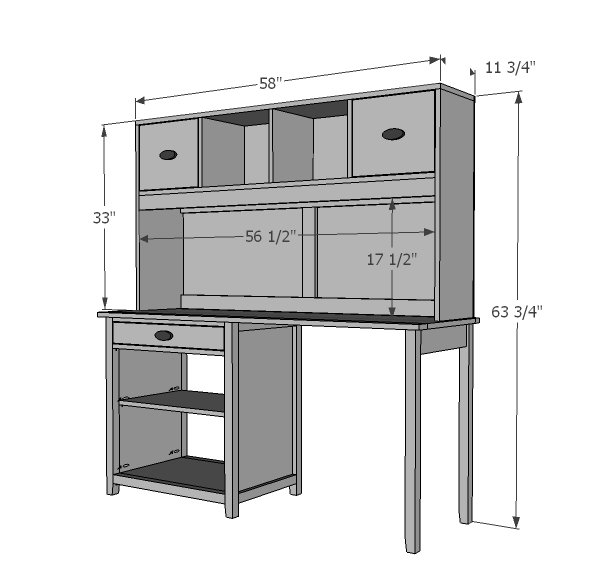
Use the size-specific shopping and cut lists below.
Shopping List
- 3 - 1x12 @ 8 feet long
- 3 - 1x3 @ 8 feet long
- 1 - sheet 1/4" plywood or backerboard
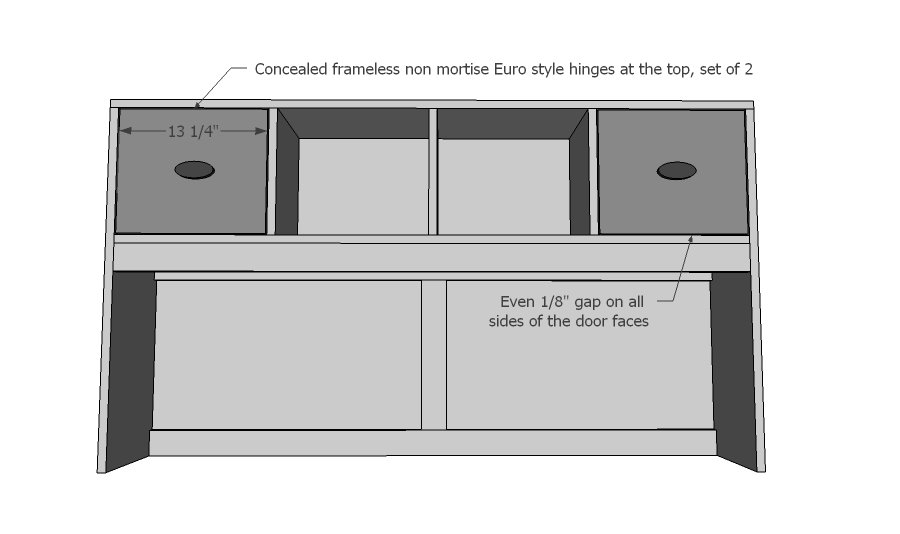
- 2 sets Euro Style hinges
Cut List
- 1 - 1x12 @ 58" (top)
- 2 - 1x12 @ 32 1/4" (sides)
- 1 - 1x12 @ 56 1/2" (bottom shelf)
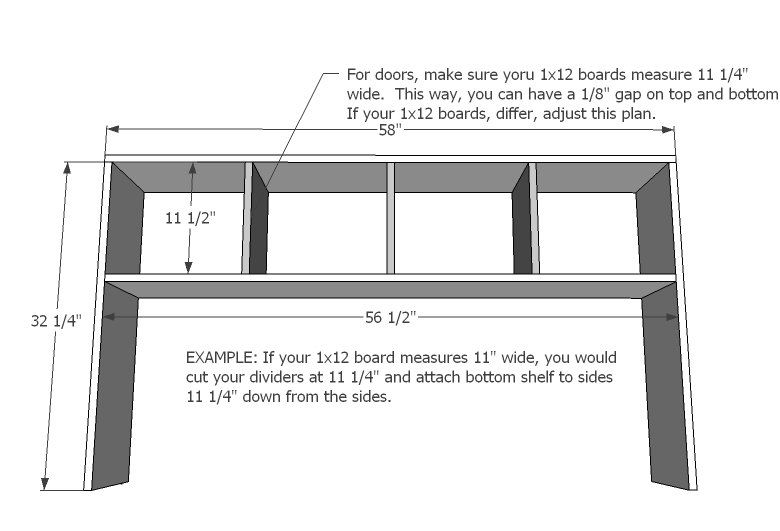
- 2 - 1x12 @ 11 1/2" (CUT TO FIT - dividers)
- 3 - 1x3 @ 56 1/2"
- 1 - 1x3 @ 15"
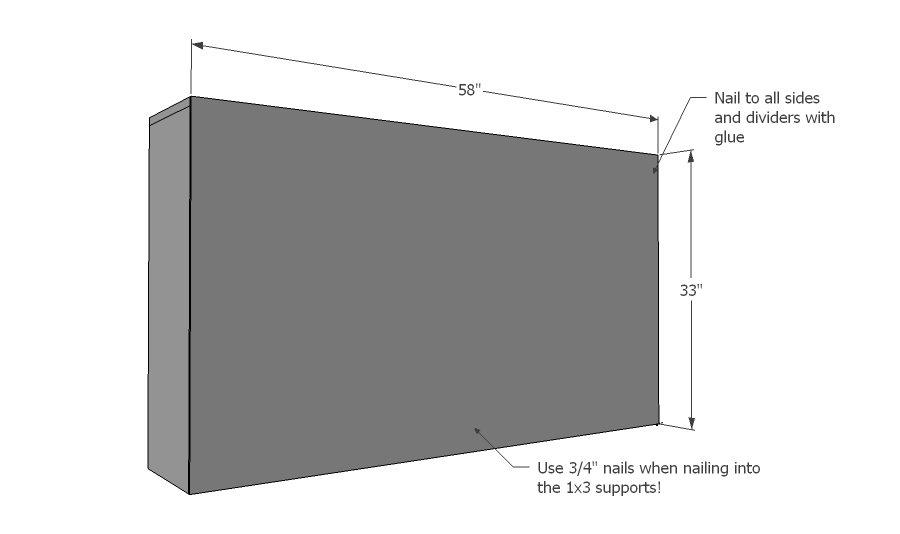
- 1 - 1/4" plywood @ 58" x 33"
- 2 - 1x12 @ 13 1/4"
Tools
- measuring tape
- square
- pencil
- safety glasses
- hearing protection
- drill
- circular saw
- nailer
- sander
- countersink drill bit
Step-by-step Instructions
Step 1
Build the box. Note that if your 1x12s are NOT 11 1/4" wide, you will need to make adjustments as noted in the plan. You can build with 2" countersunk screws or 1 1/4" pocket hole screws but I don't recommend nails because there is no face frame on this one. Check for square.
Step 2
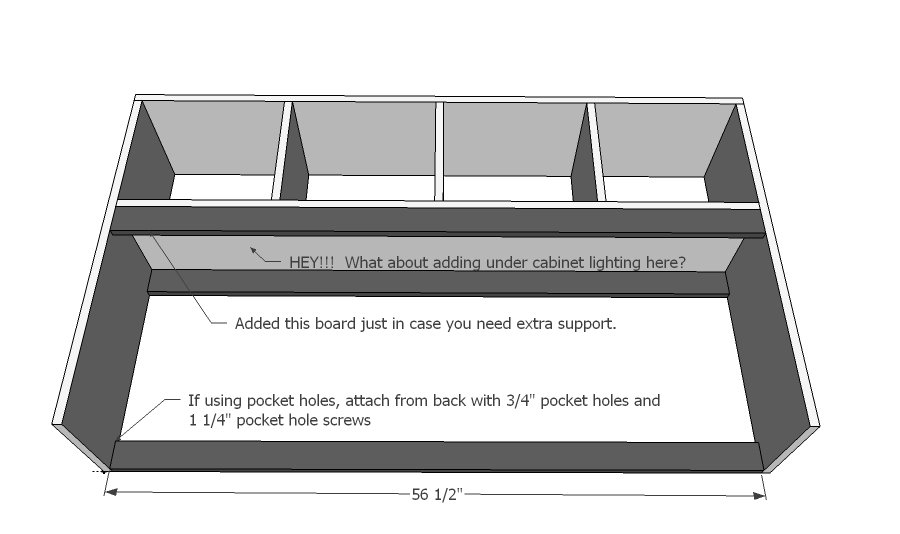
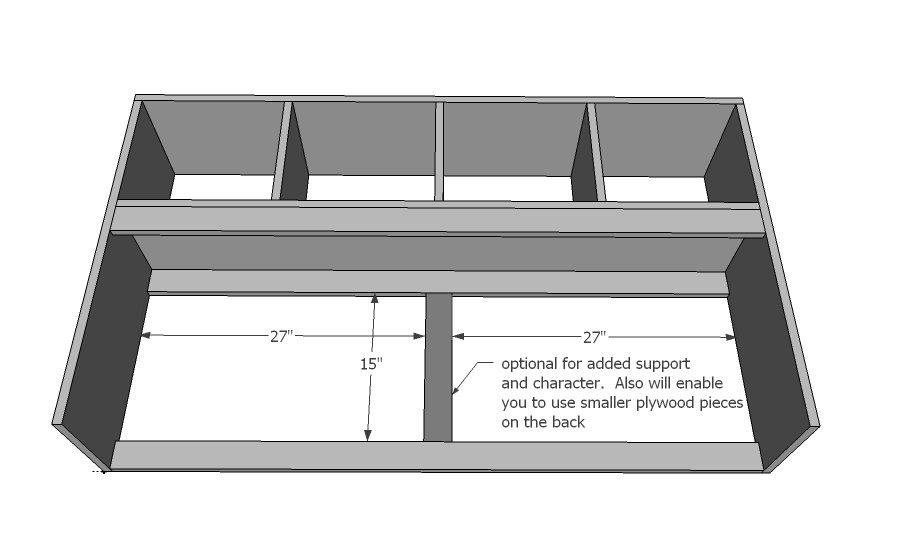
Supports - I added the front one just in case you need extra support. It's also a great spot to hide under cabinet lighting! All you would have to do is drill a hole for the power cord and hang! Image from Lowes. You can attach with 2" countersunk screws or pocket holes. On the top, make sure you also attach to bottom shelf, you can do this with nails and glue.
Step 3
This is optional, but will add some extra support to the center and looks charming.
Step 4
Attach back - be careful - you will need to use 3/4" nails when attaching to the 1x3 support boards.
Step 5
Finishing
Sand all surfaces, starting with a medium grit and finishing with fine. Wipe off the dust, fill any holes or gaps with wood filler, and sand smooth once dry. Apply primer if you're painting, then finish with your choice of paint or stain and seal with a durable clear topcoat. For outdoor projects, use exterior-rated primer, paint or stain, and sealer so the piece stands up to the weather.
Source (temporary): https://www.ana-white.com/woodworking-projects/channing-desk-hutch