Charlie Nightstand
to build your own wood nightstand inspired by the Pottery Barn Kids Charlie Nightstand or Bedside Table. This timeless nightstand features a narrow but deep profile, with a large drawer and large roomy bottom shelf.
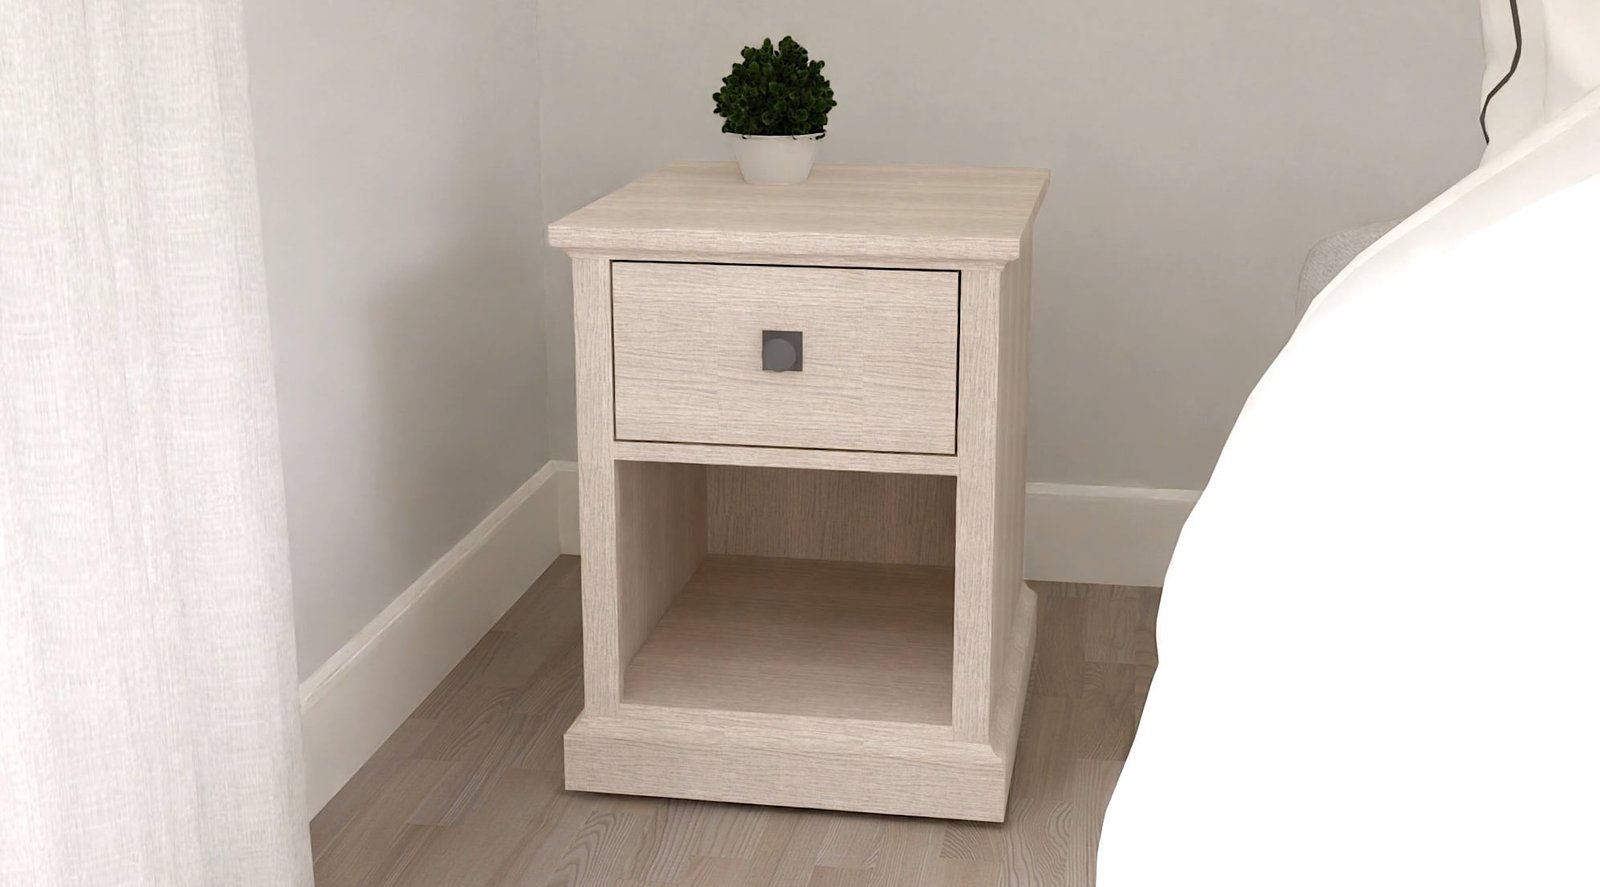
Specifications
| Project type | Nightstands |
|---|---|
| Room | Bedroom |
| Difficulty | Intermediate |
Dimensions
Use the size-specific shopping and cut lists below.
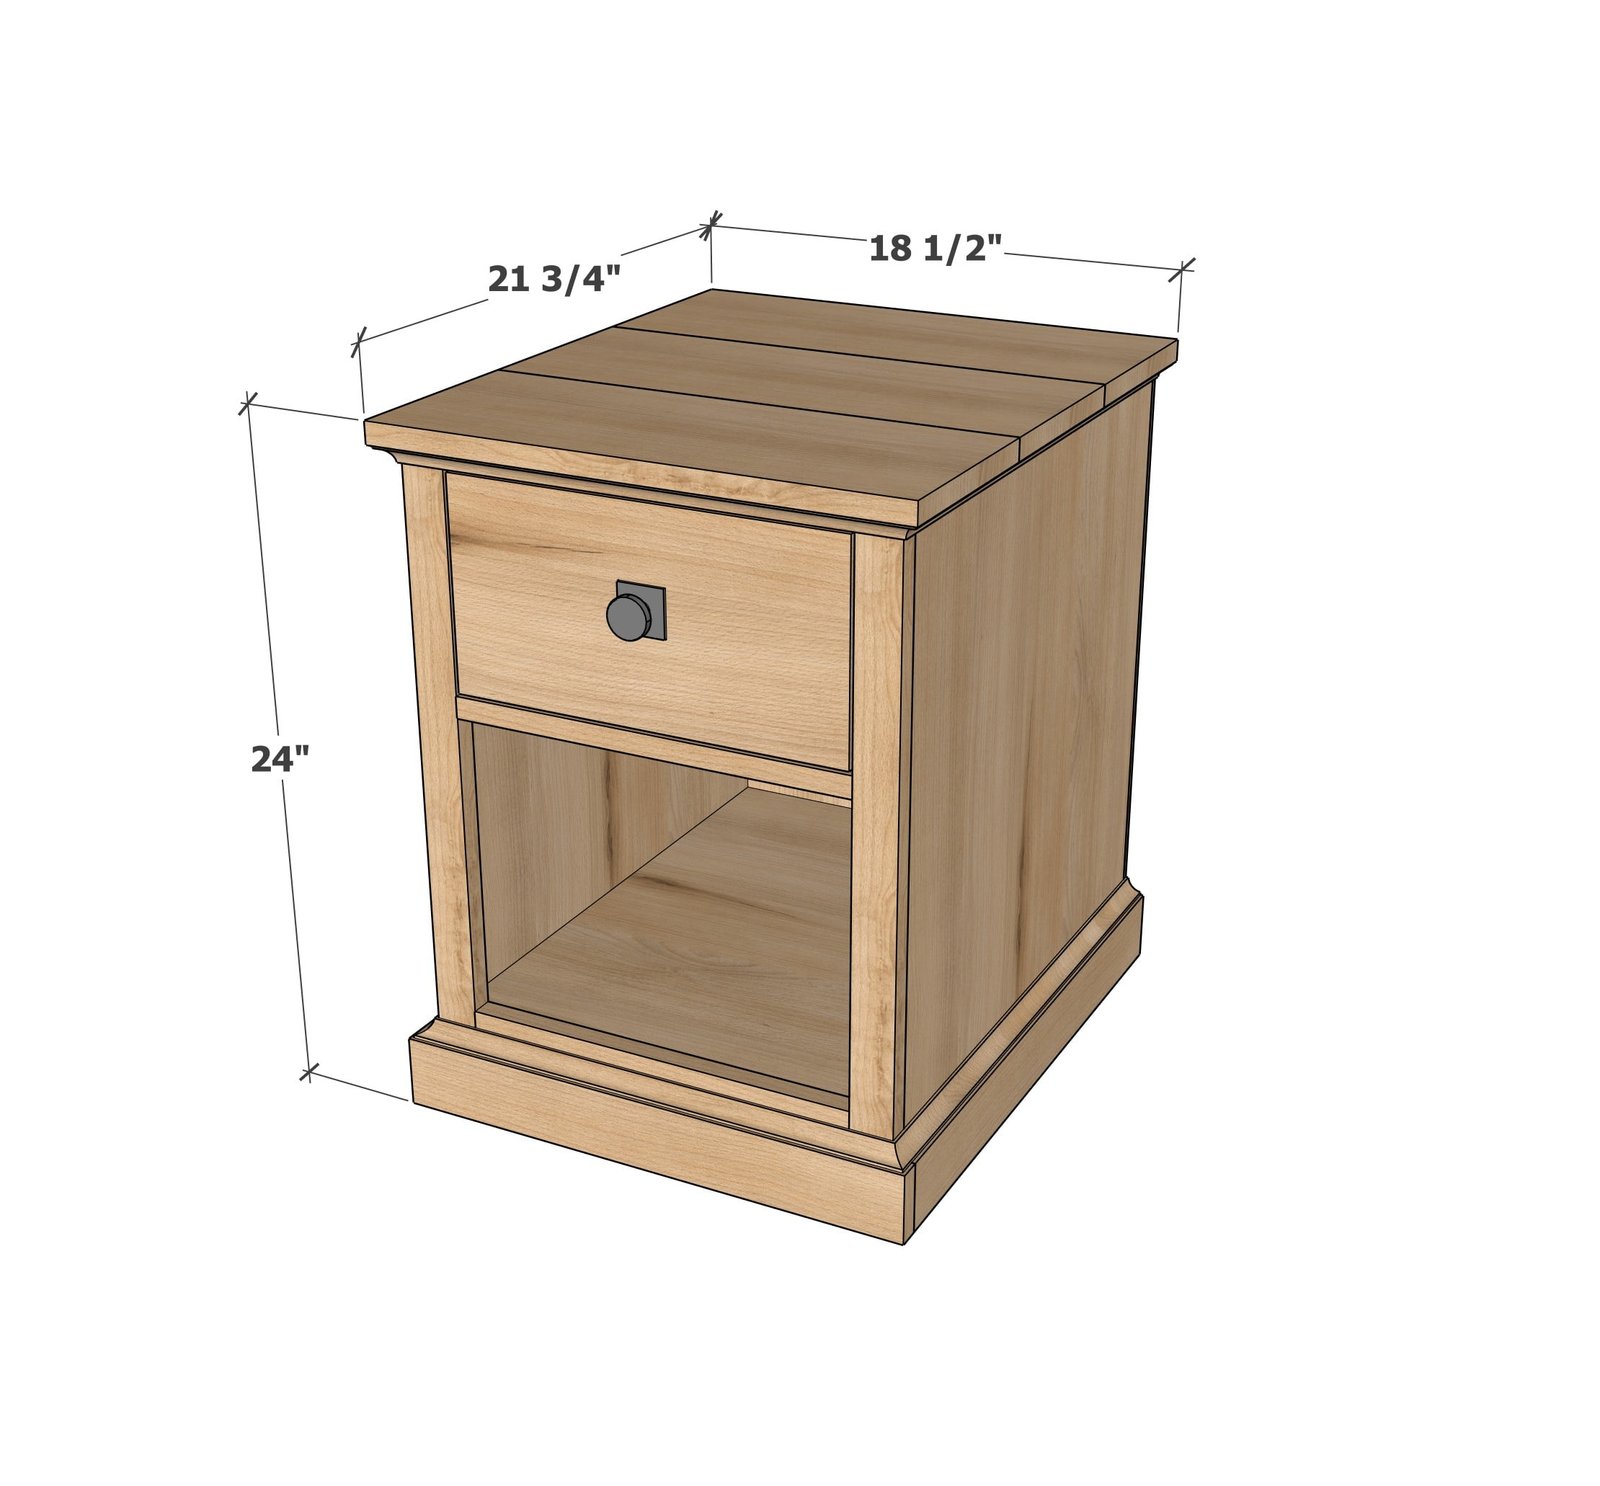
Shopping List
- 1 - 3/4" plywood at 8 feet long x 20" wide
- 1 - 1/4" plywood 24" x 30"
- 1 - 1x2 @ 8 feet long
- 1 - 1x3 @ 8 feet long
- 1 - 1x4 @ 5 feet long (drawer box)
- 1 - 1x8 @ 6 feet long
- 2 - 6' long 3/4" x 3/4" wood cove moulding
- 1-1/4" pocket hole screws (course thread, about 40)
- 1-1/4" and 3/4" collated brad nails
- 18" white roller drawer slides, bottom corner mount
- knob or handle
- wood filler
- 120 grit sandpaper
- wood paint or stain
Cut List
Cut List is for ONE Nightstand
Carcass
- 2 - 3/4" plywood @ 20" x 23-1/4" - sides
- 1 - 3/4" plywood @ 20" x 15-1/2" - bottom shelf
- 1 - 1x3 @ 15-1/2" - back support
- 1 - 1/4" plywood @ 23-1/4" x 17" - back
- 2 - 1x2 @ 23-1/4" - face frame stiles
- 3 - 1x2 @ 14" - face frame rails - cut to fit if needed
- 2 - 1x3 @ 22" - base trim, sides
- 1 - 1x3 @ 18-1/2" - base trim, front - cut to fit if needed
- 4 - 1x2 @ 9" - drawer slide cleats
- 3 - 1x8 @ 18-1/2" - tabletop
- cove moulding cut to fit
Drawer Box
- 2 - 1x4 @ 18" - drawer box sides
- 2 - 1x4 @ 11-1/2" - drawer box front and back, cut to fit opening, should be 2-1/2" less than opening measurement
- 1 - 1/4" plywood @ 18" x 13"
- 1 - 1x8 @ 13-3/4" - drawer face
Tools
- measuring tape
- square
- pencil
- safety glasses
- kreg-jig
- drill
- circular saw
- nailer
- sander
Step-by-step Instructions
Drill 3/4" pocket holes along both ends of the bottom shelf.
Drill 3/4" pocket holes facing upward on the INSIDES of the side panels (for attaching the top in later steps). Two holes, about 6" in from edges, is sufficient, as we will be attaching the top at the front and back as well. Attach the bottom shelf to the two side panels with 1-1/4" pocket hole screws and glue. If it helps, a few 1-1/4" brad nails can be used to tack the carcass together, to act as a clamp and keep the pieces in place when you go to pocket hole.
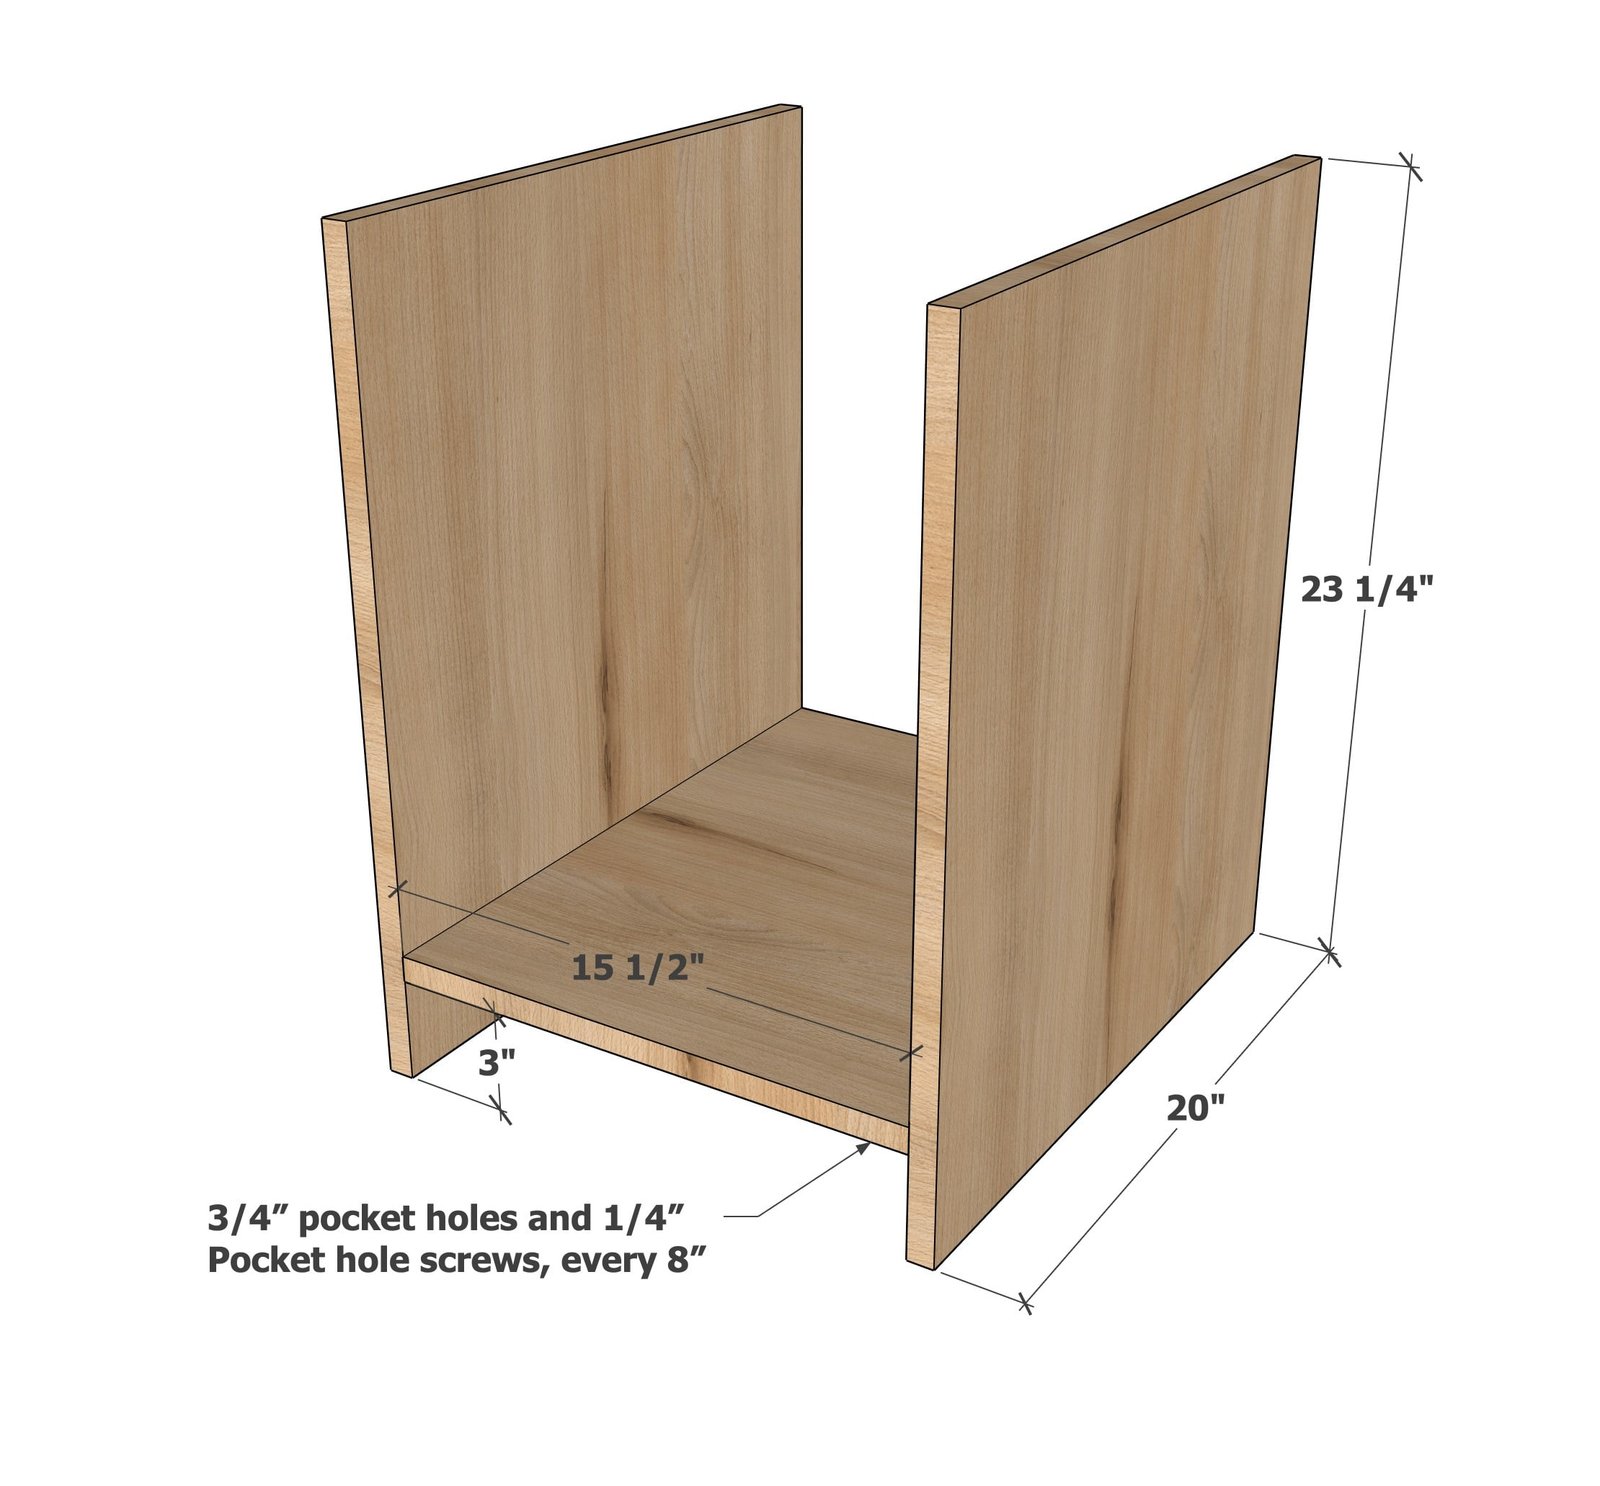
Step 2
For the 1x3 support at the back, drill two pocket holes on each end. Then drill pocket holes facing upward for attaching the top, but place these pocket holes on the INSIDE of the cabinet (as once the plywood is on the back, you won't be able to access the pocket holes). Attach the 1x3 at the back with 1-1/4" pocket hole screws.
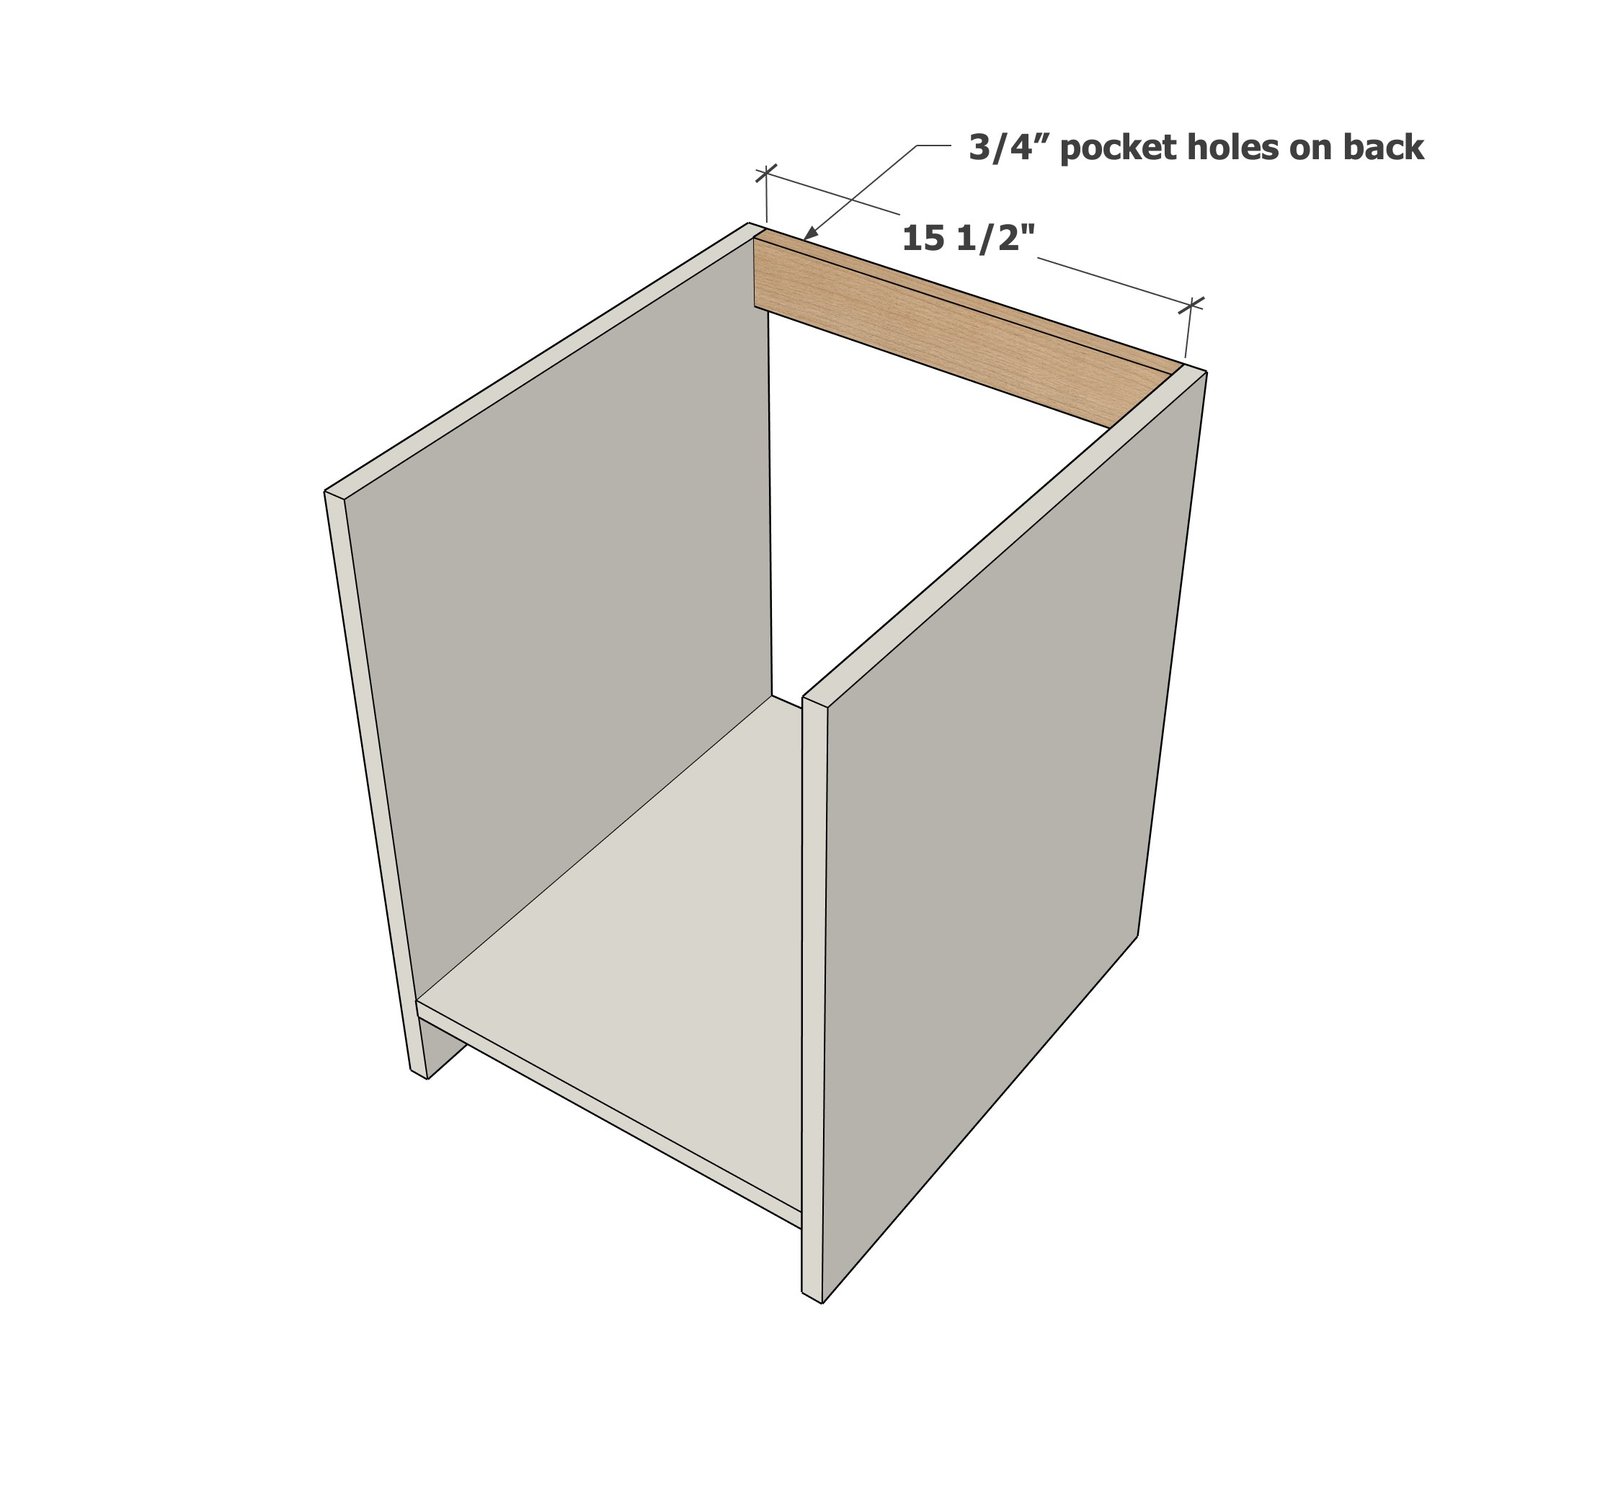
Step 3
Cut the 1/4" plywood panel from the back and attach with 3/4" brad nails and wood glue. Use the plywood panel to square up the nightstand.
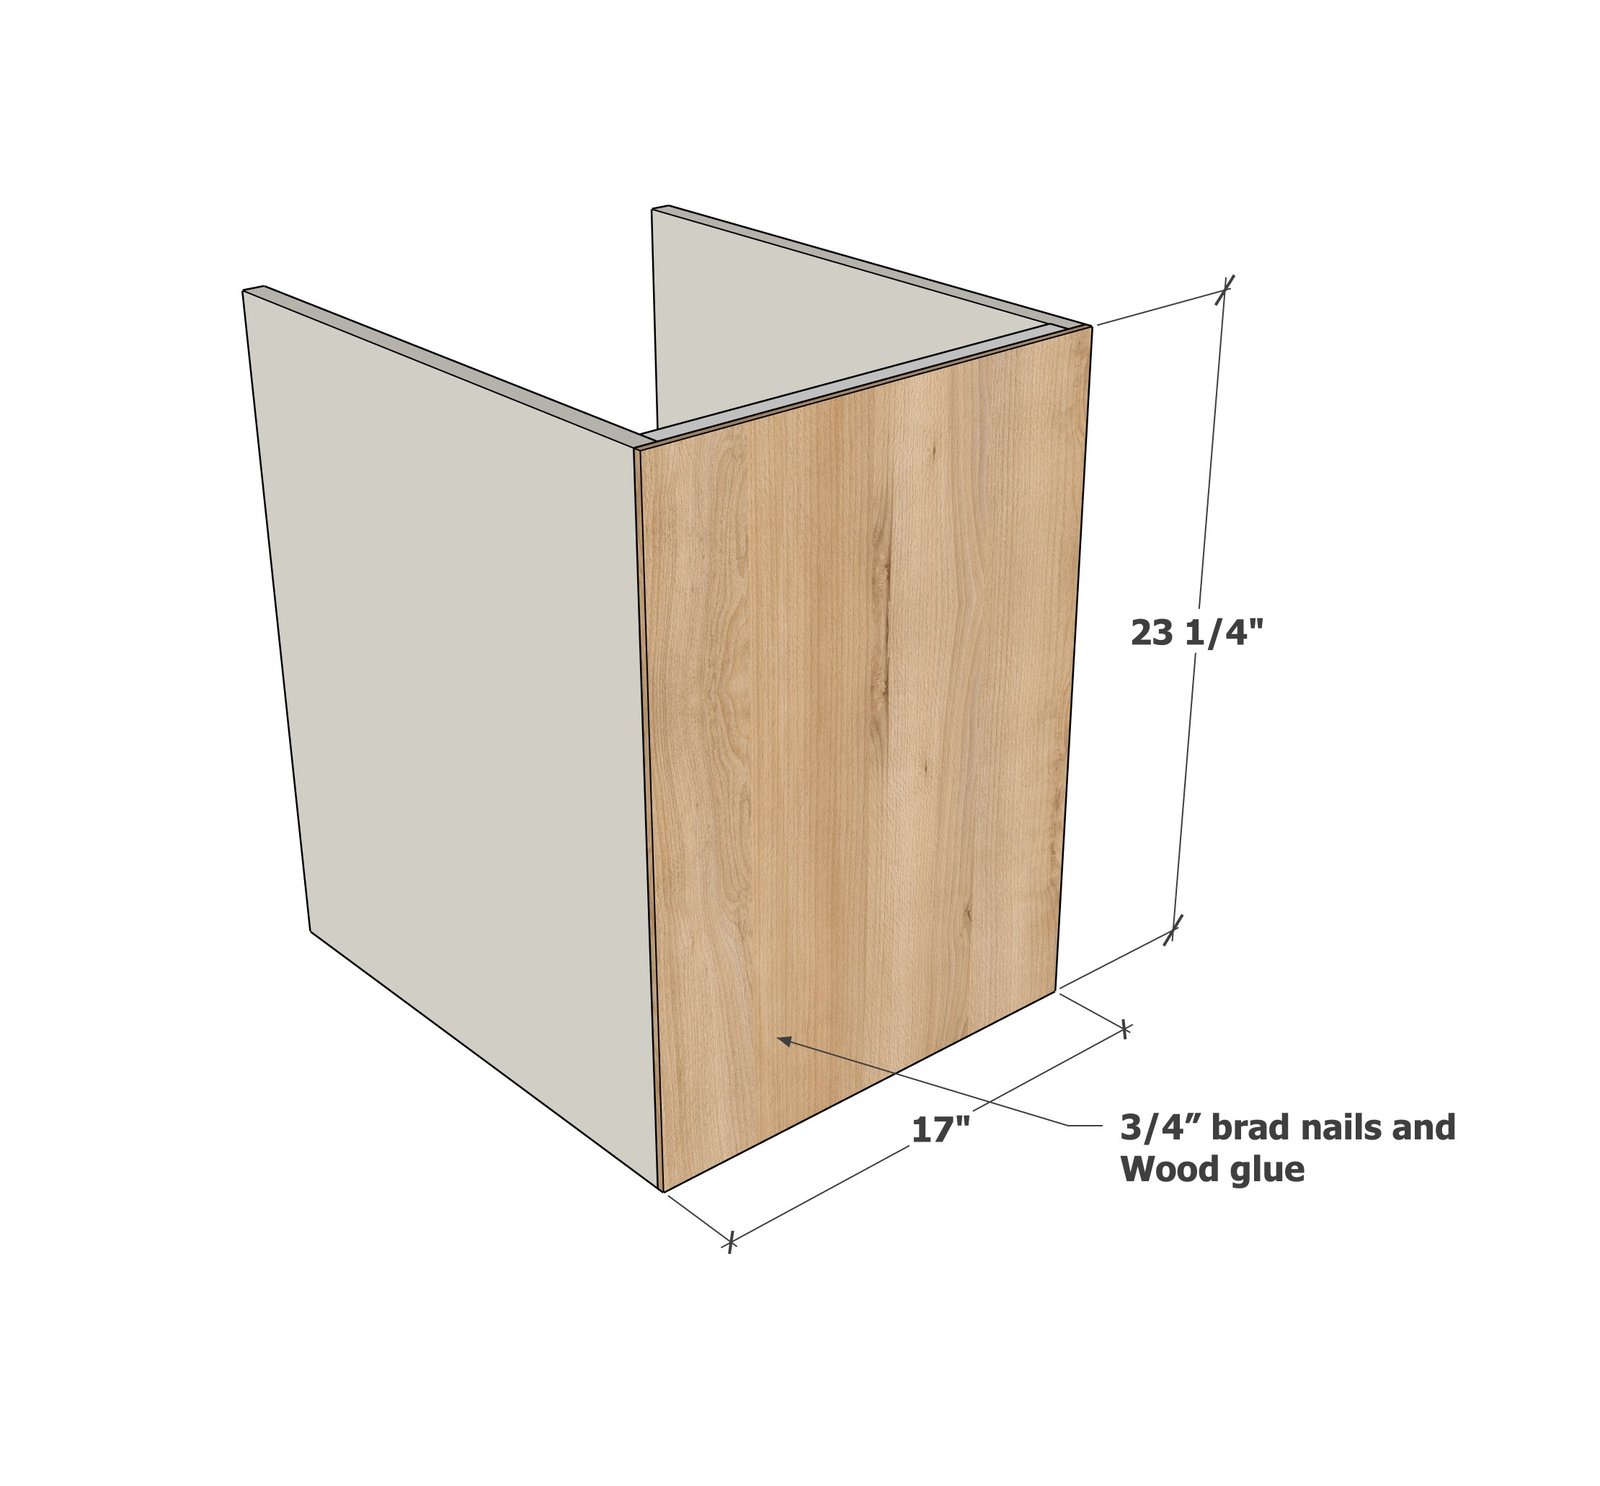
Measure the width of the carcass at the location of the bottom shelf, and make sure it is 17" wide.
Build a face frame with 1x2s as shown, so the face frame matches the width of the carcass - this should be 17". If needed, cut the 14" 1x2 as needed to get this to work out. Join the 1x2 face frame pieces together with 3/4" pocket holes and 1-1/4" pocket hole screws. Tack on with 1-1/4" brad nails and wood glue.
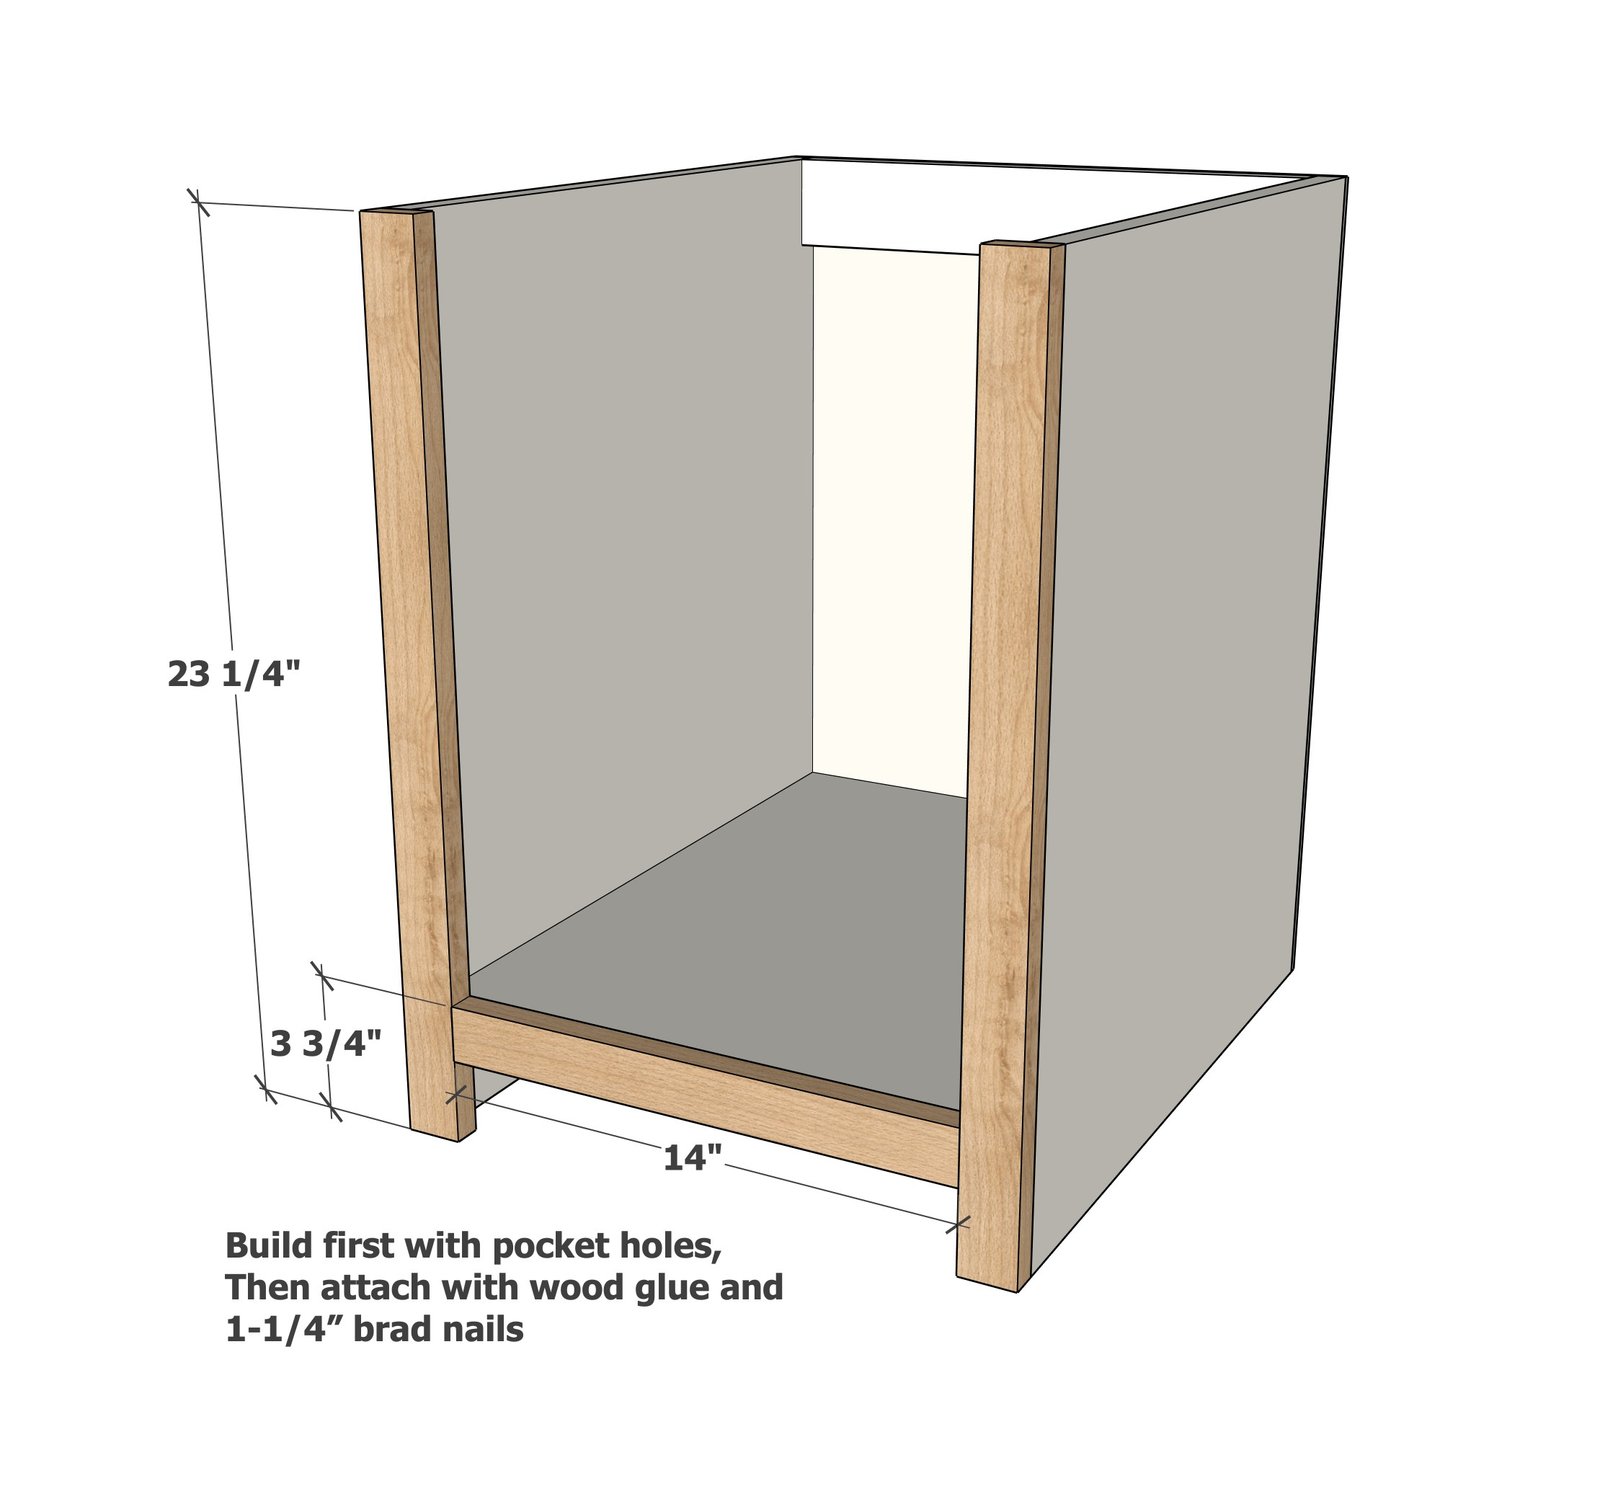
Step 5
Measure and cut to match 1x3 base on both sides.
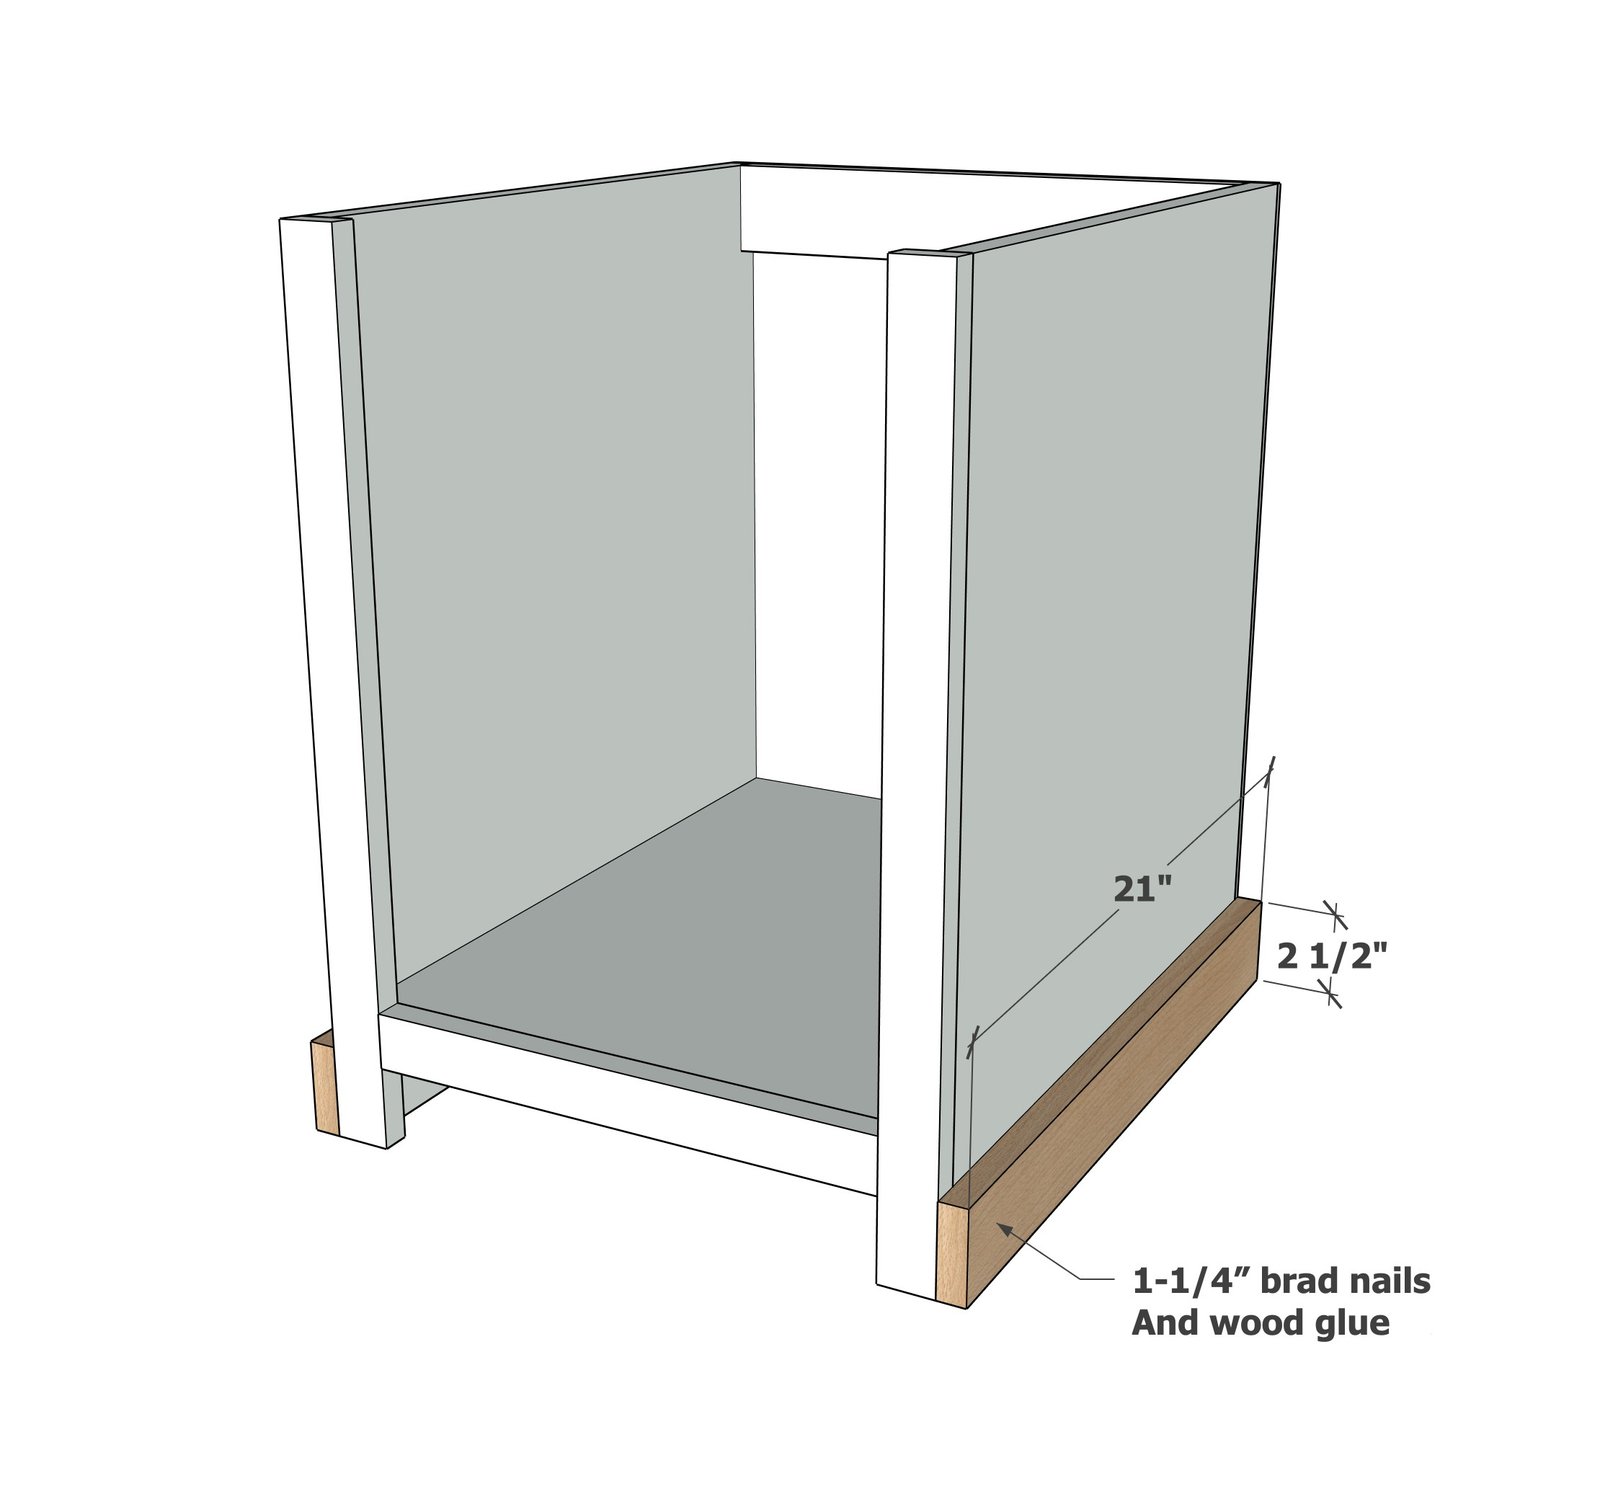
Step 6
Measure and cut the 1x3 base for the front and attach with 1-1/4" brad nails and glue.
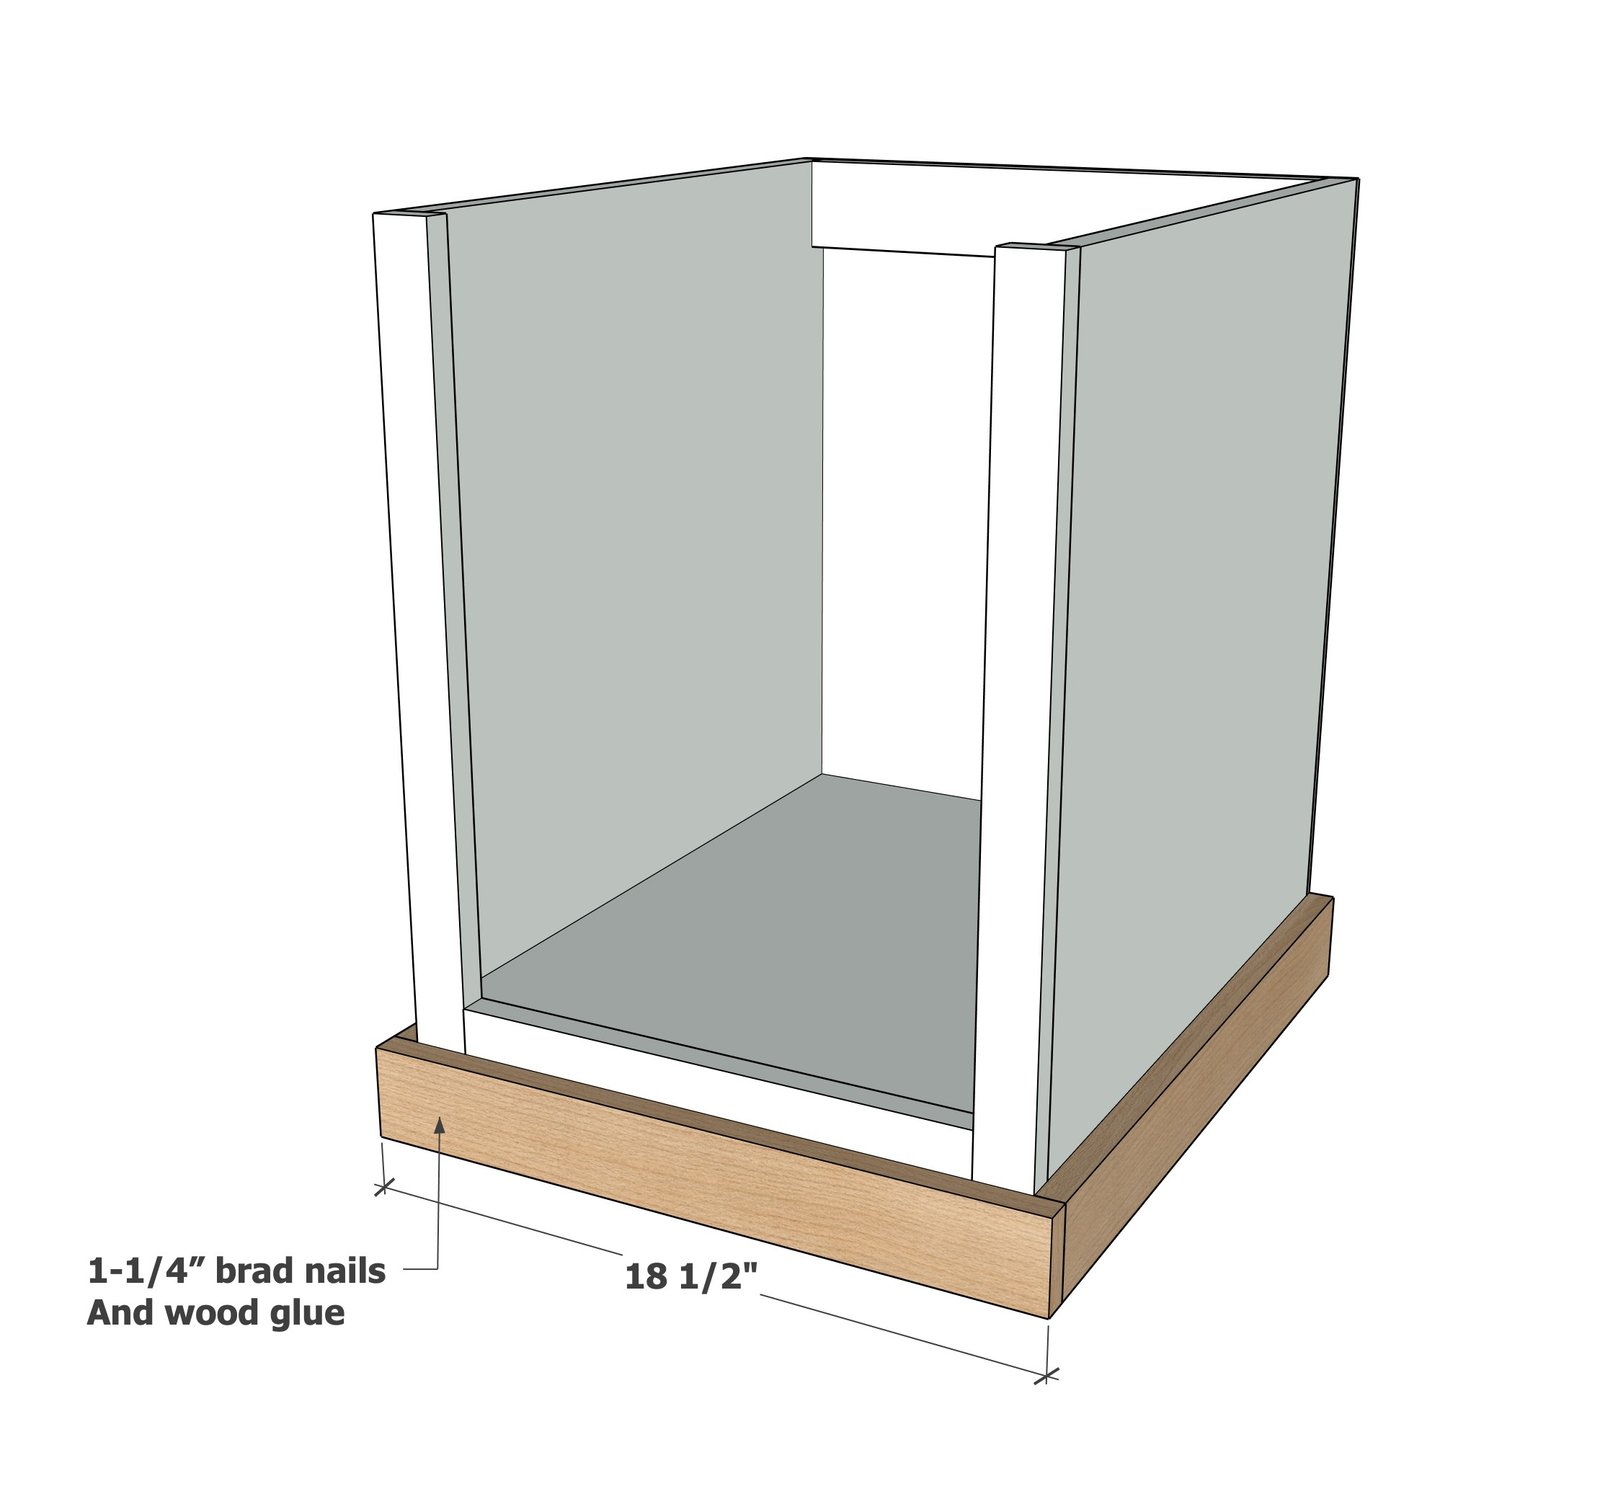
Step 7
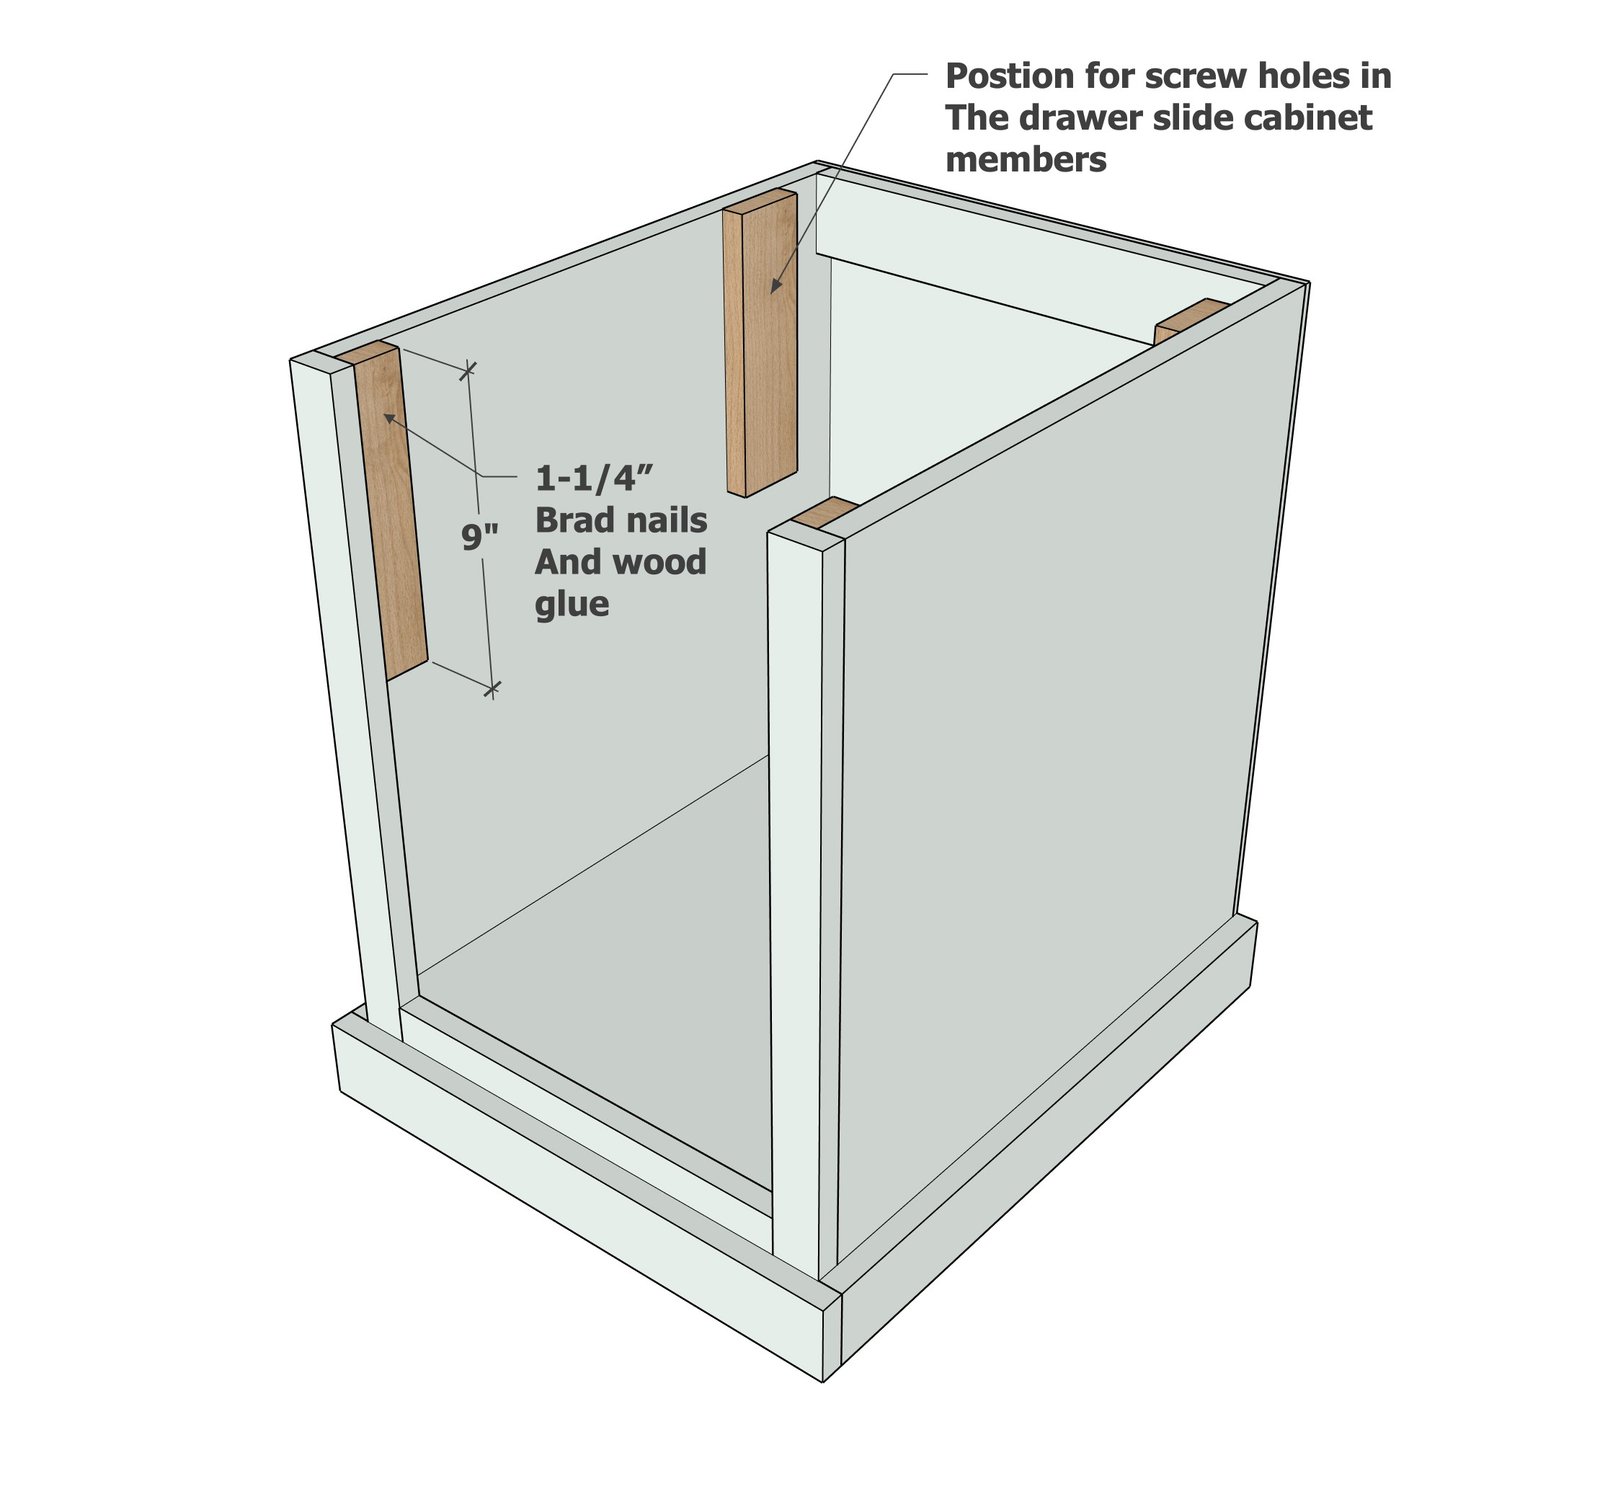
The drawer slides need inner supports to move the drawer side past the front face frame. Add 1x2s or 1x3s as shown, making sure they are placed to match the holes in your drawer slide cabinet members.
Step 8
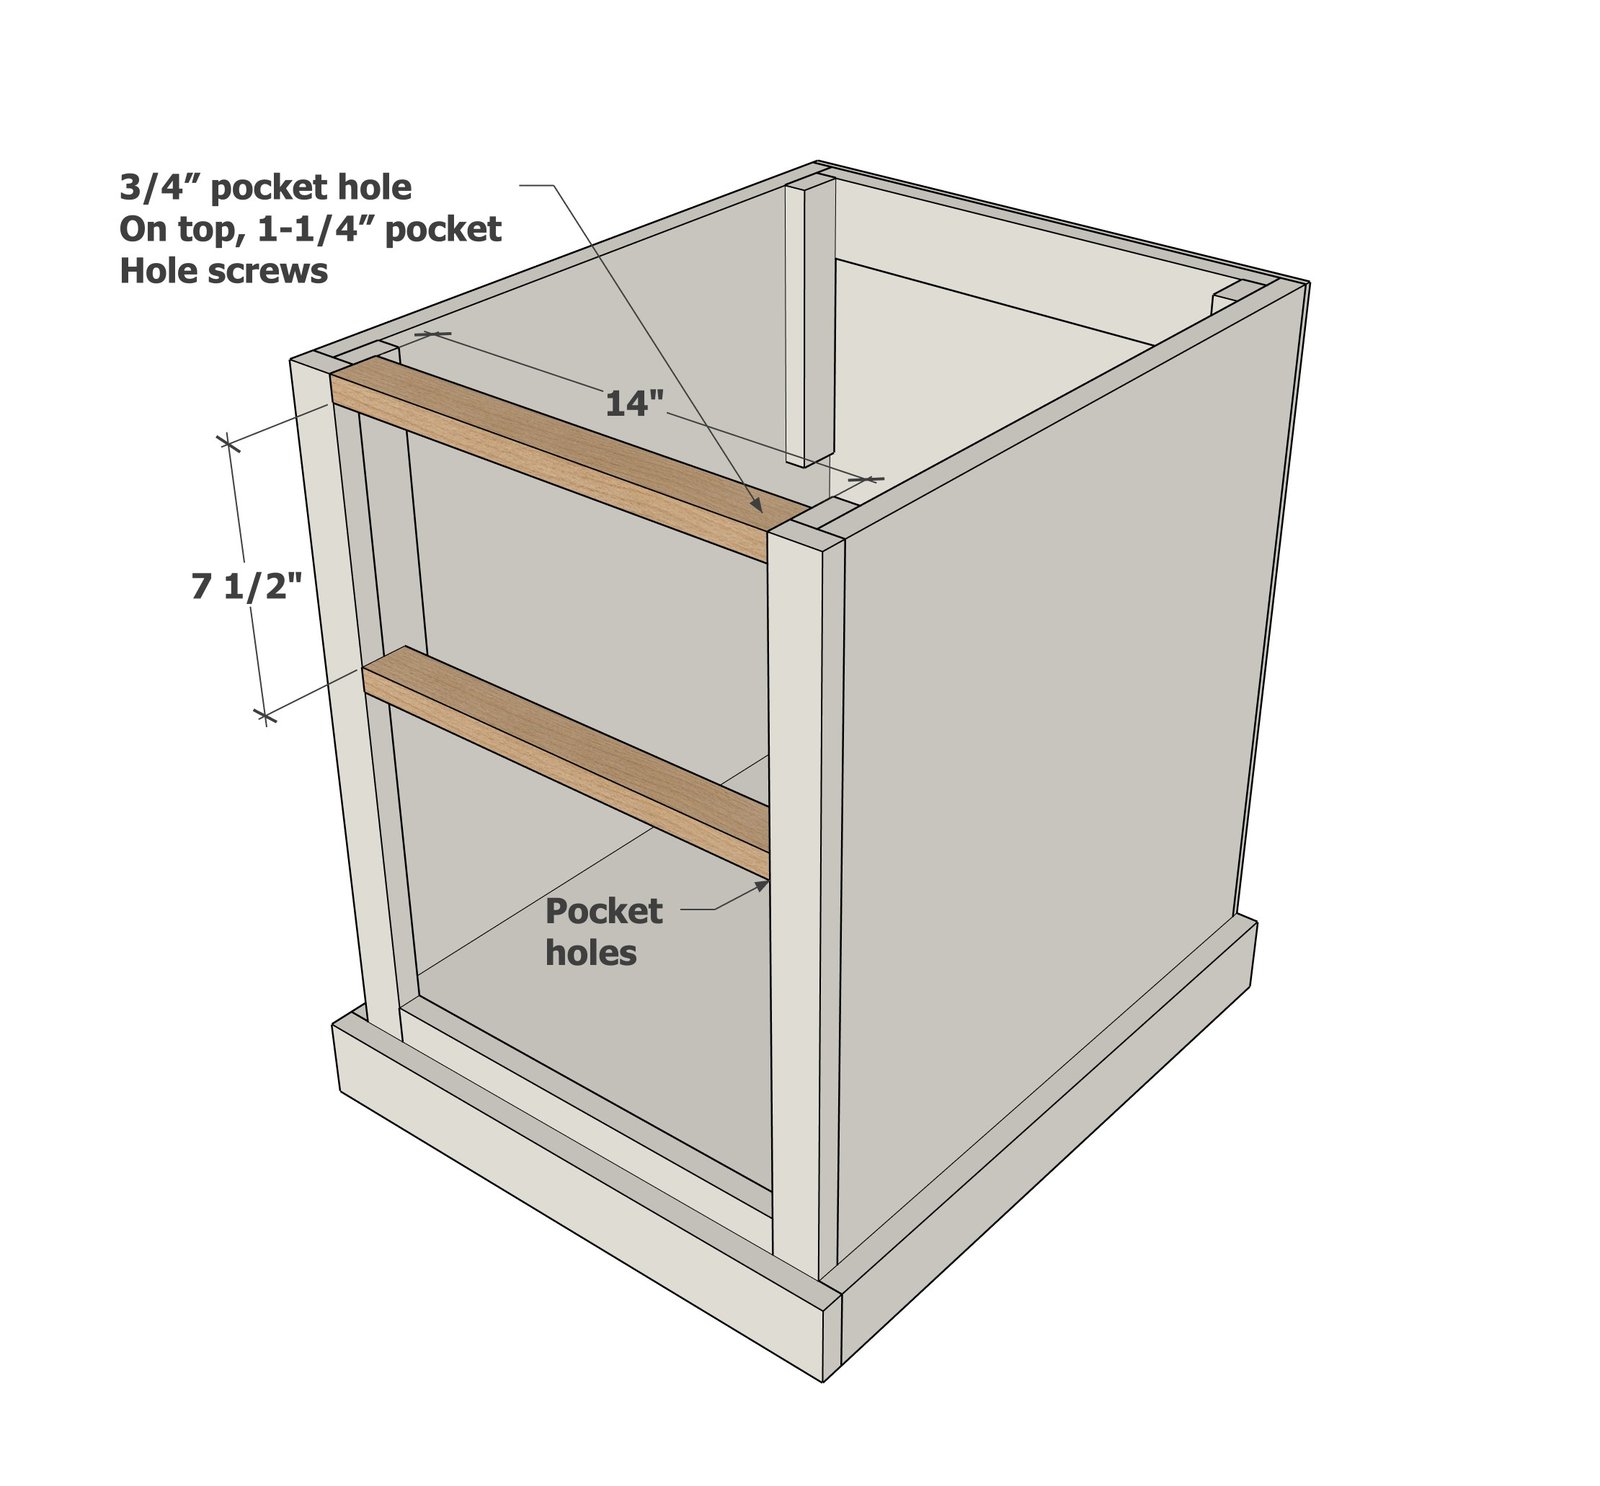
Finish the framing now of the drawer face by cutting 1x2s to the same length as the bottom face frame 1x2 (expected 14"). Drill pocket holes on the ends and attach with 1-1/4" pocket hole screws and wood glue.
Step 9
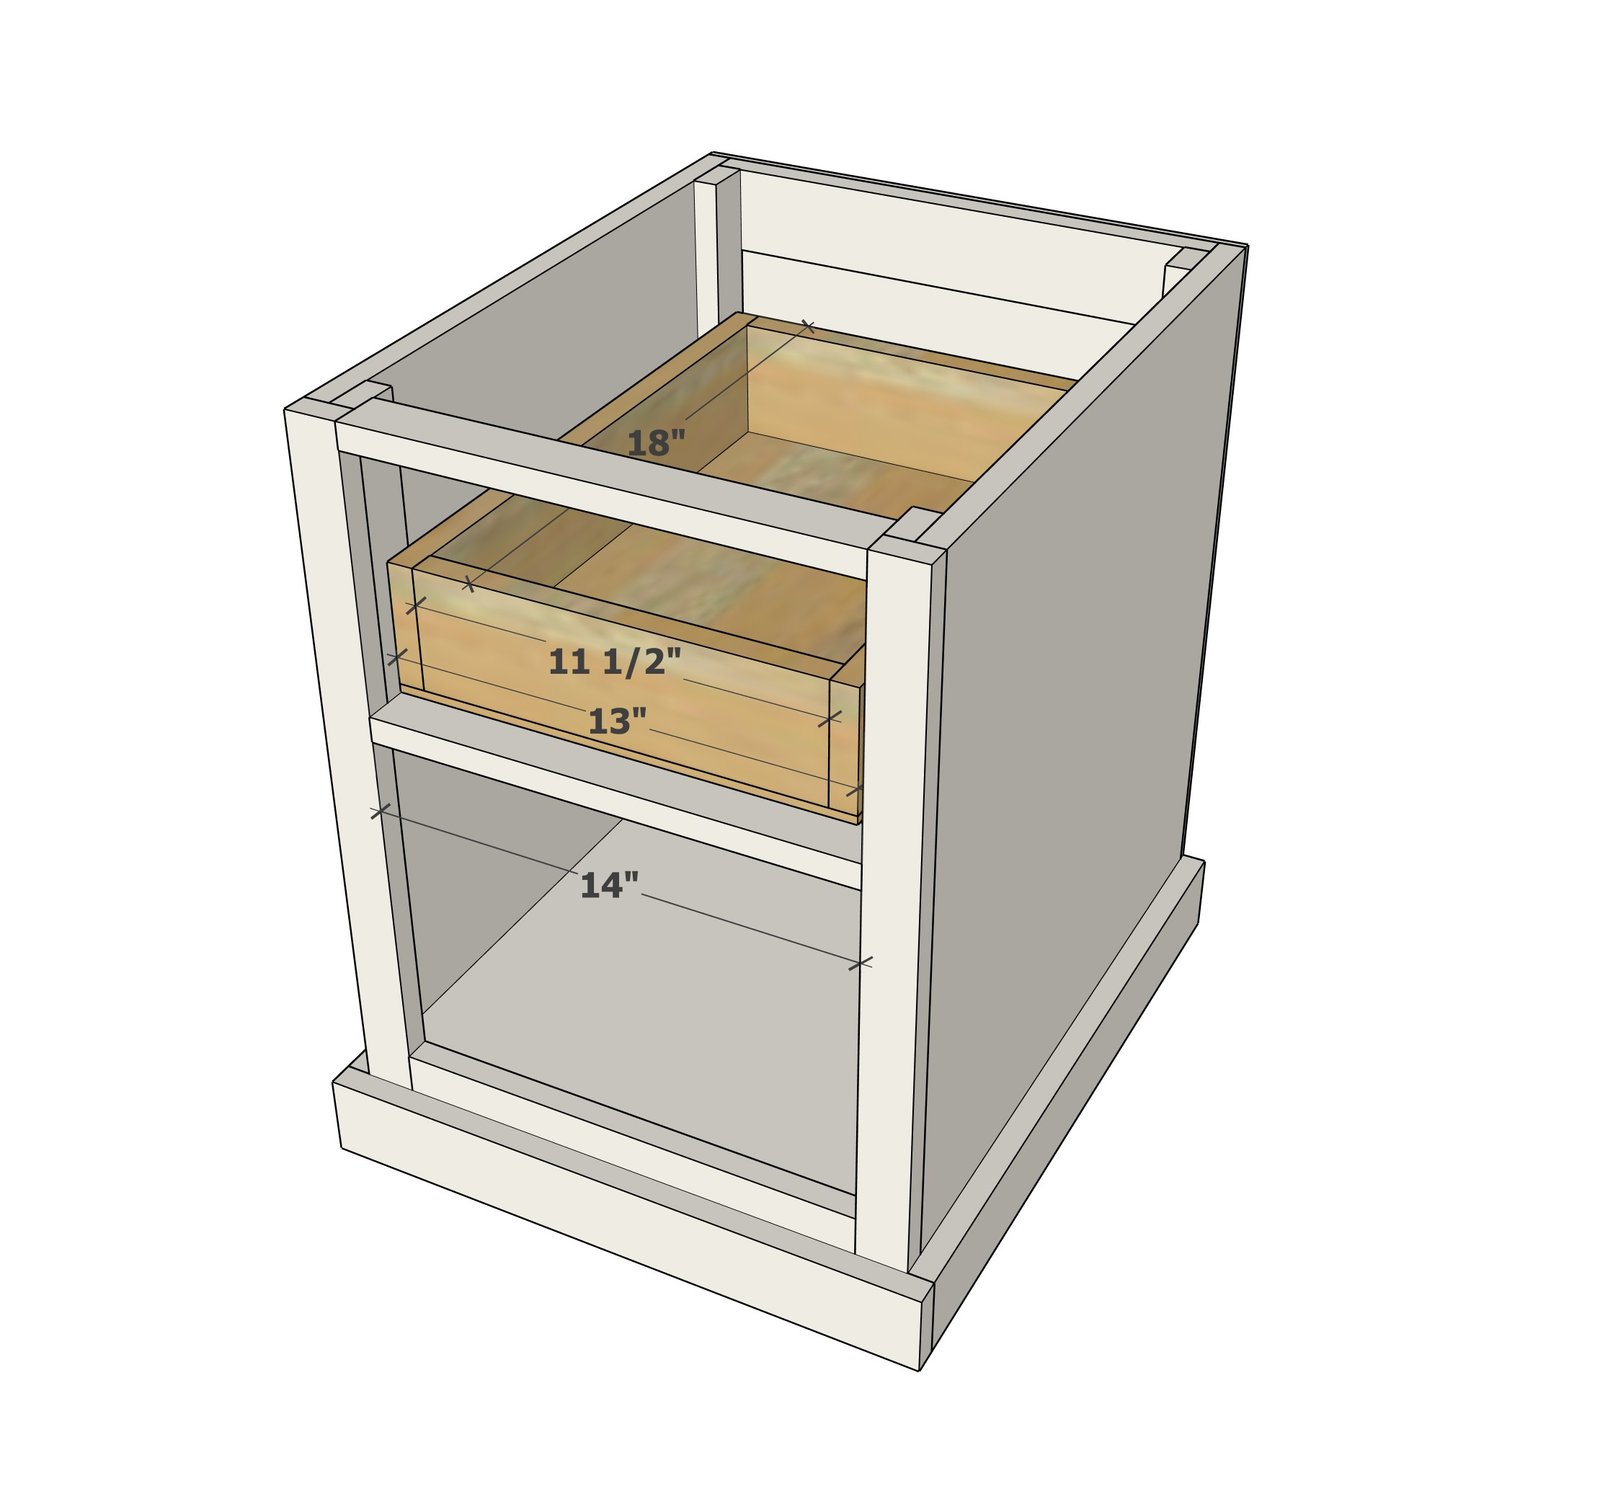
Measure the interior of the drawer opening - it should be 14". The drawer dimensions given are based off of a 14" width - if your opening differs, adjust the cut list so the drawer is 1" smaller than the opening width wise. Build the drawer with 1x4 boards, using 1-1/4" brad nails and wood glue. Attach the 1/4" bottom with 3/4" brad nails and wood glue. Install the drawer box using drawer slides in the opening, inset 3/4" to all for the drawer face in later steps. Here is my video tutorial showing the steps to install a drawer using this drawer slide method.
Step 10
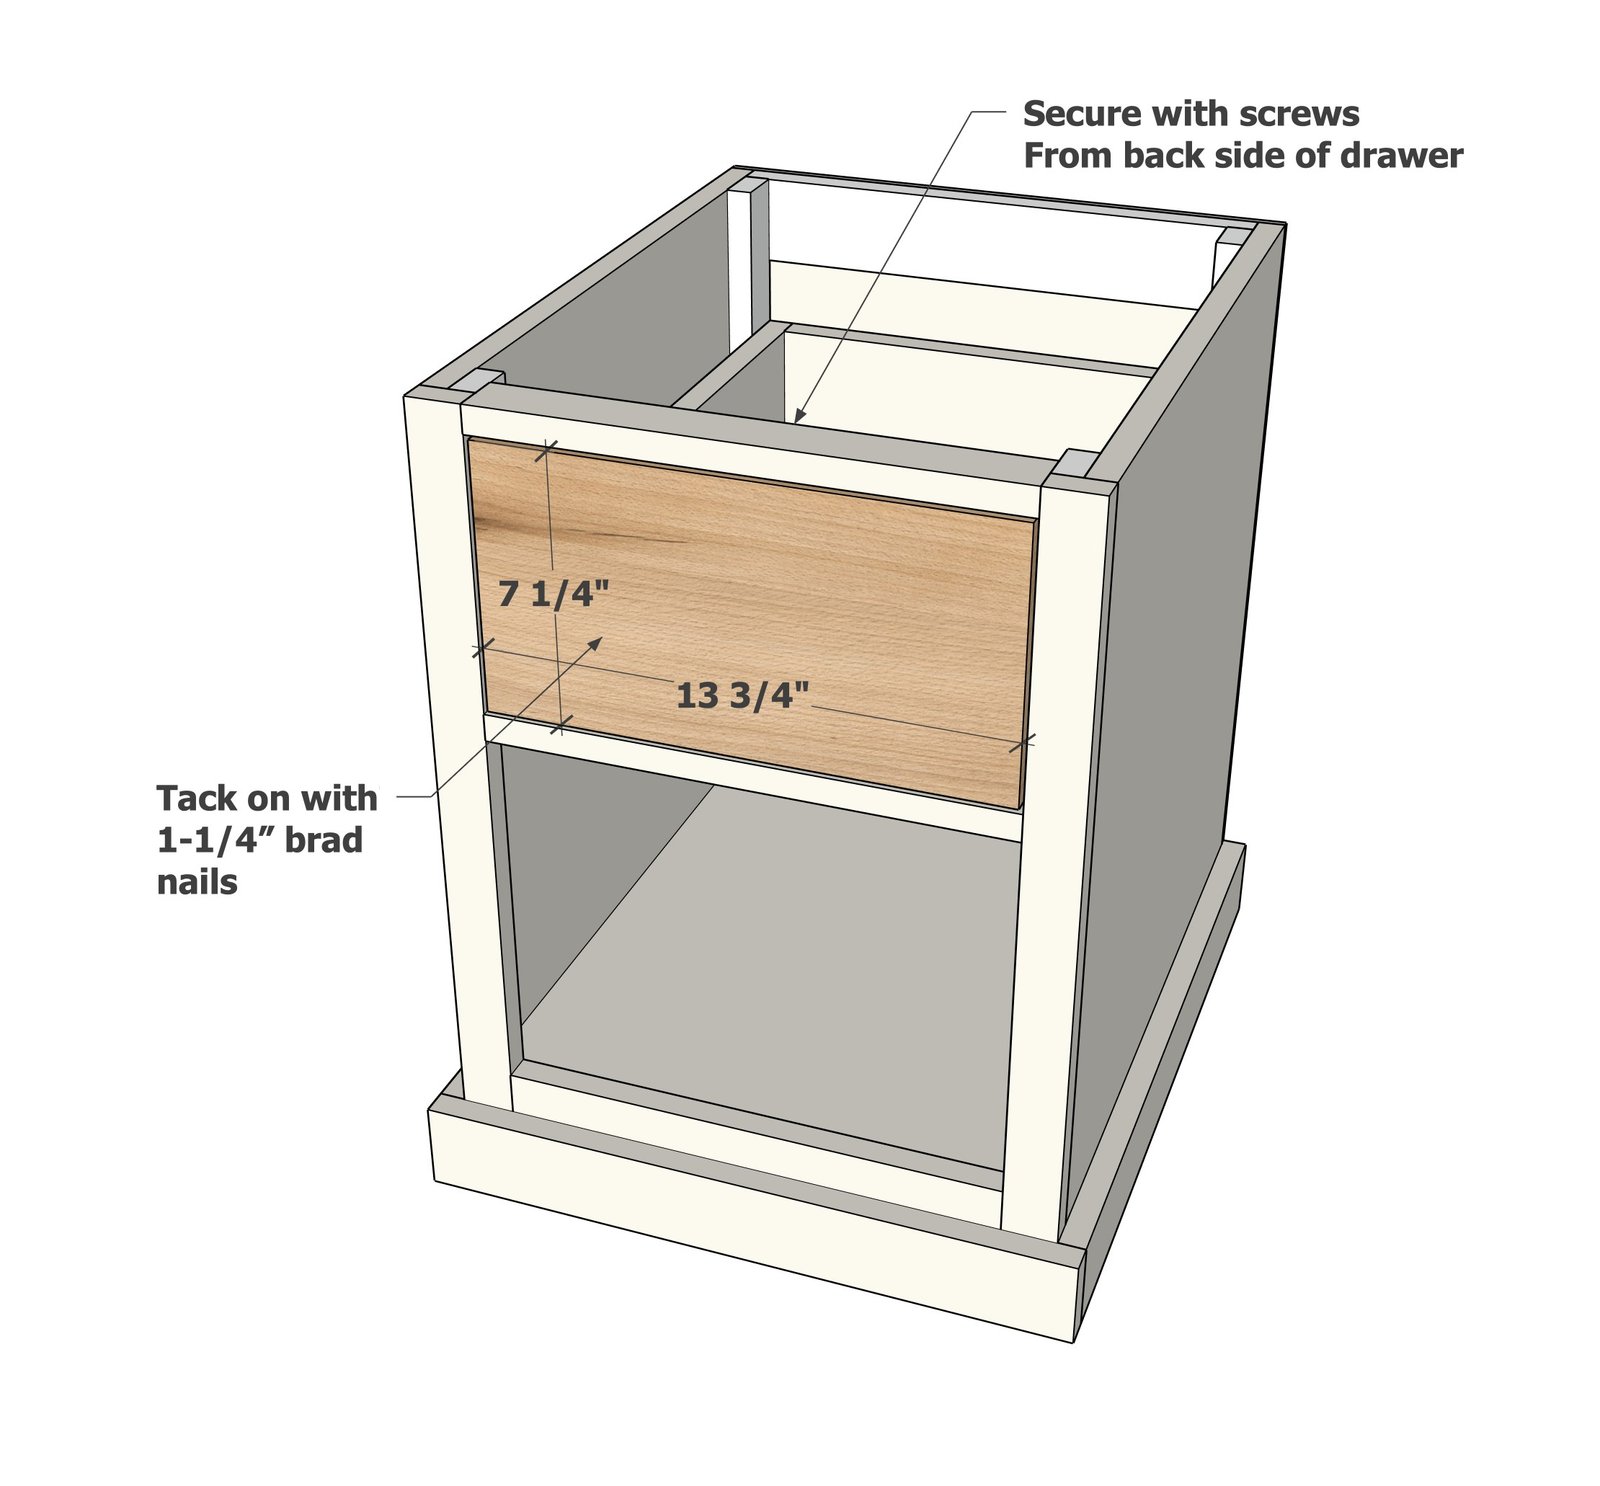
Cut the 1x8 drawer face and attach to the drawer box, with a 1/8" gap around all four sides. Use 1-1/4" brad nails and wood glue to attach. Further attach with 1-1/4" screws from inside (yes you can use pocket hole screws)
Step 11
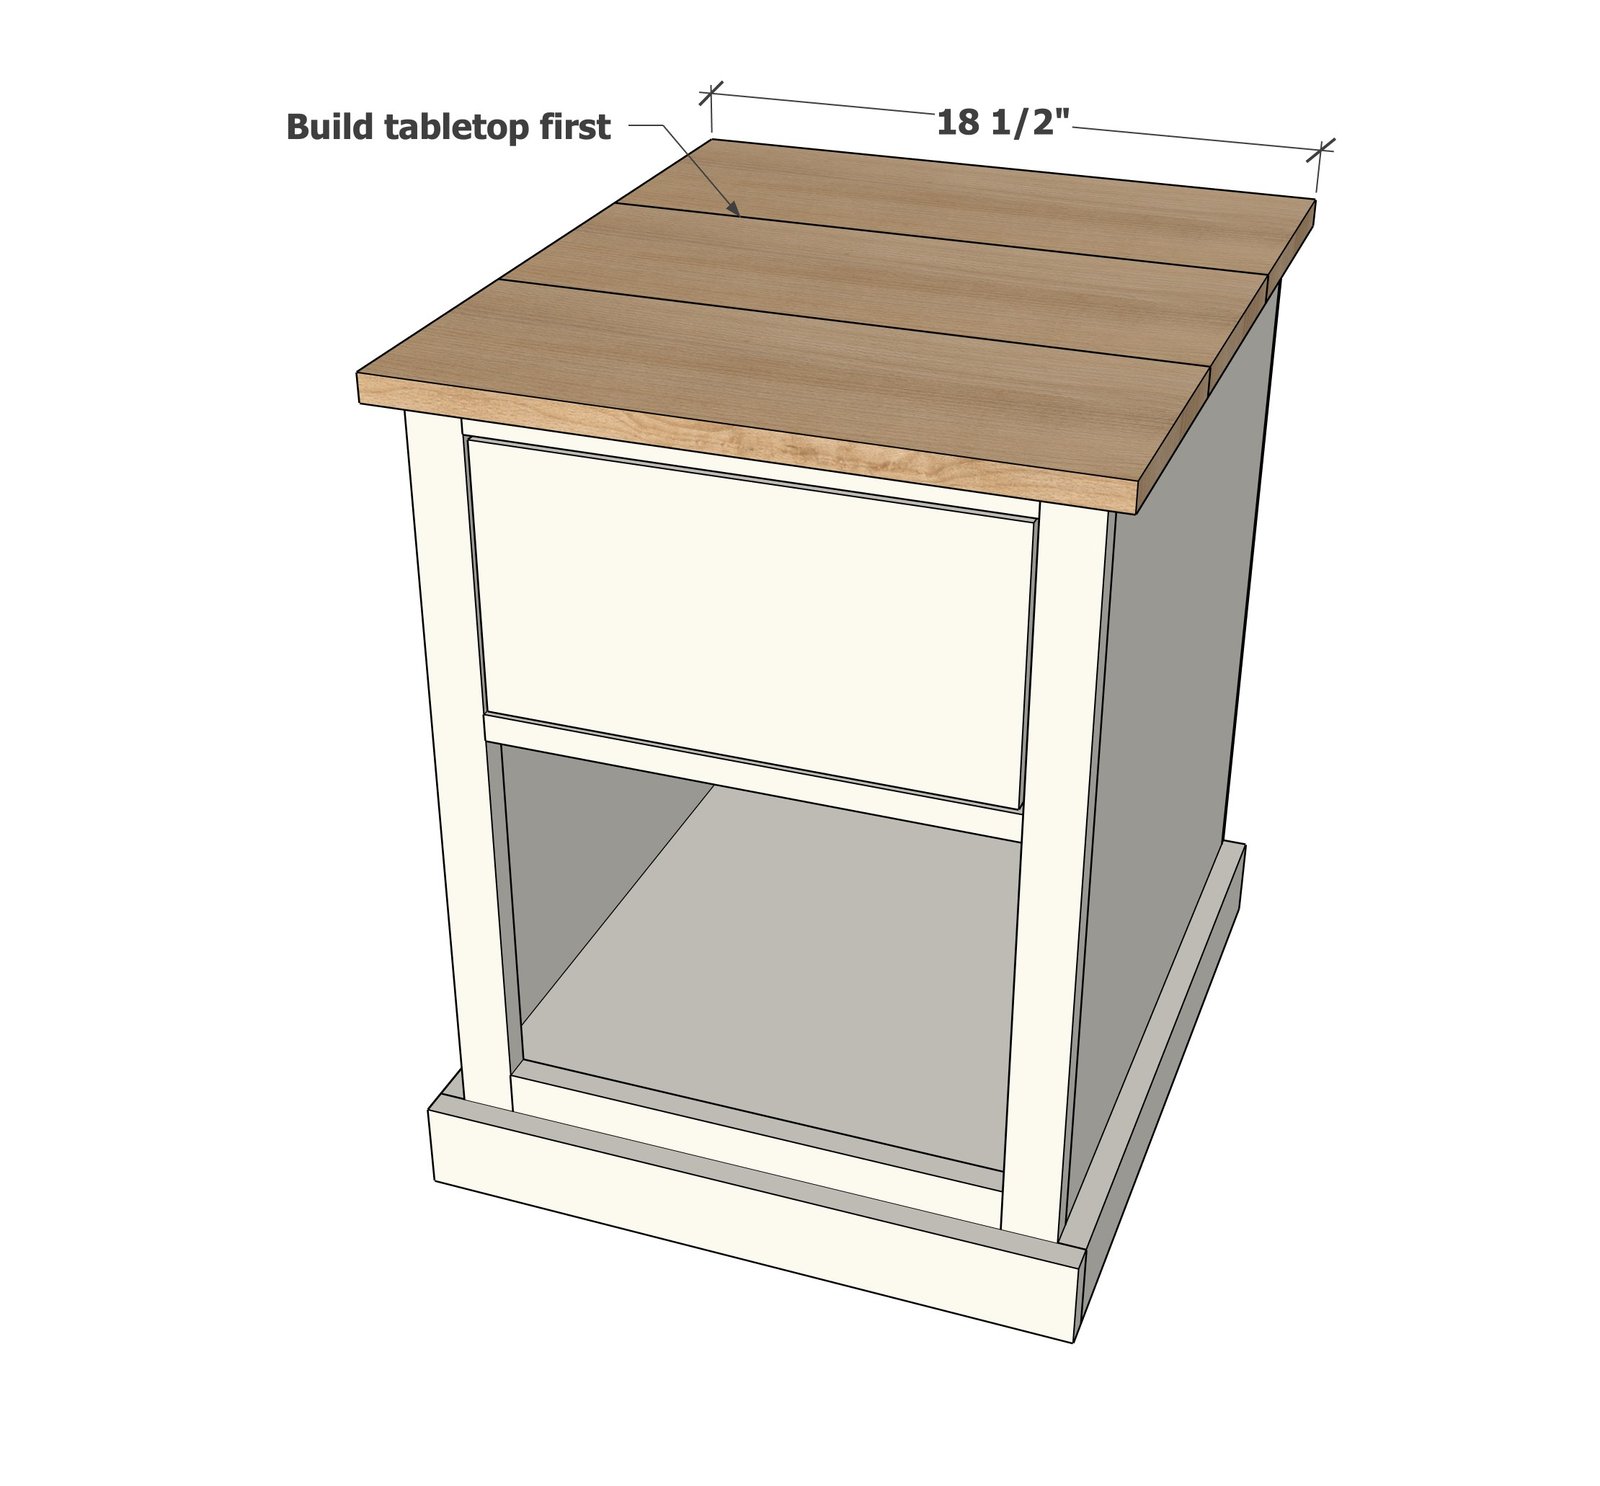
Build the tabletop using pocket holes, then attach through the predrilled pocket holes to the top, so the base has an even gap across the front and sides (about 3/4" overhang). There can be excess overhang on the back. We need the gaps on the front and sides consistent for adding the cove moulding in later steps.
Step 12
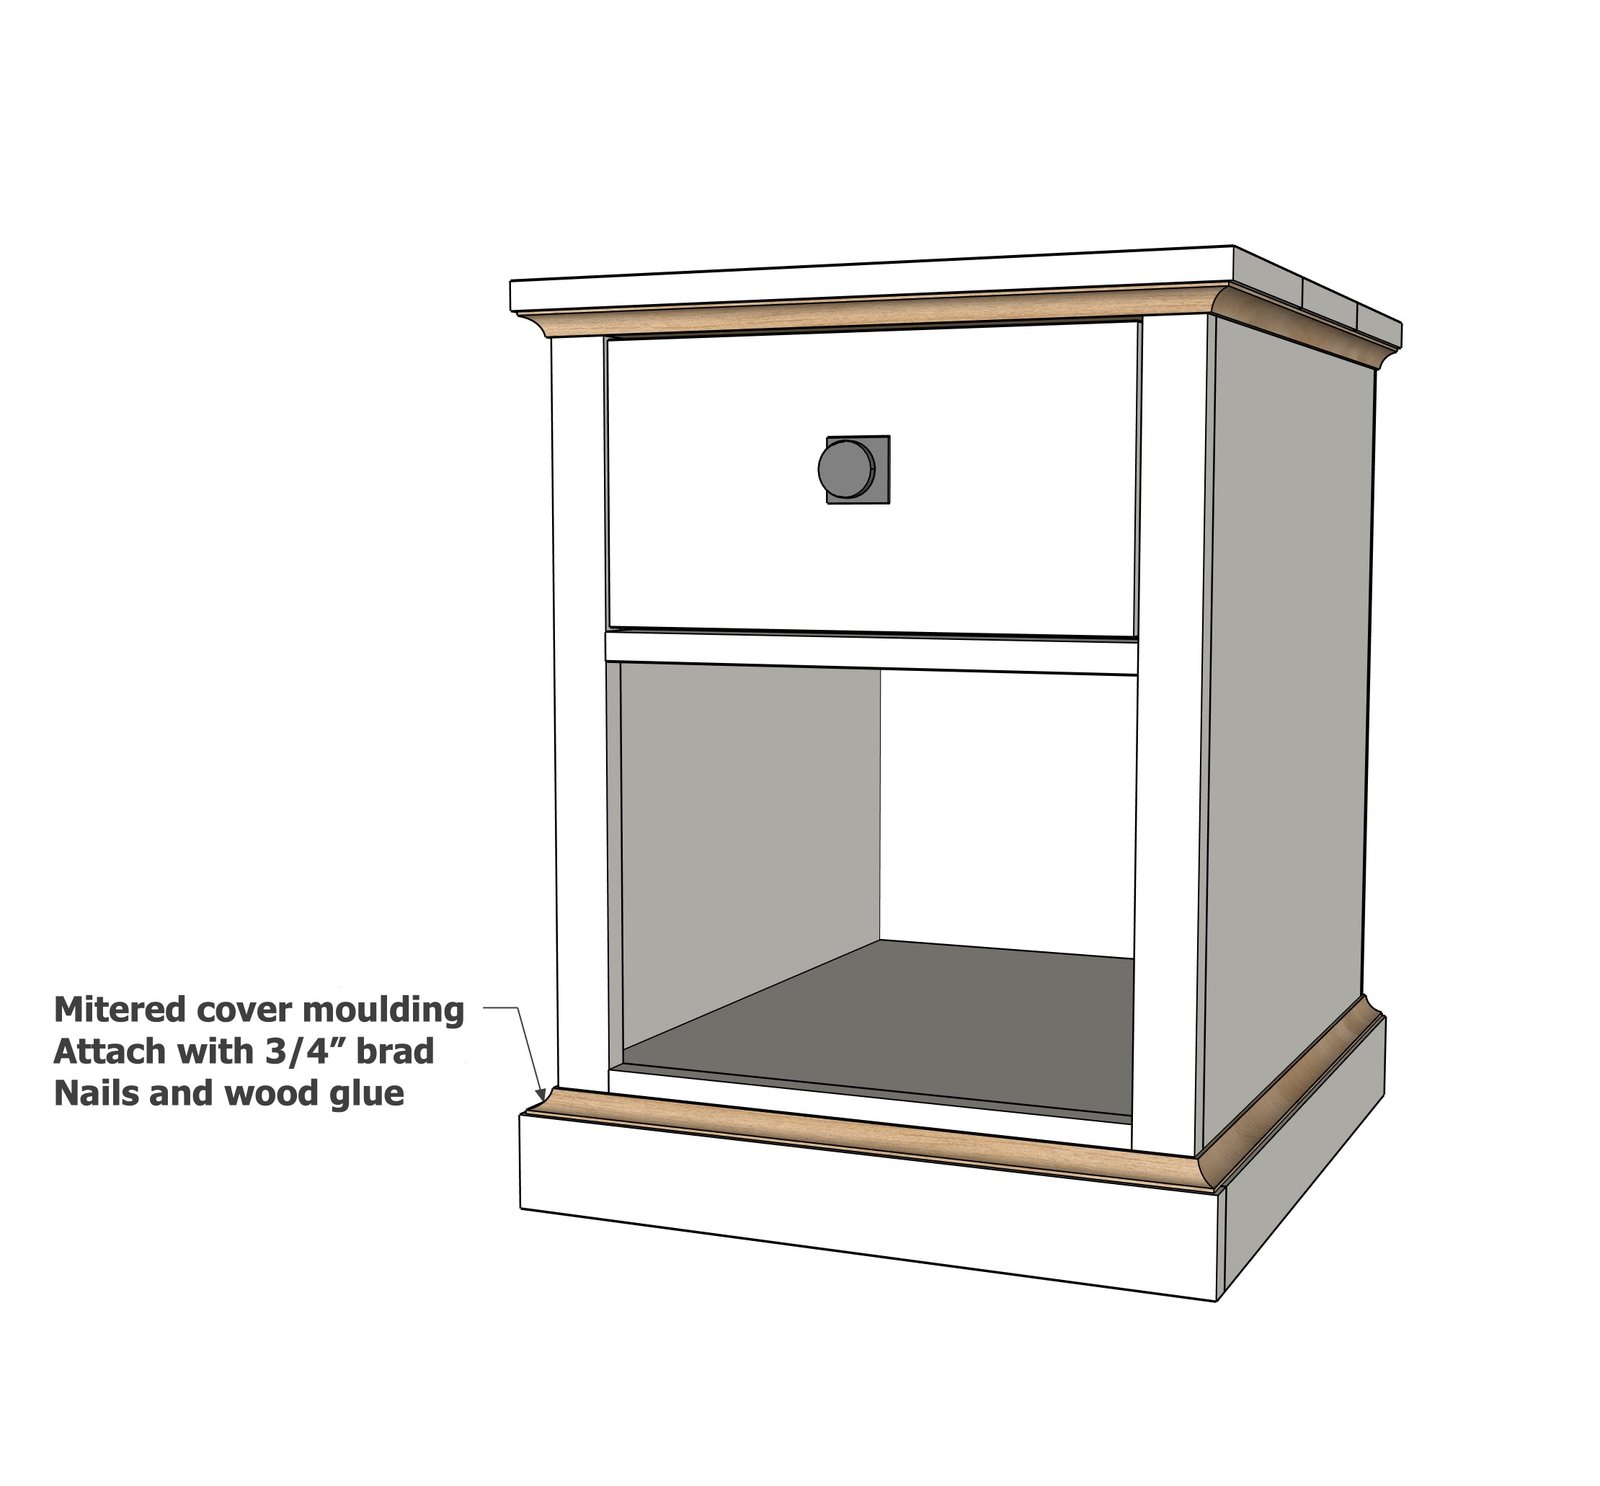
Use a miter saw to cut the cove moulding and attach to the base and underside of the top with 3/4" brad nails and wood glue.
Finishing
Sand all surfaces, starting with a medium grit and finishing with fine. Wipe off the dust, fill any holes or gaps with wood filler, and sand smooth once dry. Apply primer if you're painting, then finish with your choice of paint or stain and seal with a durable clear topcoat. For outdoor projects, use exterior-rated primer, paint or stain, and sealer so the piece stands up to the weather.
Source (temporary): https://www.ana-white.com/woodworking-projects/charlie-nightstand