Chelsea Bunk Bed System Desk or Bookshelf Supports
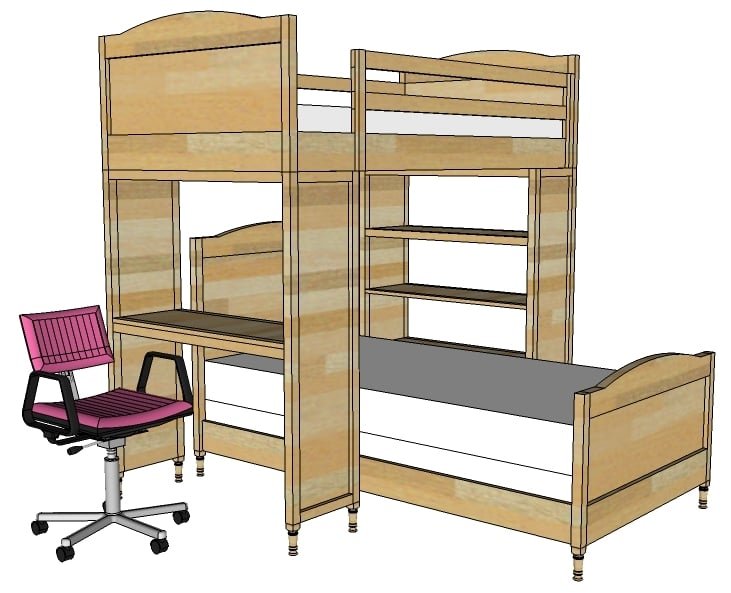
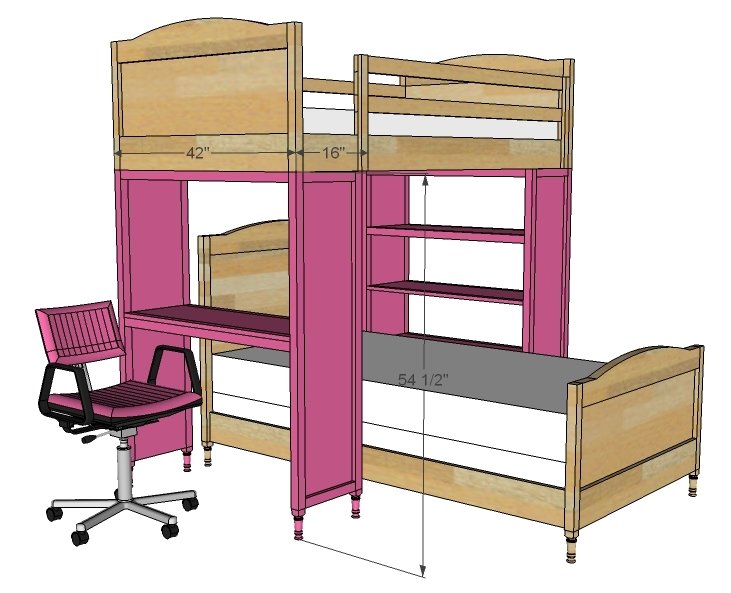
for a desk or bookshelf designed to support a top bunk. This project plan can be used to create twin over twin bunks, set perpendicular. Bookshelf features three shelves, desk features one desk height shelf. The desk is a perfect spot for homework - store bedtime books within reach in the bookshelf.
Specifications
| Project type | Bookshelf and Bookcase Plans |
|---|---|
| Room | Kids and Toys |
| Style | Children's and Kid's Room Furniture and Toy Plans |
| Difficulty | Intermediate |
Dimensions
Use the size-specific shopping and cut lists below.
Shopping List
1 - 1x12 @ 12 feet long
4 - 2x2 @ 8 feet long
1 - 1x2 @ 8 feet long
4 - decorative feet, 1 1/2" diameter, 6" tall
In addition, for the bookshelf
1 - 1x12 @ 12 feet long
3 - 1x2 @ 8 feet long
Cut List
2 - 1x12 @ 50" (Sides)
4 - 2x2 @ 50" (Legs)
4 - 1x2 @ 11 1/4" (Cut to width of 1x12s)
4 - 2x2 @ 39" (Top/Bottom Trim)
1 - 1x12 @ 39" (Desktop)
For Bookshelf (in addition to the above)
3 - 1x12 @ 39" (Shelves)
6 - 1x2 @ 39" (Shelf Trim)
Tools
- measuring tape
- square
- pencil
- hammer
- safety glasses
- hearing protection
- kreg-jig
- drill
- circular saw
- sander
- level
- countersink drill bit
Step-by-step Instructions
Step 1
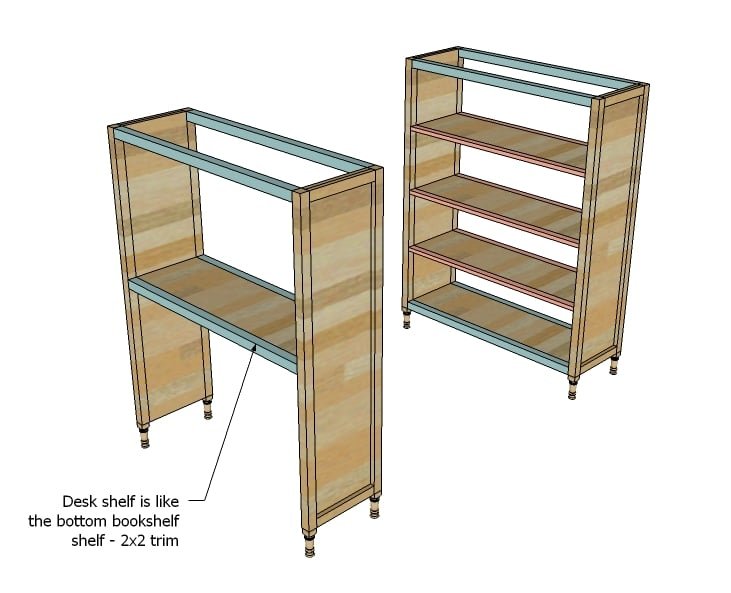
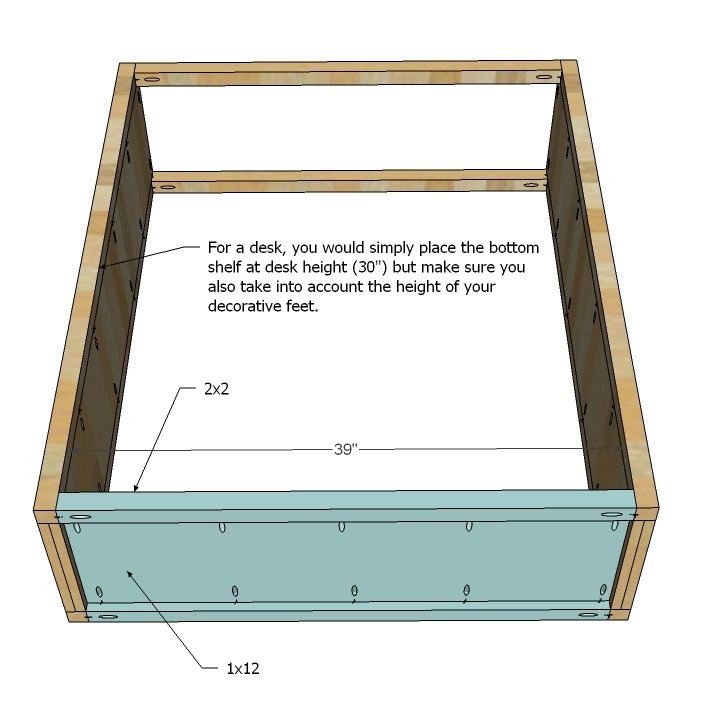
This diagram shows the difference between the desk and the bookshelf - there really is minimal difference. It's all in shelf placement. Make sure you use 2x2s to trim out your desktop for a stronger desktop.
Step 2
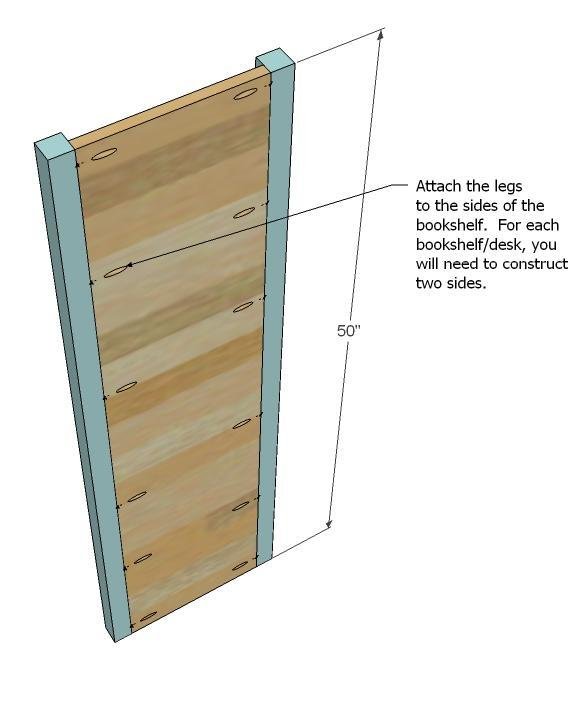
You will need to build two sides per bookshelf/desk. I show this diagram with pocket holes, if you use a Kreg Jig. While you can attach the legs to the side panel with standard screws (you'd want 2 1/2 to 3" long ones), I'd take a second to consider how much you are saving by building for yourself and invest in a Kreg Jig - it'll make your projects faster, easier, stronger.
Step 3
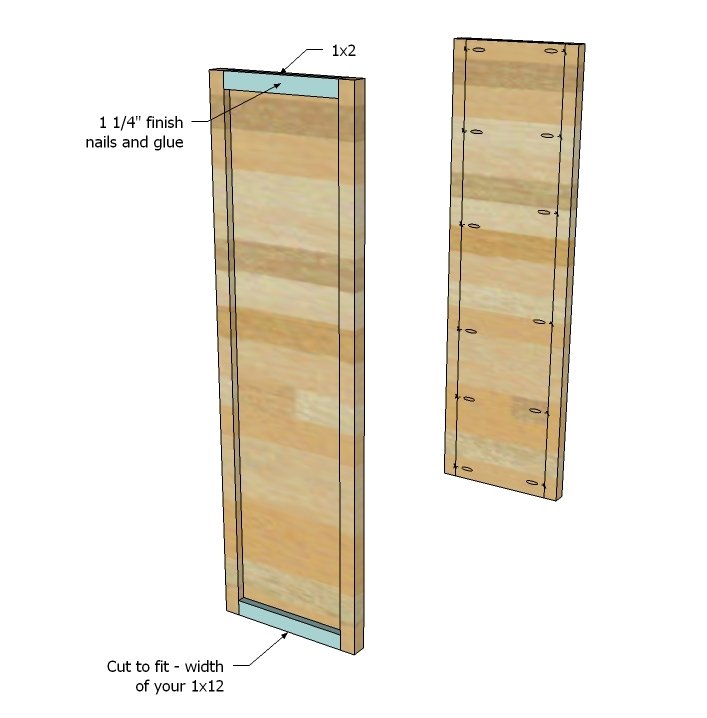
Since 1x12s are notorious for being slightly different widths, take a measurement and cut 1x2 trim pieces to fit. Nail on with 1 1/4" finish nails and glue as shown above.
Step 4
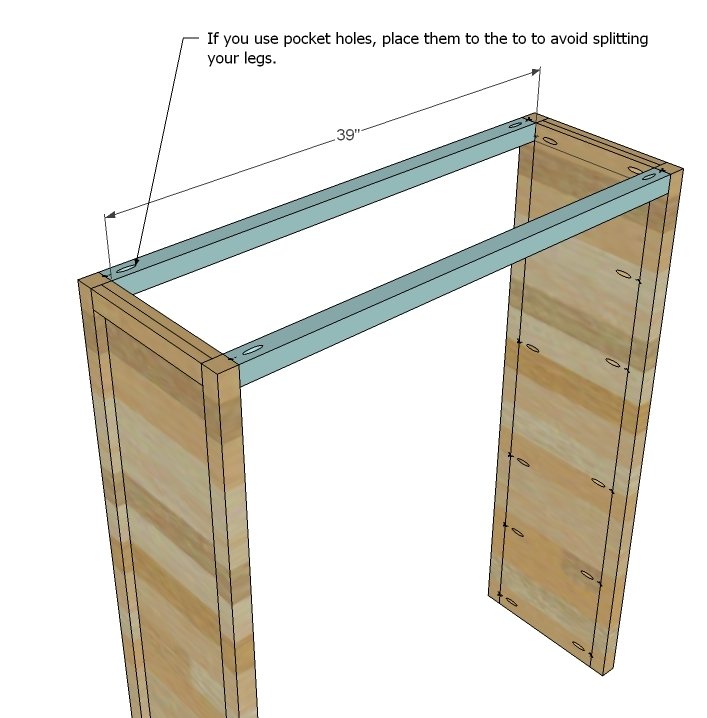
Next join the two sides on the top as shown above. One thing to consider when you use pocket holes is how to place your pocket holes for the strongest joint and to avoid splitting. Because the holes are pointed downward (as opposed to upward) in this instance, it will be much more difficult for you wood to split out on you. Always consider how you can place your screws in such a manner to create the strongest joint - but also in discreet locations.
Step 5
Step 6
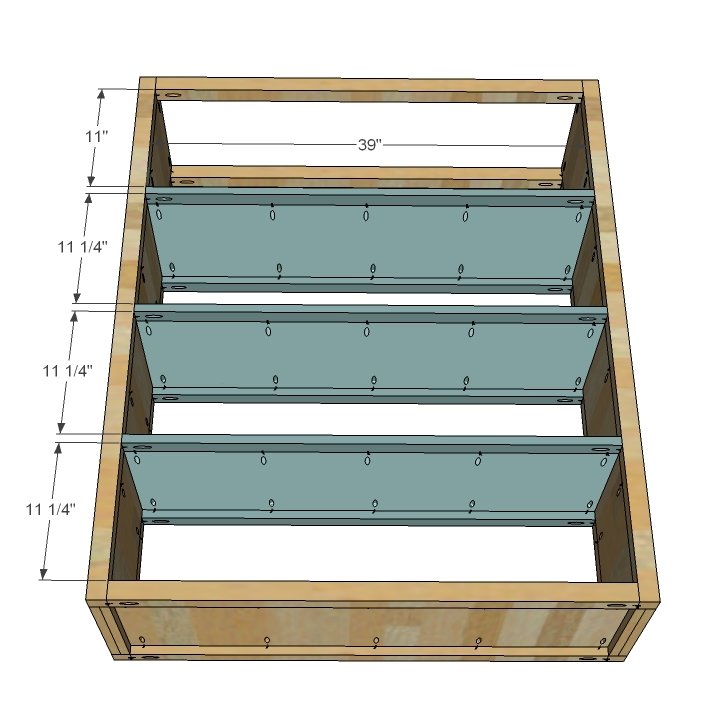
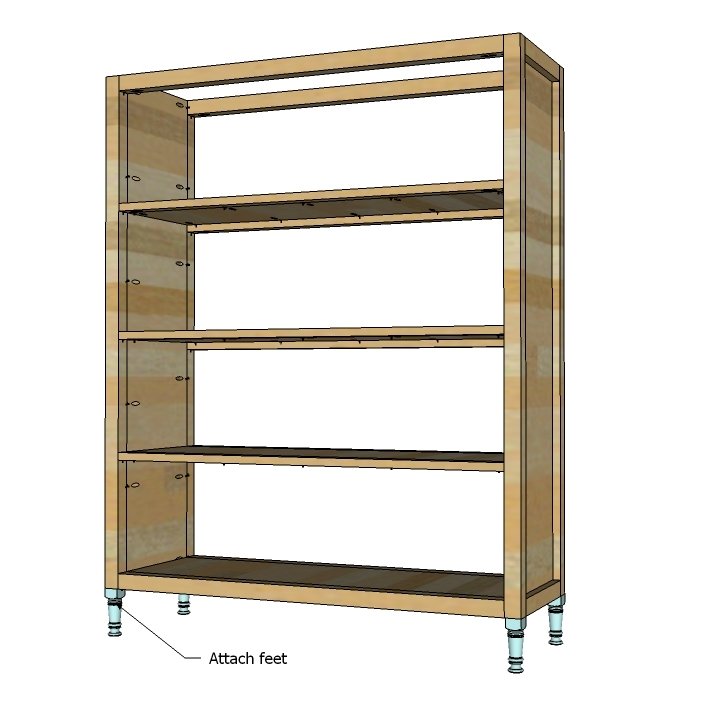
For the bookshelf, build shelves, but this time, use 1x2s. If you are planning to place heavy objects on the shelves, use 2x2s instead (just like the bottom shelf). Attach to the sides.
Step 7
In the final step, add your decorative feet. Follow the instructions given by the manufacturer.
Finishing
Sand all surfaces, starting with a medium grit and finishing with fine. Wipe off the dust, fill any holes or gaps with wood filler, and sand smooth once dry. Apply primer if you're painting, then finish with your choice of paint or stain and seal with a durable clear topcoat. For outdoor projects, use exterior-rated primer, paint or stain, and sealer so the piece stands up to the weather.
Source (temporary): https://www.ana-white.com/woodworking-projects/chelsea-bunk-bed-system-desk-or-bookshelf-supports