Child Sized Surf Board Adirondack Chair
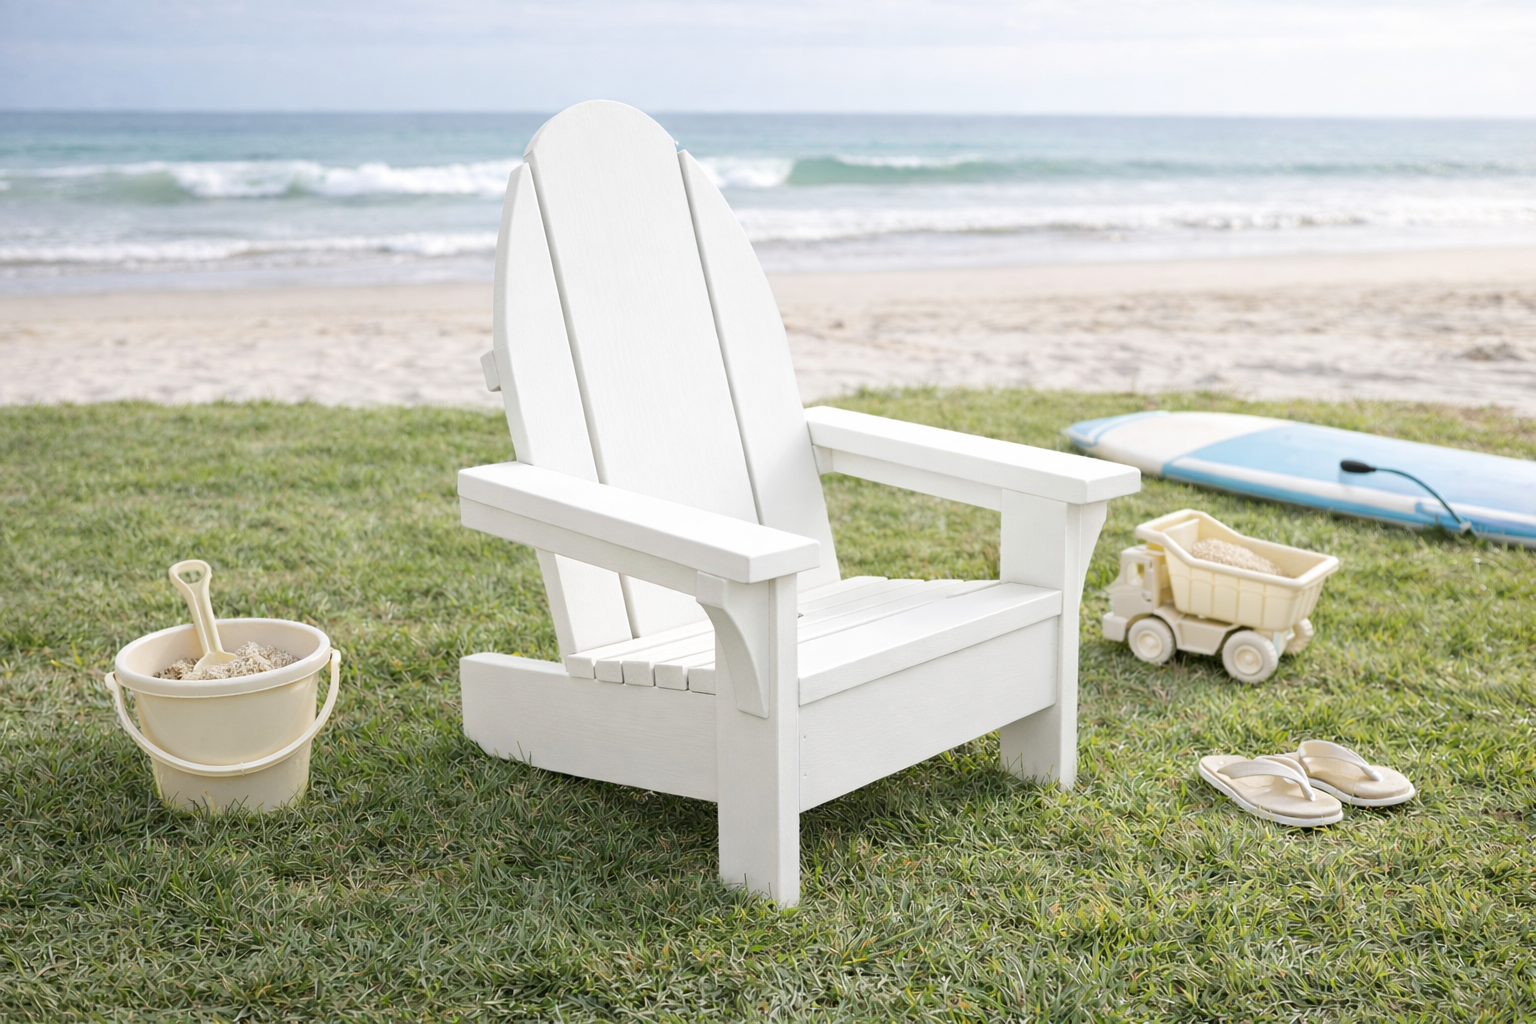
Bring the beach to your backyard with this surf board inspired Adirondack Chair for you little one! Features a lower seat, some extra styling, wide armrests, the surf board Adirondack chair is the coolest kids outdoor chair on the deck!
Specifications
| Project type | Outdoor Seating, Lounging and Accents |
|---|---|
| Room | Outdoor |
| Style | Children's and Kid's Room Furniture and Toy Plans |
| Difficulty | Intermediate |
| Estimated cost | $20 - $50 |
Dimensions
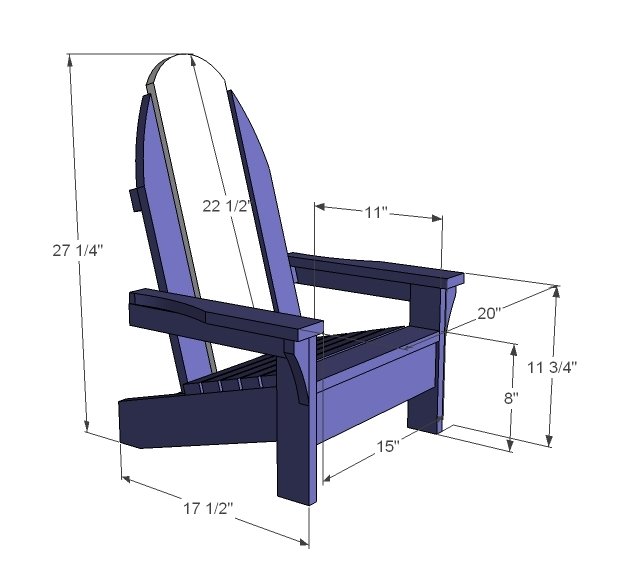
Use the size-specific shopping and cut lists below.
Shopping List
- 1 - 1x4 @ 8 feet long
- 1 - 1x8 @ 3 feet long
- 2 - 1x3 @ 8 feet long
- 2 - 1x2 @ 8 feet long
Cut List
- 2 - 1x4 @ 17 3/4" (Stringers)
- 1 - 1x4 @ 15" (Front Apron)
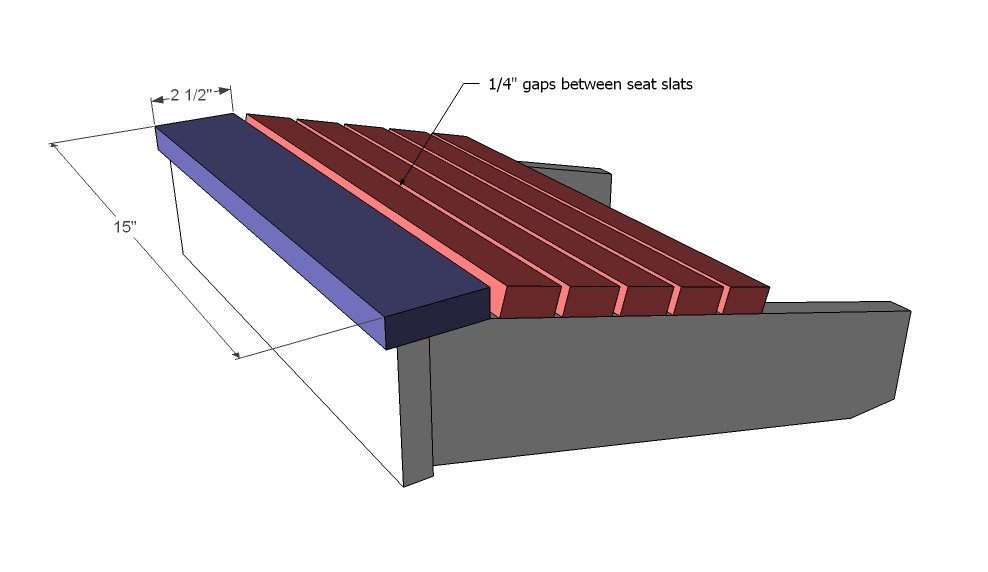
- 1 - 1x3 @ 15" (Front Seat Slat)
- 5 - 1x2 @ 15" (Main Seat Slats)
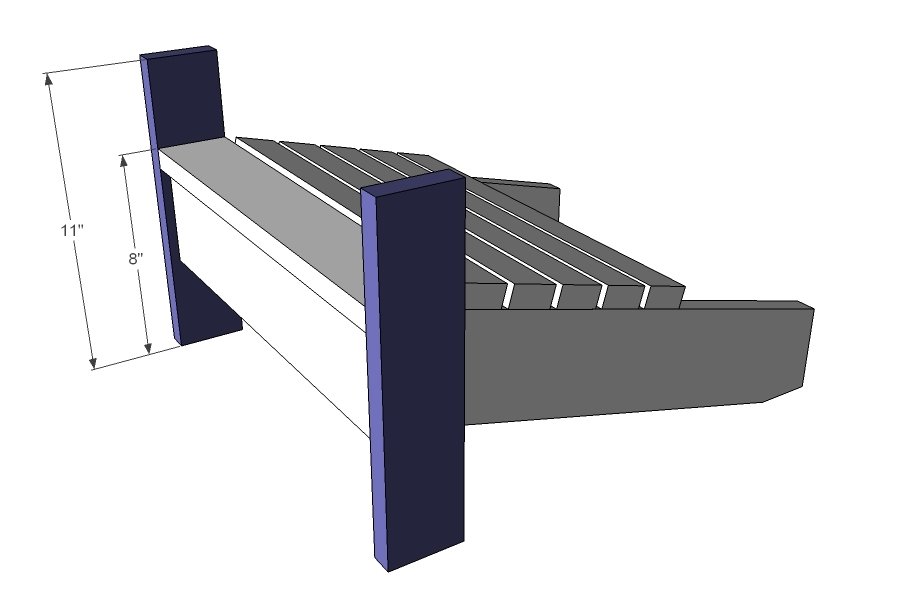
- 2 - 1x3 @ 11" (Front Legs)
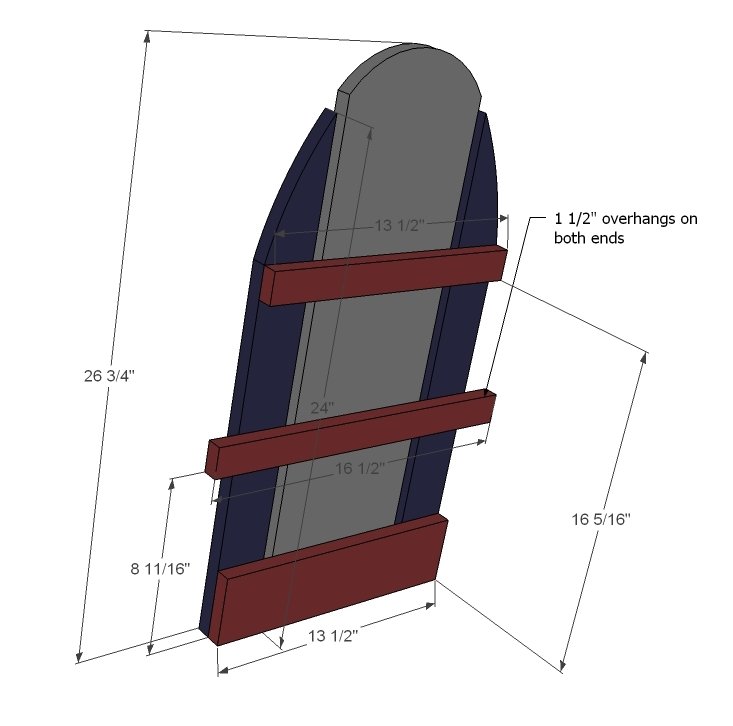
- 1 - 1x8 @ 26 3/4" (Seat Back, Middle)
- 2 - 1x3 @ 24" (Seat Back, Sides)
- 1 - 1x2 @ 13 1/2" (Top Seat Back Support)
- 1 - 1x2 @ 16 1/2" (Middle Seat Back Support)
- 1 - 1x4 @ 13 1/2" (Bottom Seat Back Support)
- 2 - 1x2 @ 13 5/8" (Arm Supports)
- 2 - 1x3 @ 14 7/9" (Arm Rests)
- 2 - 1x2 @ 4 1/2" (Decorative Arm Supports)
Tools
- measuring tape
- pencil
- safety glasses
- hearing protection
- kreg-jig
- drill
- circular saw
- jigsaw
- nailer
- sander
- level
- countersink drill bit
Step-by-step Instructions
Step 1
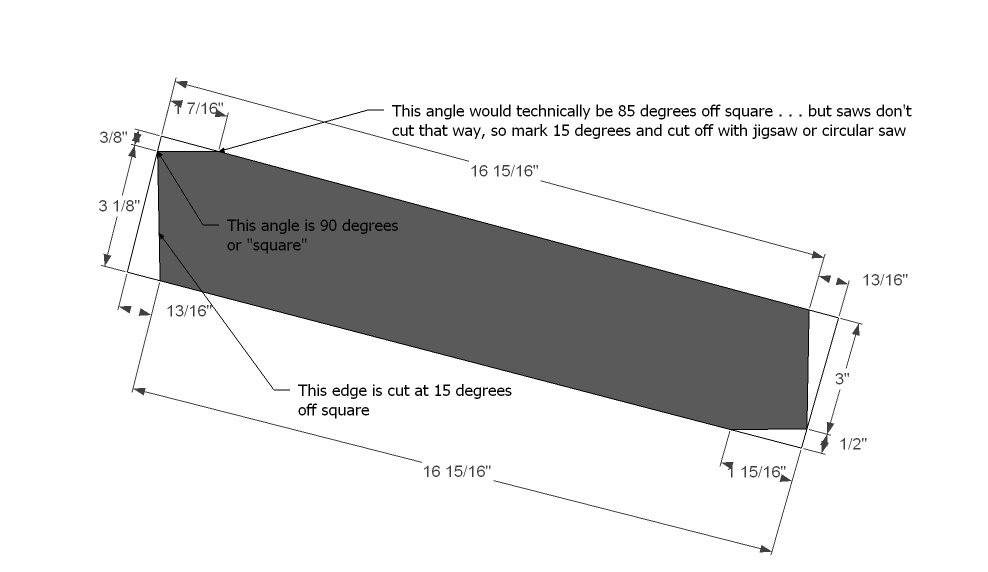
Getting the stringers cut right is super important. Mark out as shown above. Use a protractor to draw angled lines. Remember that all lines are 15 degrees off square, in one direction or another. Cut two, and ensure that both stringers match up. The front edge of the stringer should be marked as front and is shown on the upper left of the diagram above.
Step 2
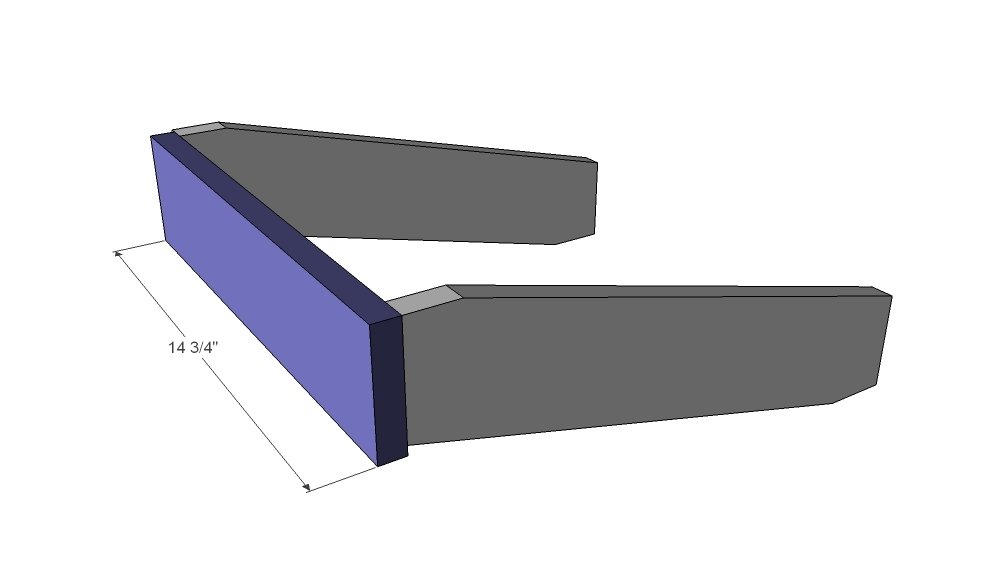
Attach front apron to stringers as shown above. Use screws and glue.
Step 3
Begin by laying the 1x3 seat slat as shown above. Keep flush to the back of the cut stringer. Follow with 1x2 slats, leaving 1/4" gaps.
Step 4
Front legs. Mark front legs for seat heights on insides. Attach legs to stringers and front apron with screws and glue. Screws into stringers must be 1 1/4", screws into front apron should be 3". TIP: To hide screws, fasten from the inside, underside of the chair.
Step 5
Step 6
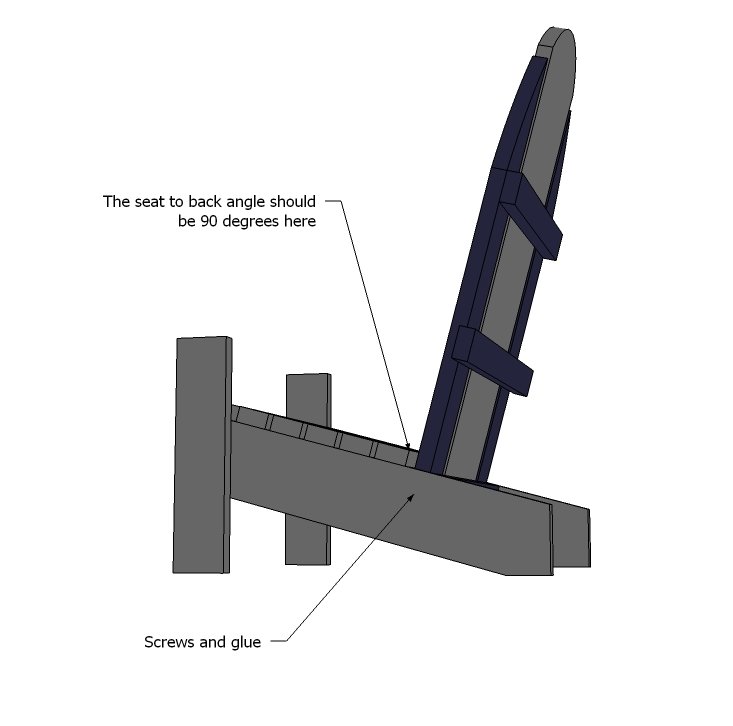
Now we are starting to look like a chair! Use 2" screws and glue to attach stringers to seat back.
Step 7
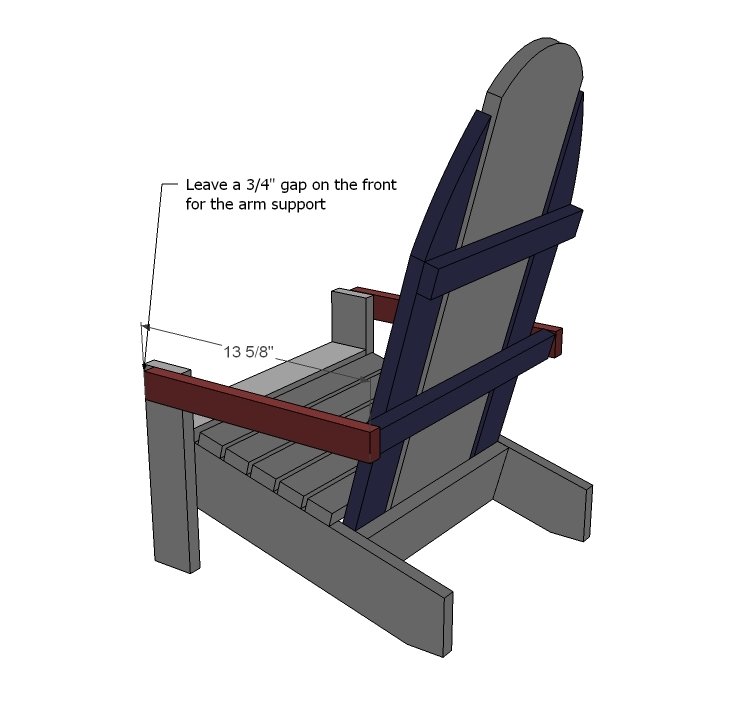
Consider step 9 and leave 3/4" to the front of the arm supports. Attach with 1 1/4" screws to front legs and 2" screws to back support as shown above.
Step 8
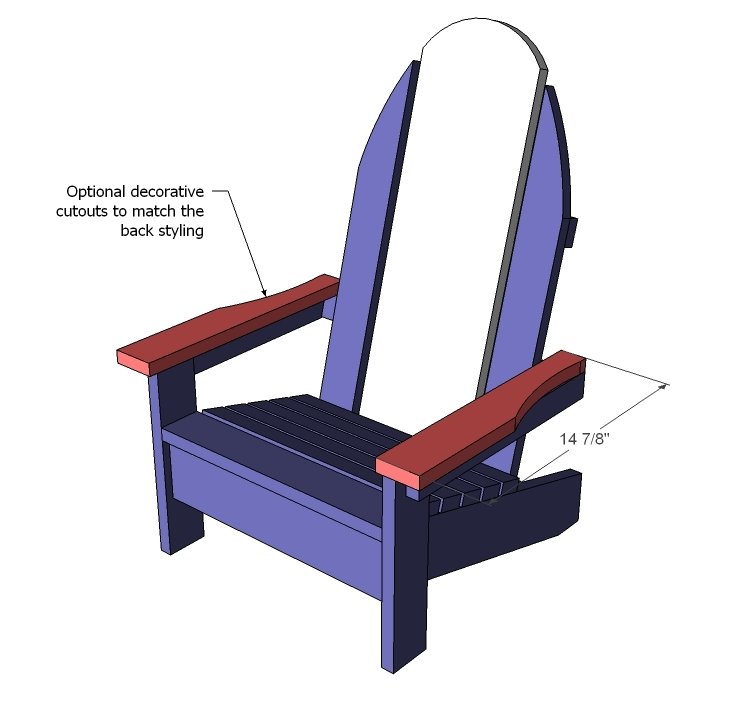
Arms need to tie in both the supports and the back support. Screw or nail down with glue and 2" fasteners. Cut out if desired as shown above.
Step 9
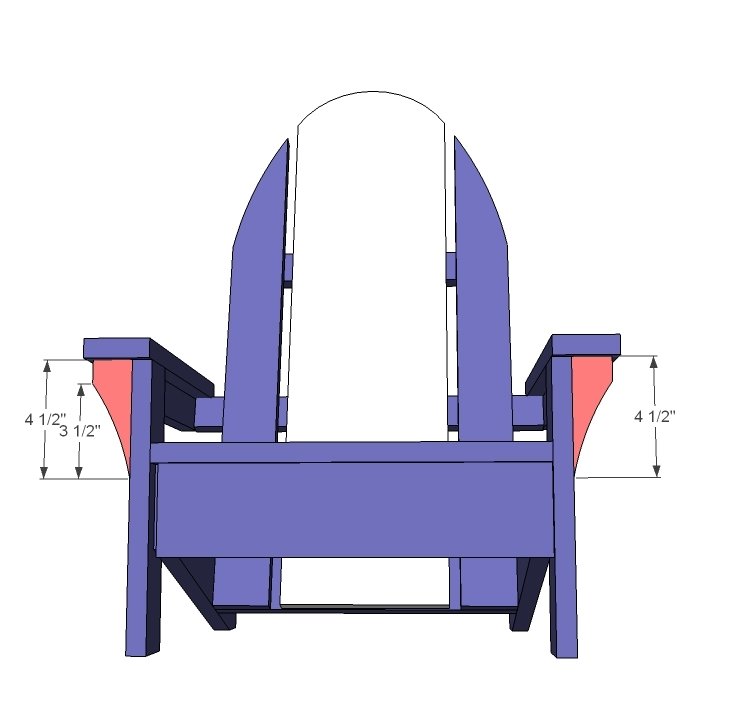
Complete the chair styling by adding decorative supports as shown above. Glue and nail in place.
Finishing
Sand all surfaces, starting with a medium grit and finishing with fine. Wipe off the dust, fill any holes or gaps with wood filler, and sand smooth once dry. Apply primer if you're painting, then finish with your choice of paint or stain and seal with a durable clear topcoat. For outdoor projects, use exterior-rated primer, paint or stain, and sealer so the piece stands up to the weather.
Source (temporary): https://www.ana-white.com/woodworking-projects/child-sized-surf-board-adirondack-chair