Child's Bench with Arbor
Hi everyone! Are you ready for another dose of DIY?
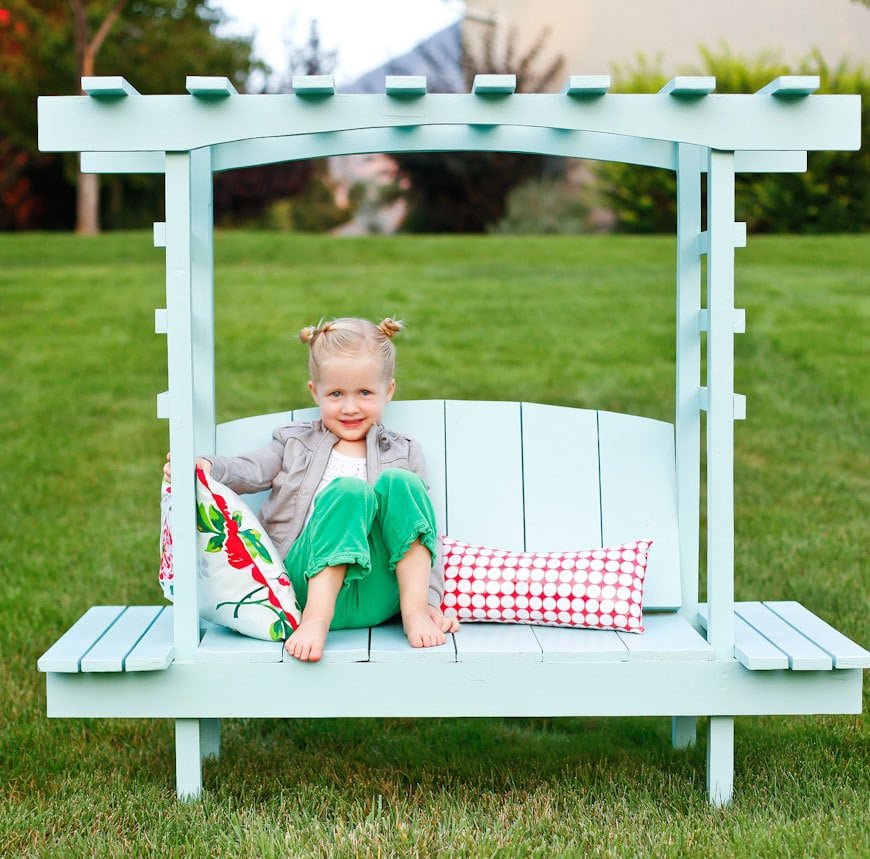
Specifications
| Project type | Bench |
|---|---|
| Room | Kids and Toys |
| Style | Children's and Kid's Room Furniture and Toy Plans |
| Difficulty | Intermediate |
| Estimated cost | $20 - $50 |
Dimensions
Use the size-specific shopping and cut lists below.
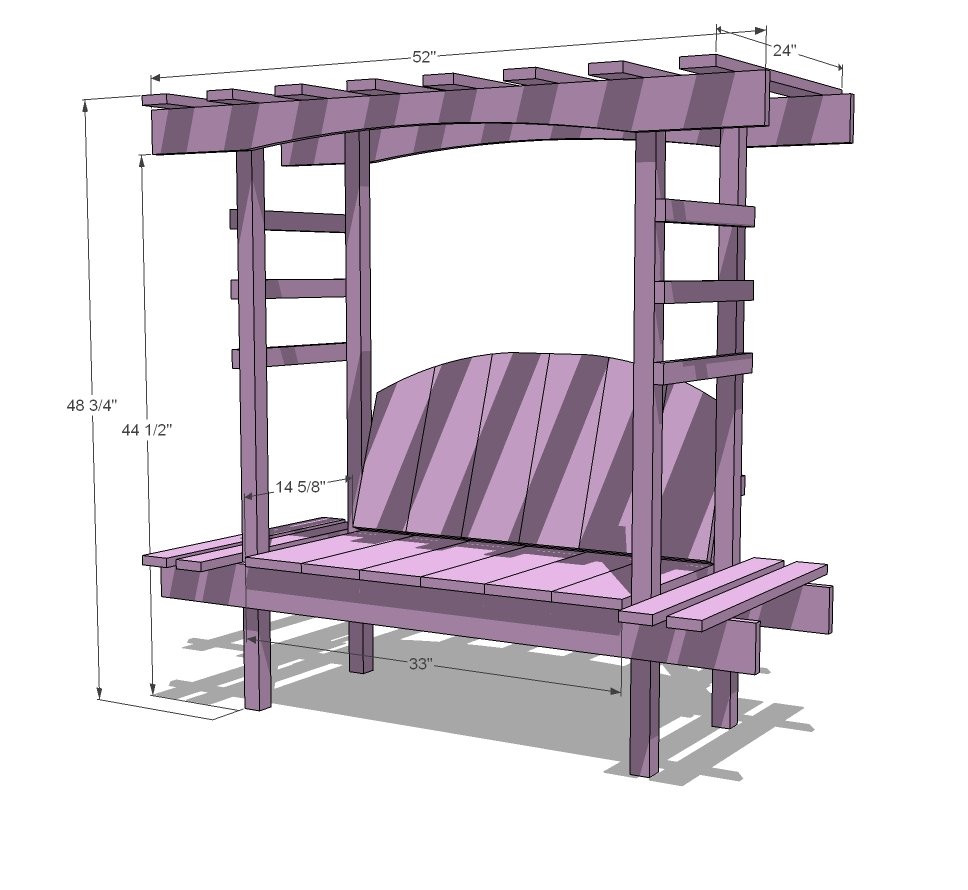
Shopping List
2 – 1x6 @ 8 feet long
3 – 2x2 @ 8 feet long
3 – 1x2 @ 8 feet long
3 – 1x4 @ 10 feet long
4 – 1x3 @ 8 feet long
1 ¼” galvanized screws 2” galvanized screws 3” galvanized screws (just need a couple)
Cut List
4 – 2x2 @ 48” (Legs) 6 – 1x2 @ 16” (Side trellis rails) 4 – 1x4 @ 52” (seat supports and top) 12 – 1x6 @ 16” (seat and backrest)* 12 – 1x3 @ 24” (Flower pot base) (top trellis) 1 – 1x3 @ 36” (Seat back support) 1 – 2x2 @ 33” (seat back base) 1 – 1x2 @ 33” (seat back top) *for the 1x6 @ 8 feet long, cut 5 – 16” long and then the remaining will be approximately 15 ½” long. Leave this shorter piece for the ends of the seat back that are slightly shorter to conserve boards.
Tools
- measuring tape
- square
- pencil
- safety glasses
- hearing protection
- drill
- circular saw
- jigsaw
- sander
- level
- countersink drill bit
Step-by-step Instructions
Step 1
Attach with 2” screws and glue. Check for square.
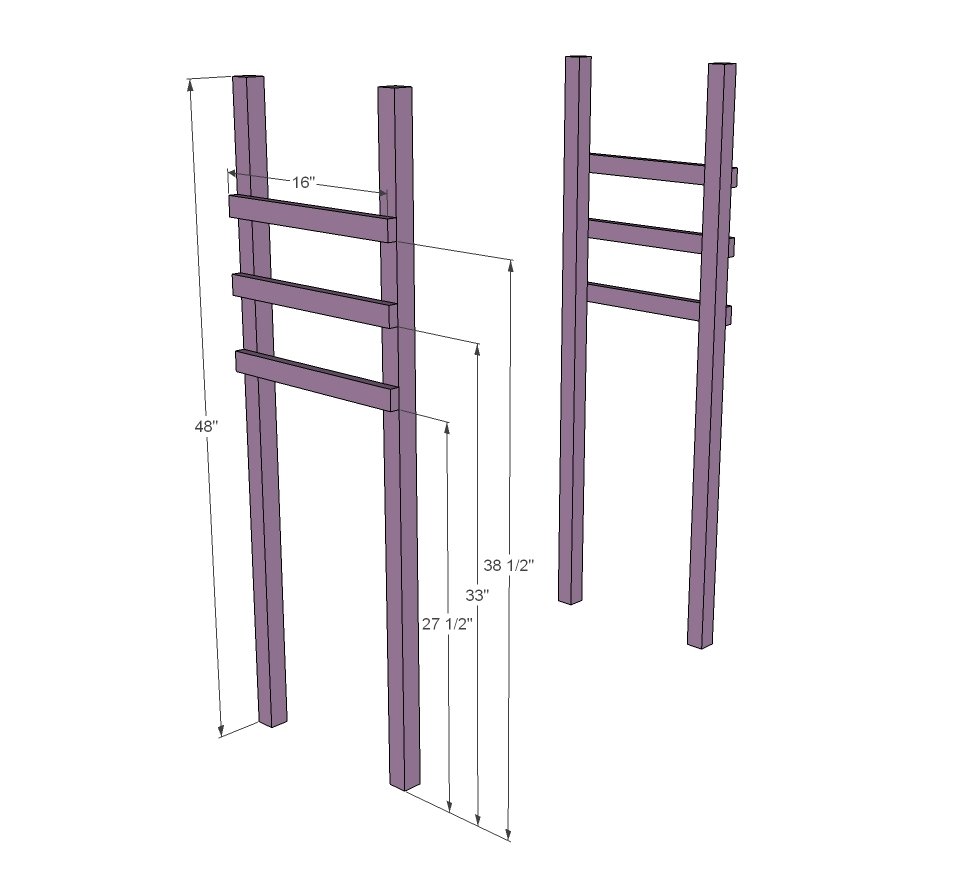
Step 2
Build seat, then attach legs. Note - seat can be attached higher for older children as well.
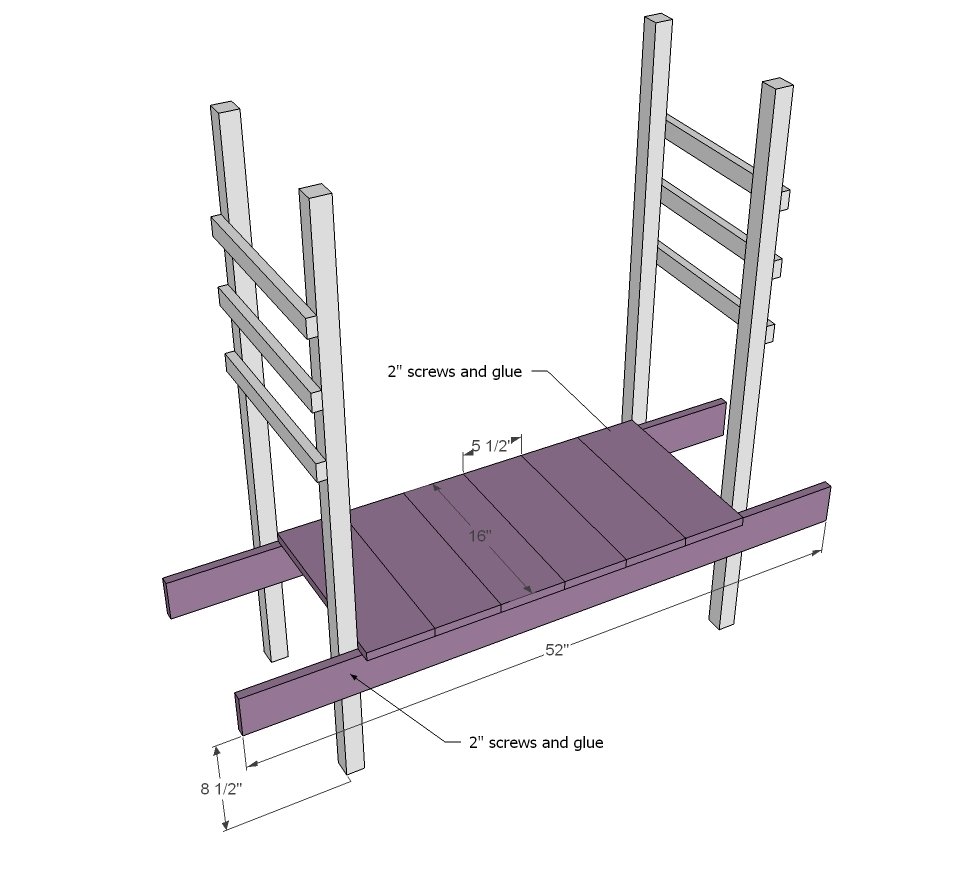
Step 3
These are for the flower pots. You can space as you like.
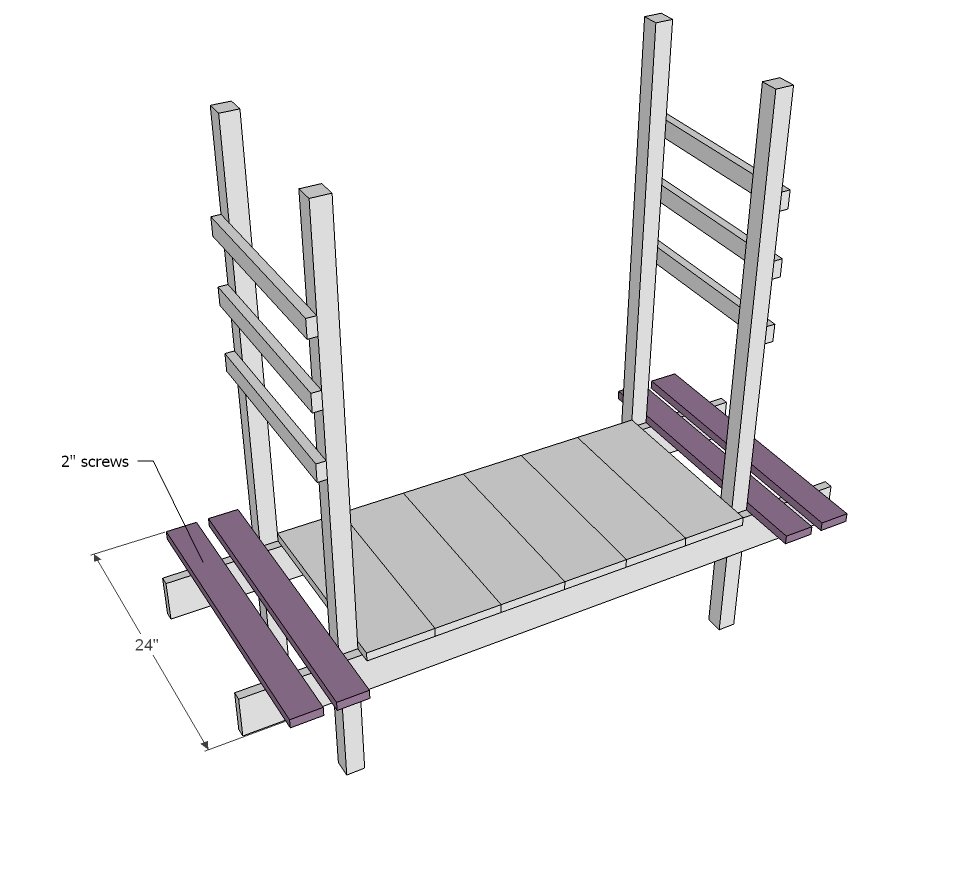
Step 4
Make sure the distance between the 2x2 is the same at the top as at the seat. Screw on with 2” screws and glue.
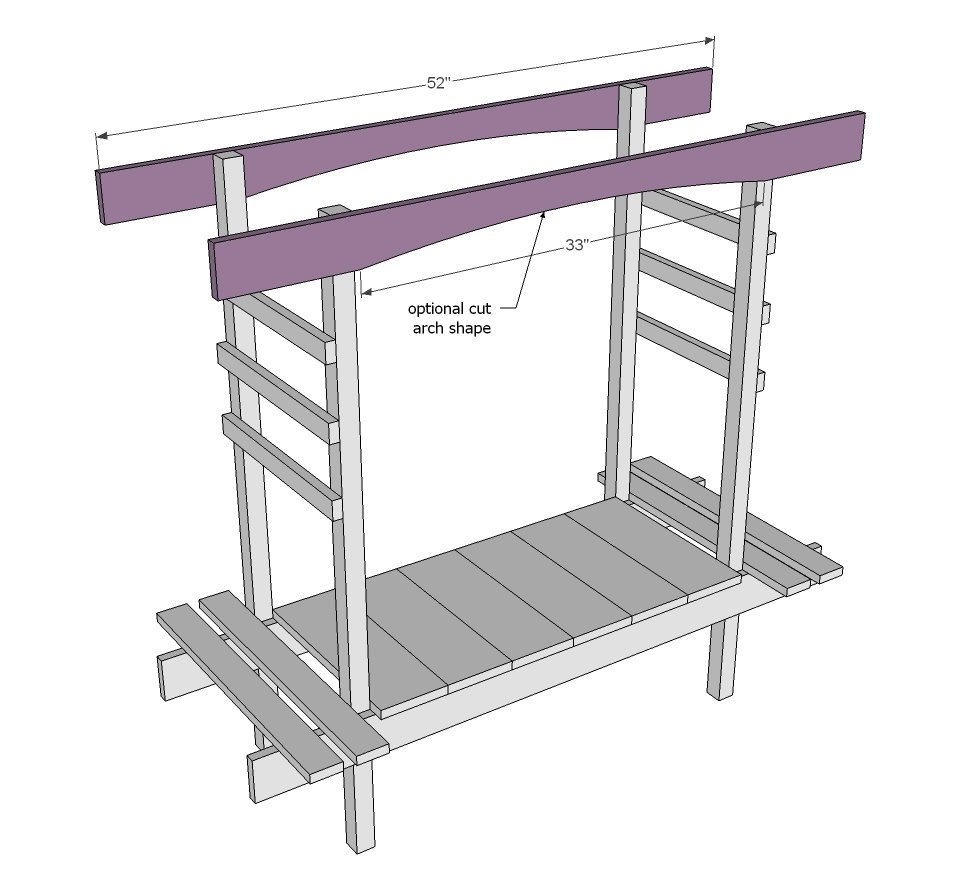
Step 5
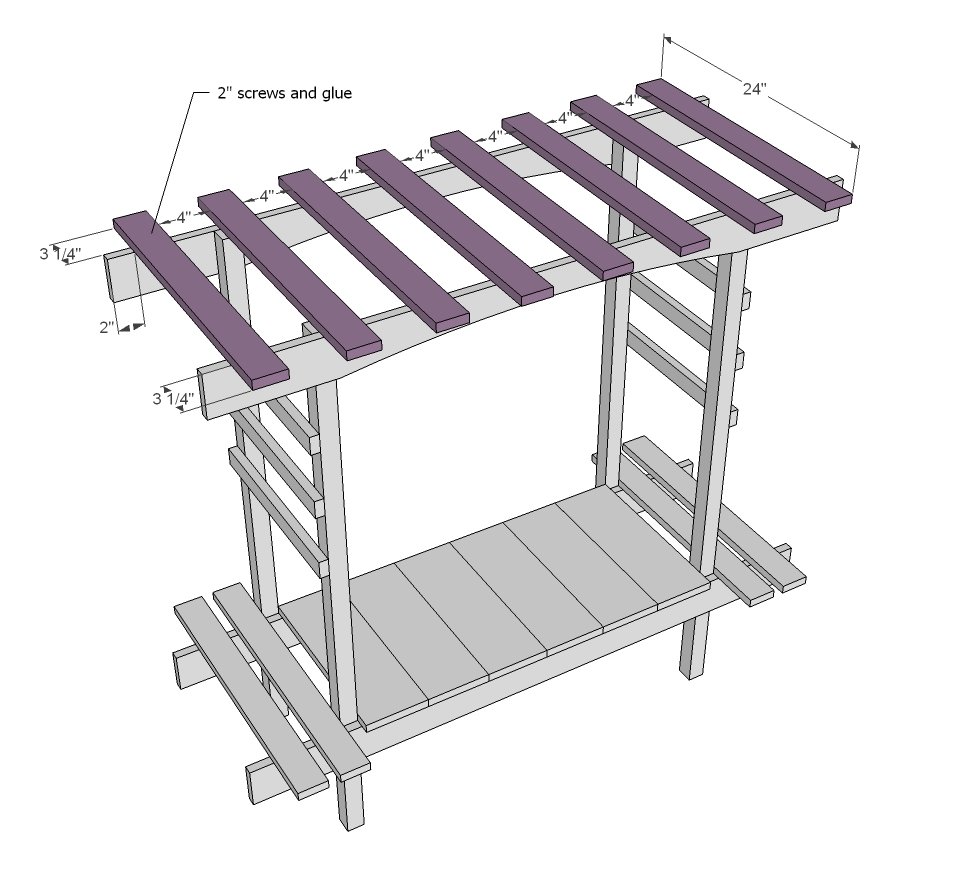
Step 6
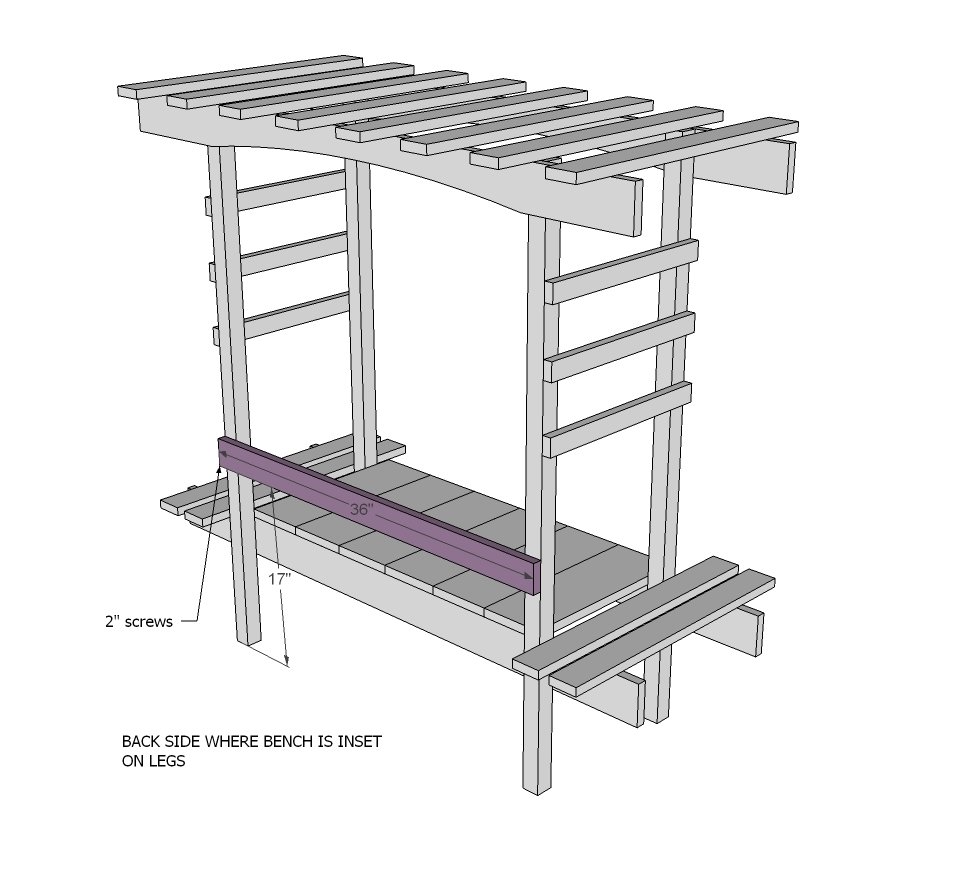
Step 7
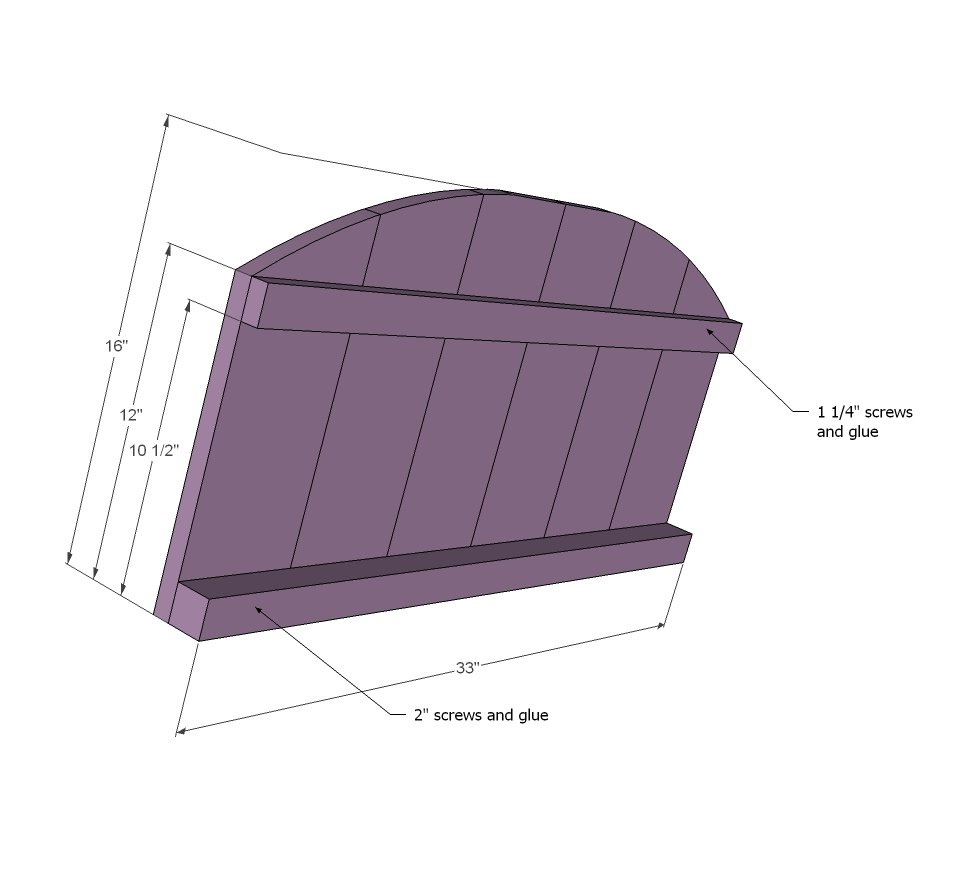
Step 8
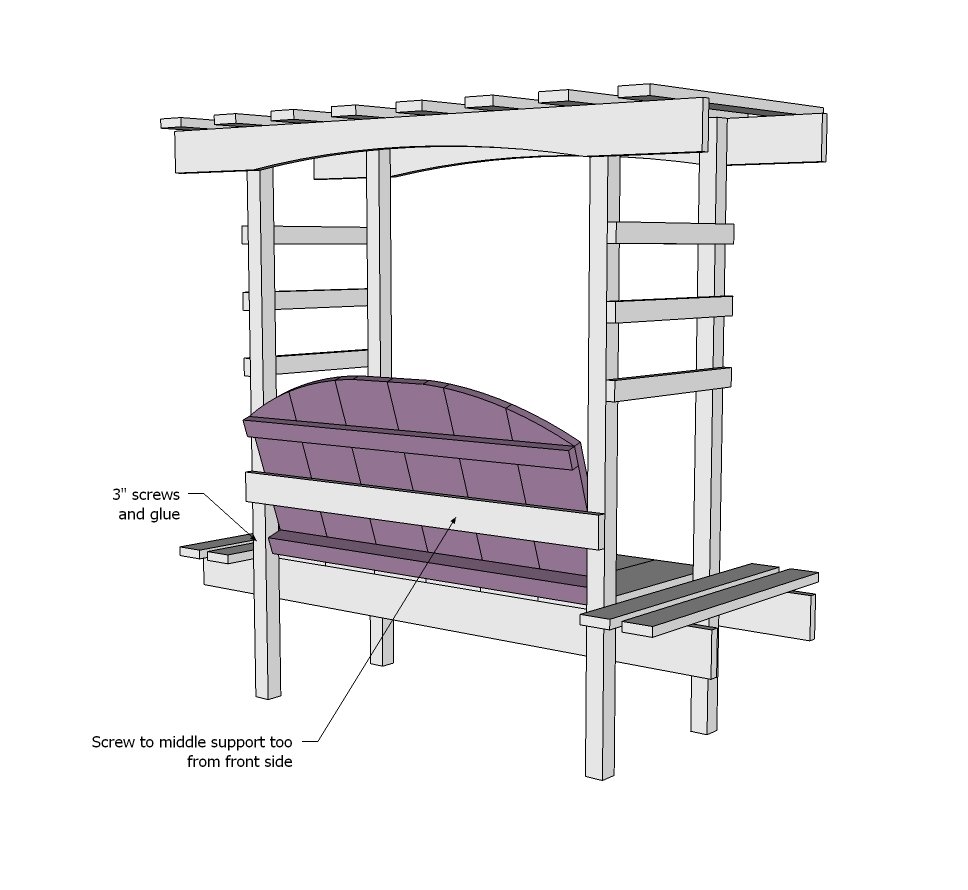
Finishing
Sand all surfaces, starting with a medium grit and finishing with fine. Wipe off the dust, fill any holes or gaps with wood filler, and sand smooth once dry. Apply primer if you're painting, then finish with your choice of paint or stain and seal with a durable clear topcoat. For outdoor projects, use exterior-rated primer, paint or stain, and sealer so the piece stands up to the weather.
Source (temporary): https://www.ana-white.com/woodworking-projects/childs-bench-arbor