Christmas Cookie Box or Serving Display
We put all that time and effort into making beautiful Christmas cookies, but how to display them? Build your own cookie box with scrap wood to display those beautiful cookies! I built this cookie box using scrap whitewood boards in less than 20 minutes. I used a Circuit to make the lettering - now, I can display and serve my cookies! This is such a cool way to transport cookies, and bring to a cookie exchange too! If you were to buy new materials, you can make this project for about $10. It was so fun, fast and easy! from with detailed diagrams, video, shopping and cut lists - everything you need to make your own wood Christmas Cookie Box!
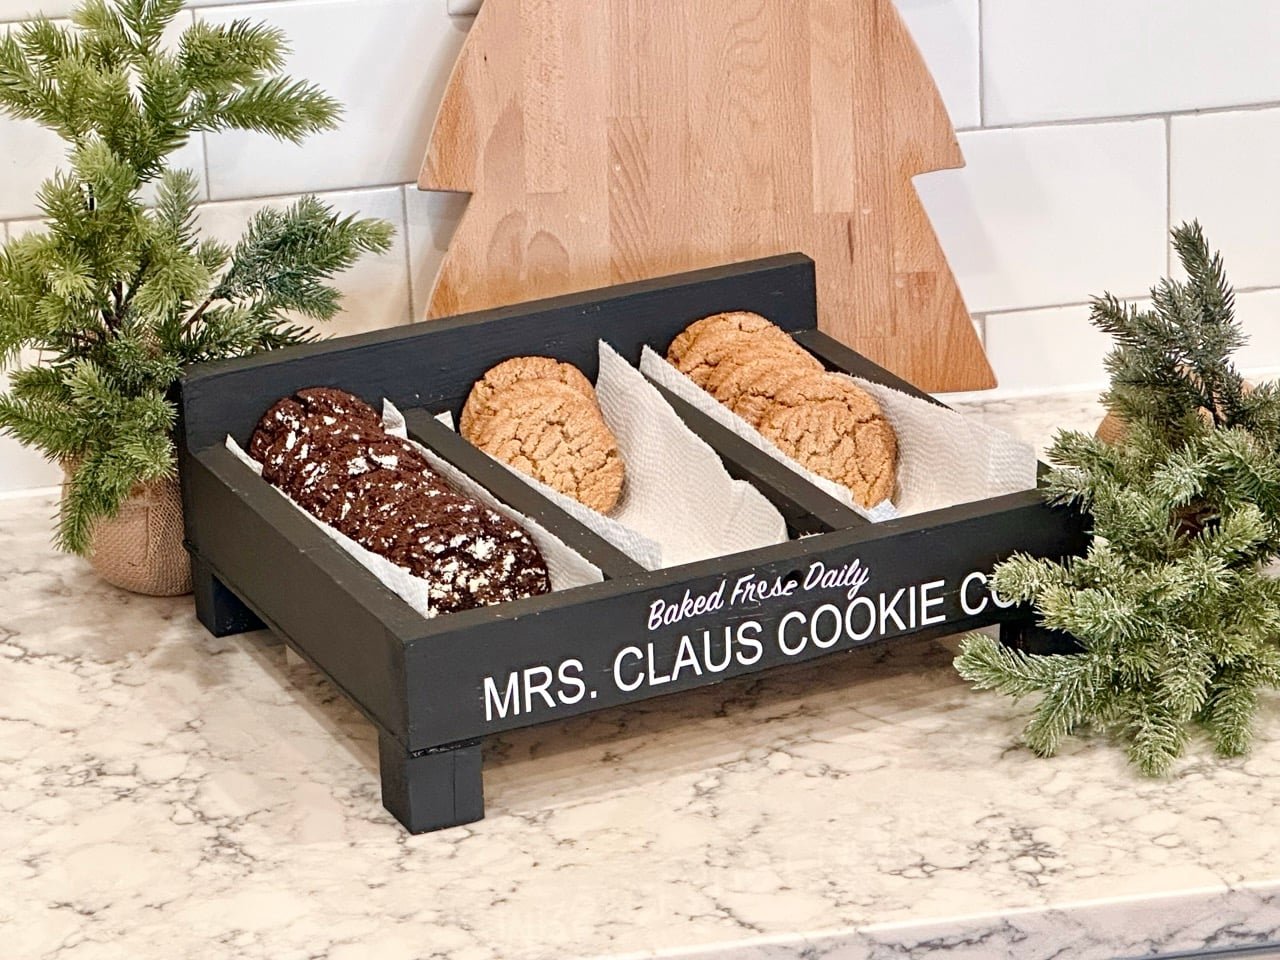
Specifications
| Project type | Food Serving and Display |
|---|---|
| Room | Parties and Events |
| Difficulty | Starter Projects |
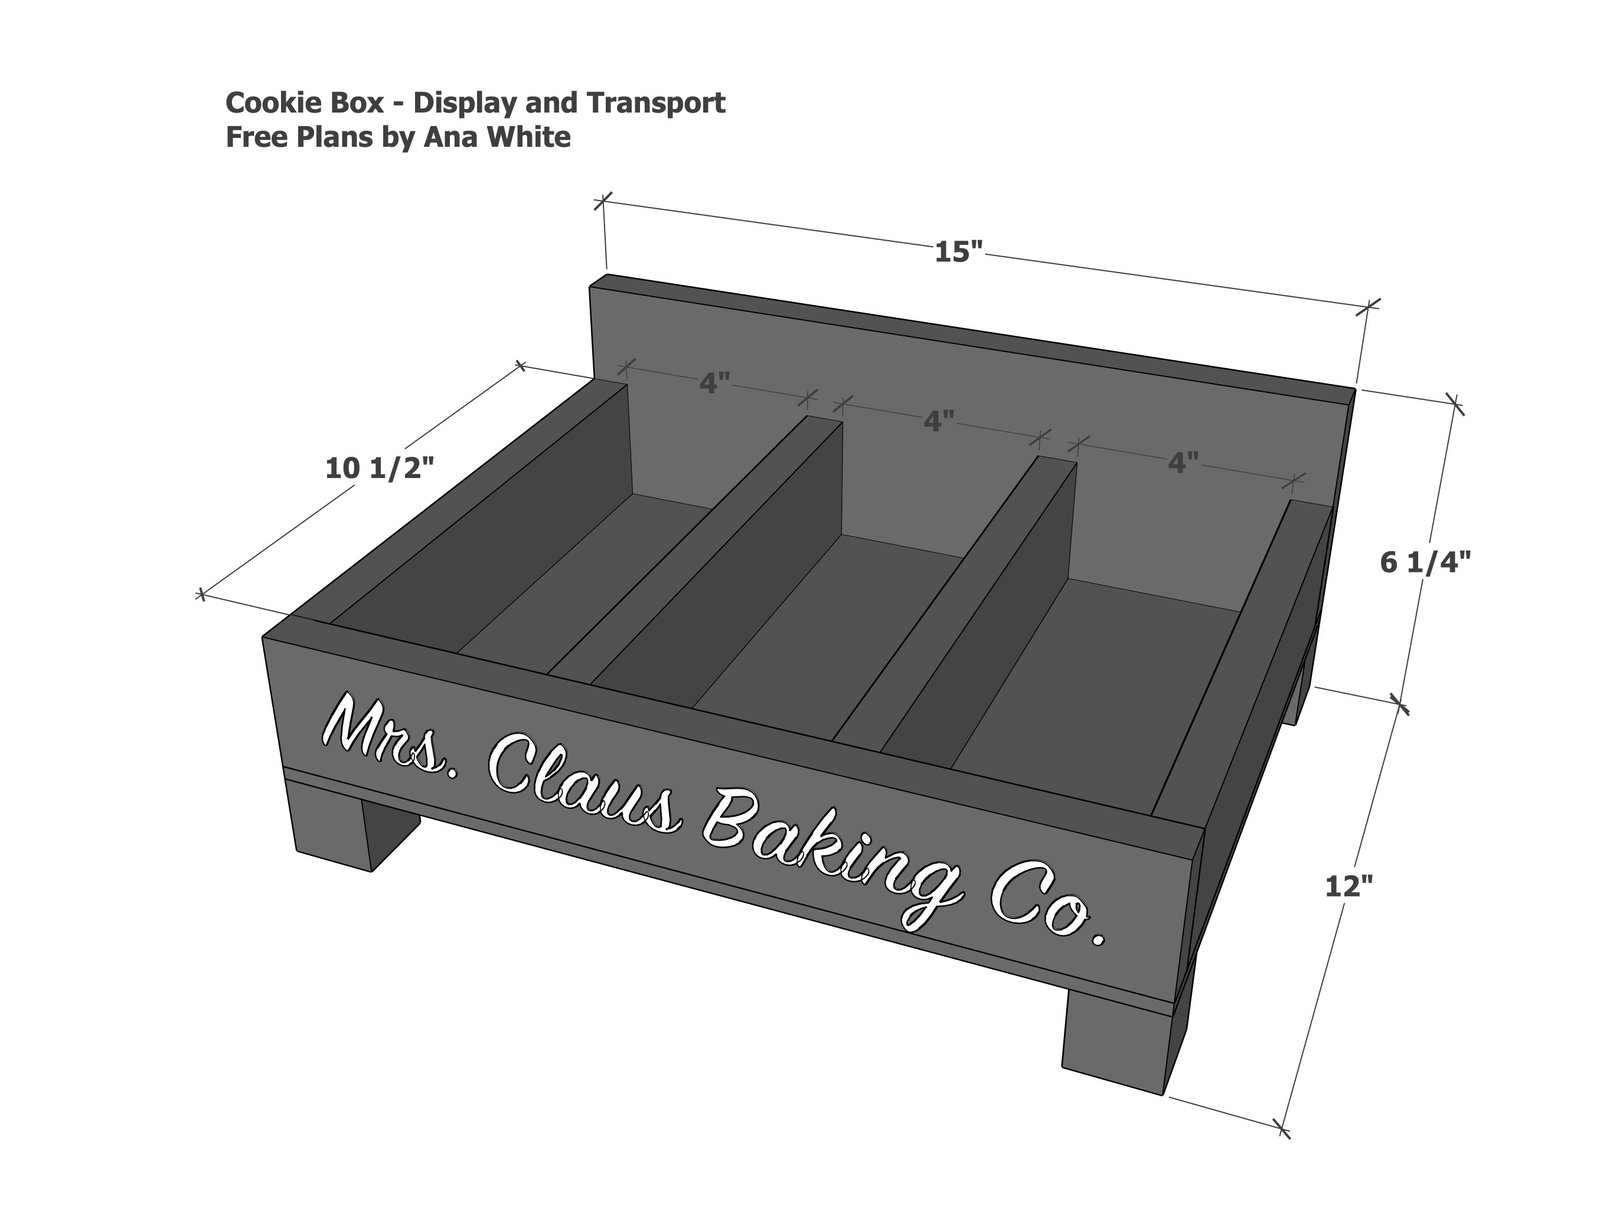
Dimensions
Use the size-specific shopping and cut lists below.
Shopping List
- 5 board feet of 1x3 (can be furring strips)
- 1 - 1x6 or 1x4 @ 15"
- 1/4" plywood @ 12" x 15"
- 6" of 2x2 scrap (will need a piece at least 16" long so you don't cut tiny pieces)
- 3/4" and 1-1/4" brad nails
- wood glue
- paint
- lettering is cut using a circuit
Cut List
- 4 - 1x3 @ 10-1/2"
- 1 - 1x3 @ 15"
- 1 - 1x4 or 1x6 @ 15"
- 1 - 1/4" plywood @ 12" x 15"
- 4 - 2x2 @ 1-1/2" - do not cut tiny pieces, instead cut the tiny piece off of a larger piece
Tools
- measuring tape
- pencil
- safety glasses
- drill
- circular saw
- nailer
Step-by-step Instructions
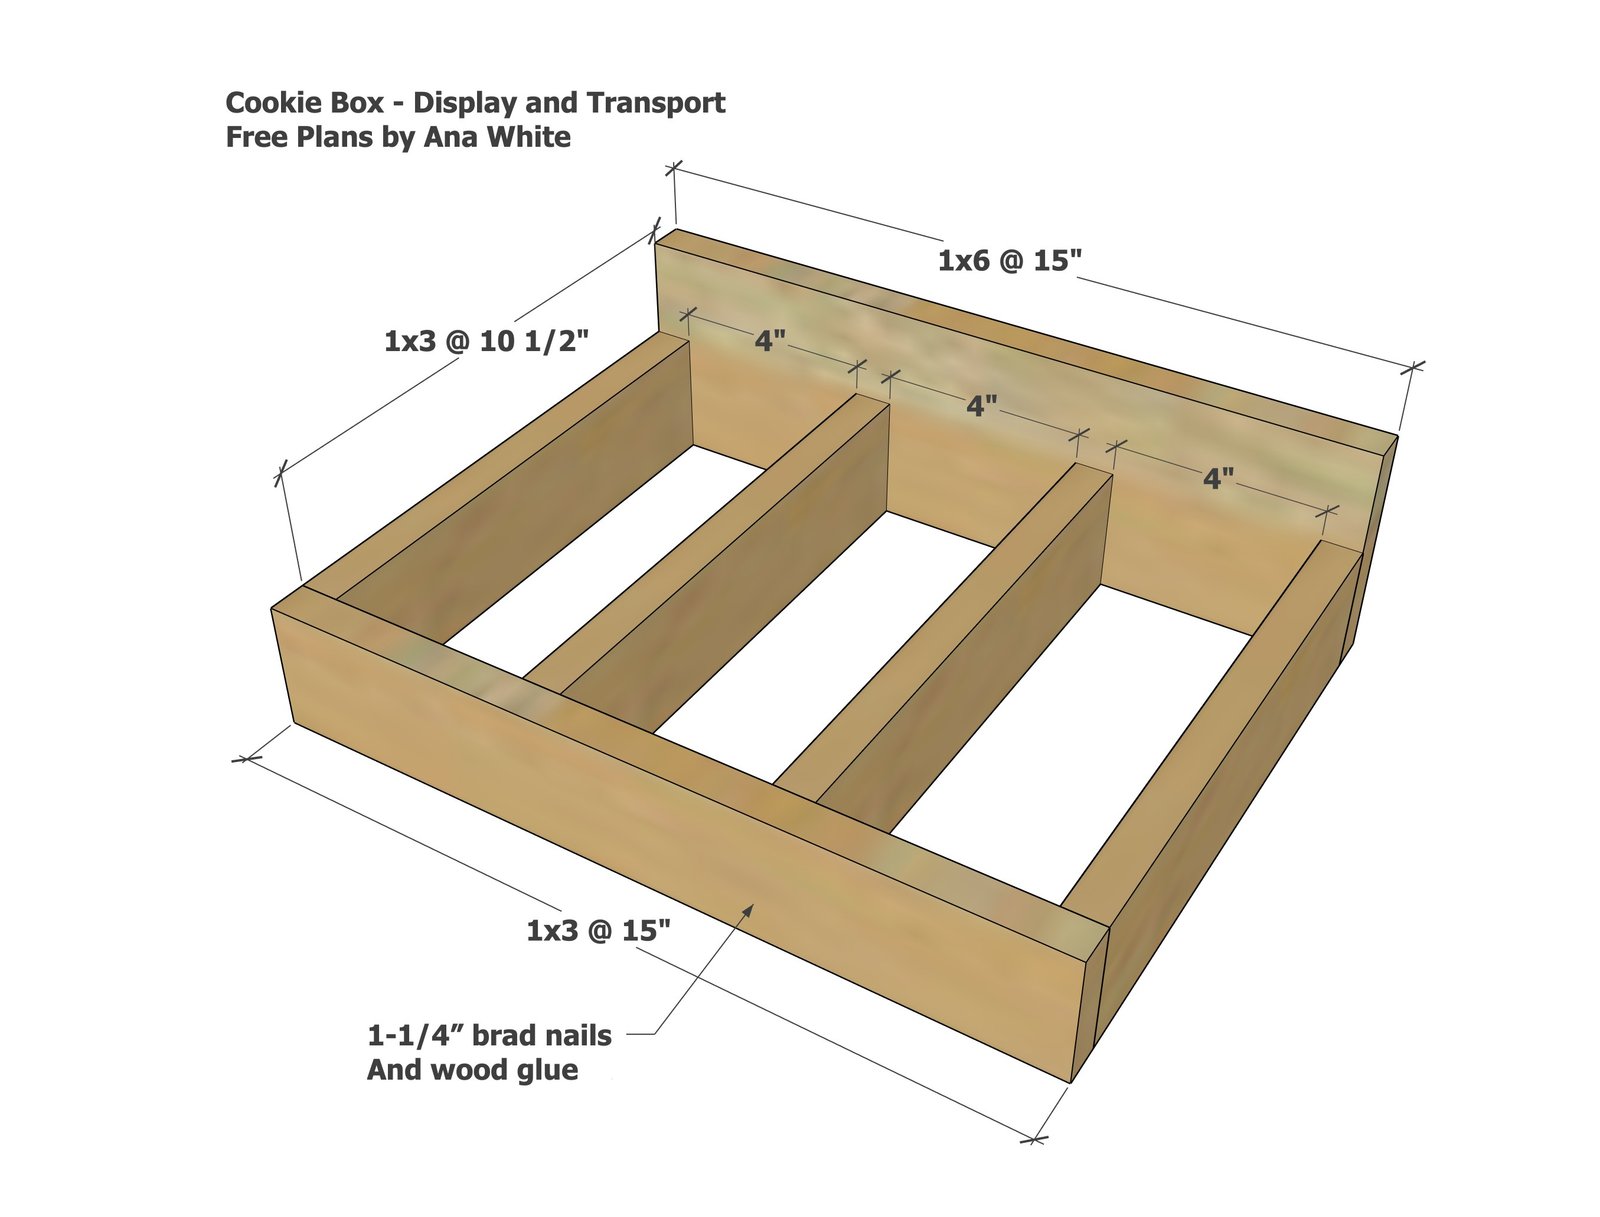
Nail the frame boards together with 1-1/4" brad nails and wood glue.
You can use a 1x6 or 1x4 for the back board.
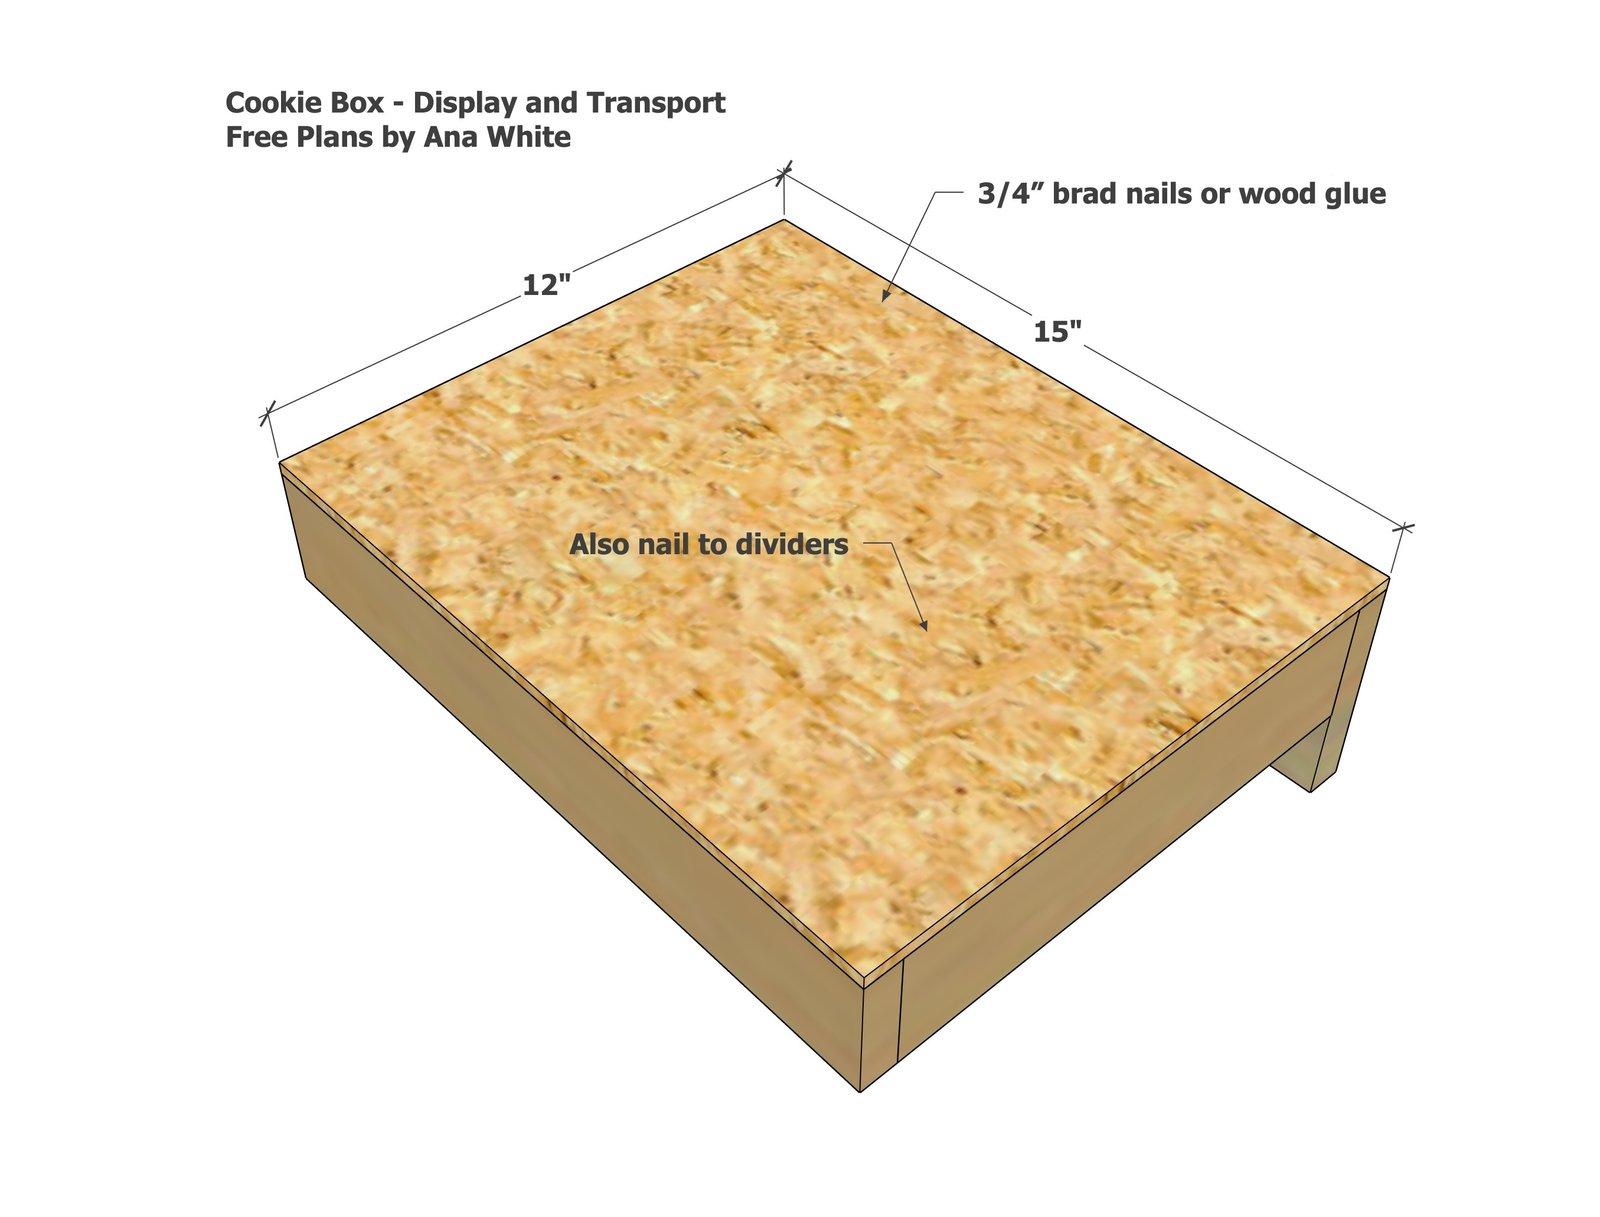
Cut the 1/4" plywood with a circular saw, clamping the plywood to the tabletop.
Use glue and 3/4" brad nails or staples to attach, make sure you attach to the center of the cookie box.
Step 3
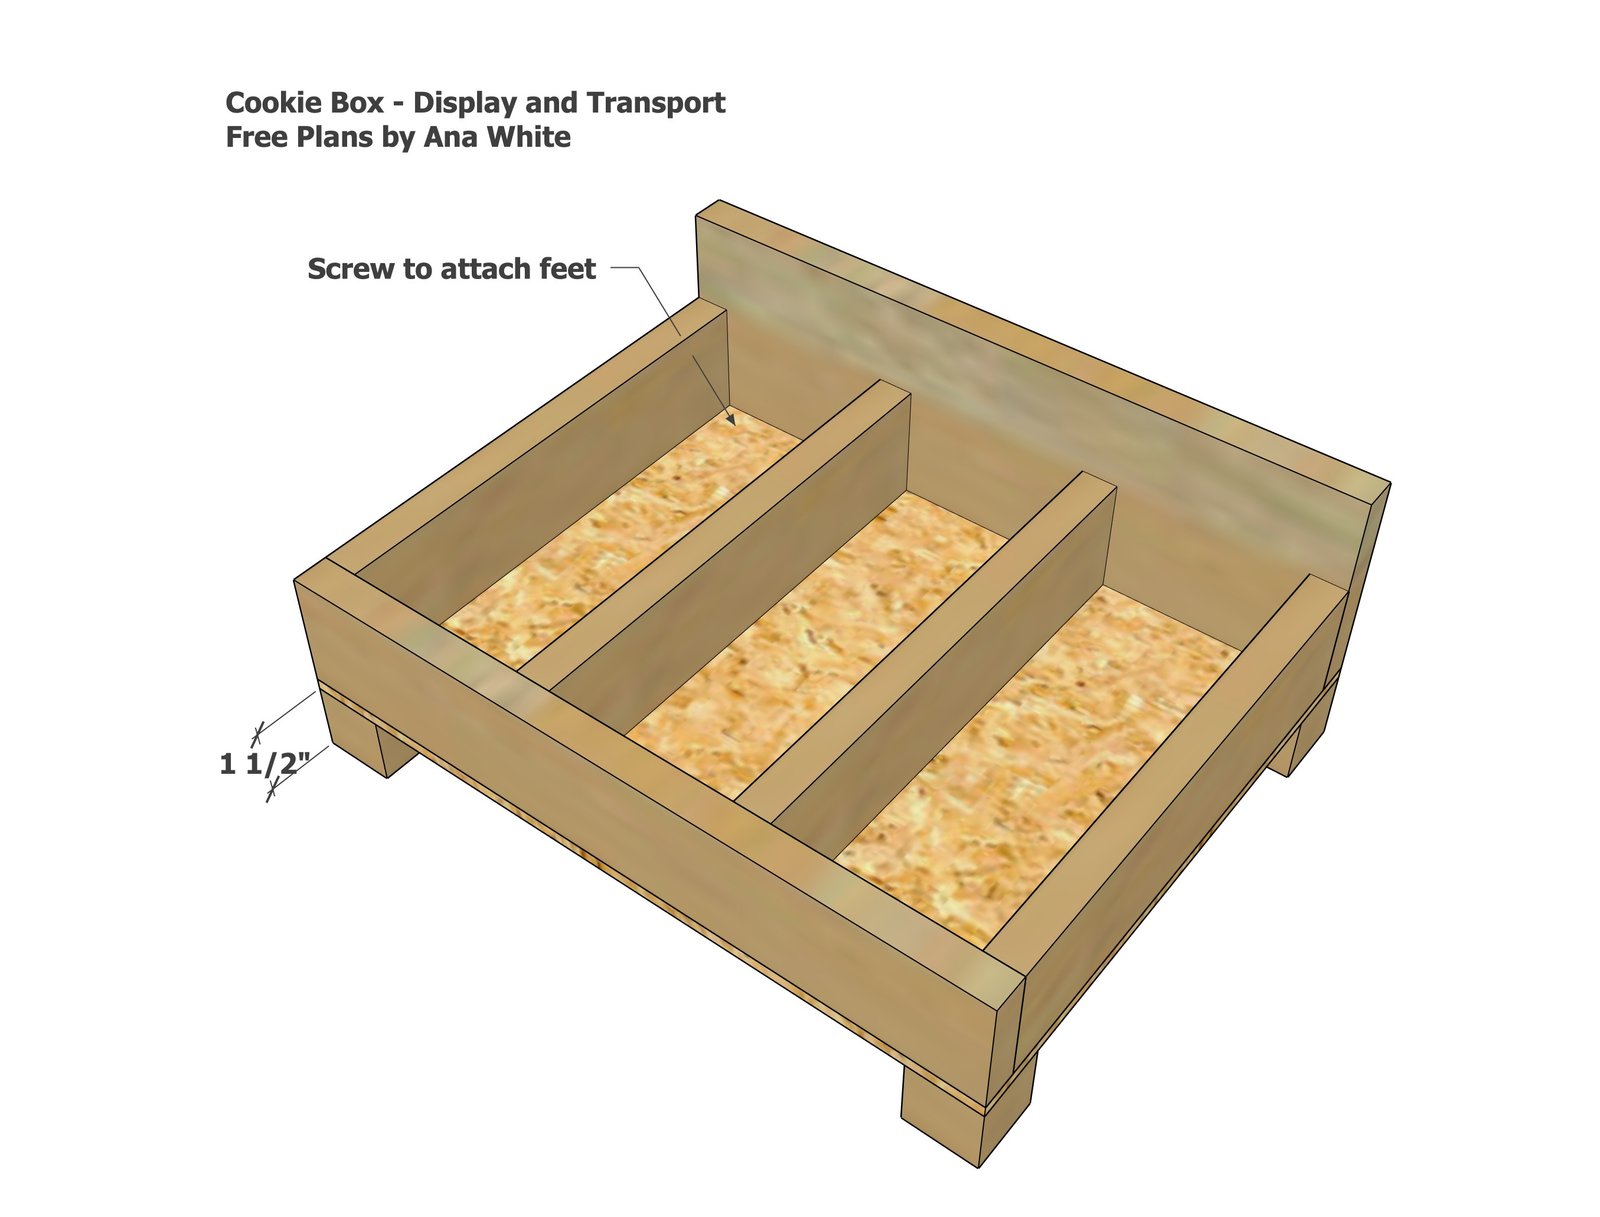
Add the feet on the bottom with glue. I used a 1-1/4" Kreg Jig screw at the corners to attach.
Finishing
Sand all surfaces, starting with a medium grit and finishing with fine. Wipe off the dust, fill any holes or gaps with wood filler, and sand smooth once dry. Apply primer if you're painting, then finish with your choice of paint or stain and seal with a durable clear topcoat. For outdoor projects, use exterior-rated primer, paint or stain, and sealer so the piece stands up to the weather.
Source (temporary): https://www.ana-white.com/woodworking-projects/christmas-cookie-box-or-serving-display