Christmas Tree Tray
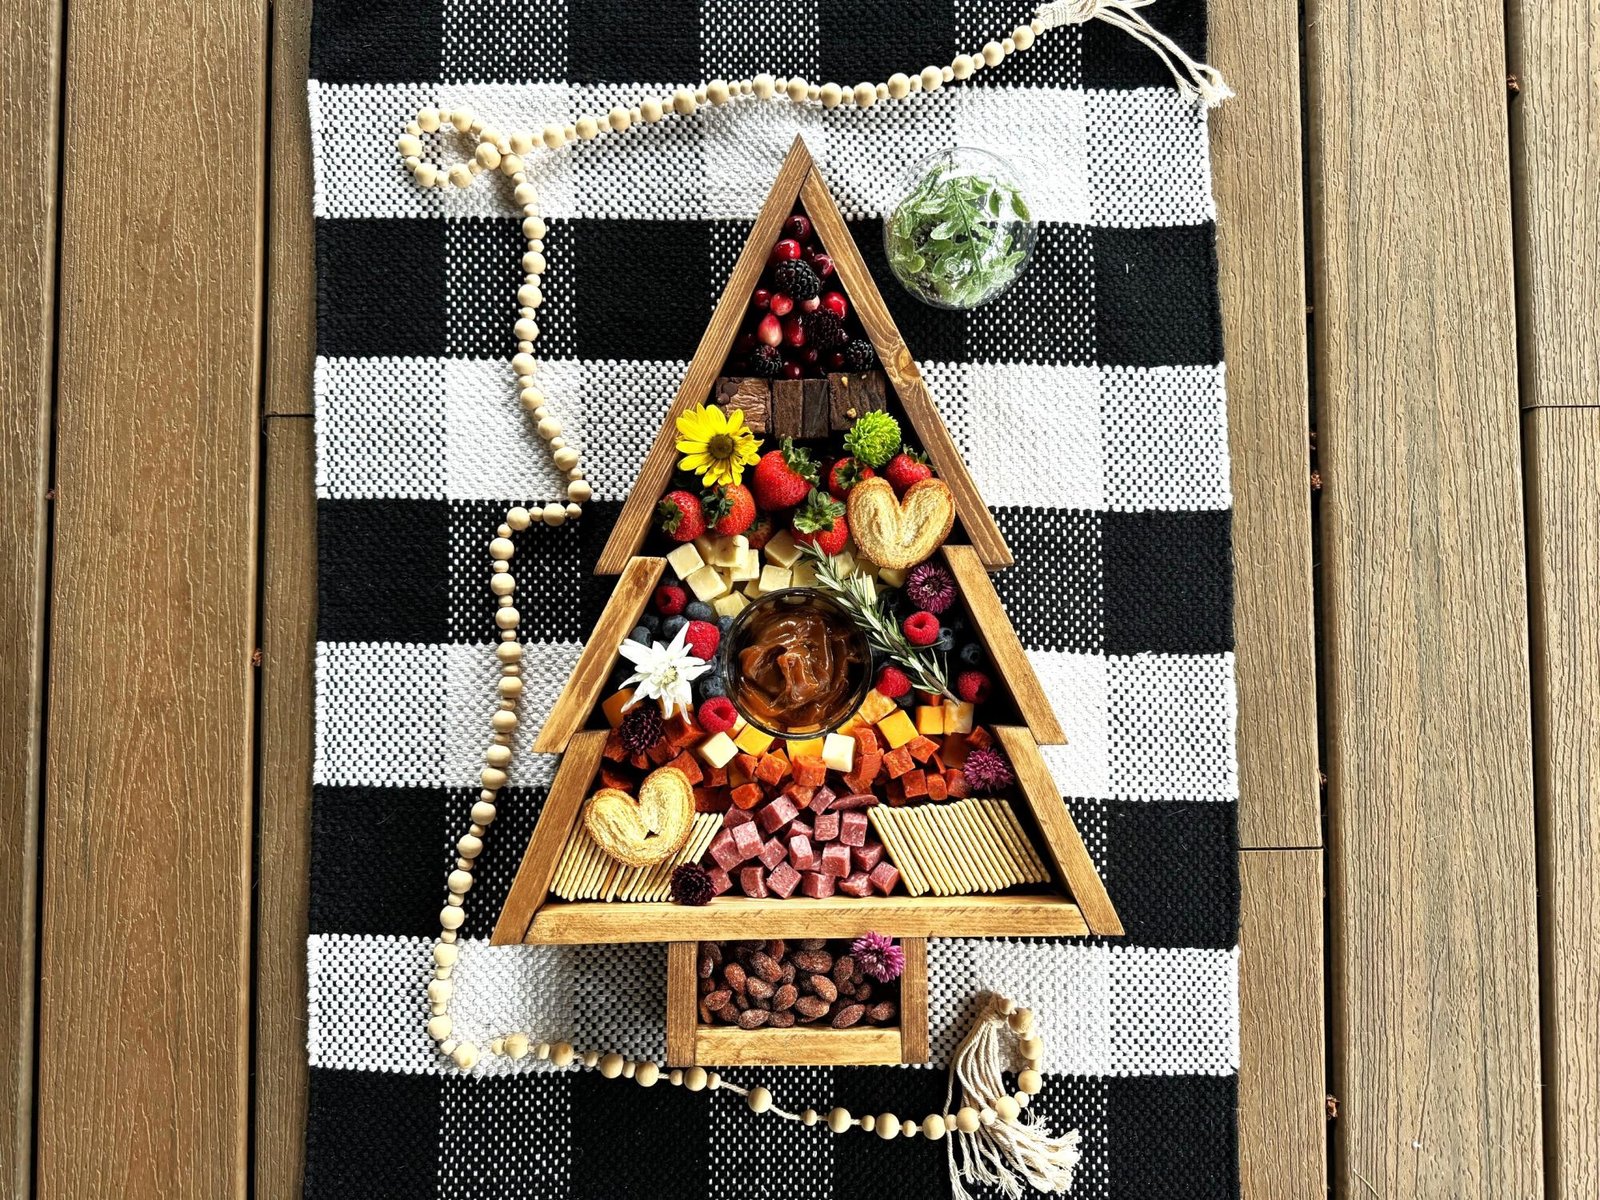
Get ready to elevate your holiday gatherings with a charming DIY wood Christmas tree tray! This budget-friendly project can be built for around $20 using common lumber and just a few tools! makes it easy to create this holiday themed tray, perfect for showcasing your favorite cheeses, meats, and seasonal treats. Not only is this project a fun way to add a personal touch to your holiday décor, but it also makes a great hostess gift and would be the perfect addition to sell at holiday craft fairs. with diagrams, build photos, cut list and shopping list - everything you need to build it today! Designed and built by Family DIYnamic
Specifications
| Project type | Food Serving and Display |
|---|---|
| Room | dining room |
| Difficulty | Starter Projects |
| Estimated cost | Under $20 |
Dimensions
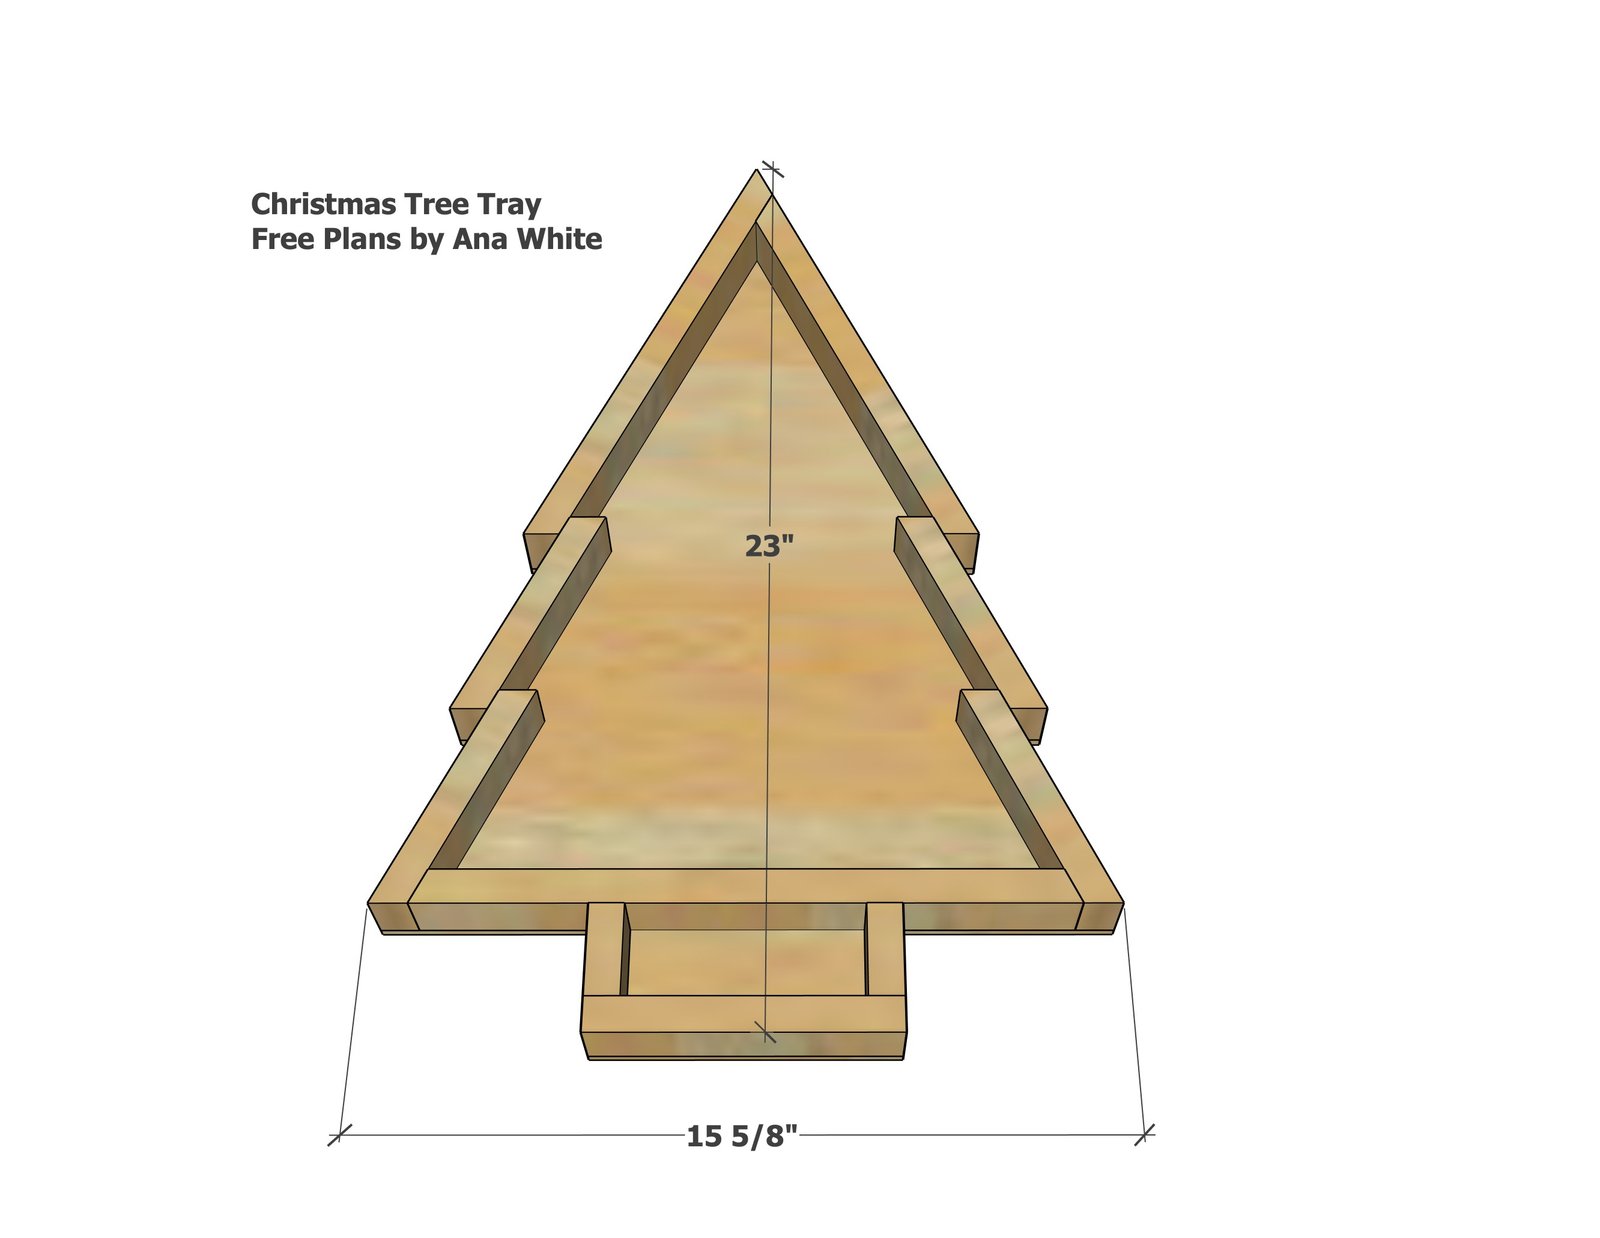
Use the size-specific shopping and cut lists below.
Shopping List
- 1 - 1x2 @ 8 feet long (can be furring strip)
- 1 - 1/4" plywood, 24" x 16"
- wood glue
- 1-1/4" brad nails
Cut List
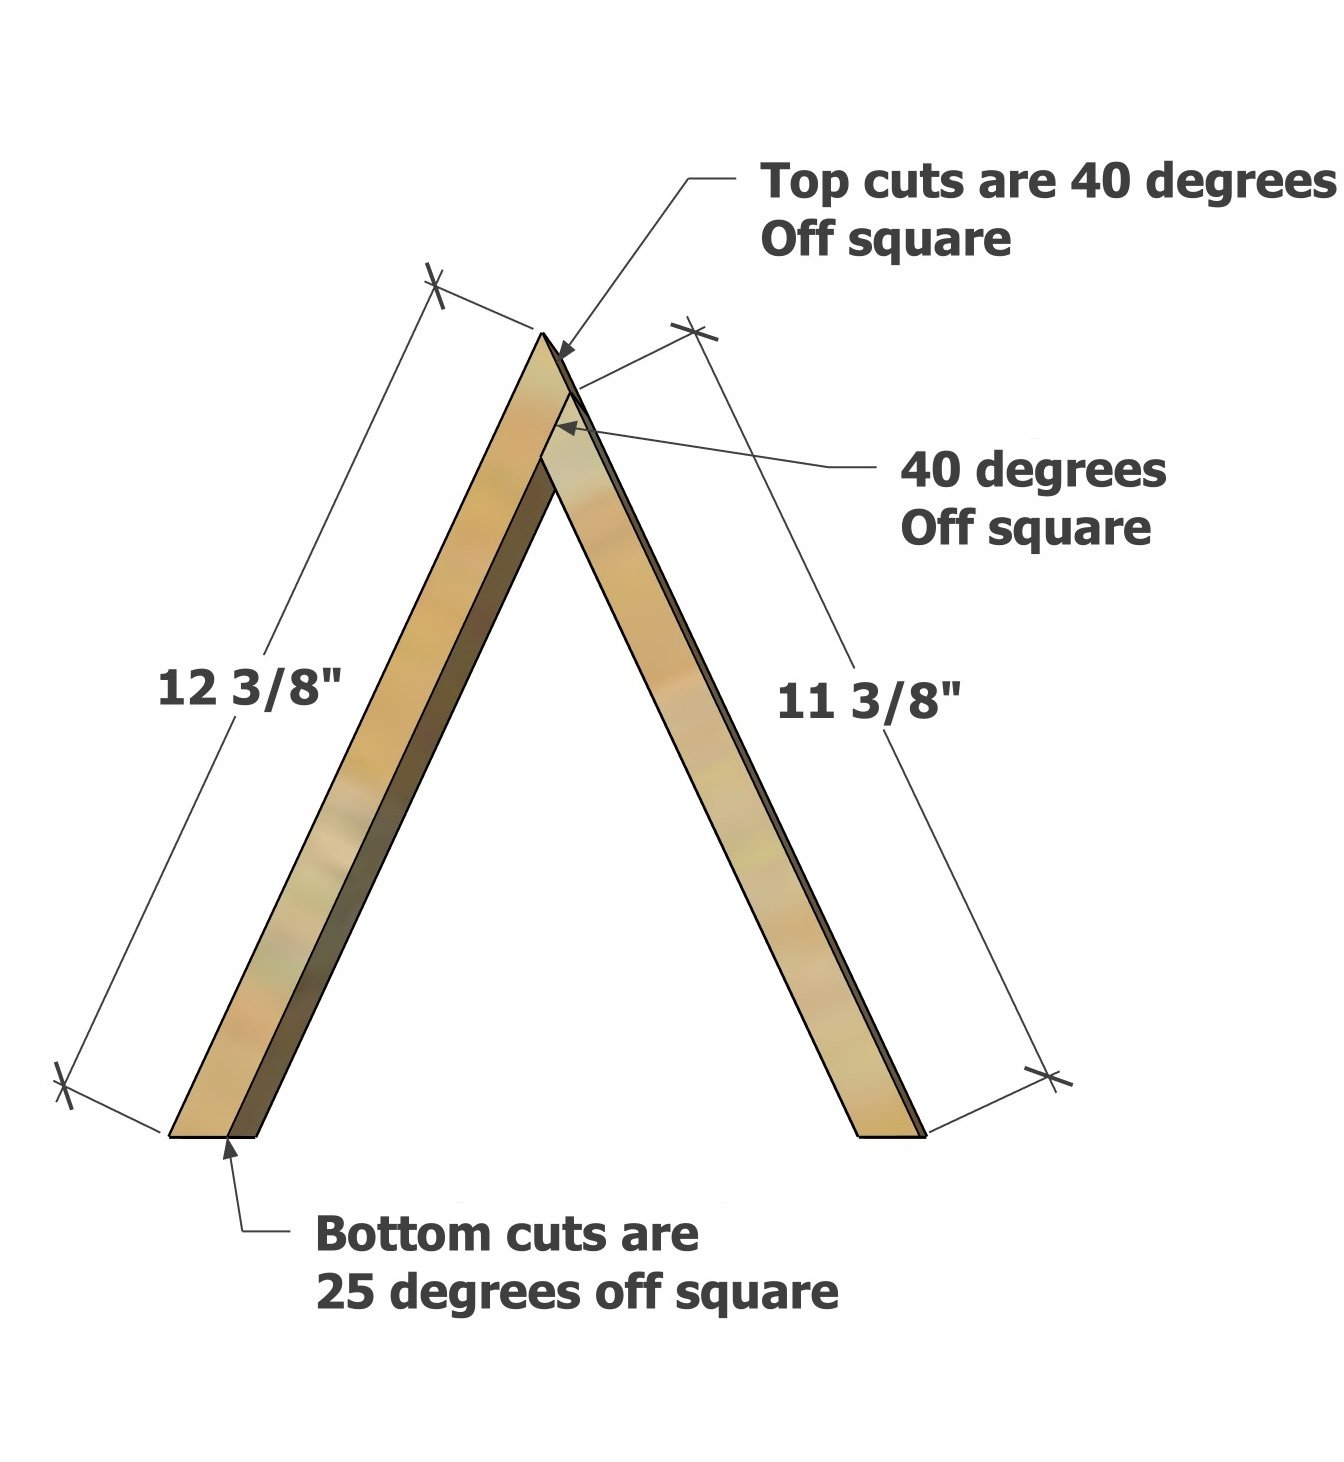
- 1 - 1x2 @ 12-3/8" - long point to long point, one end cut at 40 degree off square, the other end cut at 25 degrees off square, NOT parallel
- 1 - 1x2 @ 11-3/8" - long point to long point, one end cut at 40 degree off square, the other end cut at 25 degrees off square, NOT parallel
- 4 - 1x2 @ 5-1/2" - long point to short point measurement, ends are parallel, both ends cut at 25 degrees off square
- 1 - 1x2 @ 13-7/8" - long point to long point measurement, ends NOT parallel, both end cut at 25 degree off square
- 1 - 1x2 @ 6-1/2"
- 2 - 1x2 @ 2"
Tools
- measuring tape
- pencil
- safety glasses
- hearing protection
- jigsaw
- compound miter saw
- nailer
- sander
Step-by-step Instructions
Carefully cut out the top pieces, noting the top angles are different than the bottom angles.
Attach together with 1-1/4" brad nails and wood glue.
Step 2
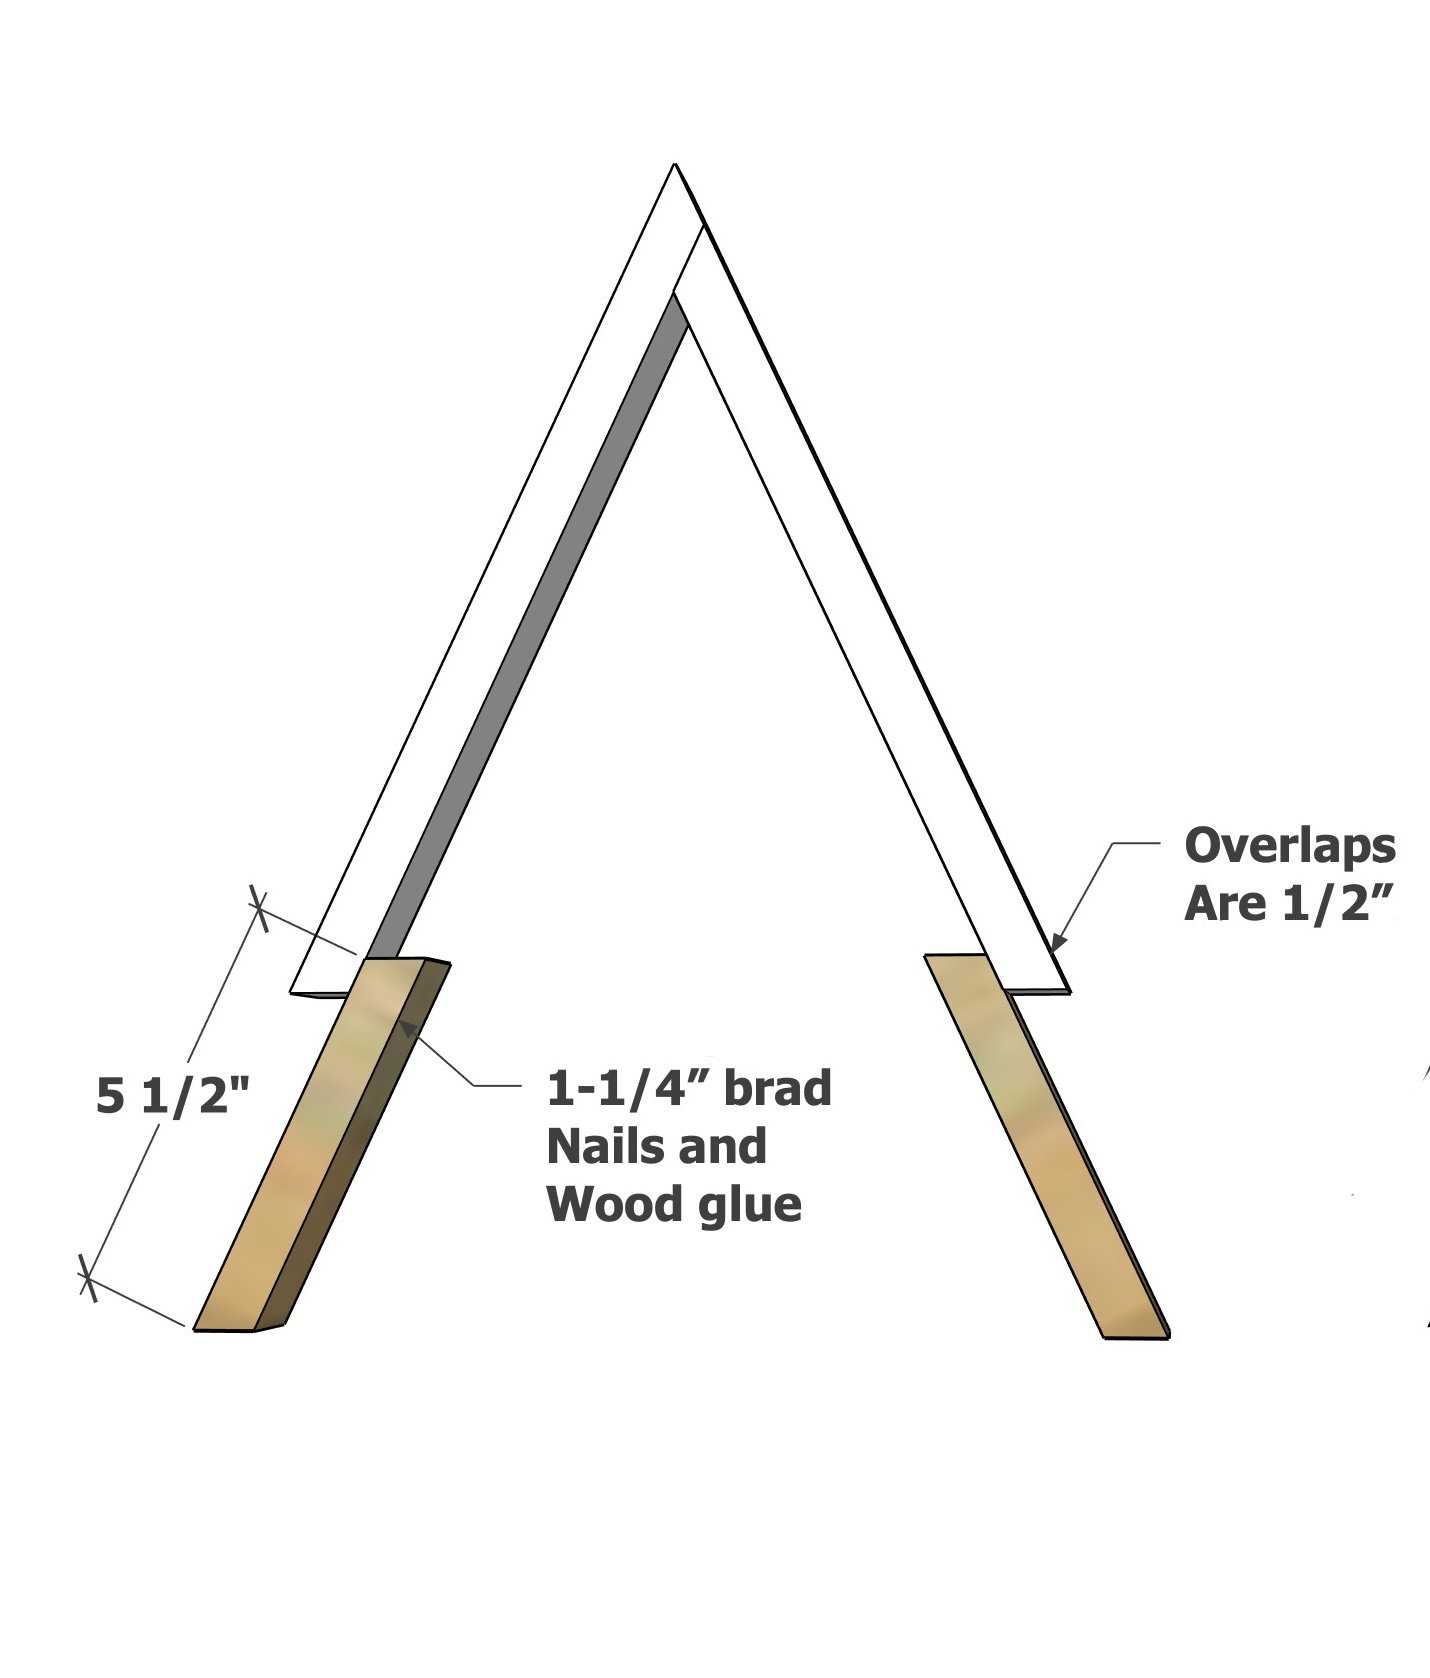
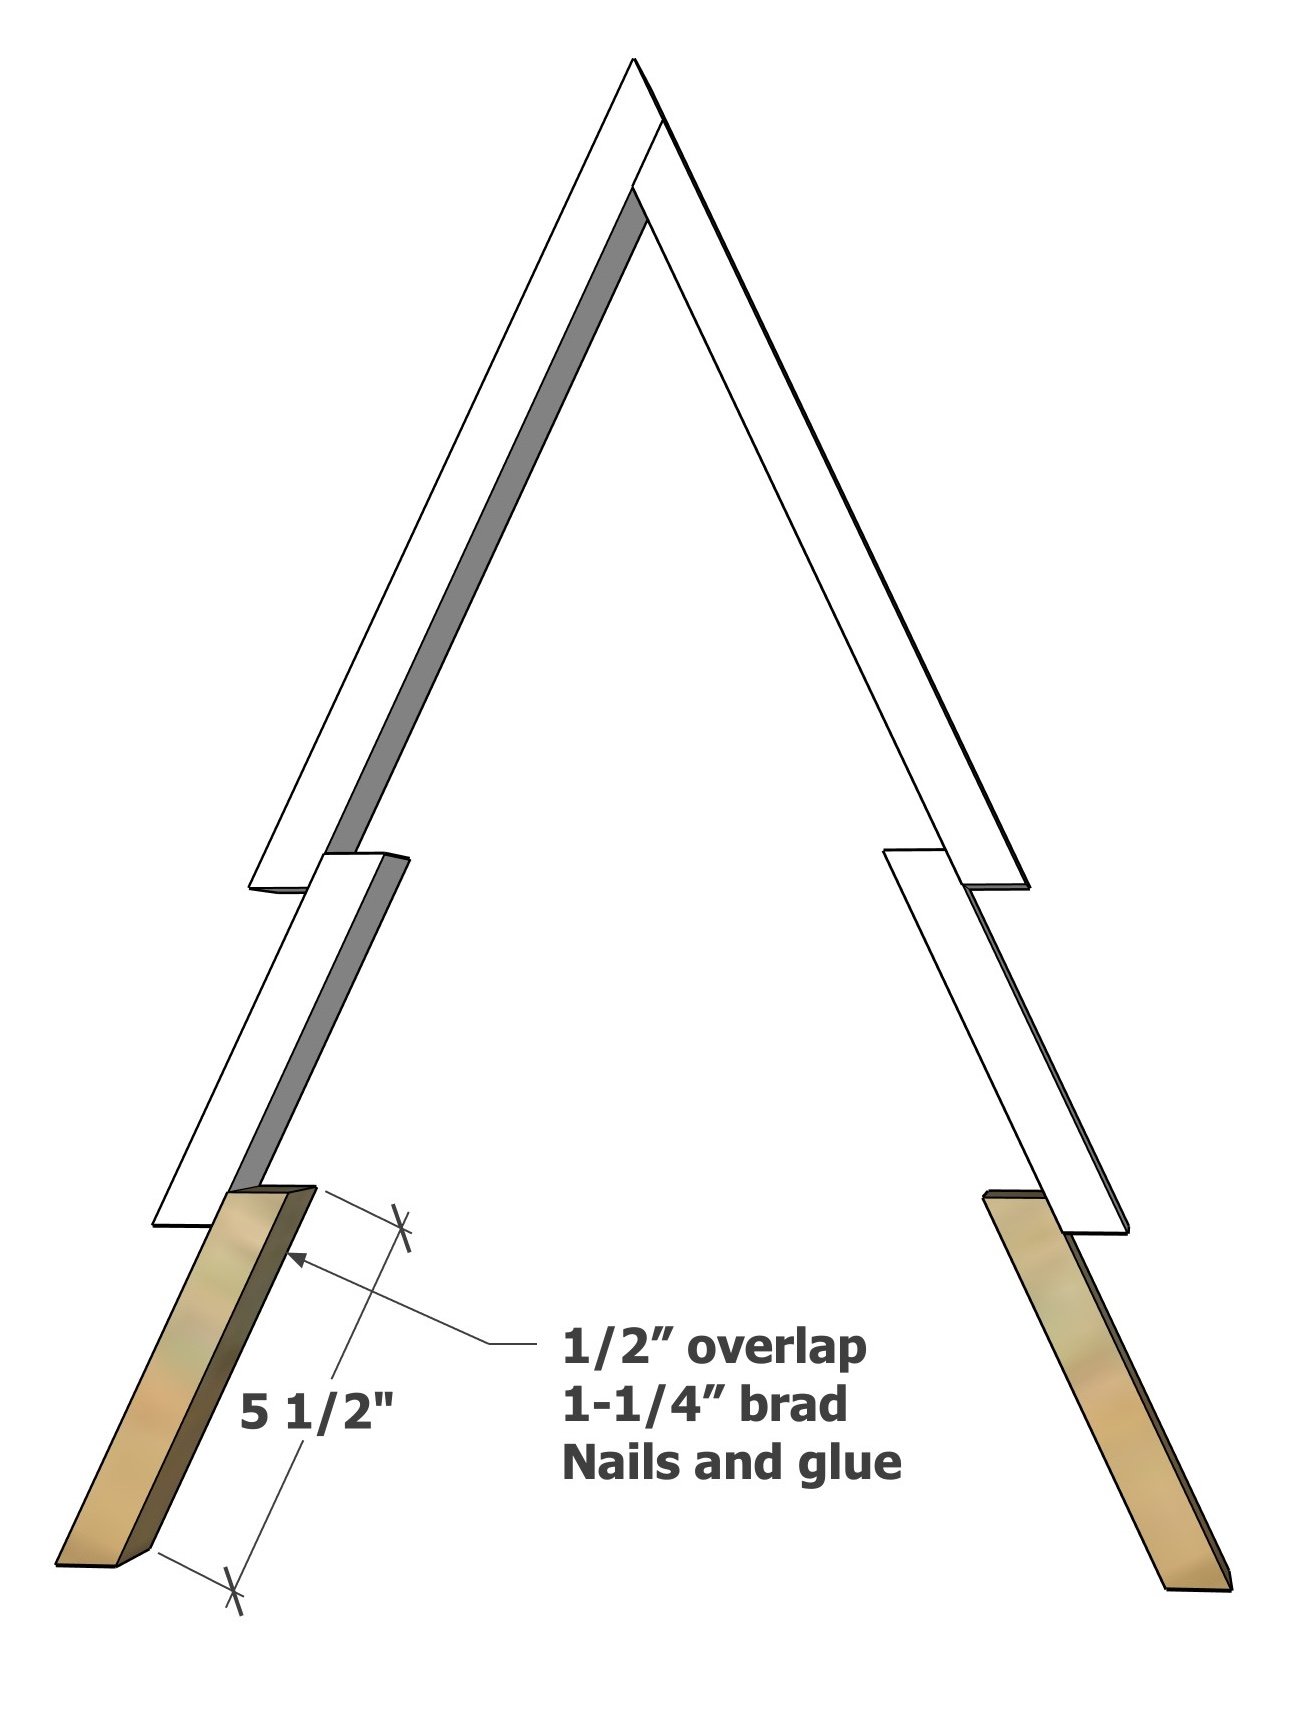
Layer the next pieces 1/2", attach with glue and nails.
Step 3
Repeat for the next row.
Step 4
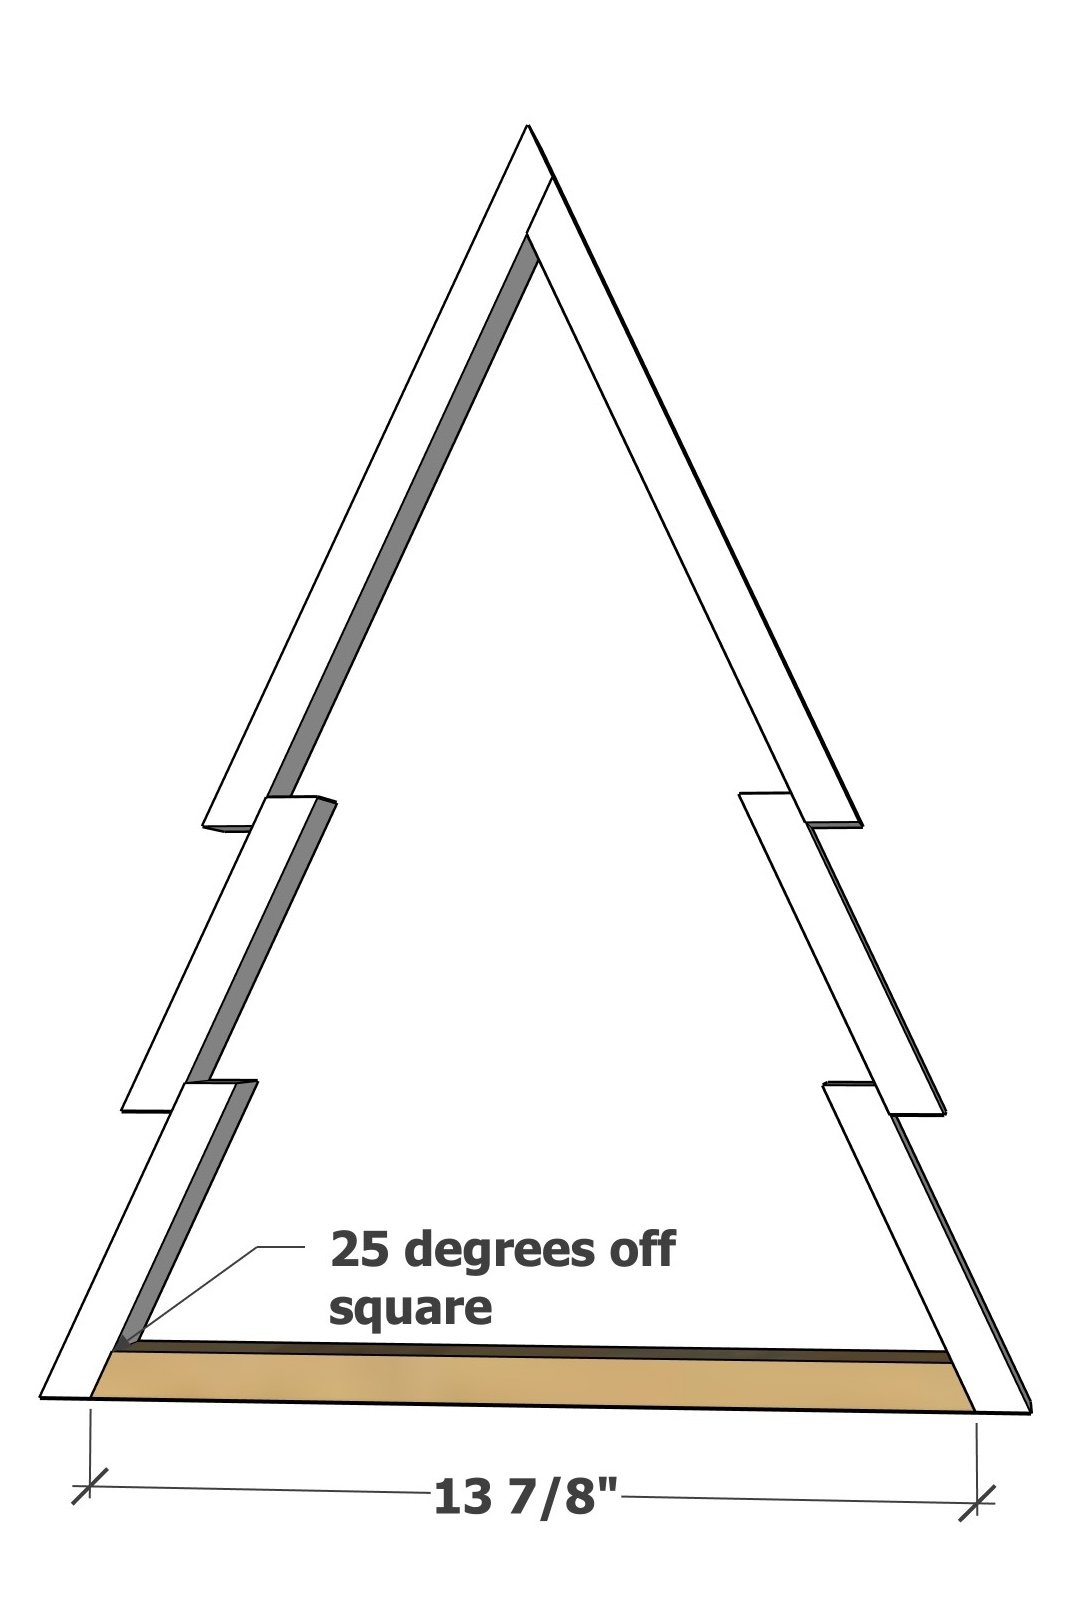
Attach the bottom with glue and 1-1/4" brad nails.
Step 5
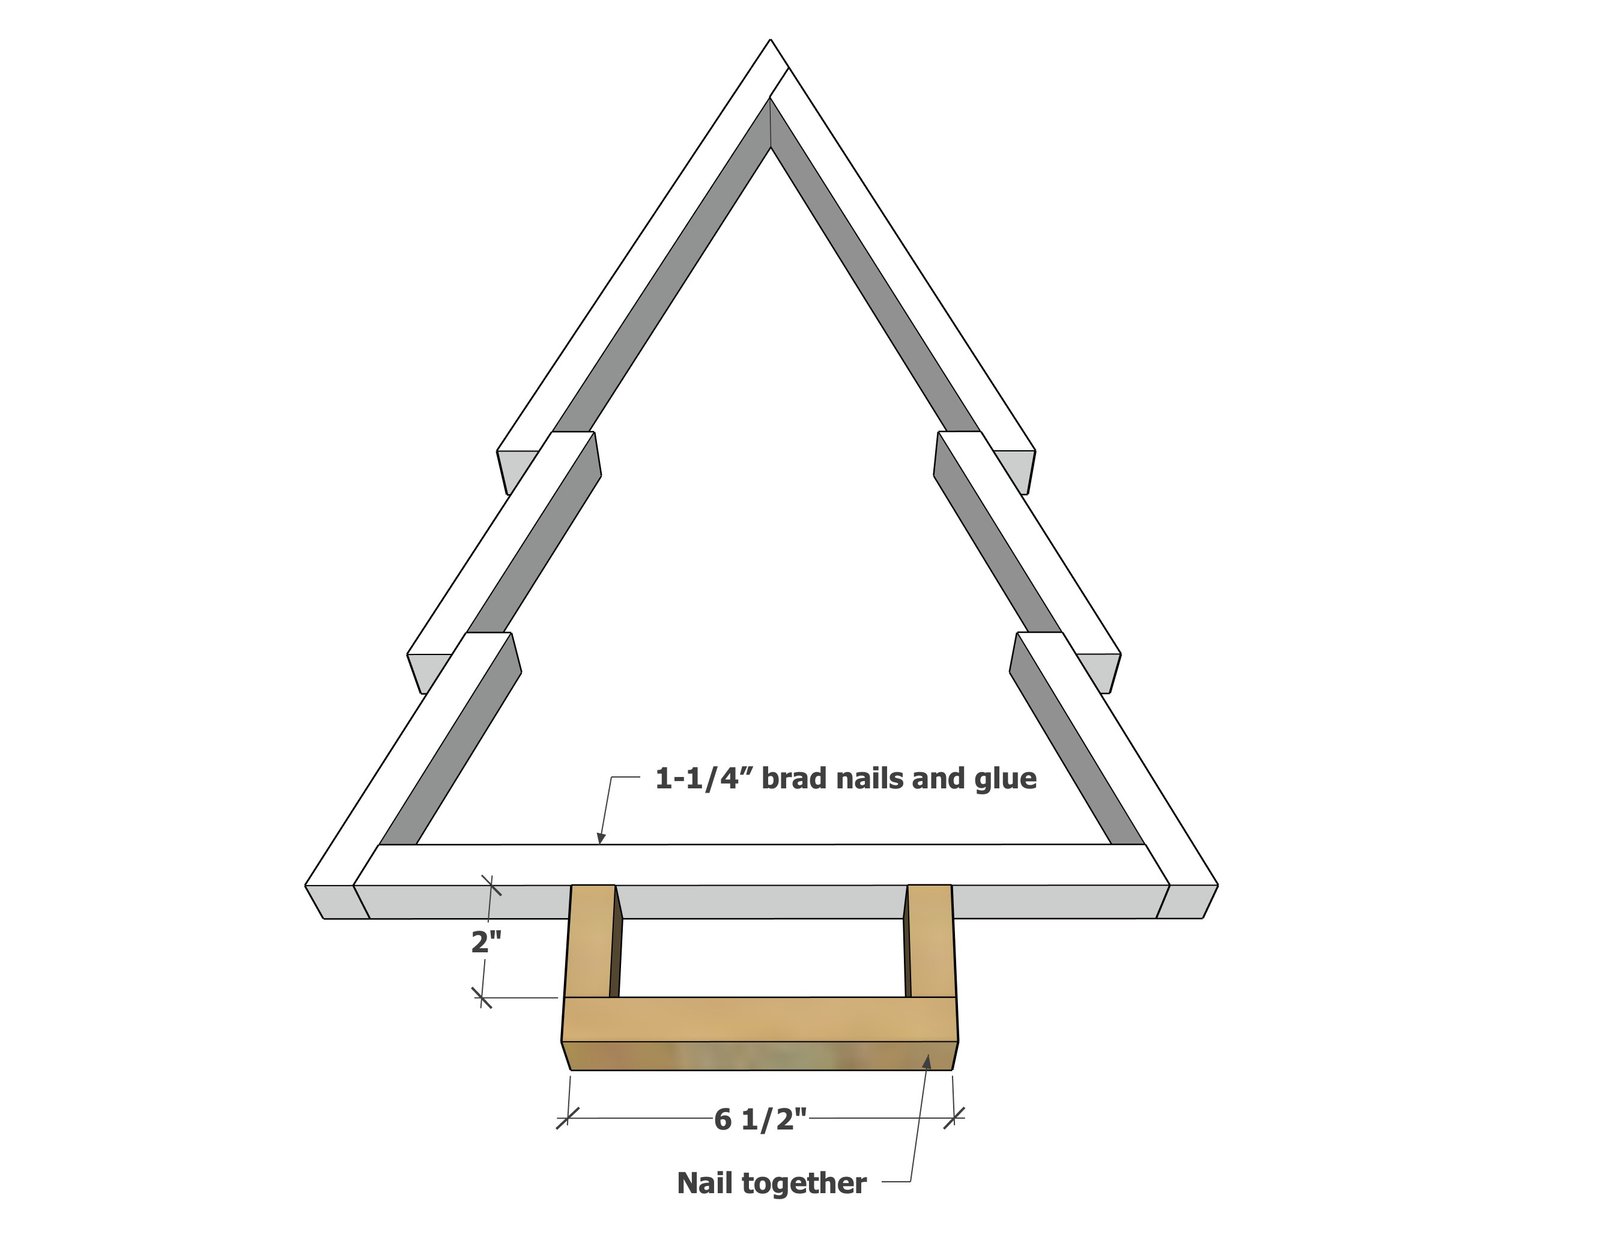
Build the bottom, then attach to the base with 1-1/4" brad nails and glue.
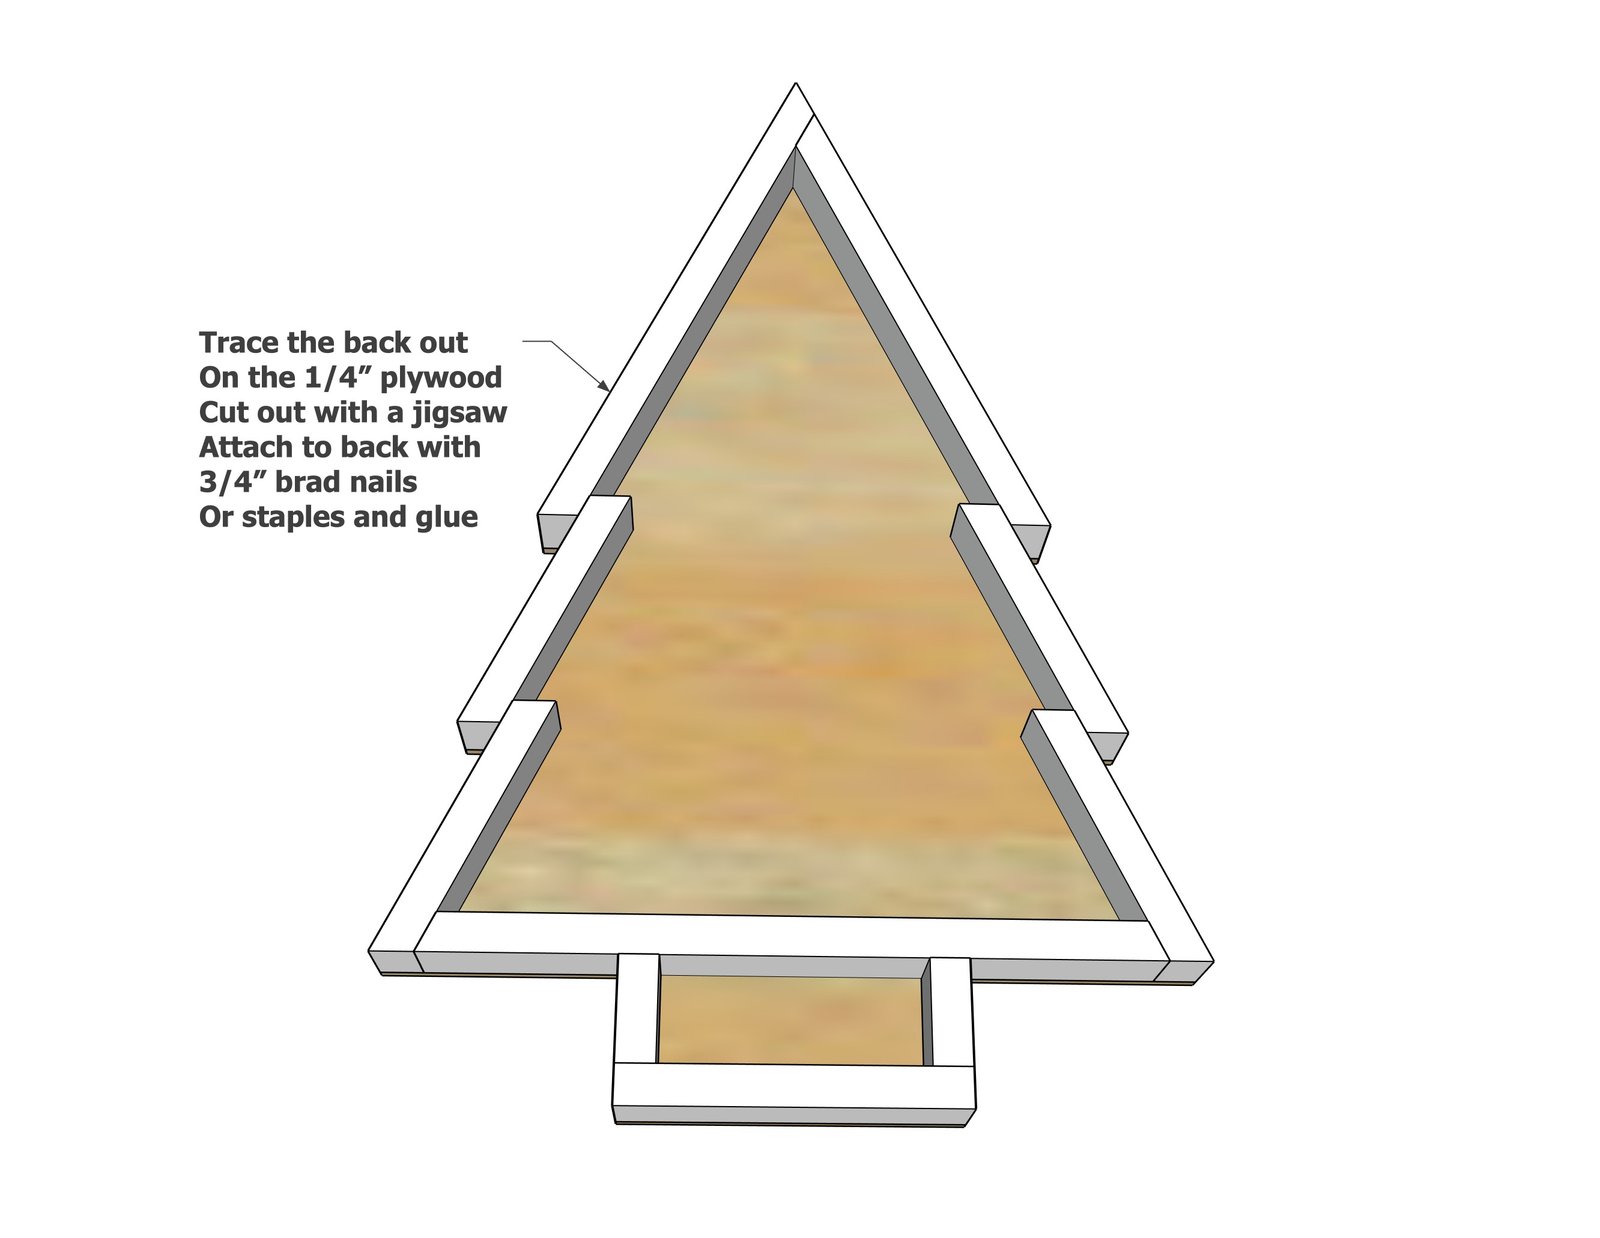
Lay out on the 1/4" plywood and trace the outside.
Cut the line with a jigsaw. Attach to the back with 3/4" brad nails and glue.
Finishing
Sand all surfaces, starting with a medium grit and finishing with fine. Wipe off the dust, fill any holes or gaps with wood filler, and sand smooth once dry. Apply primer if you're painting, then finish with your choice of paint or stain and seal with a durable clear topcoat. For outdoor projects, use exterior-rated primer, paint or stain, and sealer so the piece stands up to the weather.
Source (temporary): https://www.ana-white.com/woodworking-projects/christmas-tree-tray