Chunky Console Table Desk with Flip Down Keyboard Tray
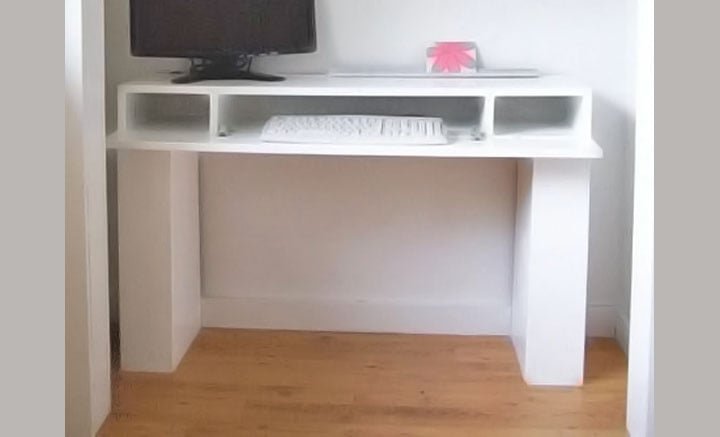
No room for a desk? This beautiful console table flips open to hide a laptop or a keyboard! You'll love it's narrow profile, hidden storage in the legs, and simple to build design. from
Specifications
| Project type | Desk, Desk Systems and Project Table Plans |
|---|---|
| Room | office |
| Style | Modern Style Furniture Plans |
| Difficulty | Intermediate |
| Estimated cost | $20 - $50 |
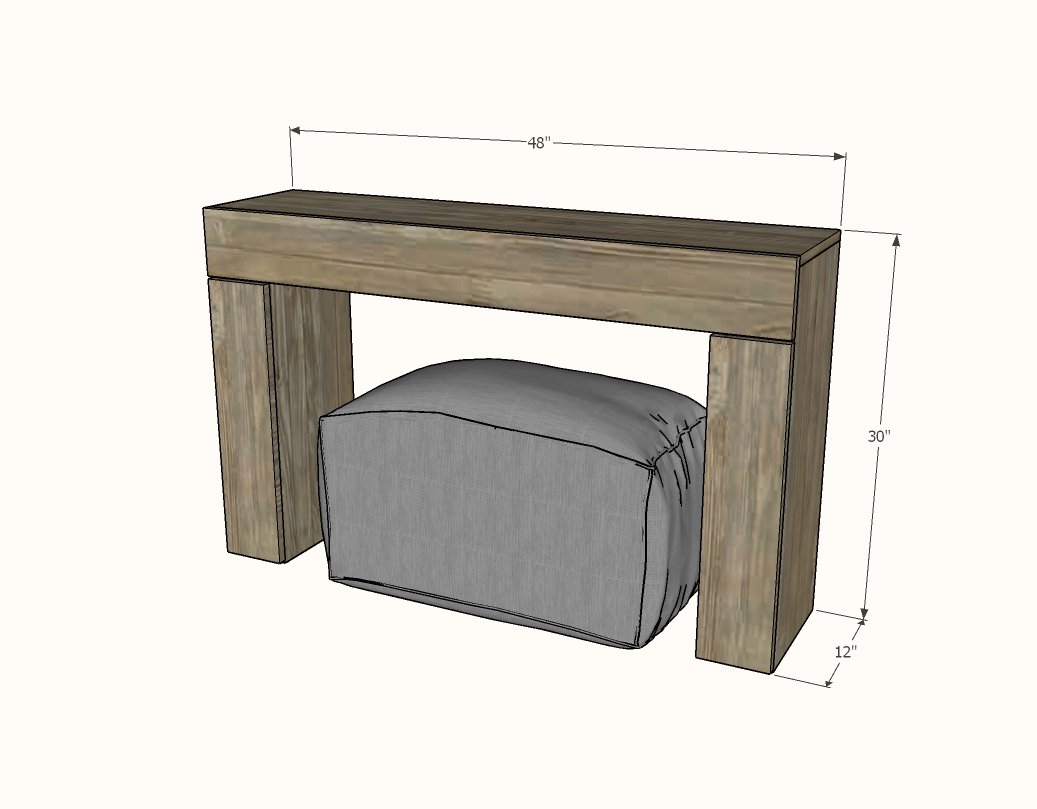
Dimensions
Use the size-specific shopping and cut lists below.
Shopping List
6 Frameless Full Overlay Euro Style Hinges like these
1 – 1×12 @ 8′ Length (cut top and shelf from this board)
1 - 1x12 @ 10' length (cut all other cuts, largest first, from this board)
1 – 1×6 @ 8′ Length
1-1/4" brad nails or 2" self tapping star bit screws or 1-1/4" pocket hole screws (or a combination of all of the above
Cut List
2 - 1x12 @ 29-1/4" - outer legs
1 - 1x12 @ 46-1/2" - shelf
2 - 1x12 @ 24-1/2" - inner legs
1 - 1x12 @ 48" - top
6 - 1x12 @ 4" - dividers
1 - 1x6 @ 48" - keyboard fold down
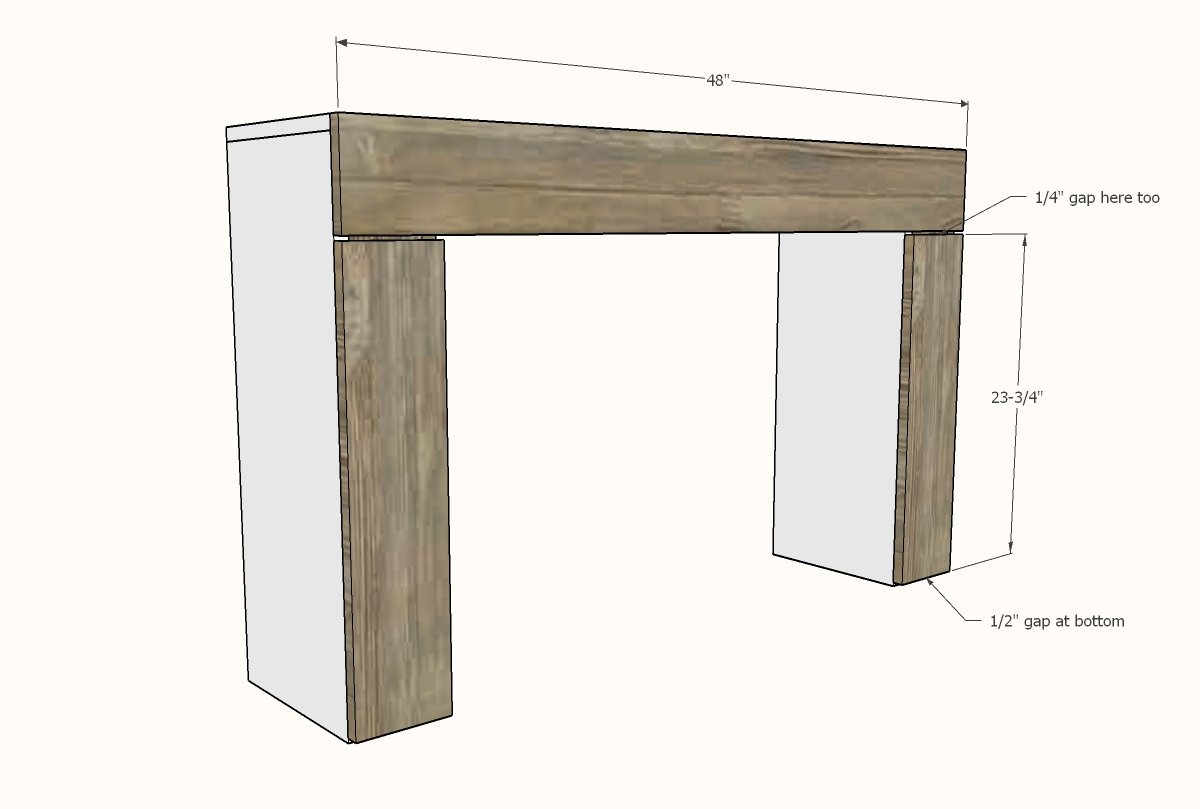
2 - 1x6 @ 23-3/4" - storage leg doors
Tools
- measuring tape
- pencil
- safety glasses
- drill
- circular saw
- nailer
- sander
Step-by-step Instructions
Step 1
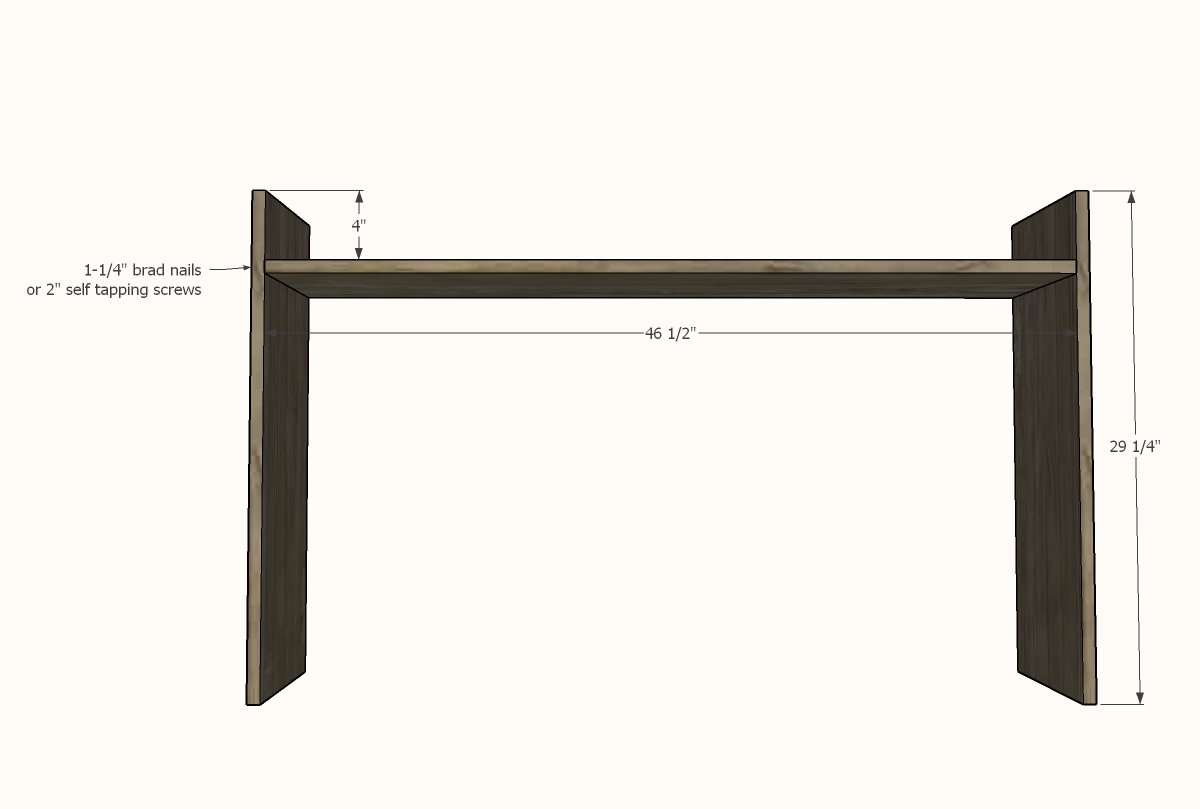
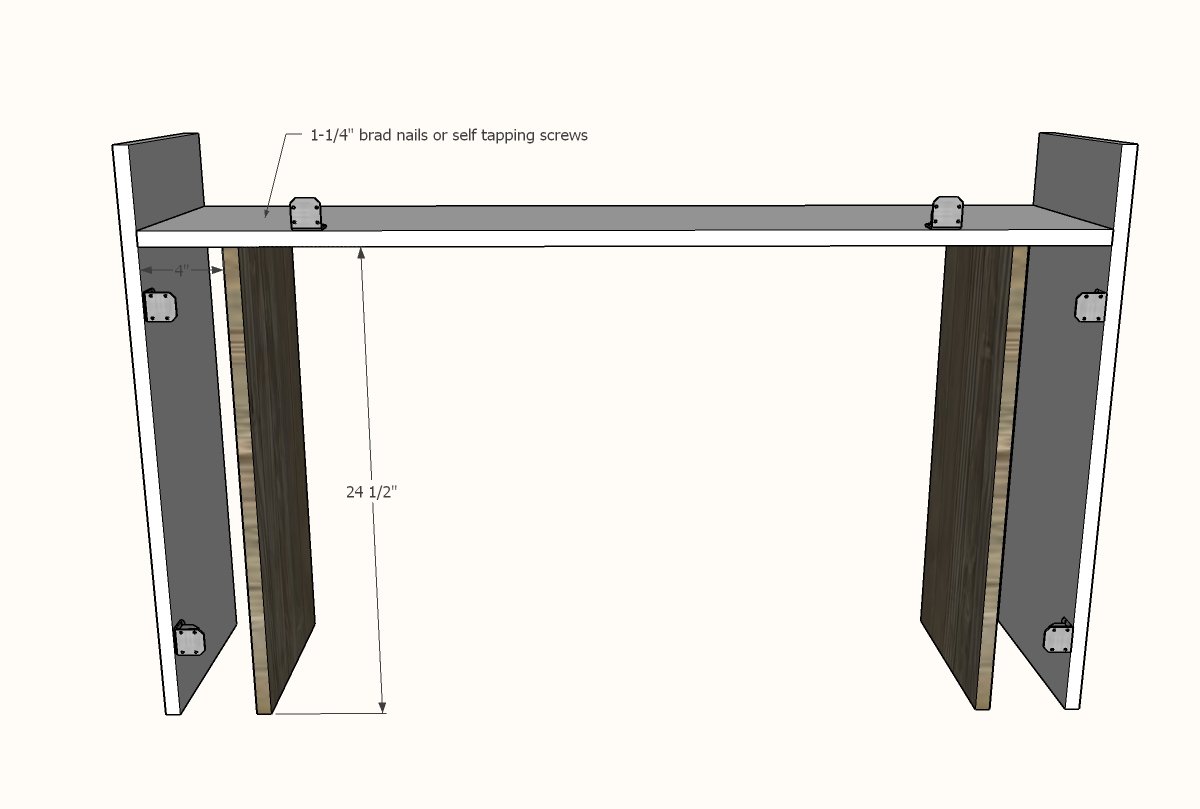
Attach legs to the desk tray using your choice of fastener - 1-1/4" brad nails and wood glue, 2" self tapping wood screws, or 3/4" pocket holes with 1-1/4" pocket hole screws. You can use any combination of these fasteners to build throughout the plans, considering that the brad nails are cheapest, easiest and easiest to hide, but pocket hole screws will create a stronger joint. Recommend for this step: Pocket Holes TIP: The 1x12 @ 4" pieces can be used as a temporary spacer to set your shelf height.
Step 2
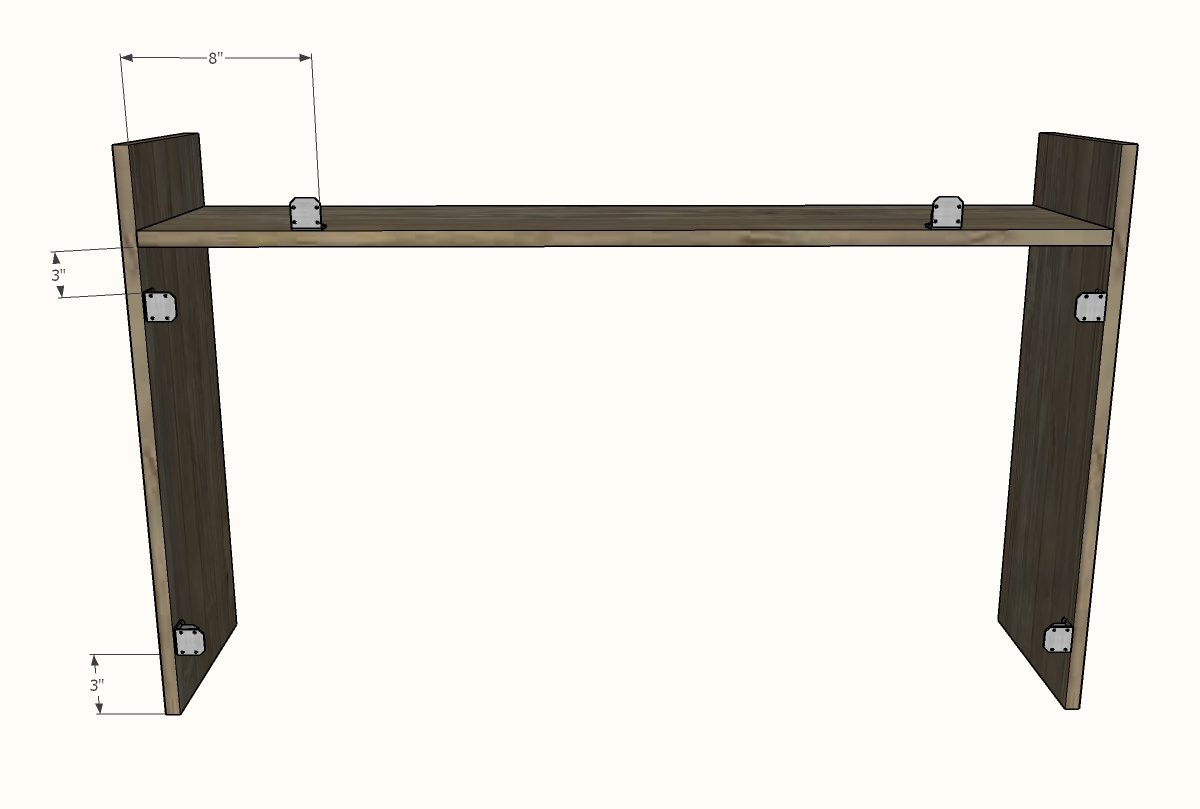
I recommend installing the hinges at this point, since it will be hard to get a drill inside the project as we progress further. Simply screw to the project as shown, with the flat front flush to the front edges of the project. You can use a scrap piece of wood to help you place the hinges, making sure they are flush to the front. Exact location is not essential, just close the locations in the diagram is good.
Attach the inner leg piece to the shelf.
Recommended: Pocket Holes
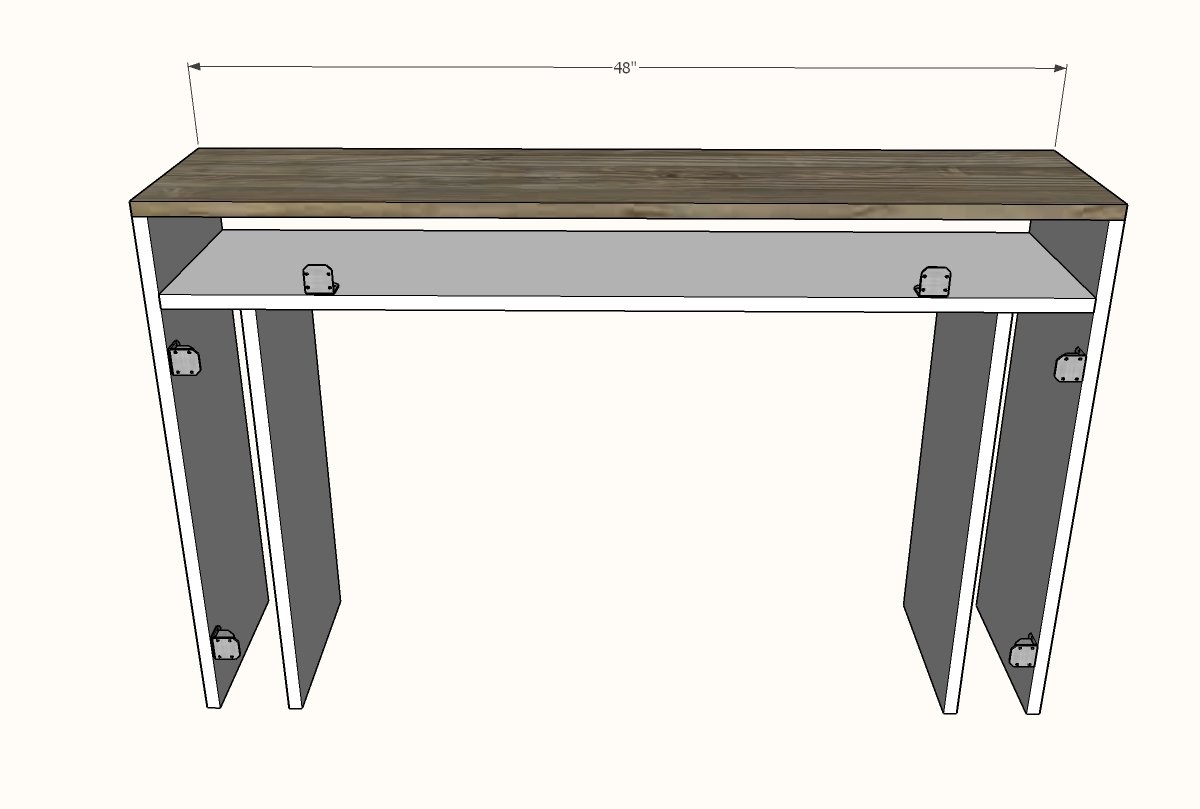
Attach top to the outer legs.
Recommended: 1-1/4" brad nails with glue since they are easiest to hide.
Step 5
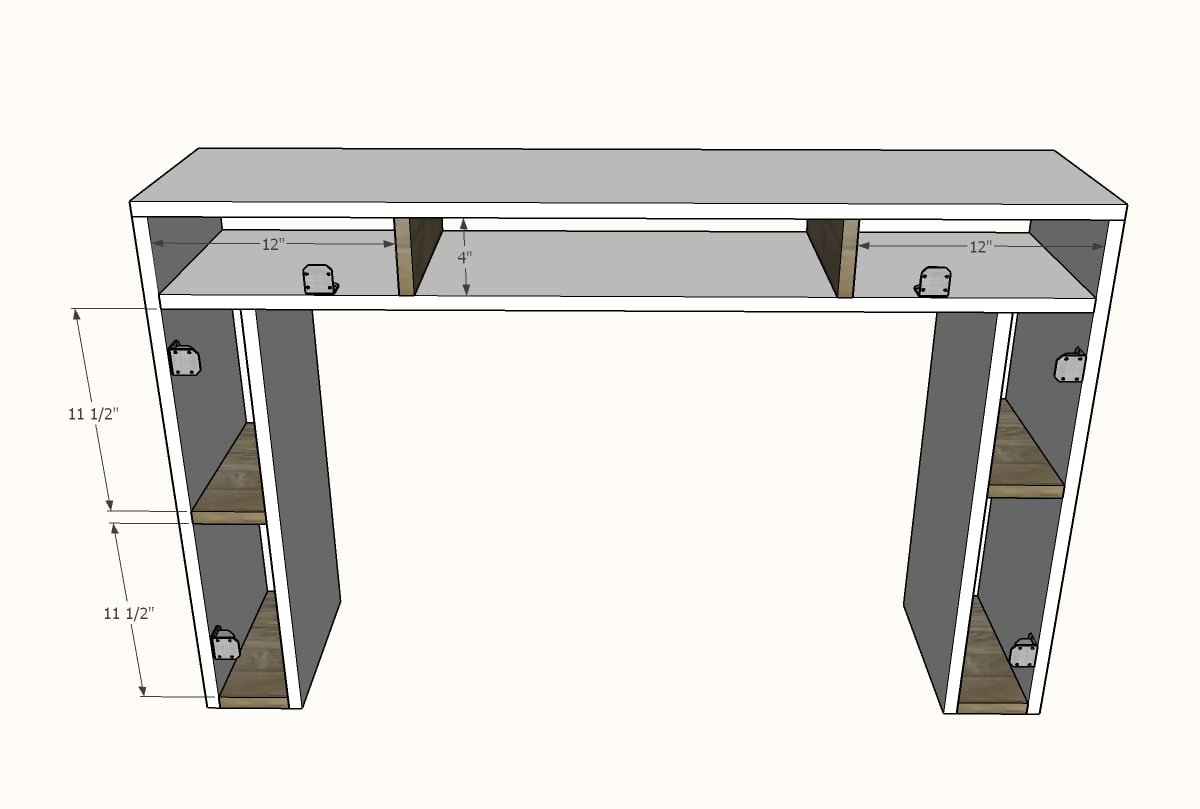
Attach dividers inside the project as shown - I've placed them so you can fit an 8-1/2" x 11" book/paper in the openings, but you can move the dividers around a good bit without changing the structure of the project. Recommended: 1-1/4" brad nails and glue.
Step 6
Position the 1x6 drawer faces under the project and attach through the hinges with screws to fasten.
Step 7
If you find you need additional support, fully enclosing the back with 1x6s (same as door faces but attached with 1-1/4" brad nails and glue) will increase the stability and strength of the project (but add costs). The keyboard fold down can be further strengthened by a hidden chain or hinge supports on the insides of the dividers.
Finishing
Sand all surfaces, starting with a medium grit and finishing with fine. Wipe off the dust, fill any holes or gaps with wood filler, and sand smooth once dry. Apply primer if you're painting, then finish with your choice of paint or stain and seal with a durable clear topcoat. For outdoor projects, use exterior-rated primer, paint or stain, and sealer so the piece stands up to the weather.
Source (temporary): https://www.ana-white.com/woodworking-projects/chunky-console-table-desk-flip-down-keyboard-tray