Chunky Leg Console Table
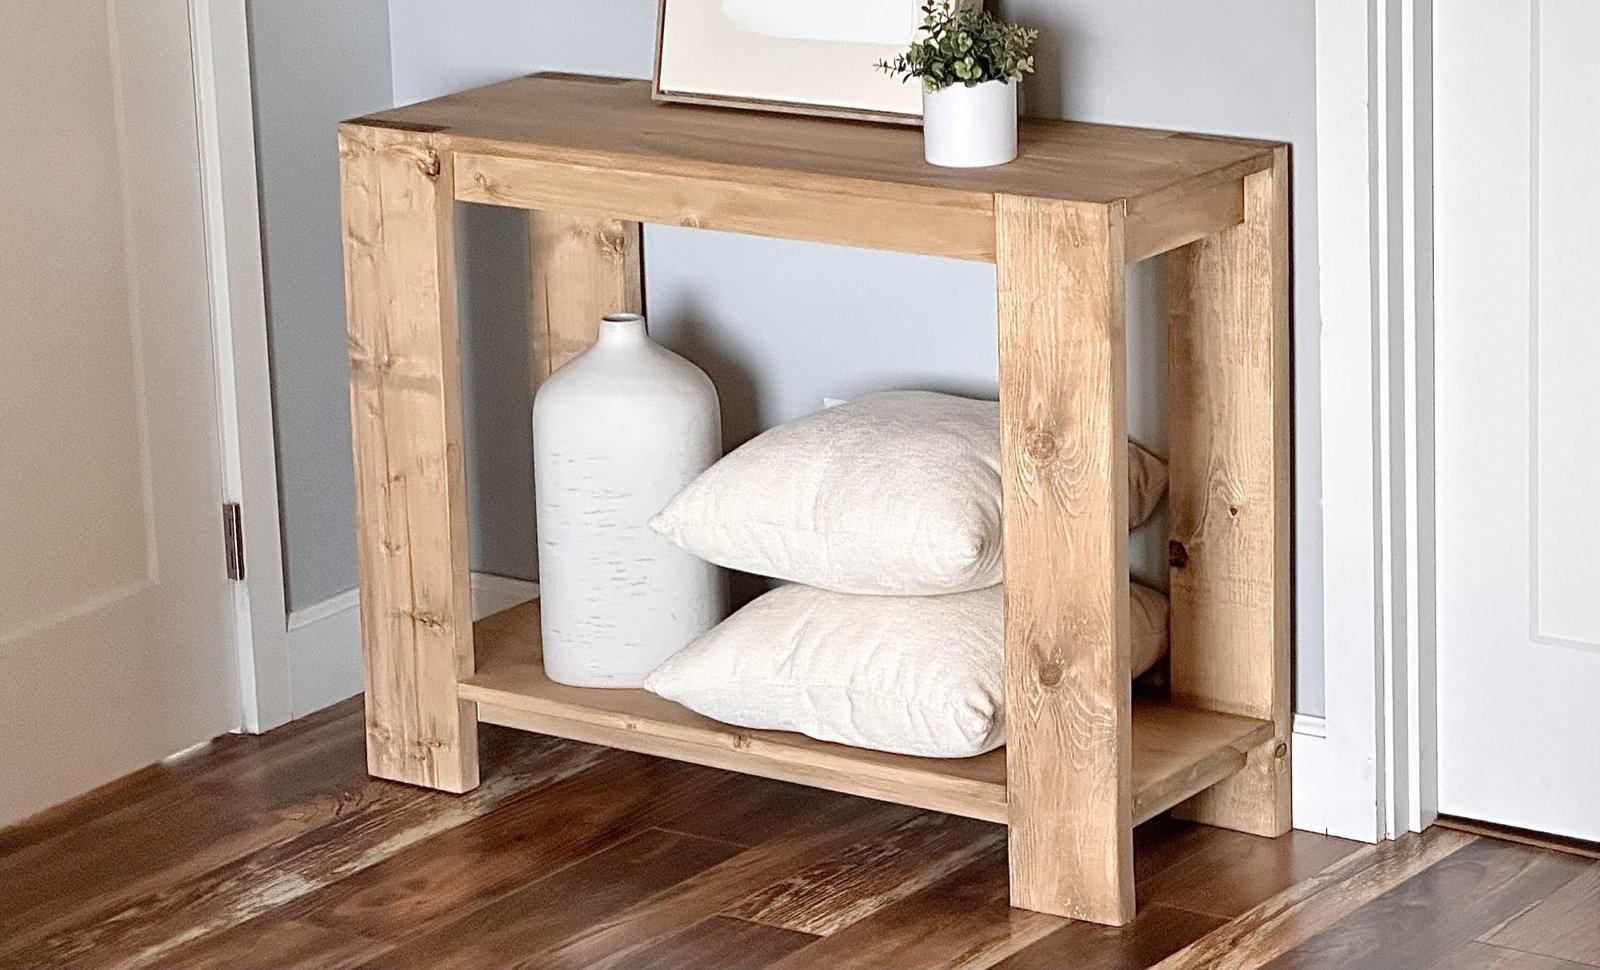
to build your own wood console table! This simple design features a chunky leg for modern vibes and dramatic framing of your decor. We love that this solid wood table can be painted or stained any color, and it's sturdy and stylish! Build it today to add beauty and function to almost any space. from feature step by step diagrams, shopping and cut list and build video.
Specifications
| Project type | Console Table Plans |
|---|---|
| Room | Entryway and Mudroom |
| Difficulty | Intermediate |
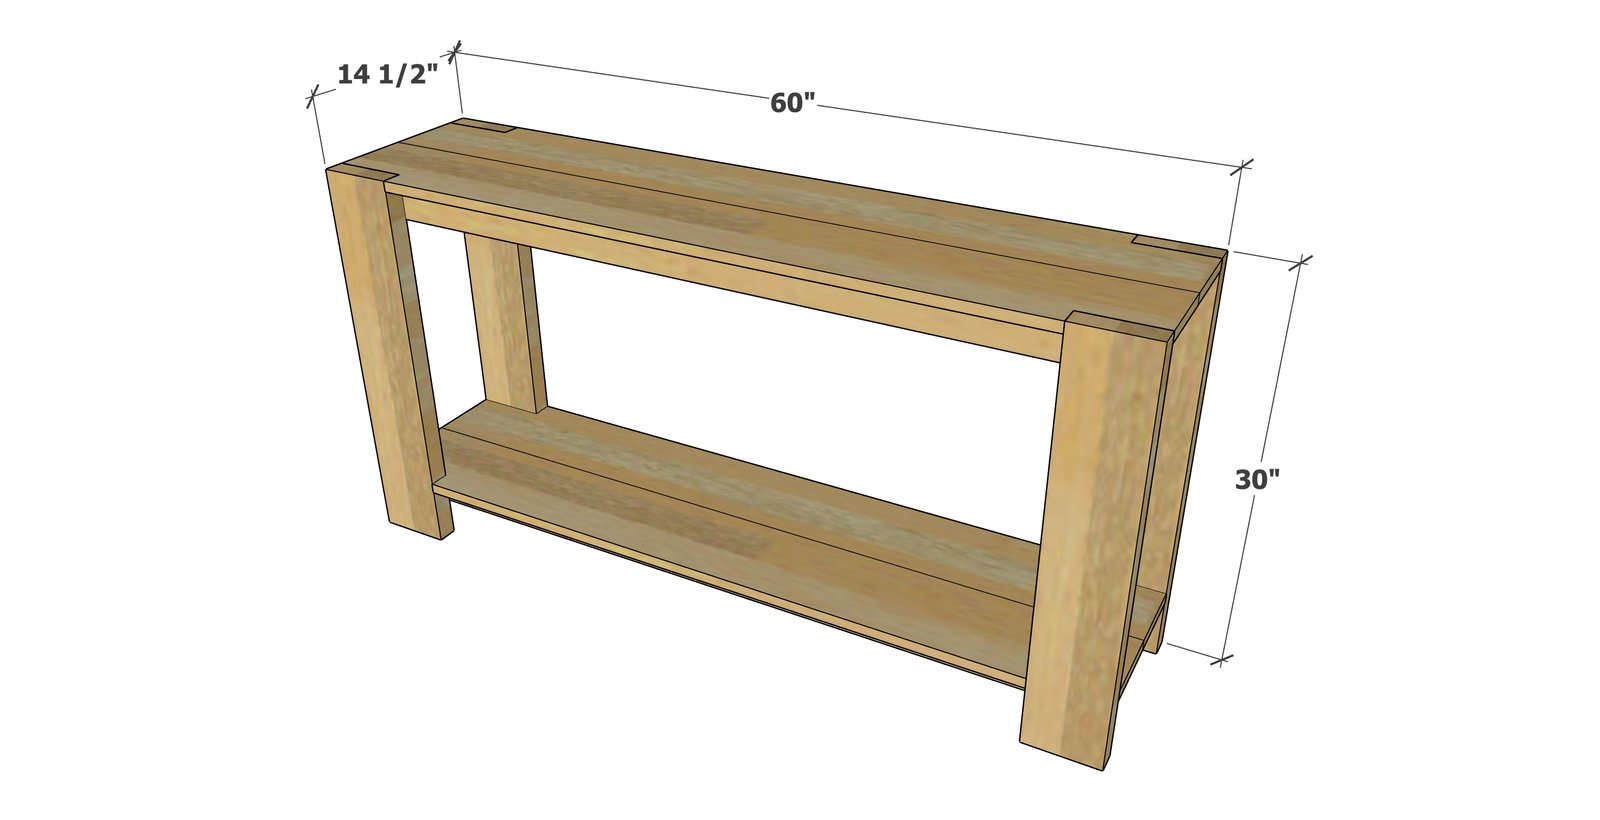
Dimensions
Use the size-specific shopping and cut lists below.
Shopping List
- 2- 1x8 @ 10 feet long
- 1 - 2x6 @ 12 feet long*
- 2 - 1x3 @ 8 feet long
- 2 - 1x2 @ 8 feet long
Cut List
- 4 - 1x8 @ 60"
- 2 - 1x3 @ 11-1/2" (measure and cut to fit)
- 2 - 1x3 @ 55-1/2" (measure and cut to fit)
- 2 - 1x3 @ 11-1/2" (measure and cut to fit)
- 2 - 1x3 @ 55-1/2" (measure and cut to fit)
- 4 - 2x6 @ 30"
Tools
- measuring tape
- square
- pencil
- safety glasses
- kreg-jig
- drill
- jigsaw
- compound miter saw
- sander
- level
Step-by-step Instructions
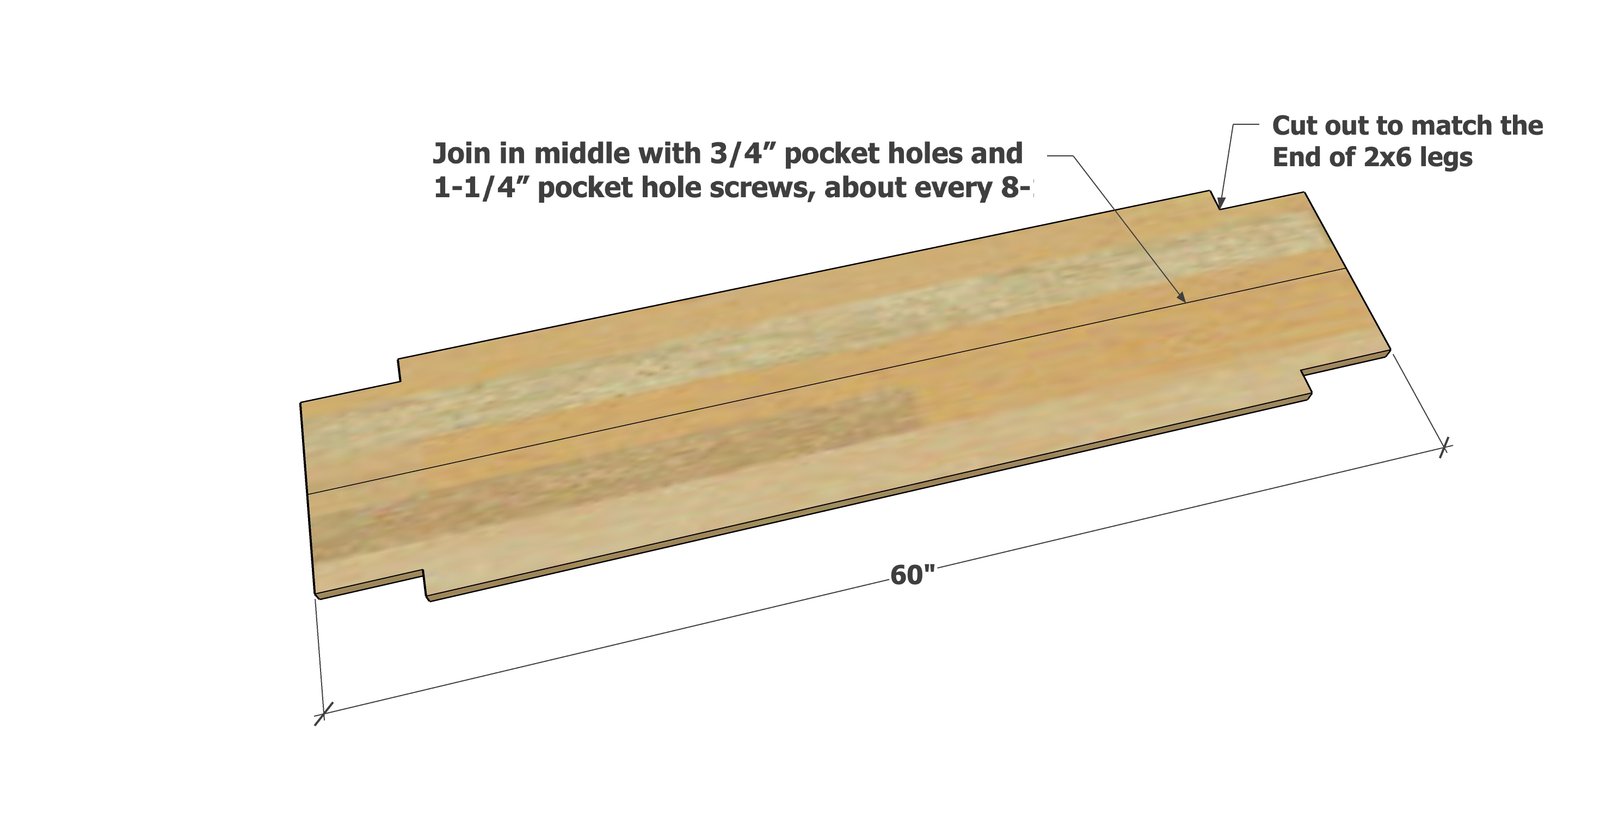
Join two 1x8 boards together with 3/4" pocket holes and 1-1/4" pocket hole screws.
Cut out the corners to match the 2x6 legs with a jigsaw. Build two identical.
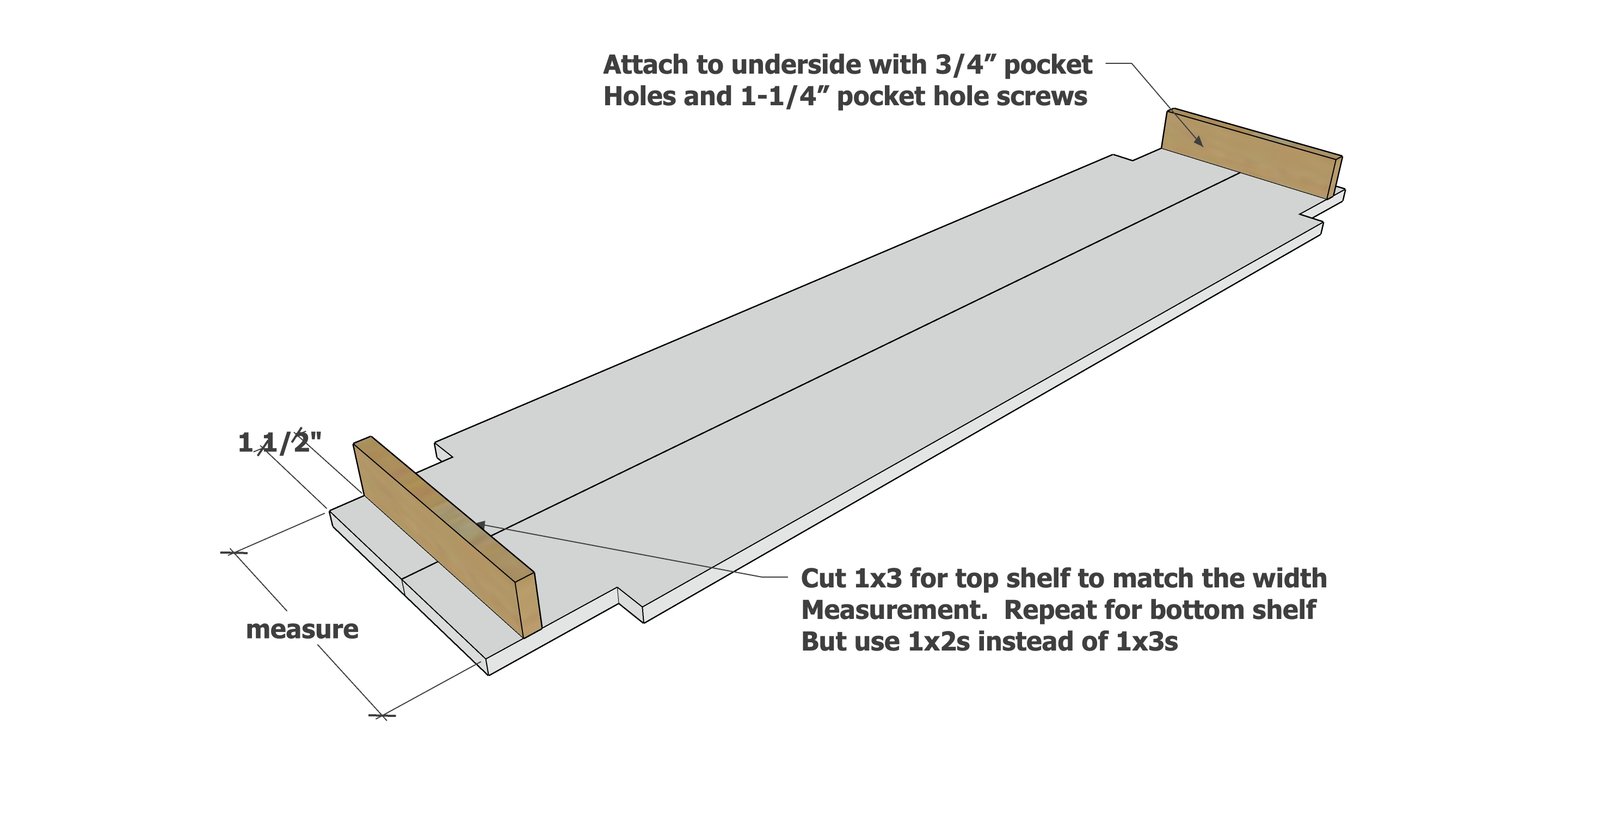
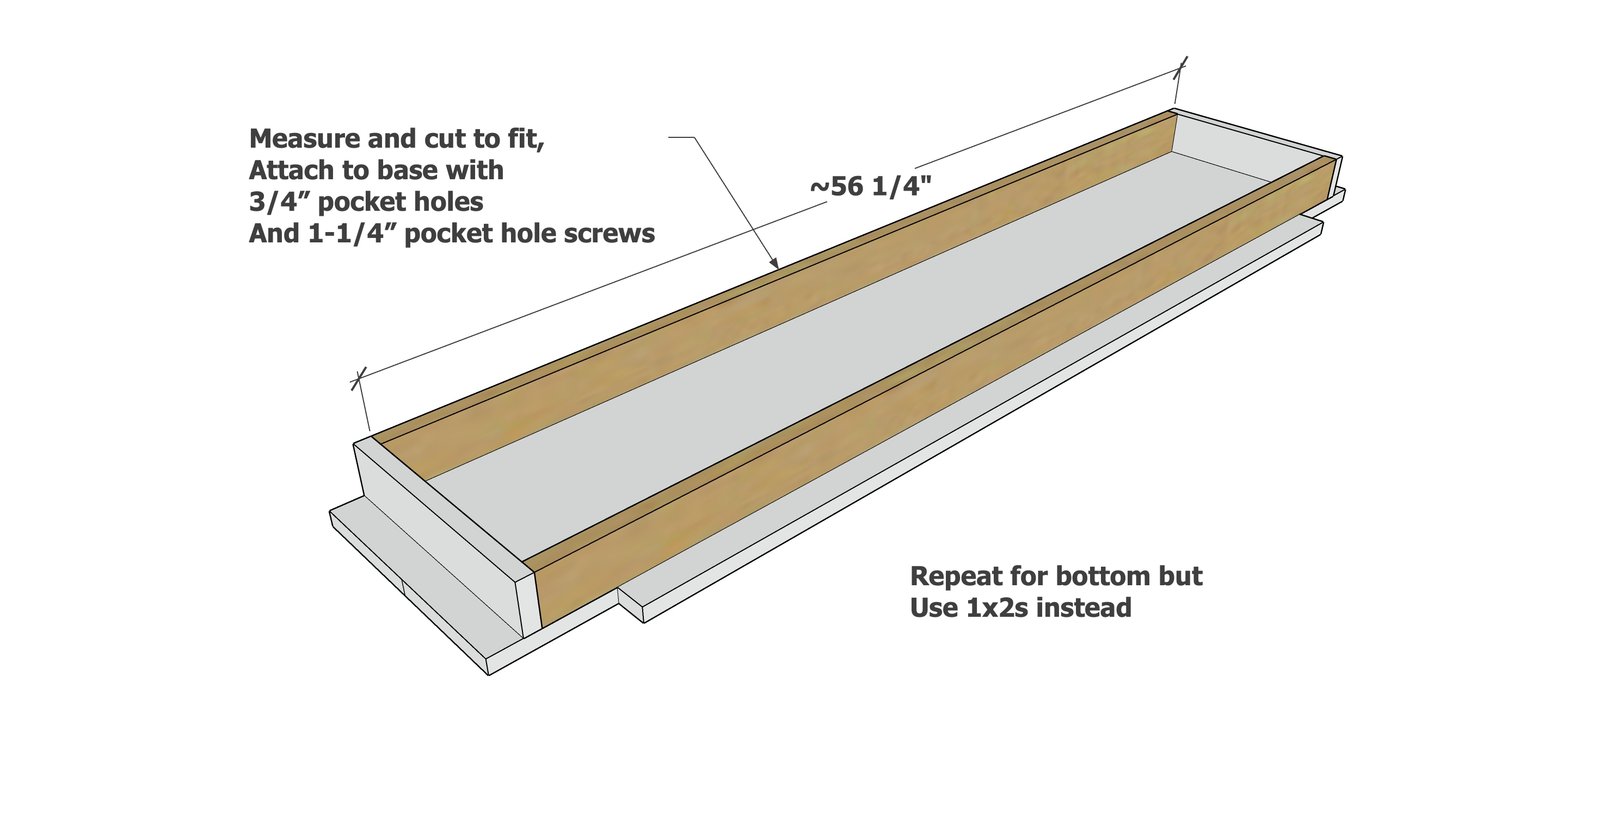
Measure between the cut outs and cut 2 1x3s to match, and 2 1x2s to match.
Attach the 1x3 pieces to one of the panels. Attach the 1x2 pieces to the other panel.
Step 3
Measure the distances in between and cut and attach 1x3s to the top panel, 1x2s for the bottom panel.
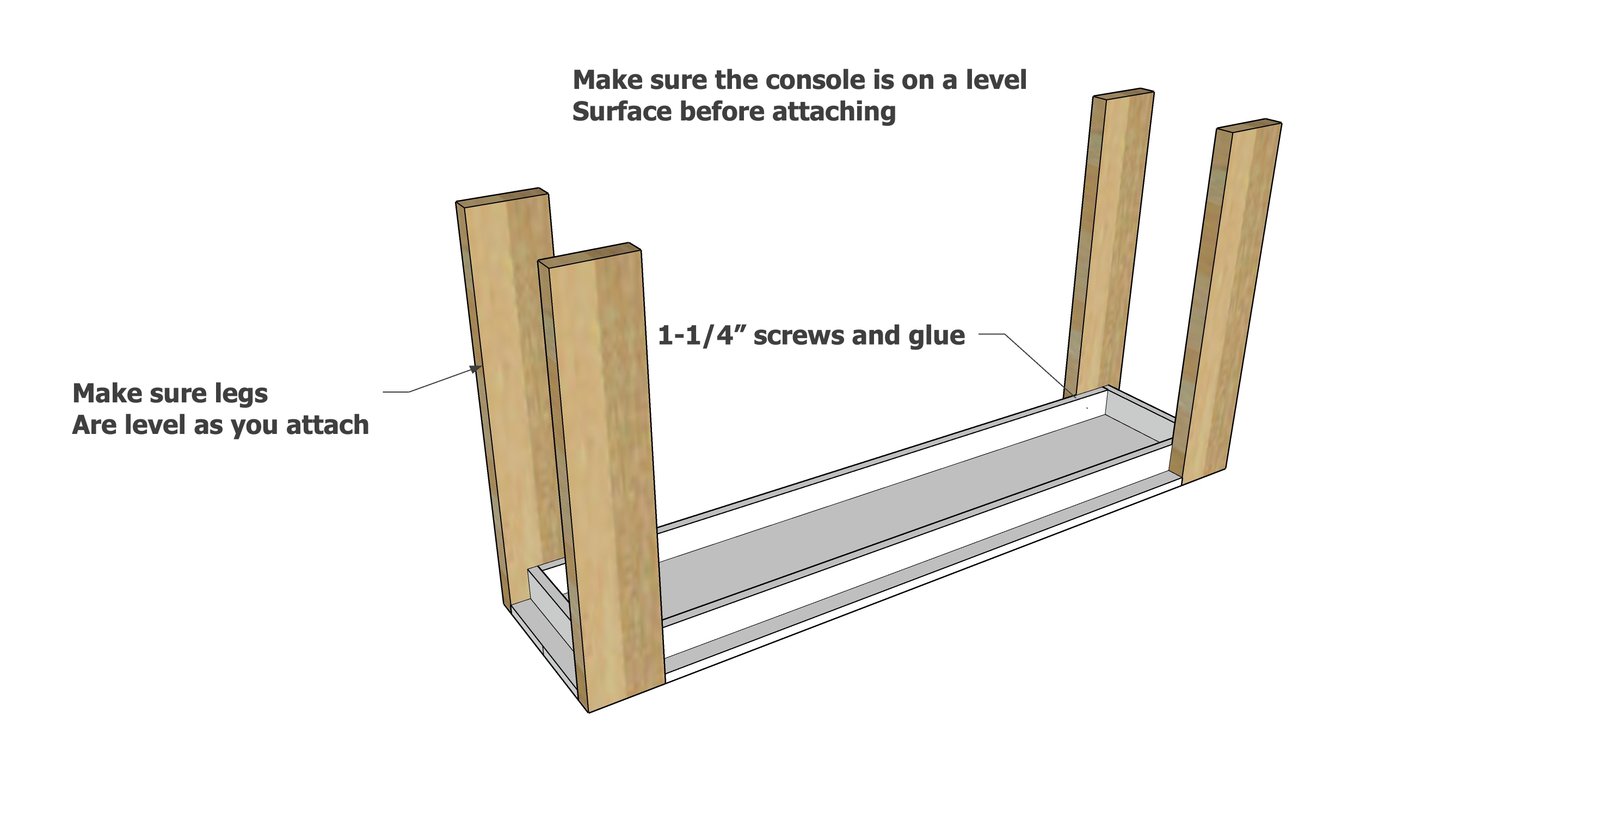
Attach the four legs to the top panel, making sure the legs are level and the tabletop is set level.
Note: Measurement shown is pulled from outside of the end 1x3
Step 5
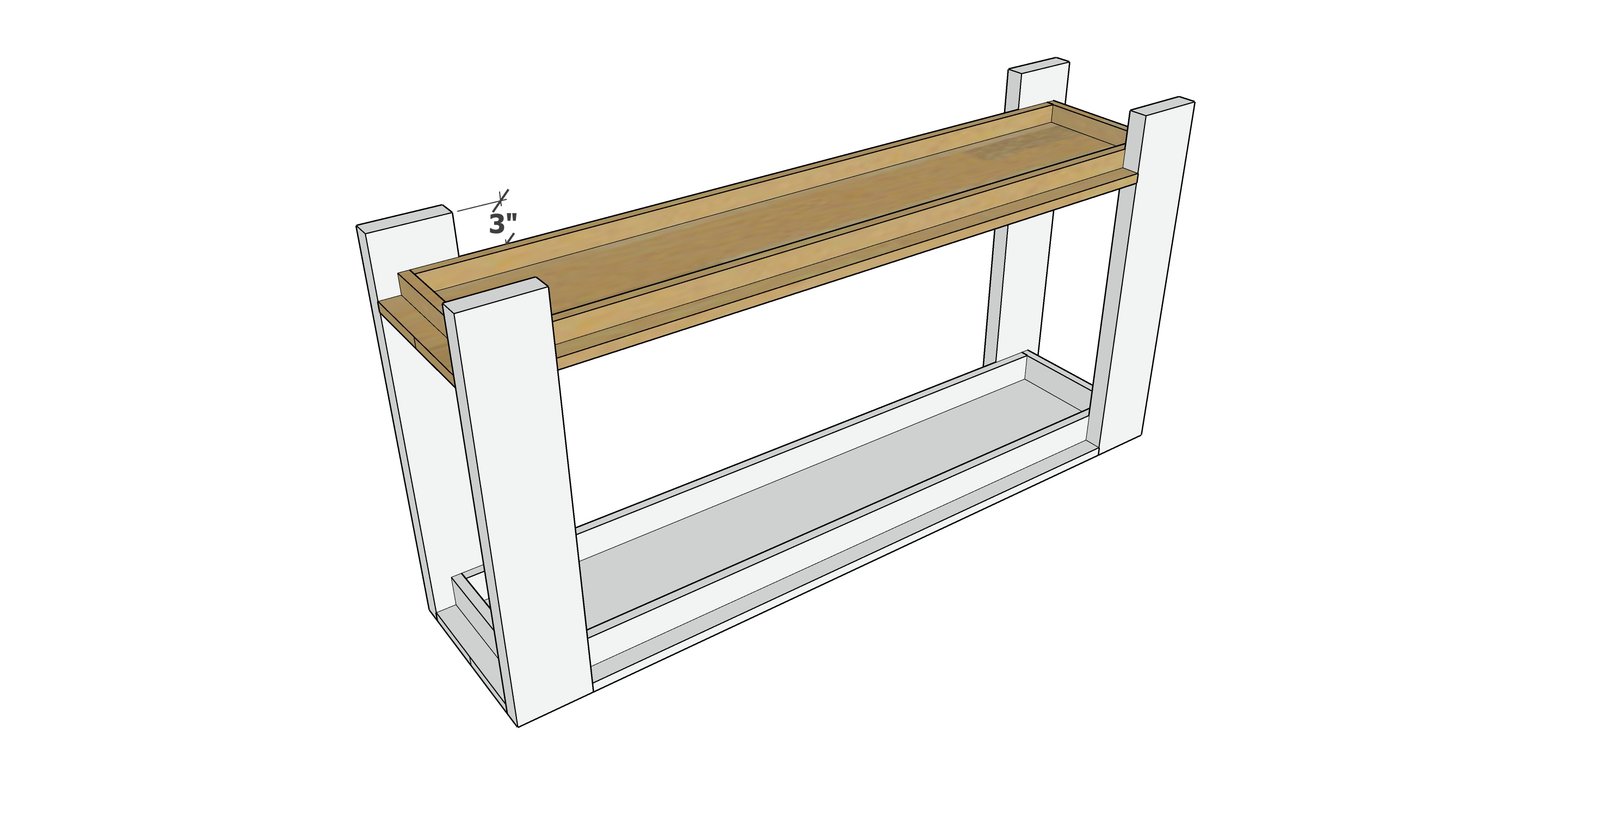
Attach bottom shelf in between legs.
Finishing
Sand all surfaces, starting with a medium grit and finishing with fine. Wipe off the dust, fill any holes or gaps with wood filler, and sand smooth once dry. Apply primer if you're painting, then finish with your choice of paint or stain and seal with a durable clear topcoat. For outdoor projects, use exterior-rated primer, paint or stain, and sealer so the piece stands up to the weather.
Source (temporary): https://www.ana-white.com/woodworking-projects/chunky-leg-console-table