Chunky Leg Side Table
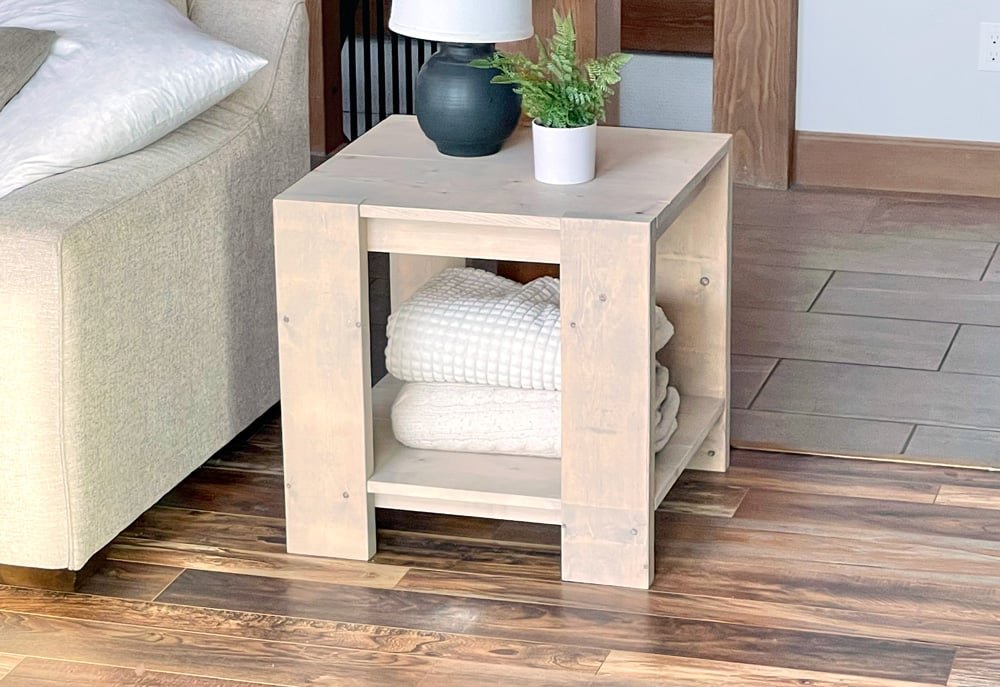
Simple to build end table or side table with a modern flair! Free DIY.
Specifications
| Project type | Side and End Table Plans |
|---|---|
| Room | Bedroom |
| Style | Modern Style Furniture Plans |
| Difficulty | Intermediate |
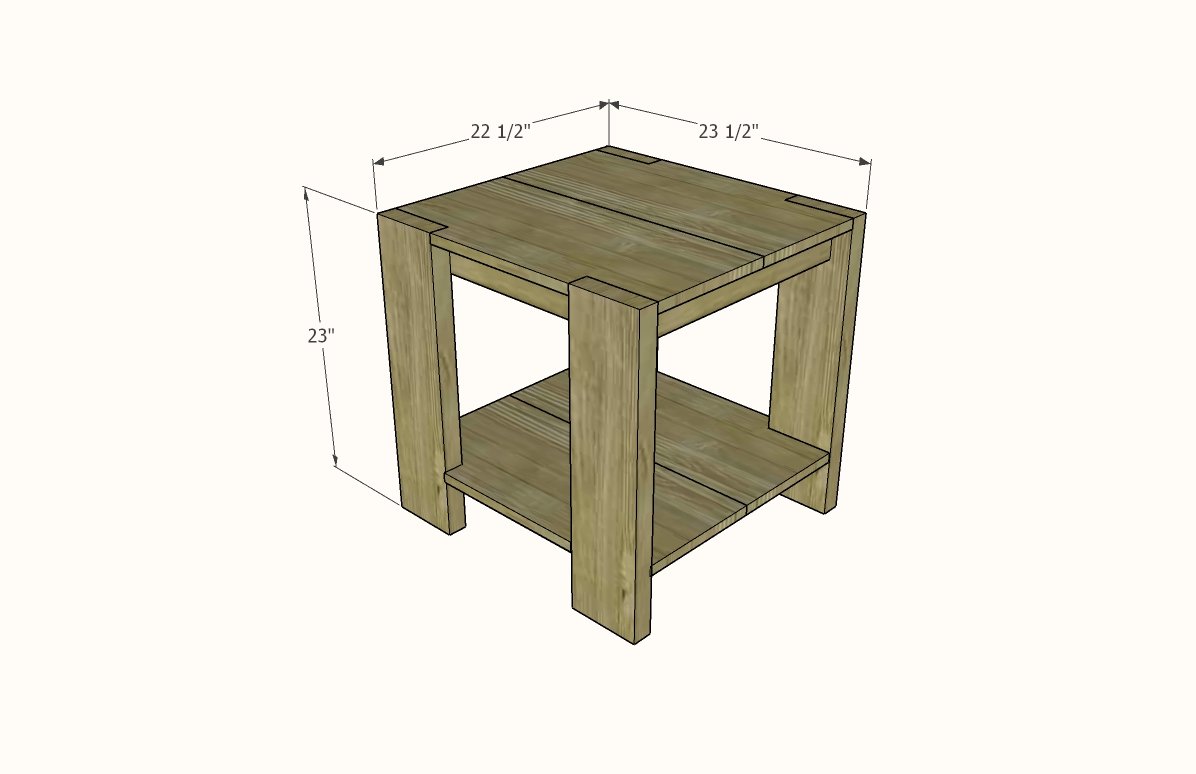
Dimensions
Use the size-specific shopping and cut lists below.
Shopping List
- 1 - 1x12 @ 8 feet long
- 1 - 2x6 @ 8 feet long
- 1 - 1x3 @ 8 feet long
- 2 - 1x2 @ 8 feet long
- 1-1/4" brad nails
- 16 - 2" long self tapping wood screws with star bit (SPAX or similar)
- wood glue
- 120 and 150 grit sand paper
- paint or stain
Cut List
- 4 - 1x12 @ 23-1/2" - shelf boards
- 4 - 2x6 @ 23" - legs
Top Shelf Frame
- 2 - 1x3 @ about 19-1/2" - measure and cut to fit
- 2 - 1x3 @ 19"
- 2 - 1x2 @ about 18" - measure and cut to fit
Bottom Shelf Frame
- 2 - 1x2 @ about 19-1/2" - measure and cut to fit
- 2 - 1x2 @ 19"
- 2 - 1x2 @ about 18" - measure and cut to fit
Tools
- measuring tape
- square
- safety glasses
- drill
- jigsaw
- compound miter saw
- nailer
- sander
Step-by-step Instructions
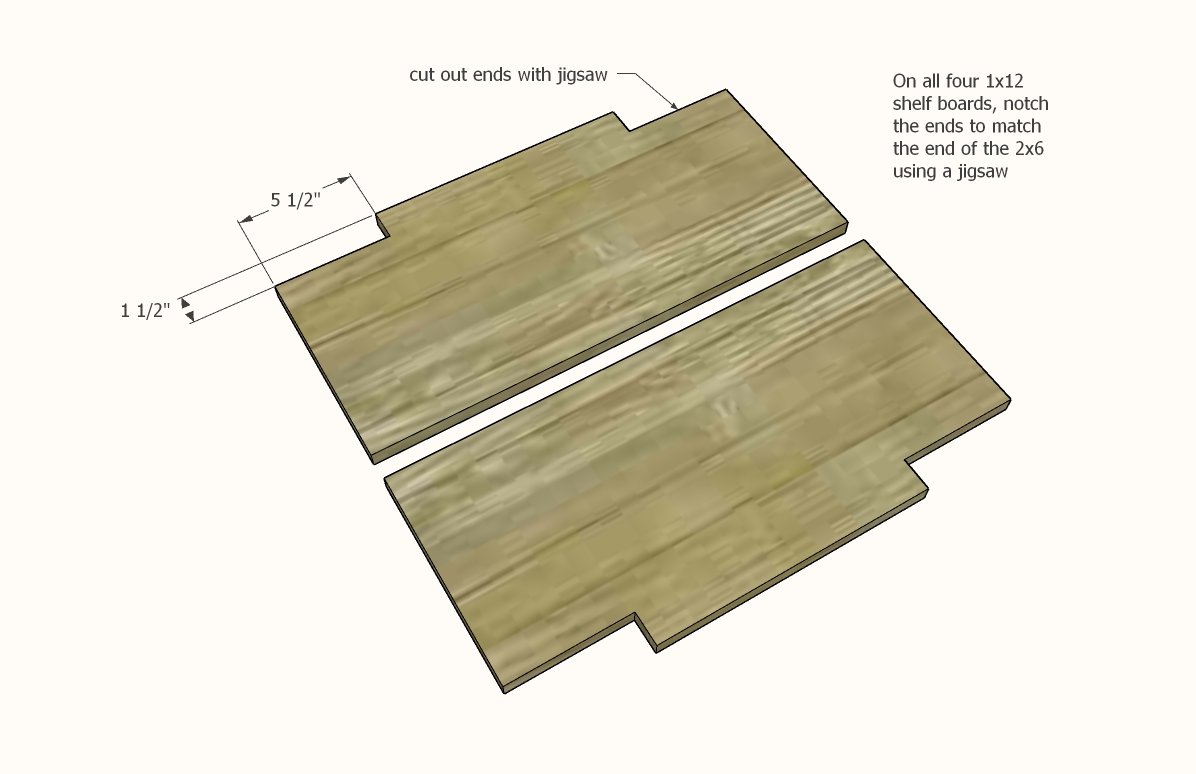
Measure the ends of your 2x6 legs - it should measure 1-1/2" x 5-1/2"
Mark out on all four 1x12 boards, and cut out with a jigsaw.
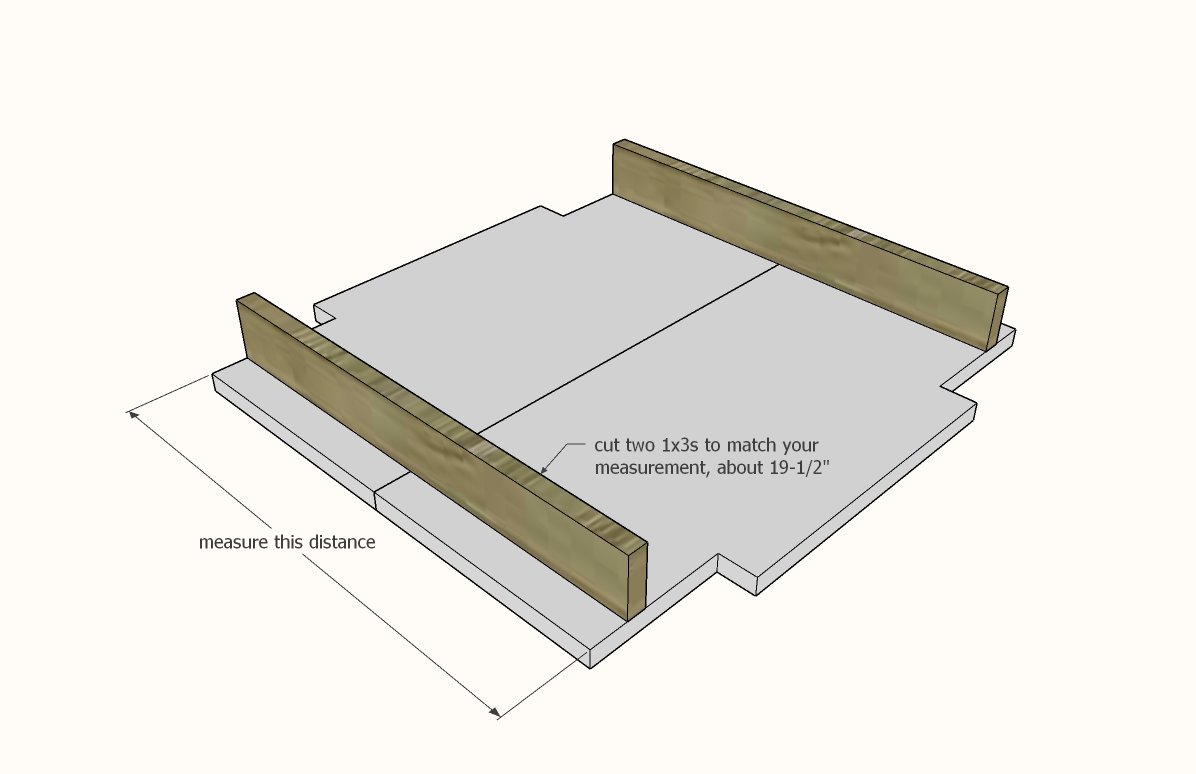
Place the cut 1x12s together and measure in between the cuts. It should be about 19-1/2".
Cut two 1x3s to this measurement.
Step 3
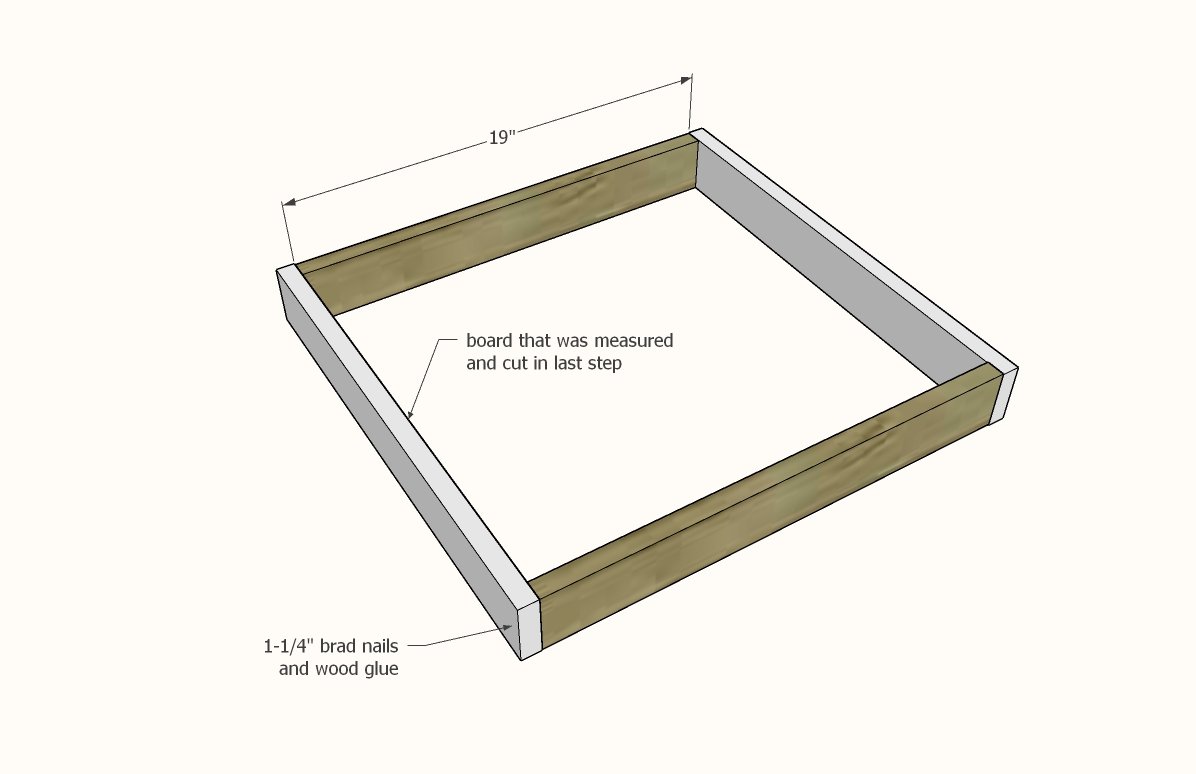
Using the 1x3s cut in the last step and the two 1x3 boards at 19" from the cut list, nail together the 1x3s into a frame.
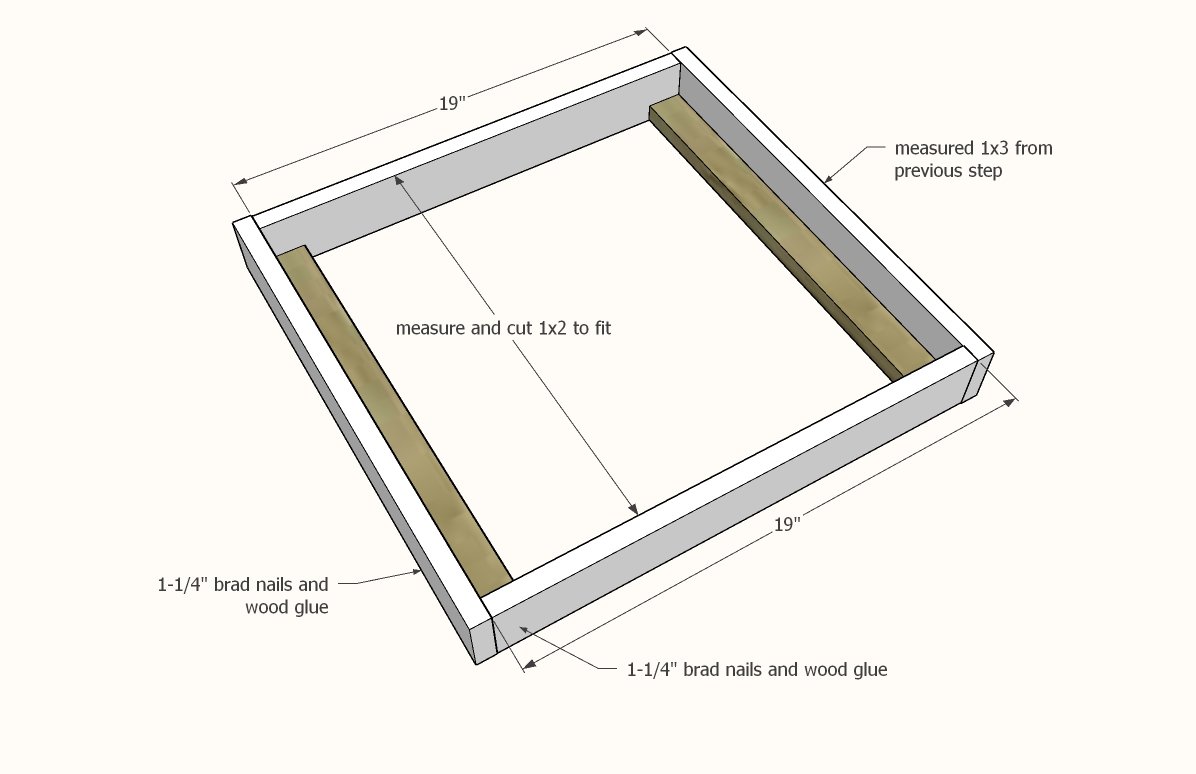
Measure the inside as shown and cut a 1x2 to fit.
Nail and glue inside the frame, flush to the bottom.
Step 5
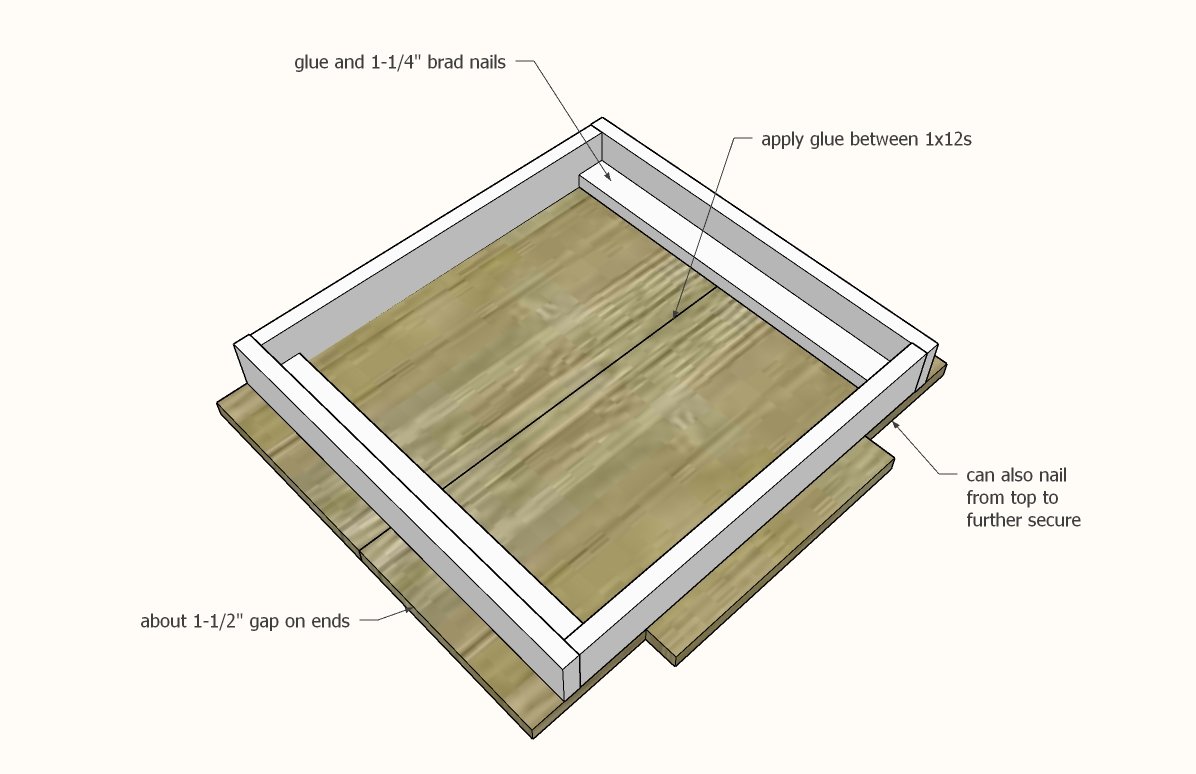
Apply glue between your 1x12 boards. If you have a Kreg Jig, attach the 1x12 boards together with 1-1/4" pocket hole screws. Apply glue to bottom edges of the frame and position on the 1x12s. Attach with 1-1/4" brad nails and glue. Also attach from top along edge that wasn't nailed.
Step 6
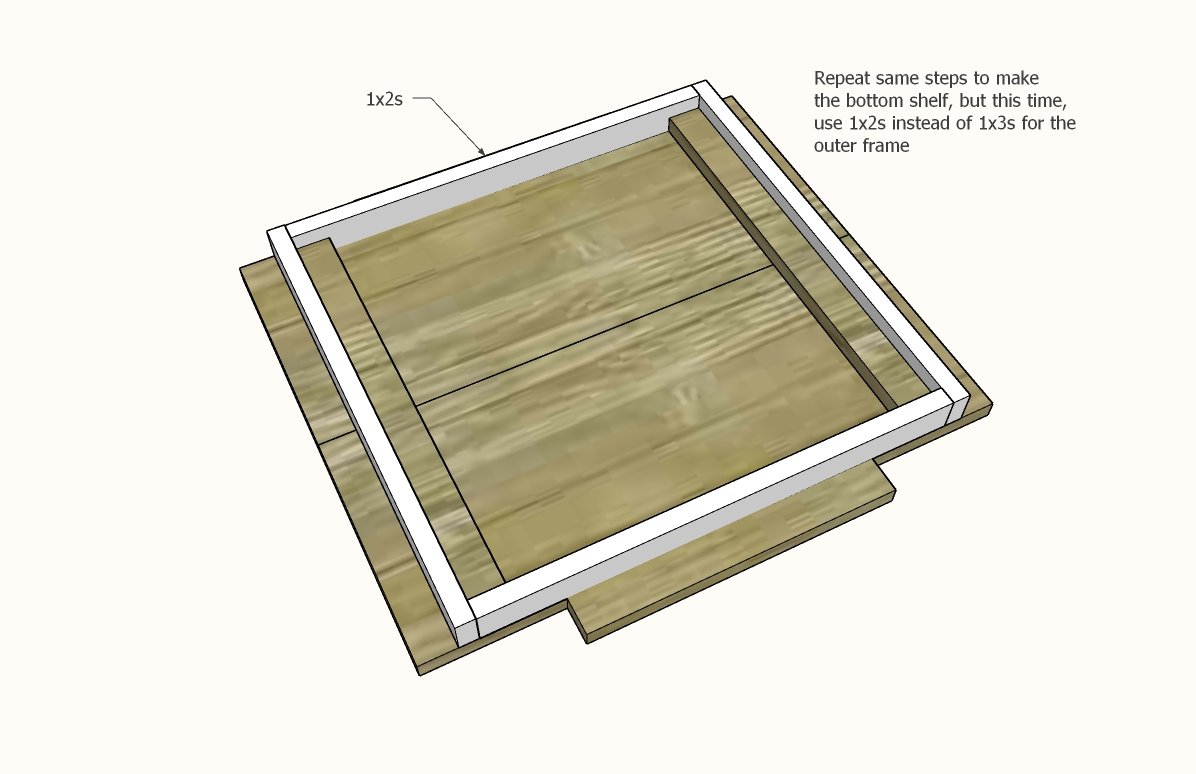
Repeat steps 1-5, but for the bottom shelf using a 1x2 frame instead of a 1x3 frame.
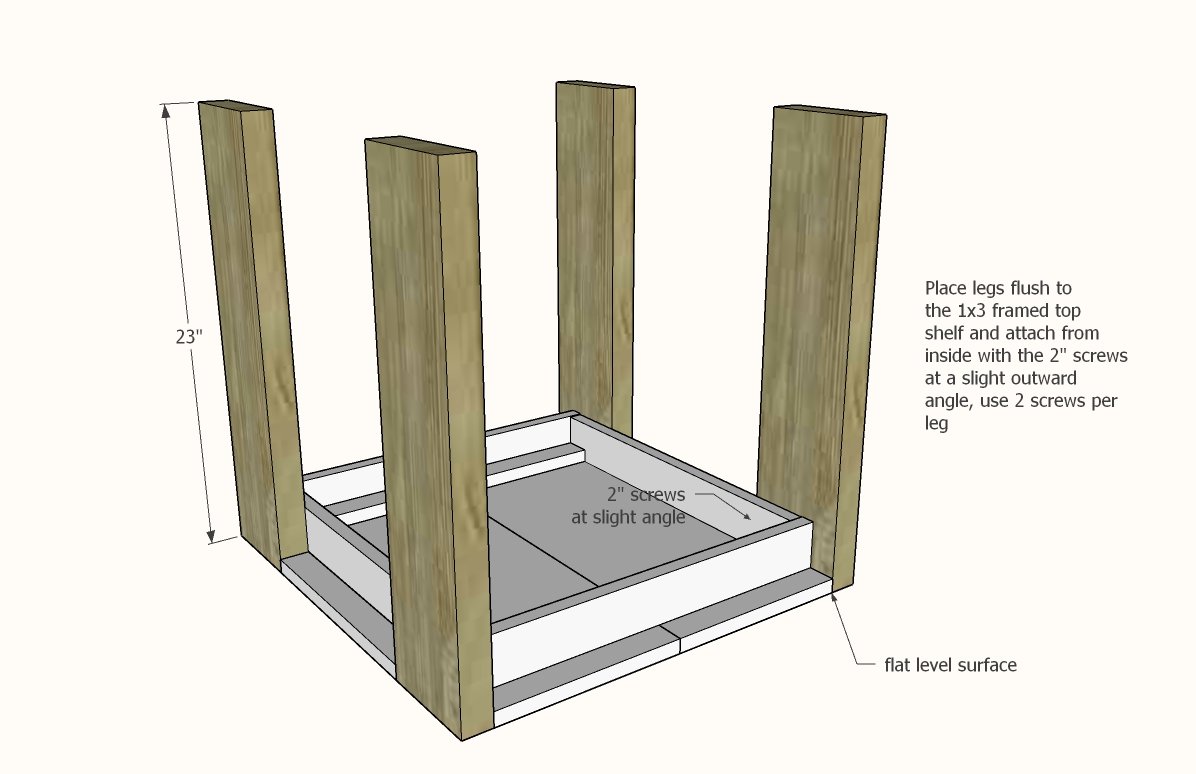
Place the top shelf (1x3 frame) face down on a flat level surface.
Attach from inside with 2" screws at a slight angle. TIP: I only did one screw at first per leg, so that I could maneuver the legs somewhat while fitting the shelf in. After I was happy with the bottom shelf and the table sitting square, I then added the second screws.
Step 8
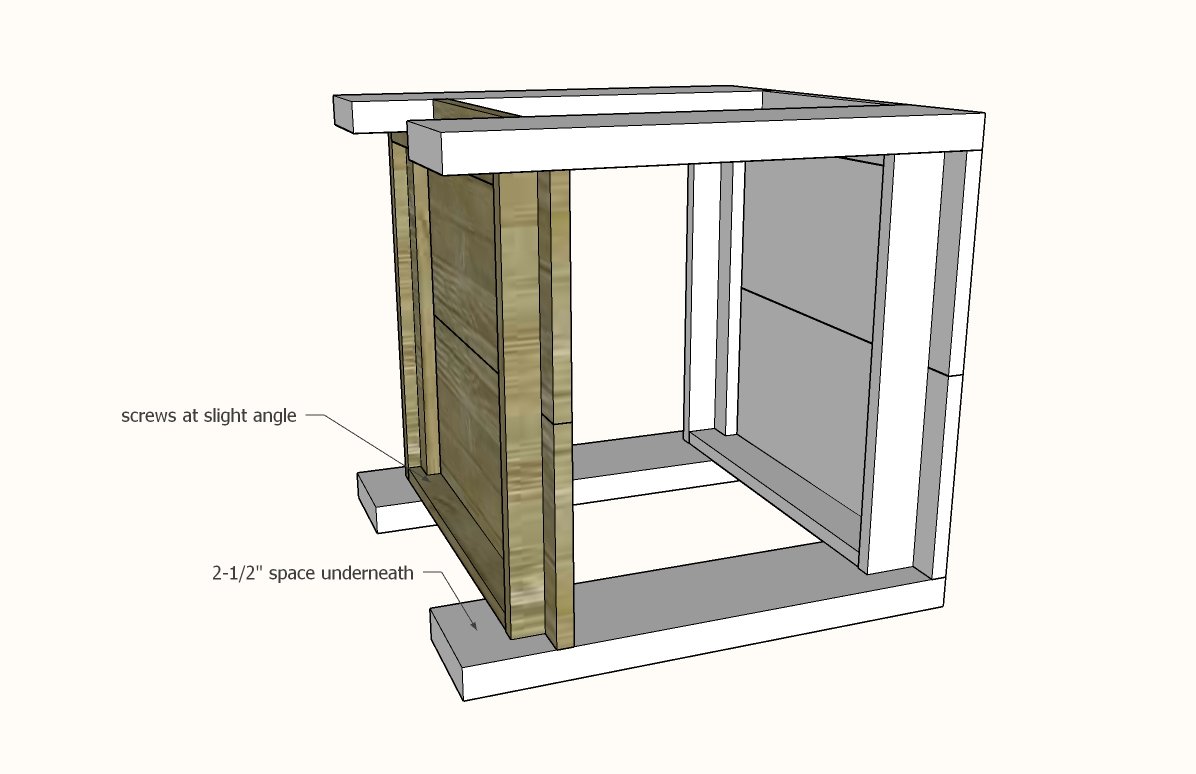
Add bottom shelf inside the legs. I used a scrap 1x3 to space the bottom shelf up 2-1/2" on the legs.
Finishing
Sand all surfaces, starting with a medium grit and finishing with fine. Wipe off the dust, fill any holes or gaps with wood filler, and sand smooth once dry. Apply primer if you're painting, then finish with your choice of paint or stain and seal with a durable clear topcoat. For outdoor projects, use exterior-rated primer, paint or stain, and sealer so the piece stands up to the weather.
Source (temporary): https://www.ana-white.com/woodworking-projects/chunky-leg-side-table