Cindy Wood Console Table with Drawers
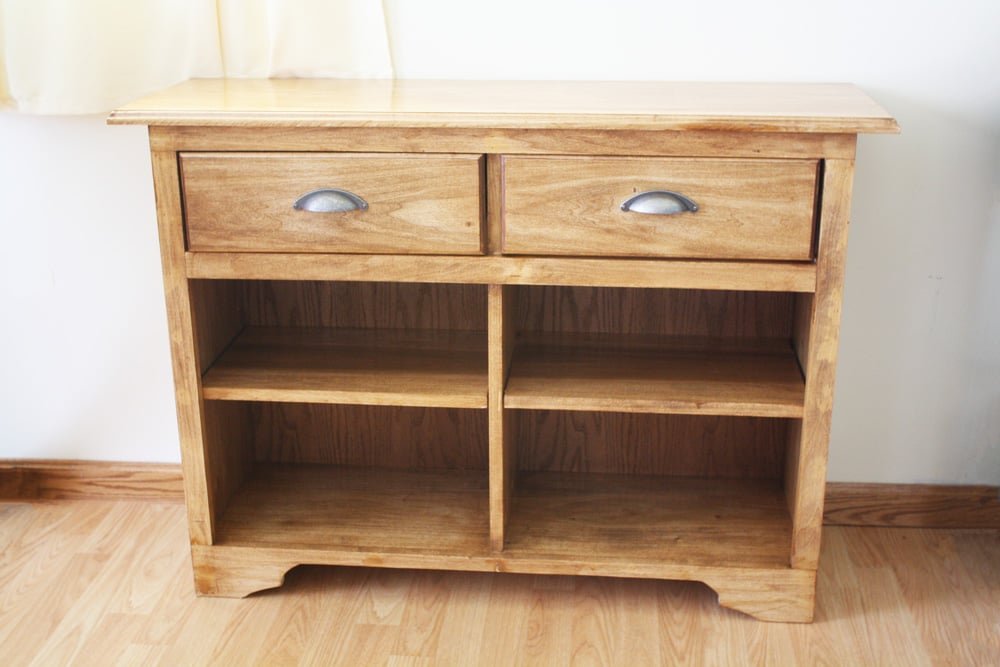
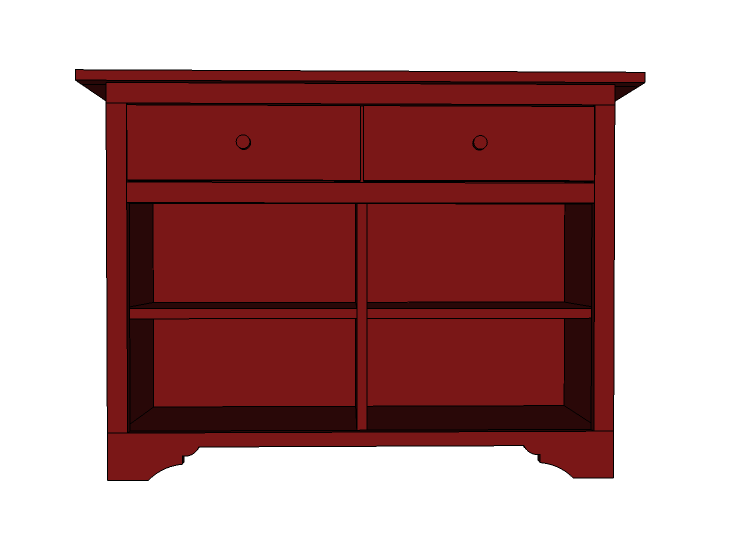
This pretty console table features two drawers and cubbies - it's perfect in an entryway or hall. The top is table height. It's made from 1x12s and 1x2s - so no need to rip plywood. Paint or stain any color of your choice. Free step by step.
Specifications
| Project type | Console Table Plans |
|---|---|
| Room | Entryway and Mudroom |
| Style | Cottage Style Furniture Plans |
| Difficulty | Advanced |
| Estimated cost | $50 - $100 |
Dimensions
Use the size-specific shopping and cut lists below.
Shopping List
- 2 - 1x4 @ 8 feet long
- 1 - 1x12 @ 8 feet long
- 1 - 1x12 @ 12 feet long
- 2 - 1x2 @ 8 feet long
- 1/2 Sheet of 1/4" plywood
- 2 sets of 10" drawer slides ( Amazon 2 pack for $11 affiliate link )
- 2 - Knobs
Cut List
- 2 - 1x12 @ 29 1/4" (Sides)
- 1 - 1x12 @ 41 1/2" (Top)
- 1 - 1x12 @ 36" (Bottom Shelf)
- 1 - 1x12 @ 25 3/4" (Center Divider)
- 2 - 1x12 @ 17 5/8" (Shelves)
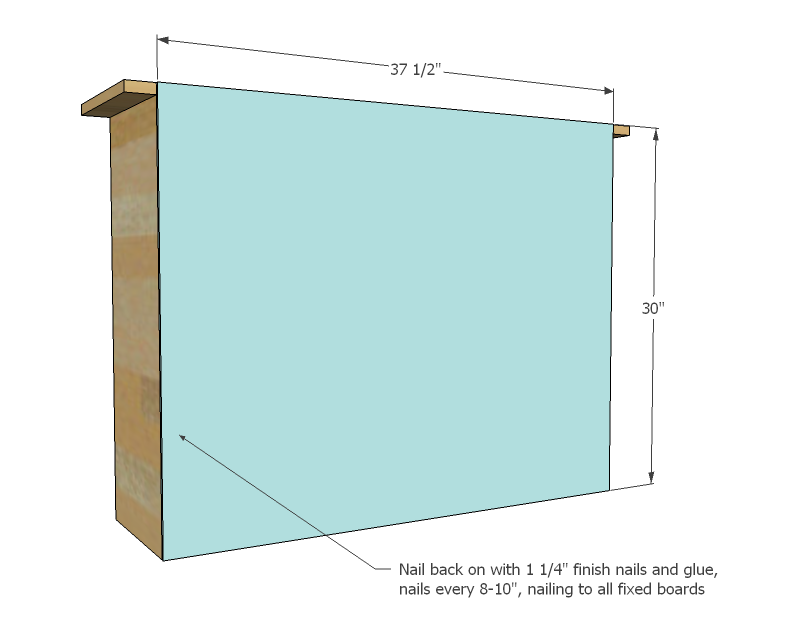
- 1 - 1/4" Plywood @ 37 1/2" x 30" (Back)
- 2 - 1x4 @ 11 1/4" (Drawer Slide Spacers - Cut to width of 1x12s)
- 1 - 1x4 @ 37 1/2" (Footer Front)
- 2 - 1x2 @ 24 1/4" (Side Trim)
- 1 - 1x2 @ 37 1/2" (Top Trim)
- 1 - 1x2 @ 34 1/2" ( Center Trim)
- 1 - 1x2 @ 41 1/2" (Top Front)
- DRAWERS- Drawer cuts, see in plan
Tools
- measuring tape
- square
- pencil
- safety glasses
- hearing protection
- kreg-jig
- drill
- circular saw
- jigsaw
- nailer
- sander
- level
- countersink drill bit
Step-by-step Instructions
Step 1
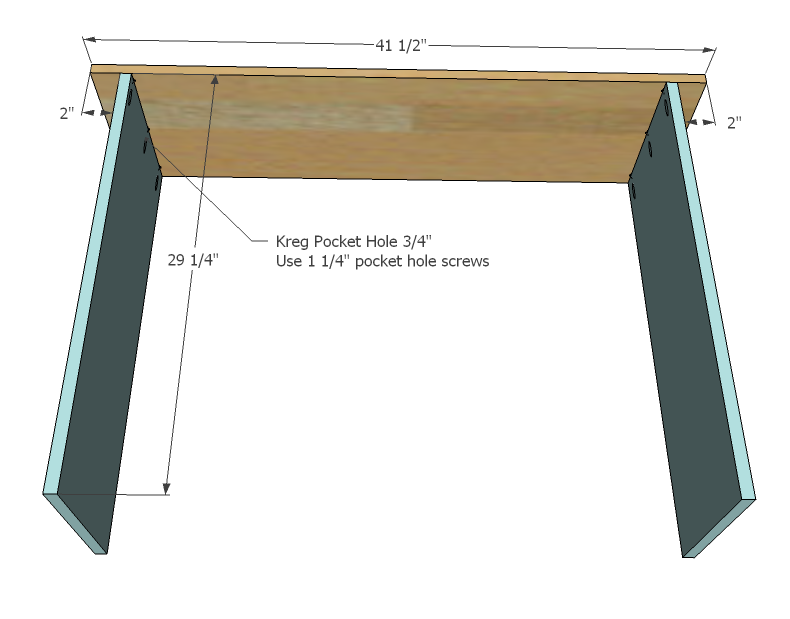
I've included pocket holes in the diagrams for those of you with a Kreg Jig. You can also use countersunk screws with glue, or even finish nails, as this cabinet is fully framed. Start by marking the top underside 2" on each end. This will be the top overhang. Then attach the two sides to the top as shown above.
Step 2
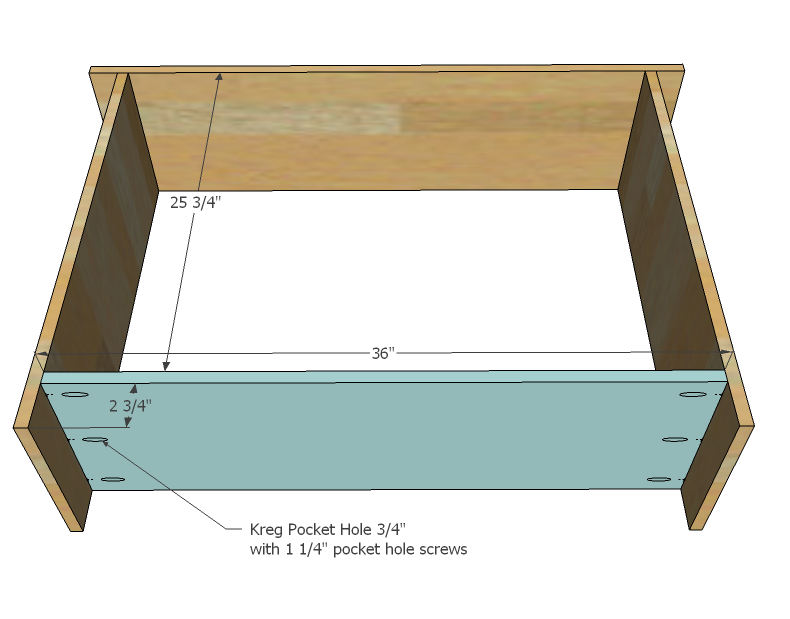
Now the bottom shelf. It sits 2 3/4" from the bottom.
Step 3
Mark the placement of the center divider and attach in place.
Step 4
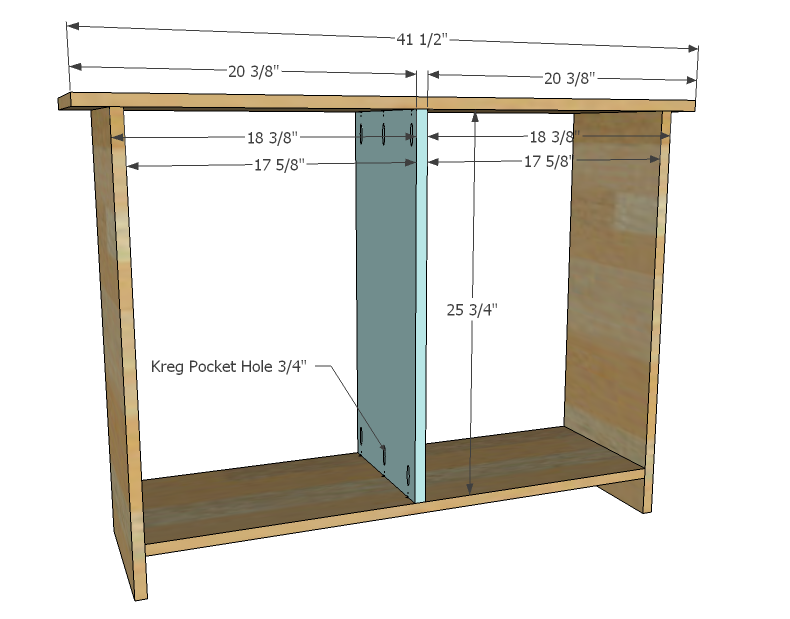
You will need a pocket hole jig to make these shelves fixed. But certainly, you could use shelf pins to make adjustable shelves. Here's a great tute on how you can use pegboard as a guide for drilling your shelf pin holes.
Step 5
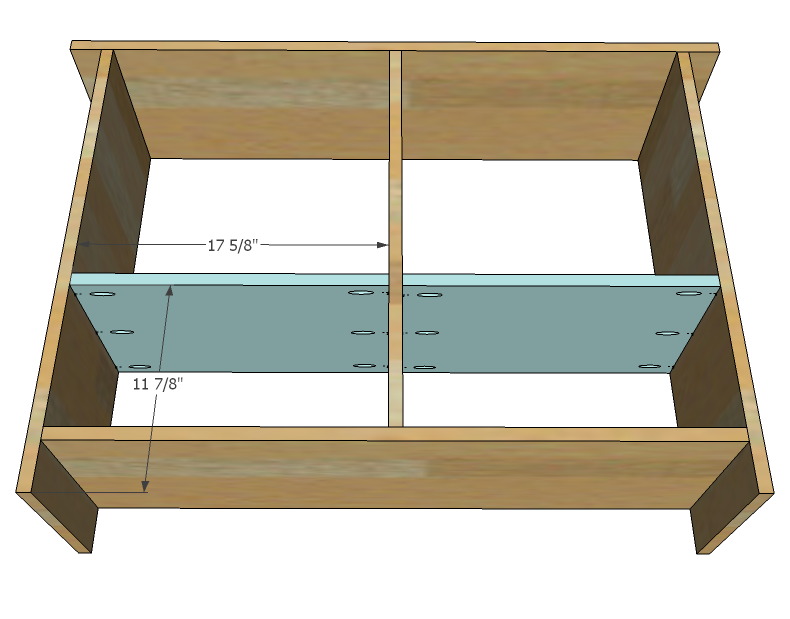
Drill 3/4" pocket holes on bottoms of shelves and attach inside the cubby area with 1-1/4" pocket hole screws.
Step 6
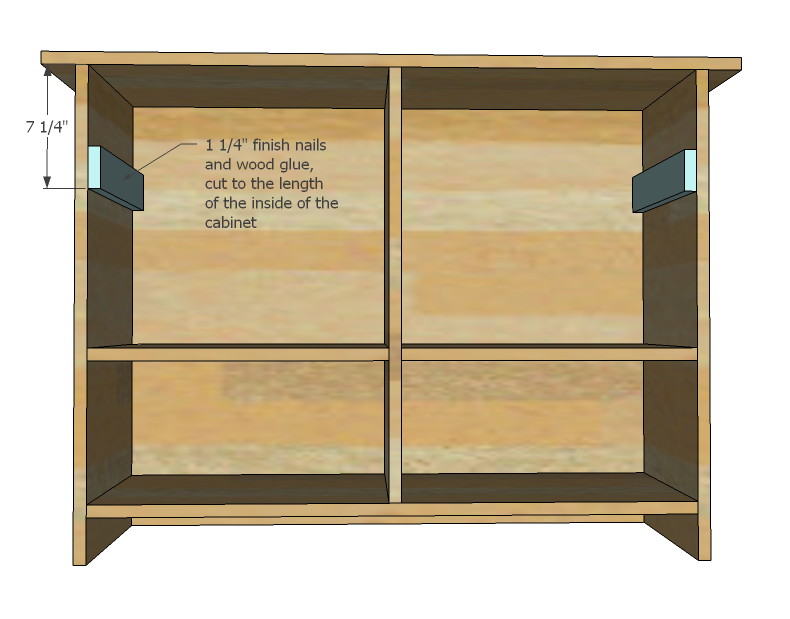
These are for your drawer guides. Use either 1 1/4" screws or nails to attach to the sides as shown in the diagram.
Step 7
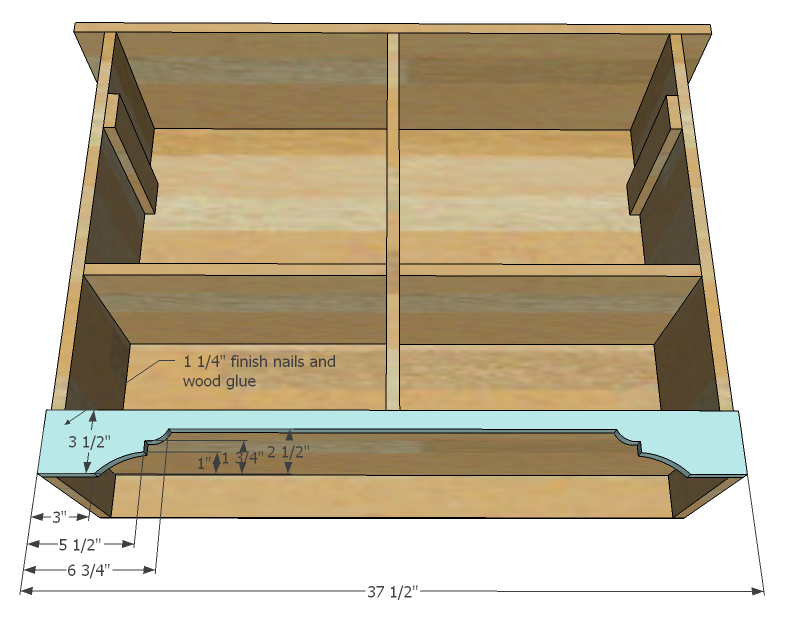
What really makes a cabinet like this one is the cutout footer. Use the diagram above to help you cut a pattern from the footer and attach. You can also start by attaching the footer, and then cut the footer out afterwards.
Step 8
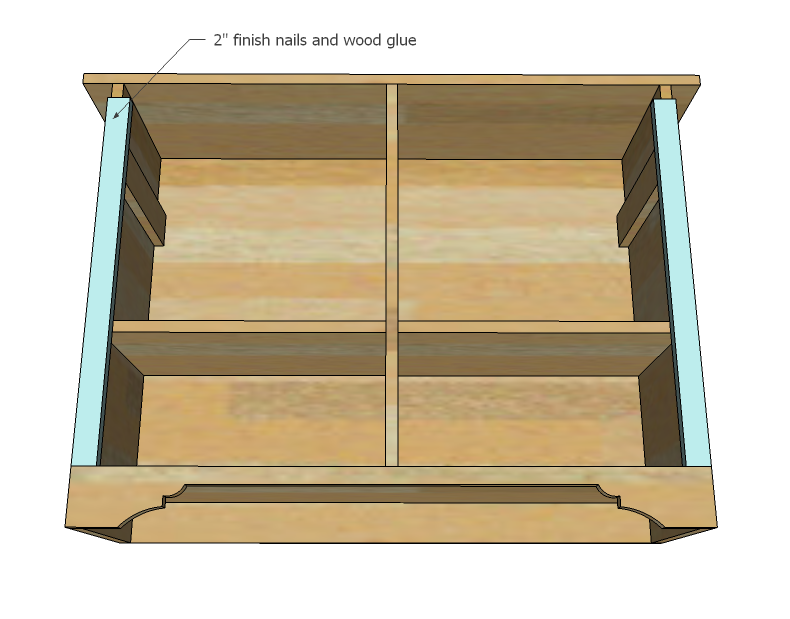
Use 2" finish nails and wood glue to attach the side trim.
Step 9
Now the header. Attach to the center divider as well.
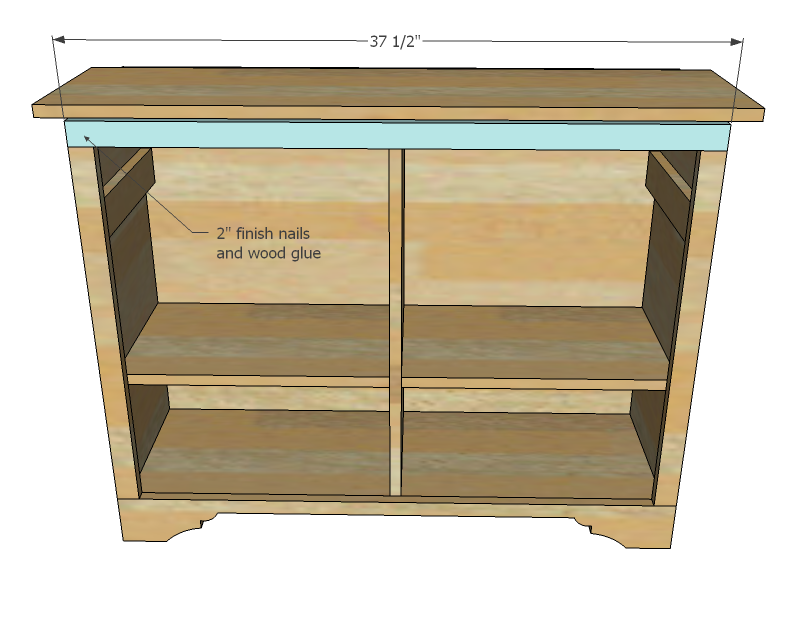
Step 10
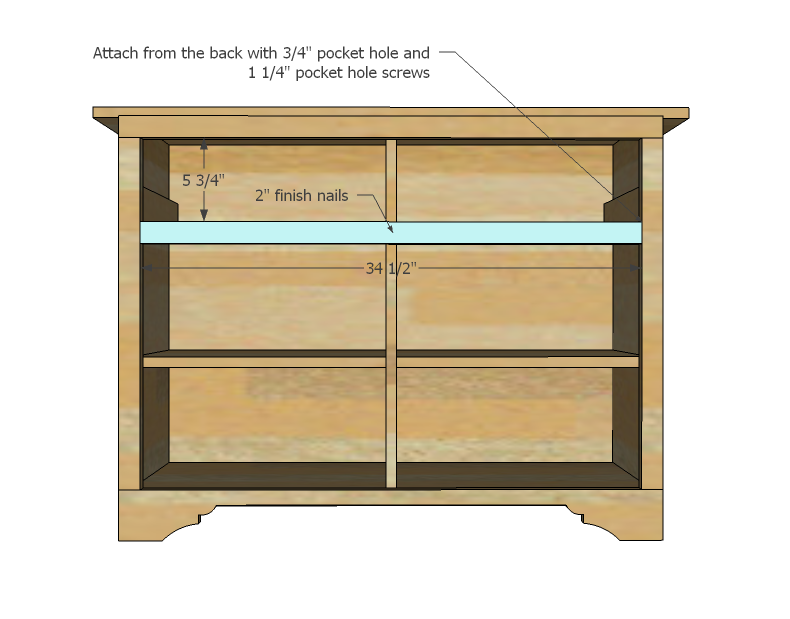
And now the drawer trim. You will need to either use pocket holes from the back or 2" screws and glue from the sides, outside to secure trim in place.
Step 11
And finally the top front. Attach in place with glue and finish nails.
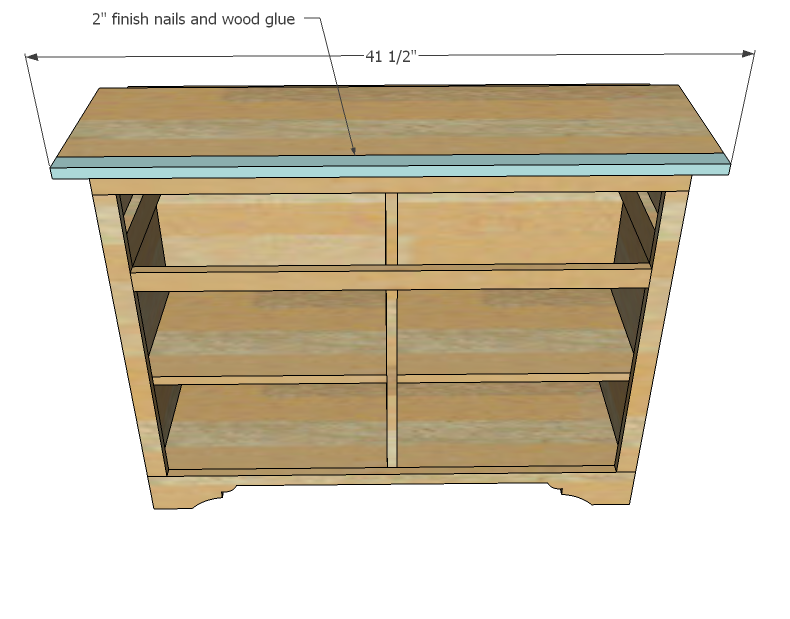
Step 12
You will need to build two drawer boxes as shown above. Build the drawer boxes and attach 1/4" plywood leftover to the bottom. Don't worry about the plywood falling off - the drawer slides will hold it on. Your drawers should be built to fit your cabinet. Be aware that lumber can differ in width AND thicknesses, so you should always build to the cabinet. Standard drawer slides require 1/2" clearance on each side of the drawer, so make your drawers 1" less than the overall interior opening - use the diagram above as a guide. UPDATE: We recommend using 10" drawer sides and slides so there's no issue with the drawer face being inset. Video on how to install drawer slides and size drawers:
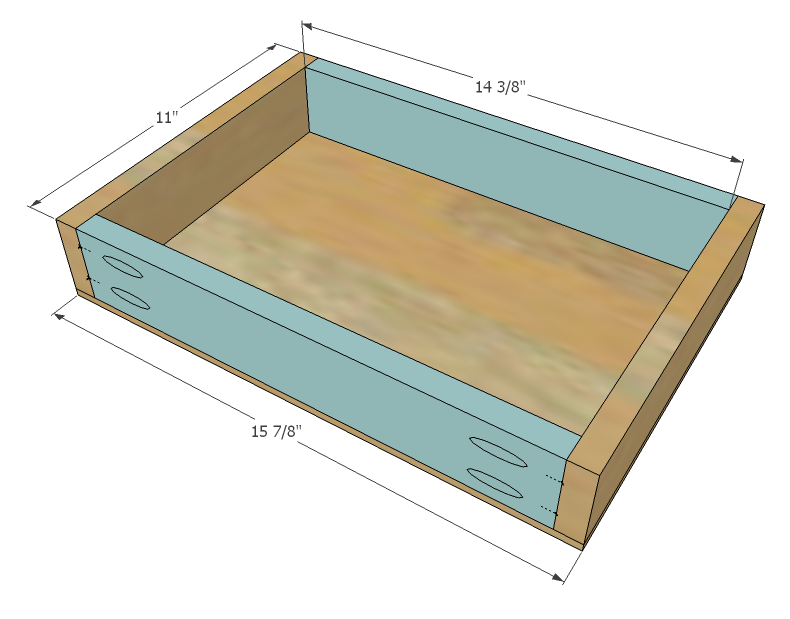
Step 13
Install drawers into the cabinet as shown above with the drawer slides. Here's a tute on the type of slides you should use and also how I install a drawer. Remember that the drawer box needs to sit 3/4" inset from the face frame to allow for the drawer faces (see next step).
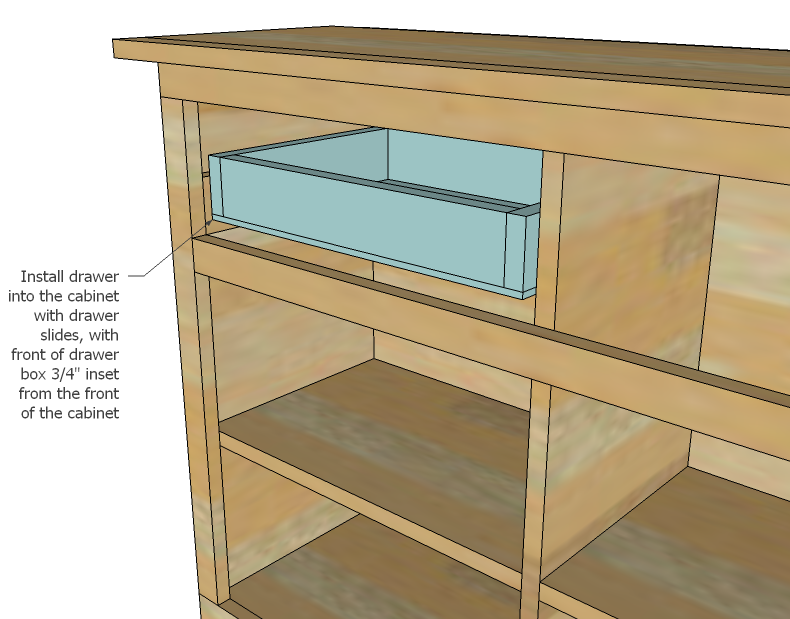
Step 14
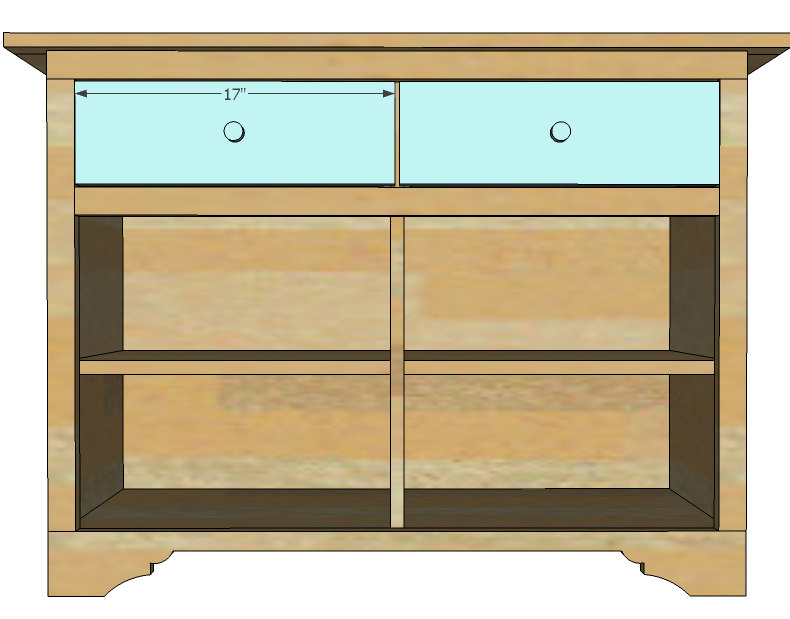
Cut your drawer faces to fit the openings, and center of the drawers. Attach with 1 1/4" finish nails (careful about the hardware locations) and glue. Then remove drawer and attach faces to drawer boxes with 1 1/4" screws from the inside.
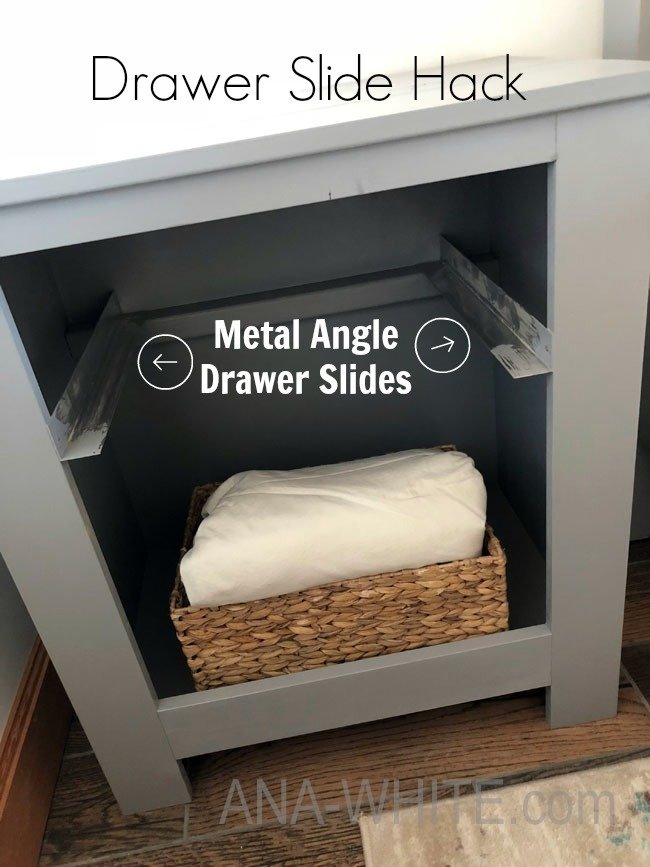
DRAWER SLIDE OPTION:
Use metal angle (about $5 for 4 feet) to support your drawer. Then build the drawer so it fits inside the angle, but leave enough room for your drawer to slide easily.
Finishing
Sand all surfaces, starting with a medium grit and finishing with fine. Wipe off the dust, fill any holes or gaps with wood filler, and sand smooth once dry. Apply primer if you're painting, then finish with your choice of paint or stain and seal with a durable clear topcoat. For outdoor projects, use exterior-rated primer, paint or stain, and sealer so the piece stands up to the weather.
Source (temporary): https://www.ana-white.com/woodworking-projects/cindy-wood-console-table-drawers